
How Long Do Chicken Strips Last?
A Clear Shelf-Life Guide

Chicken strips are a staple in many households due to their versatility and ease of preparation. Proper storage is crucial to ensure their quality and safety. When cooked chicken strips are kept in the refrigerator at or below 40°F, they can last between three to four days before they should be consumed or discarded to prevent any risk of foodborne illness.
The shelf life of cooked chicken strips can also depend on how they were processed and prepared. For instance, breaded and fried chicken strips might have a slightly different texture after being stored compared to grilled ones. However, the time frame for safe consumption remains consistent regardless of the cooking method.
Understanding the appropriate storage times helps maintain the best flavor and safety of your chicken strips. Storing them in sealed, airtight containers can further preserve their taste and texture.
Understanding Chicken Strips

Chicken strips are a popular choice for both main courses and snacks, valued for their versatility, taste, and nutritional benefits.
What Are Chicken Strips?
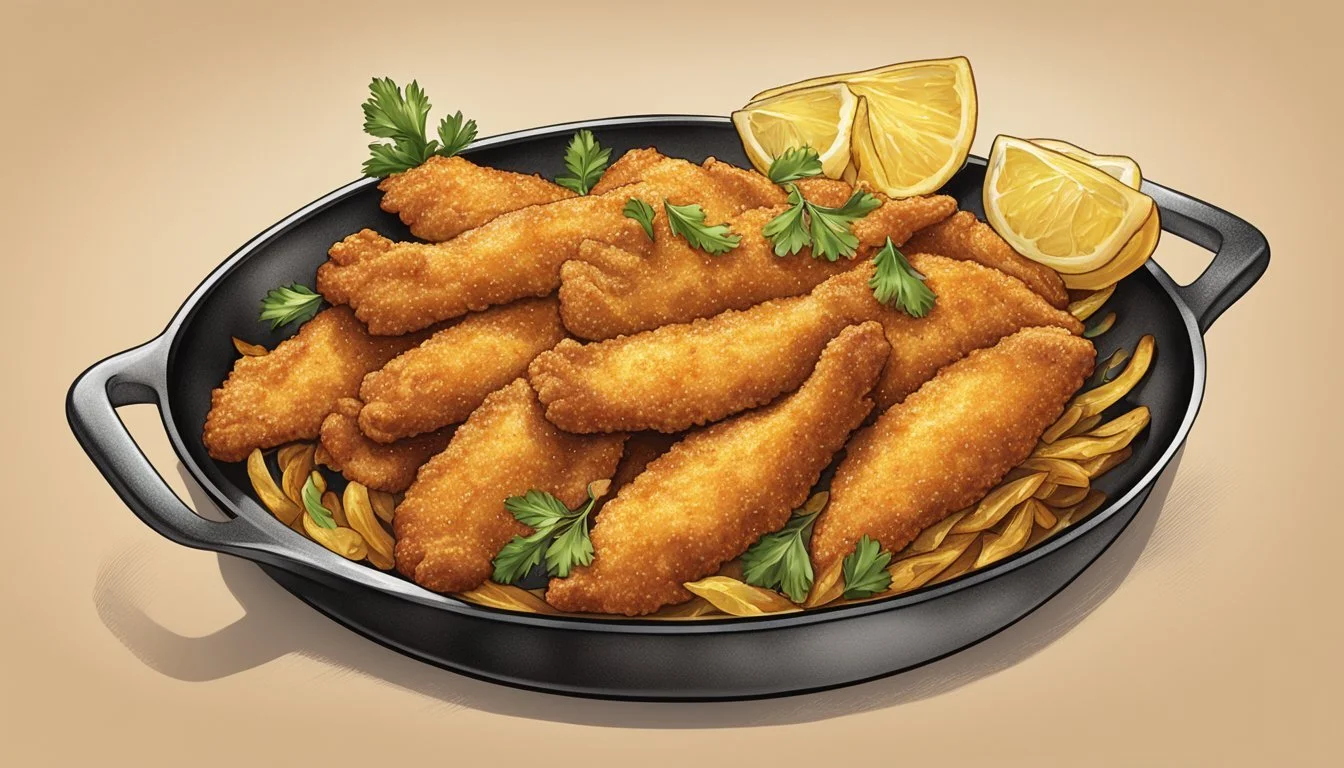
Chicken strips are pieces of chicken breast that have been sliced into narrow, long pieces. This cut typically employs boneless and skinless chicken to provide a lean source of protein. Chicken strips can be breaded and fried or simply baked, adding a crisp texture that makes them a favorite across age groups. They are commonly served as an appetizer, in salads, or as a main course and are especially popular in kid-friendly meals.
Nutritional Profile and Benefits
Chicken strips are high in protein, providing essential nutrients that support muscle health and overall bodily functions. A typical serving of baked chicken strips (100 grams) contains around 165 calories and provides 31 grams of protein.
They are a low-fat option when baked rather than fried, making them a healthier choice for those monitoring their fat intake. Besides protein, they offer essential vitamins and minerals, including Vitamin B6, niacin, and phosphorus. These nutrients support energy production, nervous system health, and bone strength.
Chicken strips can be part of a balanced diet, contributing valuable nutrition whether served as a snack or a more substantial meal component.
Proper Storage of Chicken Strips

Proper storage of chicken strips is crucial to maintaining their freshness, flavor, and safety. Whether you're storing leftovers or preparing for a meal ahead, here are clear guidelines for storing chicken strips in the refrigerator, freezer, and airtight containers.
Refrigerator Storage
Refrigerator storage is suitable for short-term keeping of chicken strips. After cooking, let the chicken strips cool down to room temperature before refrigerating. Store them in a shallow, airtight container to ensure even cooling and prevent bacterial growth.
For maximum freshness, chicken strips should be consumed within 3 to 4 days when stored in the refrigerator at or below 40°F (4°C). Always label the container with the storage date. This helps in keeping track of how long they've been stored and in avoiding spoilage.
Freezer Storage
Freezer storage is ideal for long-term preservation. Before freezing, arrange the chicken strips in a single layer on a baking sheet to flash-freeze them. This process ensures that the strips don’t stick together. Once frozen, transfer them to a freezer-safe airtight container or heavy-duty freezer bag.
Label the container or bag with the date of freezing. Chicken strips can be stored in the freezer at 0°F (-18°C) for up to 3 months. When ready to use, thaw them in the refrigerator overnight to maintain texture and prevent bacterial growth.
Airtight Containers
Using airtight containers is essential to maintain the quality of chicken strips. These containers prevent air exposure, which can lead to freezer burn and moisture loss. Both rigid containers with tight-fitting lids and heavy-duty zip-top bags are suitable.
When storing in an airtight container, ensure that the chicken strips are packed in single layers and separated with parchment paper if necessary. This helps in retaining flavor and texture while preventing contamination. Always ensure the container is clean and dry before use to maximize food safety and freshness.
Preparation and Cooking Techniques

Proper preparation and cooking techniques can significantly enhance the flavor and texture of chicken strips. These techniques include seasoning and marinating, breading methods, and varying cooking approaches.
Seasoning and Marinating
Seasoning and marinating are crucial steps. Marinating the chicken strips in a mixture of herbs and spices can infuse deep flavors. Common ingredients include paprika, garlic powder, chili powder, Italian seasoning, salt, and pepper.
Marinating for at least 30 minutes allows the spices to penetrate the meat. Combine the seasonings with a little oil to help the mixture adhere to the chicken. For a quicker option, use a dry rub of the same spices.
Breading Methods
Breading is an essential part of achieving a crispy texture on chicken strips. Start by coating the strips in flour, then dip them in beaten egg. This double coating process helps the breading stick better.
For the final coat, choose between different breading types. Panko breadcrumbs offer a light, crispy coating, while crushed cornflakes provide a crunchier texture. Mix any additional spices with the breadcrumbs for extra flavor.
Cooking Variations
There are several cooking methods to choose from, each offering different results. Baking the chicken strips in a preheated oven at 400°F (200°C) for 18-20 minutes ensures even cooking and a healthy option with less oil. Ensure they reach an internal temperature of 165°F (74°C).
Another popular method is frying. Heat oil to 350°F (175°C) and cook the chicken strips for 3-5 minutes until golden brown. This method achieves the crispiest texture but adds more calories. Each cooking technique offers unique advantages based on dietary preferences and desired outcomes.
Cooking Chicken Strips in an Oven
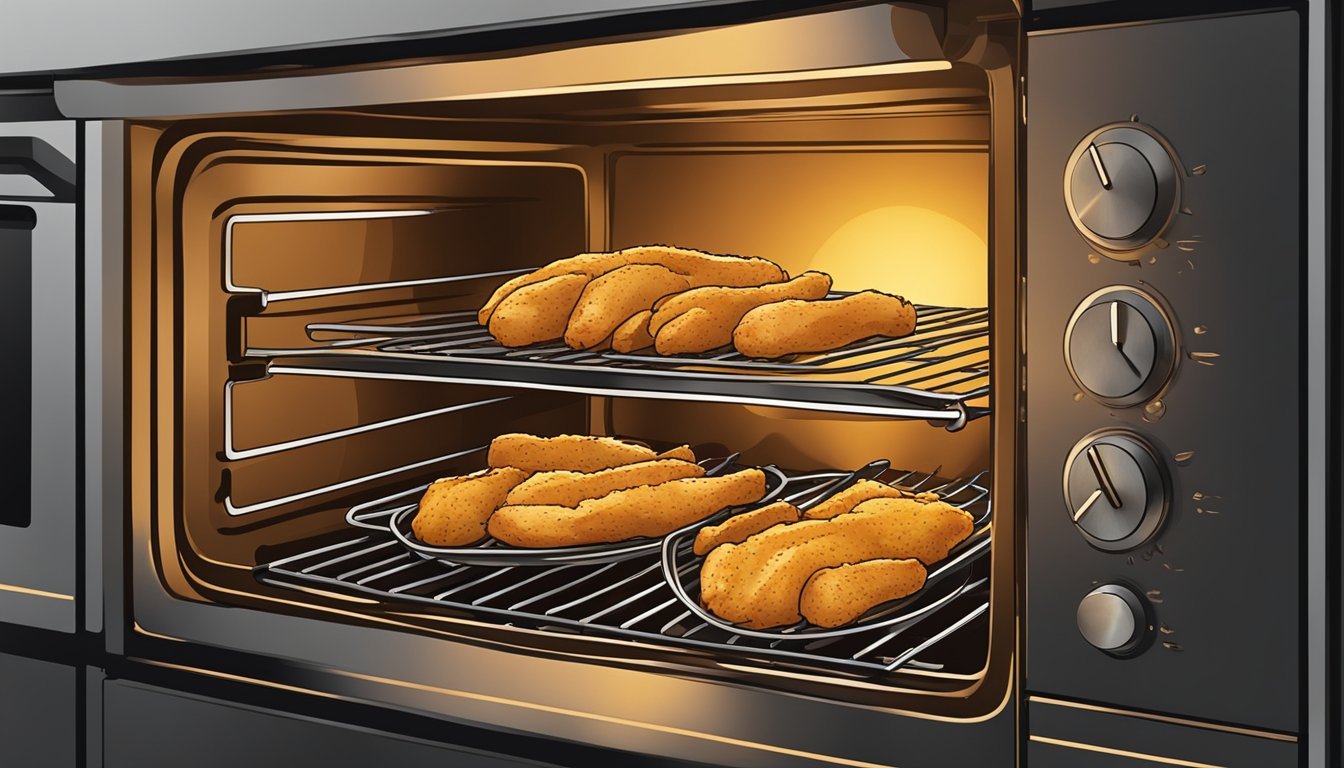
Cooking chicken strips in an oven requires attention to temperature, baking techniques, and proper timing to ensure they cook evenly and reach the appropriate internal temperature.
Steps for Even Cooking
Start by preheating the oven to the required temperature, typically 400°F (200°C). It's crucial to use a baking sheet lined with parchment paper or aluminum foil to prevent sticking. Arrange the chicken strips in a single layer, making sure to leave space between each strip. This spacing allows heat to circulate evenly, promoting consistent browning.
Turn the chicken strips halfway through the cooking time to ensure even browning on both sides. Using a light coat of cooking spray or olive oil can enhance the crispiness of the strips. Ensure each piece is coated evenly with seasonings before baking.
Determining Doneness
Use a meat thermometer to check the internal temperature of the chicken strips. They should reach at least 165°F (74°C) to ensure they are safe to eat. Insert the thermometer into the thickest part of the strip without touching the baking sheet to get an accurate reading.
Look for a golden-brown color and crispy texture, which indicate that the chicken is well-cooked. Ensure there are no pink spots in the meat, as this signals it may not be fully cooked. If you do not have a meat thermometer, another method is to cut into the thickest piece to check that the meat is white and the juices run clear.
Cooking Times and Temperatures
Chicken strips generally need to bake at 400°F (200°C) for about 15-20 minutes. Cooking times may vary based on the thickness of the strips and the specific oven. For thinner strips, around 12-15 minutes may suffice, while thicker strips could require closer to 20 minutes.
Flipping the strips halfway through cooking helps achieve even browning and ensures the strips cook through evenly. Always verify the internal temperature reaches 165°F (74°C) before serving to guarantee they are fully cooked. Preheating the oven is essential for maintaining an even temperature throughout the cooking process, resulting in optimal texture and taste.
Enhancing Flavor and Texture
Enhancing the flavor and texture of chicken strips involves carefully selecting seasonings and achieving the desired crispiness. Both elements are crucial for creating a satisfying eating experience that is both versatile and enjoyable.
Selecting the Right Seasonings
The choice of seasonings significantly impacts the flavor of chicken strips. They should complement the natural taste of chicken while adding layers of flavor. Popular seasonings include garlic powder, paprika, and black pepper.
Blending these spices with salt and a touch of cayenne pepper can create a balanced and flavorful profile. Using marinades like teriyaki or dipping sauces such as honey mustard can also enhance taste.
Experimenting with herbs like thyme or rosemary can introduce new dimensions. The versatility of chicken strips allows for a wide range of seasoning combinations.
Achieving Crispiness
Achieving a crispy texture is essential for making chicken strips appealing. This can be done by coating the strips in a mixture that promotes crispiness.
A commonly used method is to first dip the strips in flour, followed by an egg wash, and finally coat in bread crumbs or panko. This creates a crunchy exterior.
Cooking methods such as frying or baking will affect the final texture. Frying in hot oil ensures a golden, crispy finish, while baking at a high temperature can also yield a desirable crispiness with less oil.
Using an air fryer can provide a similar crispy texture without the extra calories from oil. Adjusting cooking times and temperatures based on the thickness of the strips will help achieve perfect results.
Serving Suggestions

Chicken strips can be paired with a variety of dishes to create a well-rounded meal. Consider the following options to enhance your dining experience with the perfect sides, salads, and sauces.
Side Dishes
Chicken strips pair excellently with a range of side dishes. Mashed potatoes are a comforting choice, enhancing the meal with their creamy texture and buttery flavor. Steamed vegetables like broccoli, carrots, and green beans add a nutritious and colorful component. For those who enjoy a bit of crunch, French fries or sweet potato fries serve as a delightful complement. Macaroni and cheese is another hearty side that delivers a satisfying, cheesy element.
Salad Pairings
Balancing the crispiness of chicken strips with fresh greens creates a refreshing contrast. A Caesar salad with its crunchy romaine, creamy dressing, and Parmesan cheese offers a classic pairing. For a sweeter note, a spinach and strawberry salad with balsamic vinaigrette adds a unique twist. Consider a Greek salad with tomatoes, cucumbers, olives, and feta cheese for a Mediterranean flair. Additionally, a simple garden salad with mixed greens, cucumbers, and cherry tomatoes offers a light, healthy option.
Sauce Accompaniments
Dipping sauces significantly enhance the flavor of chicken strips. Ranch and honey mustard are traditional choices that pair well with the savory taste. For a spicy kick, Buffalo sauce or sriracha mayo can be used. Barbecue sauce and honey barbecue provide a sweet, smoky accompaniment, while garlic aioli offers a rich, garlicky option. Sweet and sour sauce delivers a tangy dimension perfect for those looking for contrasting flavors.
Reheating Leftover Chicken Strips
Reheating leftover chicken strips can be done effectively using an oven, air fryer, or microwave. Each method ensures that the chicken remains moist and flavorful.
Using an Oven or Toaster Oven
Preheat the oven to 350°F (177°C). Arrange the chicken strips in a single layer on a baking tray. Adding a small amount of chicken stock or water in the tray helps maintain moisture. Cover the tray with aluminum foil to prevent the chicken from drying out. Place the tray in the oven for about 10-15 minutes until they are thoroughly heated.
For a toaster oven, use the same temperature and procedure. The even heat distribution in these appliances helps to keep the chicken juicy while restoring its crispy exterior.
Reheating in an Air Fryer
Set the air fryer to 375°F (190°C). Place the chicken strips in the basket in a single layer, making sure they don’t overlap. Heat for about 5-7 minutes, shaking the basket halfway through to ensure even heating.
The circulating hot air crisps up the exterior while keeping the inside tender. This method is excellent for restoring the original texture of the chicken strips.
Microwave Reheating Tips
Use medium power to reheat the chicken strips in the microwave. Place the strips on a microwave-safe plate with a damp paper towel on top to retain moisture. Heat for 1-2 minutes, checking and turning the strips halfway through.
If the chicken feels dry, you can sprinkle a few drops of water before covering it with the paper towel. Although microwaves can heat unevenly, using medium power and shorter intervals can help achieve a better texture.
Safety Considerations
When handling and preparing chicken strips, applying proper safety precautions is essential to prevent foodborne illnesses and ensure the meat is safe to consume. Key points include preventing contamination, proper cooking, and safe storage techniques.
Preventing Foodborne Illness
Chicken strips should not remain at room temperature for longer than 2 hours. Bacteria such as Salmonella can multiply rapidly between 40°F (4°C) and 140°F (60°C). Proper refrigeration immediately after cooking is vital. Leftover chicken must be stored in airtight containers to protect it from contamination. Reheating leftovers should ensure the internal temperature reaches 165°F (74°C) to kill any potential bacteria.
Proper Handling and Cooking
Proper handling and cooking start with ensuring raw chicken is stored separately from other foods in your fridge. Using a meat thermometer ensures chicken strips are fully cooked. The safe internal temperature for cooked chicken is 165°F (74°C). Cooking chicken thoroughly destroys harmful bacteria, reducing the risk of food poisoning. Be mindful of cooking methods; whether fried or baked, chicken should reach the proper internal temperature.
Avoiding Cross-Contamination
Cross-contamination can occur when raw chicken juices come into contact with other foods, utensils, or surfaces. Always use separate cutting boards and utensils for raw chicken. Clean all surfaces and tools immediately after contact with raw chicken to prevent the spread of bacteria. Ensuring proper hygiene practices when handling chicken significantly reduces contamination risks.
Alternatives and Variations

Exploring different approaches to chicken strips can offer health benefits, unique flavors, and cater to various dietary preferences. Below are some viable options and creative ideas.
Healthier Alternatives
Baked Chicken Strips: Baking instead of frying can reduce calorie intake and lower fat content. Use whole-grain breadcrumbs or crushed nuts for additional nutrients.
Air-Fried Chicken Strips: Using an air fryer yields crispy strips without the need for excessive oil, making it a popular, healthier choice.
Vegan Chicken Strips: Plant-based alternatives like tofu or seitan mimic the texture and can be seasoned similarly, providing a protein-rich, meatless option.
Experiment with organic seasonings, such as herbs and spices, to further boost the health profile.
Non-Breaded Options
Switching to non-breaded variations lowers calorie and carbohydrate counts.
Grilled Chicken Strips: Season chicken strips with herbs and spices, then grill them for a smoky flavor without additional breading.
Naked Chicken Strips: Simple yet flavorful, these strips involve marinating in lemon juice, garlic, and herbs, then pan-frying or baking until golden.
Spiced Chicken Bites: Marinate strips in bold spices like cumin, paprika, and turmeric for a burst of flavor without added breading.
Creative Flavor Twists
Adding different seasonings and coatings can transform traditional chicken strips into culinary delights.
Asian-Inspired Chicken Strips: Marinate in soy sauce, ginger, garlic, and sesame oil. Bake or air-fry for a savory twist.
Buffalo Chicken Strips: Toss with buffalo sauce and bake for a spicy, tangy variation. Serve with a side of celery and blue cheese dip.
Coconut-Crusted Chicken Strips: Coat strips with shredded coconut and panko breadcrumbs. Bake until crispy for a tropical flavor.
These approaches provide flexibility and creativity, making chicken strips a versatile option adaptable to various tastes and dietary needs.
