
How to Grill with a Salt Block
Mastering the Art of Flavorful, Healthy Cooking
Grilling with a Himalayan salt block is an innovative cooking method that imparts a subtle salty flavor to foods while also offering a presentation that is sure to impress guests. By using a block of pink salt as a cooking surface, chefs and home cooks alike can benefit from its ability to distribute heat evenly and retain high temperatures. The blocks are sourced from ancient salt deposits deep within the Himalayan mountains and are known for their purity and mineral content.
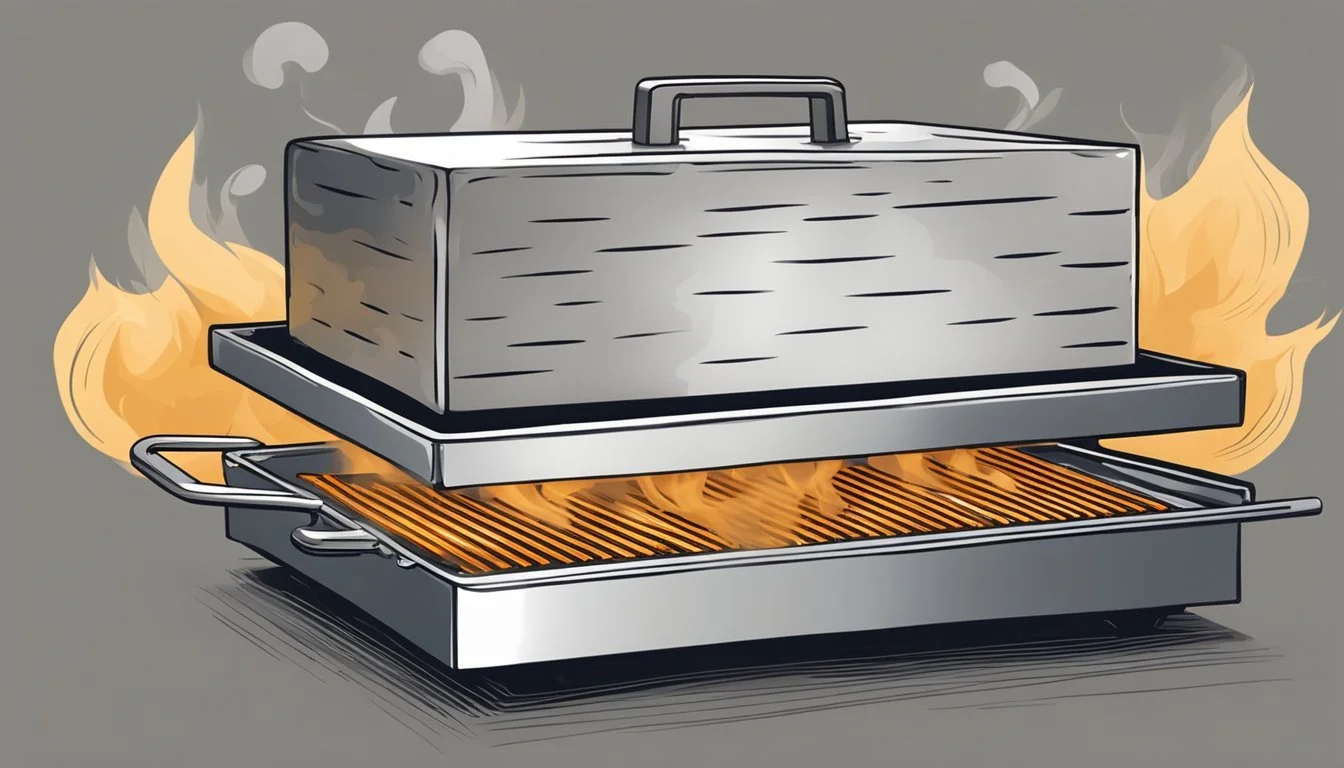
Preparing a salt block for use on the grill requires patience and attention to detail. The block must be heated gradually to prevent cracking; this is typically done by placing it over a low heat source and slowly increasing the temperature over the course of several increments. Once the block reaches the desired temperature, it can be used to cook a variety of foods, from steaks and seafood (What wine goes well with seafood?) to vegetables and more.
The versatility of a salt block extends beyond grilling. It can serve both as a cooking surface and as a unique serving platter, making it a versatile tool in the kitchen. When properly cared for, a salt block can be used multiple times, providing a novel cooking technique that adds both flavor and flair to any meal.
Benefits of Using a Salt Block for Grilling
Grilling with a Himalayan salt block brings distinct advantages ranging from enhanced taste to visual appeal. These slabs of pink salt not only impart a subtle salinity to food but also come packed with minerals contributing to a healthful grilling experience.
Unique Flavor Profile
When one grills with a Himalayan salt block, the food gains a unique flavor profile. Unlike regular table salt, a salt block provides a more nuanced salty taste, adding depth to the overall flavor of grilled items. This subtle salt infusion is achieved through the slow and even heat transmission of the salt block, allowing for a gourmet grilling experience.
Natural Minerals and Health Aspects
Himalayan pink salt is renowned for its natural mineral content, including over 80 minerals that are beneficial to health. The high mineral content lends not only to the unique taste but also to the nutritional value of the food prepared on it. The heat of the grill allows for slight mineral transfer to the food, making salt block grilling a choice that may contribute positively to one’s dietary mineral intake.
Visual Appeal and Presentation
A Himalayan salt block also serves as an impressive presentation tool. The vibrant pink color of the block adds a visually stunning aspect to the dining experience. Cooking on a salt block means the food is served directly on the heated block, which not only retains warmth but also turns the meal into a decorative centerpiece, elevating the overall dining presentation.
Selecting the Right Salt Block
When choosing a salt block for grilling, one should prioritize a block that ensures even heat distribution and longevity. The right block will enhance both the cooking process and the flavor of the food.
Size, Thickness, and Shape Considerations
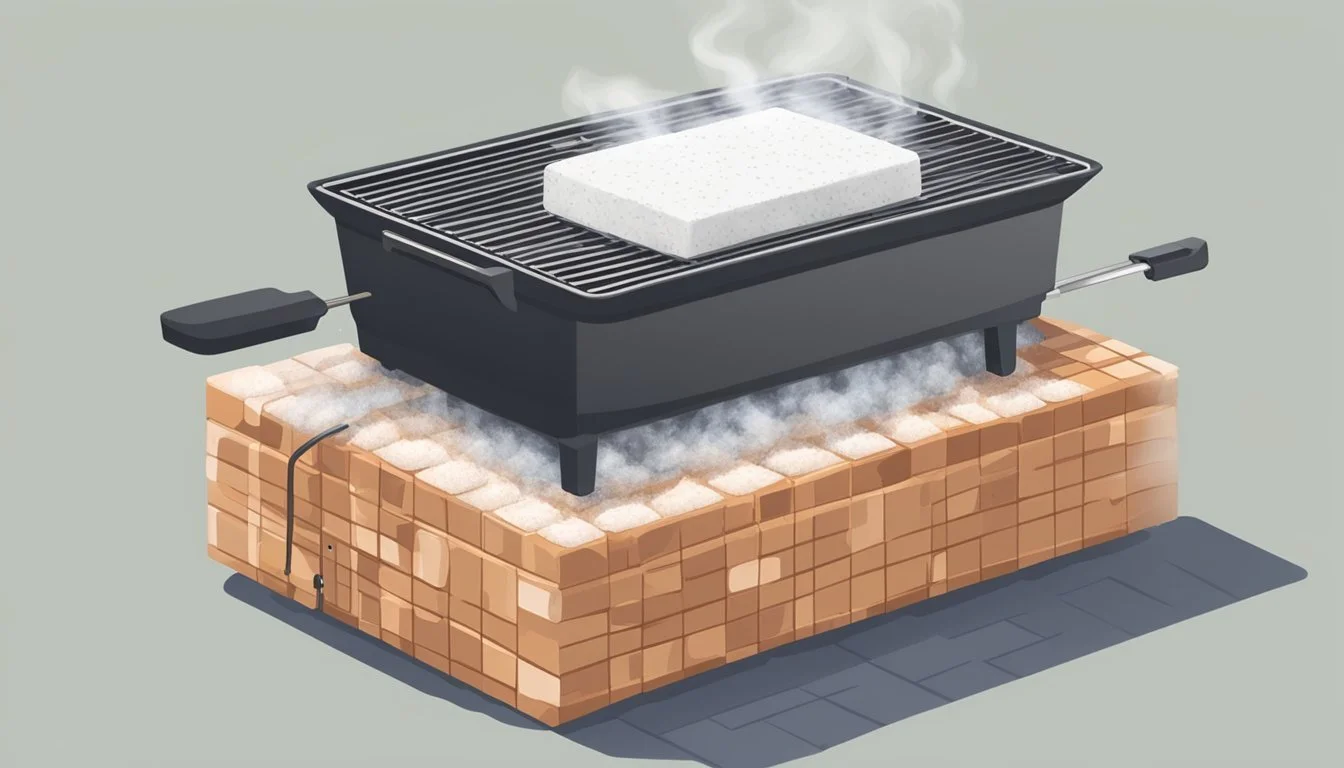
The dimensions of a salt block determine its suitability for various types of grills and the amount of food it can accommodate. Thickness is especially critical, as it affects the block's durability and heat retention. A block should be at least 1.5 to 2 inches thick to withstand high temperatures without cracking. The shape, whether round, square, or rectangular, should fit comfortably on one's cooking surface.
Evaluating Quality and Avoiding Cracks
High-quality Himalayan pink salt blocks are known for their purity and mineral content, which contribute to the complexity of flavor they impart. One should examine a block closely for any signs of cracks or structural weaknesses before purchasing, as these imperfections can lead to breakage when the block is heated. It's essential that the salt block is completely dry, as residual moisture can also cause cracks upon heating.
Types of Salt Blocks
While Himalayan salt blocks are the most popular, due to their rich mineral content and striking pink color, other types of salt blocks are available as well. The choice depends on one's flavor preferences and the specific cooking application. Regardless of type, a high-quality salt block should have a history of resilience and be renowned for its ability to distribute heat evenly across its cooking surface.
Preparing Your Salt Block for Cooking
A salt block must be properly heated and cared for before use to ensure safety and enhance the cooking experience. It requires gradual heating and specific cleaning steps to maintain its integrity.
Heating Your Salt Block
Initial Heating: Begin by placing the salt block over low heat on a grill or stove top for 15 minutes. This is crucial to prevent cracking.
Gradual Temperature Increase: After the initial warming period, incrementally increase the heat to medium and maintain it for another 15 minutes.
Final Heating Stage: Finally, raise the heat to high, allowing the salt block to heat for an additional 15 minutes, reaching a temperature typically between 400°F and 500°F.
Cleaning and Care Before Use
Avoid Soap: Prior to cooking, clean the block with a damp cloth but avoid soap as it can penetrate the porous surface.
Dry Thoroughly: Ensure the block is completely dry before commencing the heating process to prevent cracks from temperature shock.
Safety Precautions and Tips
Handling Hot Blocks: Always use heat-resistant gloves when handling the salt block to protect against burns.
Appropriate Surfaces: Place the block on a heat-resistant surface to avoid damage to countertops.
Avoid Sudden Temperature Changes: Never expose the salt block to sudden temperature shifts as this may lead to cracking.
By following these specific steps and precautions, cooks can ensure their salt block is ready for a safe and flavorful cooking experience.
Grilling Techniques with a Salt Block
Grilling with a salt block introduces a unique flavor profile to food while allowing for high-heat cooking that is perfect for searing meats. The key to mastery lies in understanding the process of temperature control and the proper care of the block itself.
Meat and Steak Searing
When searing meat or steak on a salt block, the chef should start by ensuring the block is gradually brought to temperature. It is crucial to heat the salt block in stages to avoid cracking: begin on a low setting for approximately 15 minutes, then slowly increase the heat to medium for another 15 minutes, before finally raising the heat to high. Once the salt block reaches the desired temperature—a process that generally takes around 45 minutes—it can be used for cooking.
Allow the steak to reach room temperature.
Pat dry to promote even searing.
Searing the Steak:
Place the steak on the heated salt block.
Cook for a few minutes on each side until well-browned.
To determine the perfect time to flip or remove the steak, using a meat thermometer is recommended. The internal temperature should read:
135°F (57°C) for medium-rare
145°F (63°C) for medium
155°F (68°C) for medium-well
The salt block imparts a subtle saltiness and can produce a desirable crust on the steak's surface, enhancing its flavor and texture. After searing, it's important to let the meat rest before serving to allow the juices to redistribute.
Grill masters should place the salt block on the grill grates or oven to conduct the heat properly. Always handle the salt block with care, as it will be extremely hot after heating. When done correctly, searing meats on a Himalayan salt block can elevate the grilling experience to a new culinary level.
Cooking Different Types of Food
When grilling with a salt block, chefs can enhance the natural flavors of their ingredients, offering a distinctive taste experience. The high heat retention and even heat distribution make it ideal for various foods, where both cooking and serving can make for an enticing presentation.
Salt Block Recipes for Seafood
Seafood benefits from the subtle salt infusion a heated block provides. For fish slices, a moderate heat level is sufficient to cook them through while imparting a delicate saltiness. A light drizzle of lemon juice can be added before serving to enhance the seafood's flavor profile.
Shrimp: Arrange on the block and cook until opaque.
Scallops (What wine goes well with scallops?): Sear until they have a golden crust, typically less than 5 minutes per side.
One can also experiment with thin fish steaks or fillets, taking care not to overpower the natural flavors of the seafood with too much additional seasoning.
Vegetables and Other Foods on Salt Block
The salt block performs well with vegetables (veggies) and dry foods which can sustain a higher heat.
Asparagus: Typically takes 10-15 minutes to char lightly.
Sliced zucchini and bell peppers: Will be ready once they show grill marks and soften slightly.
Prior to placing garlic or any vegetable on the block, lightly oiling them helps in preventing sticking. Once cooked, they make beautiful presentations when served directly on the warm block, imparting a mild saltiness that can replace additional seasoning.
Serving with a Salt Block
A salt block offers a unique way to present and serve dishes by either keeping them warm or chilled. The dense crystalline structure retains temperature efficiently, whether it's heated or cooled, making it an ideal serving platter.
Using a Salt Block as a Serving Platter
A heated salt block can be brought directly to the table to serve hot dishes. It is vital to ensure the block has had time to cool slightly and is safe to touch the edges. Placing the block on a wooden base or trivet prevents damage to table surfaces. The residual heat can keep food warm, while the salt naturally seasons the dish as it rests on the block.
Salt Blocks for Chilling Foods
For serving cold foods, a salt block can be placed in the freezer for a couple of hours before use. It can then act as an elegant serving platter that keeps items like sushi (What wine goes well with sushi?), cheese, or fruits chilled. The salt block's temperature is distributed evenly, ensuring consistent chilling without over-seasoning the food.
Enhancing Presentation at Home
Salt blocks have a striking pink hue that can enhance the presentation of any dish served at home. The key is to serve food with contrasting colors and textures to highlight both the dish and the block's natural beauty. Complementary garnishes or herbs can add a pop of color and provide a visual feast for guests.
Care and Maintenance Post-Use
Proper post-use care and maintenance are essential for maximizing the longevity of a salt block. These steps ensure the salt block is ready for future grilling adventures.
Cooling and Cleaning
After use, one should allow the salt block to cool to room temperature before any cleaning is attempted. Rushing this process can result in cracking or breaking of the salt block. Once cooled, the user should gently remove any food residue with a soft brush or sponge and minimal water. As salt is naturally antimicrobial, heavy detergents or soaps are not needed and should be avoided to preserve the integrity of the block.
Storing Your Salt Block
Storing the salt block correctly is imperative for its care. The salt block must be completely dry before storage. Wrapping the block in a towel or cloth can aid in keeping moisture at bay. Once dry, the user can store the salt block in a place where temperature and humidity are low; this can be a cupboard or pantry. Additionally, freezer storage is not recommended as the extreme cold can cause the salt block to crack. It’s also wise to rest the salt block for at least 24 hours before its next use to ensure any remaining moisture evaporates.
Troubleshooting Common Salt Block Issues

When grilling with a Himalayan salt block, one must consider heat management, salt block erosion, and maintenance of the cooking surface to ensure longevity and optimal cooking performance.
Managing Heat and Preventing Cracks
Heat Management: Gradual heating is the cornerstone of preventing cracks in a salt block.
Low Heat: Begin with a low heat setting for about 15 minutes.
Medium Heat: Increase to medium heat and continue heating for another 15 minutes.
High Heat: Finally, raise the heat to high for an additional 15 minutes, allowing the salt block to reach the desired temperature for grilling.
Crack Prevention: A thick salt block offers better durability and heat distribution. Ensure the block is completely dry before heating to prevent cracks due to moisture expansion.
Dealing with Salt Block Erosion
Care Techniques: Proper care minimizes erosion.
Use: Cook on the block when it reaches between 300°F to 500°F for an optimal non-stick surface and to preserve its low porosity.
Cleaning: After cooking, let the salt block cool completely, then wipe it with a damp cloth and scrub gently to remove food residues. Avoid soaking it in water.
Longevity: Regular seasoning of the salt block can aid in longevity, but expect natural erosion over time due to its soluble nature and repeated exposure to heat and food moisture.
Cooking Surface Maintenance
Seasoning: Over time, the non-stick surface can be maintained through careful seasoning. This process involves heating the block slowly and applying a thin layer of oil before use.
Storage: To maintain the integrity of the block, store it in a dry, cool place away from humidity.
Inspection: Regularly inspect the salt block for deep cracks or signs of potential breakage before use.
Advanced Salt Block Cooking Techniques
Mastering the use of a salt block for grilling involves understanding its application on various heat sources and its unique role in the food smoking process. These techniques enable chefs to deliver rich flavor infusions and precise heat control.
Using a Salt Block on Various Heat Sources
When using a salt block, one must consider the heat source to optimize cooking performance. On a gas grill, a salt block should be placed over an unlit section while the grill is preheated. The block should warm up over low heat, escalating to high heat in stages to prevent cracking, typically reaching around 500°F (260°C).
For electric ranges, achieving uniform heat distribution can be challenging. To counteract this, elevate the block with a heatproof metal ring to allow for air circulation. Start on low heat, and incrementally increase every 10 minutes to avoid thermal shock.
With wood and charcoal combinations, the trick is to maintain consistent temperature. Begin with a small amount of charcoal, adding more gradually to raise the heat. It ensures the block does not experience a rapid temperature rise which could lead to damage.
Incorporating Salt Blocks into Food Smoking
Employing a salt block in a smoker involves indirect heat, a technique suitable for enhancing the flavor of smoked dishes. Meat-smoking benefits from the salt block's consistent heat radiation, penetrating the meat evenly. When smoking items like pulled pork or smoked brisket, placing the block in the smoker with the meat can impart subtle saltiness and contribute to a more tender, juicy result.
For delicate items such as duck poppers, a salt block offers a stable surface that can assist in achieving a gentle smoke while preventing sticking or overcooking. The block should be heated progressively within the smoker, following the same principles of gradual temperature increase as with direct grilling.
Concluding Tips for First-Time Users
Embarking on the journey of salt block cooking may be unfamiliar territory, but a few key guidelines will ensure a successful introduction. The following tips are crucial for those new to using salt blocks as both a cooking surface and a serving platter.
Beginner's Guide to Salt Block Cooking
Salt blocks are versatile tools, serving both as a cooking surface for imparting a subtle, smoky flavor and as an aesthetically pleasing serving platter. Beginners should start with a gradual heating process to avoid cracks. Gradually heat your salt block in 15-minute increments, starting from a low temperature and stepping up to about 500°F (260°C).
Incorporating Salt Blocks into Your Cooking Regime
Integrating salt blocks into your routine adds an exciting twist to conventional grilling. Beginners can explore a range of recipes, from grilling steaks for a savory smoky flavor to chilling the block for presenting sushi. The salt block's ability to both cook and serve creates a culinary dual-functionality that can elevate your home dining experience.
Best Practices for Optimal Results
To achieve the best results with a salt block, maintaining an even heating process is crucial. Sudden temperature changes can crack the block. Always allow the block to cool completely before cleaning, and avoid using soap which can erode the salt. Mark Bitterman, an expert on culinary salt, advocates for salt block cooking as highlighted on The Meadow's 'About Us' page, demonstrating the technique's growing recognition.
Additional Resources and References
For those seeking further guidance, additional resources such as books by salt experts, comprehensive guides, and cooking blogs can offer in-depth insight into the nuances of salt block cooking. Novice users can refer to online tutorials that illustrate step-by-step instructions to ensure they are informed about the foundational steps of this unique cooking technique.
