
Dry-Aging Your Own Steaks Without Fancy Equipment
Simple Methods for Home Cooks
Dry-aging steak at home may seem intimidating, but it can be done easily with basic equipment most people already have in their kitchens. Anyone can dry-age their own steaks without expensive machinery or specialized tools by following simple methods and focusing on careful temperature and air control. This makes the depth of flavor and tenderness of dry-aged beef accessible, even outside high-end steakhouses.
For home cooks interested in richer, more complex steak, the process only requires patience, some fridge space, and attention to food safety steps. Simple tips and clear guidance allow anyone to enjoy the unique taste of dry-aged steak without any restaurant reservations or costly appliances.
What Is Dry-Aging?
Dry-aging is a controlled process that transforms fresh beef into dry-aged steak through time, air, and temperature management. The main effects are a concentrated beef flavor and a tender texture that cannot be achieved by cooking fresh beef alone. These changes come from unique biological and chemical transformations that occur over days or weeks.
The Science Behind Dry-Aging
Dry-aging involves storing large cuts of beef, like ribeye or strip loin, in a refrigerated environment with precise humidity and airflow. The process typically lasts from two weeks to over a month. During this period, two major changes occur:
Moisture Loss: Water evaporates from the meat, which intensifies its flavor.
Enzymatic Activity: Natural enzymes in the beef break down collagen and muscle fibers, making the steak more tender.
The meat’s outer surface dries and forms a crust, which is later trimmed away. The interior remains protected, allowing for safe aging. This environment must be closely monitored to prevent spoilage. The result is dry-aged beef with a more pronounced, nutty aroma and complex taste.
Key Differences: Dry-Aged vs. Fresh Beef
Dry-aged steak stands apart from fresh beef in several noticeable ways. The flavor is richer and more savory due to both moisture reduction and the breakdown of proteins and fats. This process gives dry-aged beef a firmer texture and an umami profile that steak lovers often prefer.
Here’s a quick comparison:
Feature Fresh Beef Dry-Aged Beef Flavor Mild, sometimes metallic Deep, concentrated, nutty Texture Moist, dense Tender, firm Shelf Life Short Longer (when properly aged) Aging Process Minimal (wet-aged or not at all) 2-6+ weeks in air
Dry-aged steak is usually more expensive at restaurants due to the time, space, and care needed. At home, understanding these differences can help set expectations when dry aging steak using DIY methods.
Benefits of Dry-Aging Your Own Steaks
Dry-aging beef at home allows individuals to control the aging process to achieve specific results in taste and texture. Many notice significant changes in both the overall flavor concentration and in the cost when compared to dining at high-end steakhouses.
Flavor and Tenderness Improvements
Dry-aging produces concentrated flavor by reducing water content and breaking down muscle fibers. As moisture evaporates from the steak, the remaining flavor compounds become more intense. This results in a rich, beefy taste that is often described as nutty, earthy, or filled with umami flavor.
Enzymatic tenderization occurs naturally during the aging process. The enzymes break down tough connective tissues, leading to a tender steak that is easier to chew. This method creates a noticeably different mouthfeel and texture compared to fresh-cut or wet-aged beef.
Those who dry-age at home can select the precise age, typically between 21 and 45 days, allowing for customization of flavor strength and tenderness. This flexibility lets steak enthusiasts create steaks tailored to their preferences.
Cost Savings Compared to Steakhouse Options
High-end steakhouses often charge a premium for dry-aged steaks, sometimes double or triple the retail price of regular cuts. By managing the process at home, one pays mostly for the initial cut of beef, basic refrigeration, and time.
Below is a typical cost comparison:
Option Cost (per 16 oz steak) Steakhouse (dry-aged) $40–$60+ Home dry-aged $15–$25
The difference becomes more significant over multiple meals or with larger cuts. Home dry-aging eliminates extra markups from restaurant services and packaging, while still delivering the core benefits of flavor concentration and tenderization enjoyed in steakhouses. This makes premium-quality steak more affordable and accessible to enthusiasts.
Choosing the Right Cuts for Home Dry-Aging

Selecting the best meat cuts is crucial for successful dry-aging at home. The choice of beef and its quality will impact the flavor, texture, and safety of your final dry-aged steak.
Best Cuts: Ribeye, Strip Loin, and Sirloin
For home dry-aging, it's best to start with larger, bone-in sections like ribeye, strip loin (often called New York strip), and top sirloin. These cuts have excellent marbling and a protective fat cap, which help prevent drying out and spoilage during the aging process.
Ribeye and strip loin are especially favored because their fat content enhances flavor and tenderness. The porterhouse and rib steak, which are similar in structure, also perform well. Cuts like tenderloin are generally avoided because they're too lean and prone to drying out.
A comparison of common cuts for dry aging:
Cut Marbling Fat Cap Recommended Ribeye High Yes Yes Strip Loin Moderate Yes Yes Sirloin Moderate Thin Yes Porterhouse High Yes Yes Tenderloin Low No No
Opt for a whole roast or primal cut if possible, since single steaks have less protection and are more likely to spoil.
Selecting Quality Beef
The quality of beef selected has a major impact on the outcome. Seek out USDA Choice or Prime grades for better marbling—visible intramuscular fat is crucial for both flavor and tenderness in dry-aged beef.
Look for beef with a uniform texture, a vibrant red color, and white, creamy fat. Avoid cuts with excessive moisture or dark spots, which could indicate improper storage. The fresher and higher quality the starting cut, the safer and tastier the dry-aged result.
If sourcing locally, ask your butcher for well-marbled ribeye, strip loin, or sirloin sections with the bone and fat cap intact. For dry-aging, avoid pre-cut steaks and always choose larger pieces for better results.
Understanding the Dry-Aging Process
The dry-aging process transforms beef by altering its moisture content and encouraging the breakdown of fibers, which results in more concentrated flavors and a more tender texture. This method relies on careful control of time, airflow, and temperature to achieve desired changes.
Aging Timeframes Explained
During dry aging, beef is kept in a refrigerated environment with regulated airflow, usually at temperatures between 34–38°F (1–3°C). The duration of aging directly affects the flavor development and texture of the steak.
Most home dry-aging is done for 21–45 days.
7–14 Days: Minimal change; slight tenderness, subtle flavor
21–30 Days: Noticeably more tender texture with richer beef flavors
30–45 Days: Bolder flavor development, pronounced nutty, and earthy notes
Longer Periods (60+ Days): Very concentrated flavors; sometimes described as funky or blue-cheese-like
Shorter timeframes produce milder changes, while extended aging enhances both the complexity and depth of flavor. Longer aging also increases the degree of tenderness due to ongoing enzymatic activity in the muscle fibers.
Moisture Loss and Texture Changes
One of the main effects of the dry-aging process is controlled moisture loss. As the beef ages, the outer layers lose water to the surrounding air, resulting in up to 20–30% weight reduction for some cuts.
This moisture loss has two main effects:
Concentrates Flavors: Less water means the natural beef flavors become richer and more intense.
Tenderizes Meat: Enzymatic breakdown of muscle fibers produces a noticeably tender texture.
The outer crust of the steak will dry and darken during aging. This outer layer should be trimmed away before cooking, revealing the properly aged beef inside. By managing both time and dehydration, the dry-aging process balances enhanced flavor with a tender, enjoyable bite.
Equipment and Setup Essentials

Dry-aging steak at home can be done safely and effectively with accessible tools. Maintaining the right temperature, humidity, and airflow is crucial to prevent spoilage and achieve the best results.
Using a Standard Refrigerator
Home cooks can use a regular kitchen refrigerator as a makeshift aging environment, but there are a few caveats. Regular fridges typically run colder and more humid than commercial aging chambers. To improve results, the refrigerator should be dedicated to dry aging and not used for everyday food.
Storing only the beef avoids cross-contamination of odors and bacteria. Some people opt for a mini fridge, which can be set aside for this purpose. While commercial dry-aging fridges offer better precision, a household unit is sufficient if checked regularly.
If using a shared fridge, keep the meat on a separate shelf, away from produce or highly aromatic foods. Space around the steak is needed for proper air circulation.
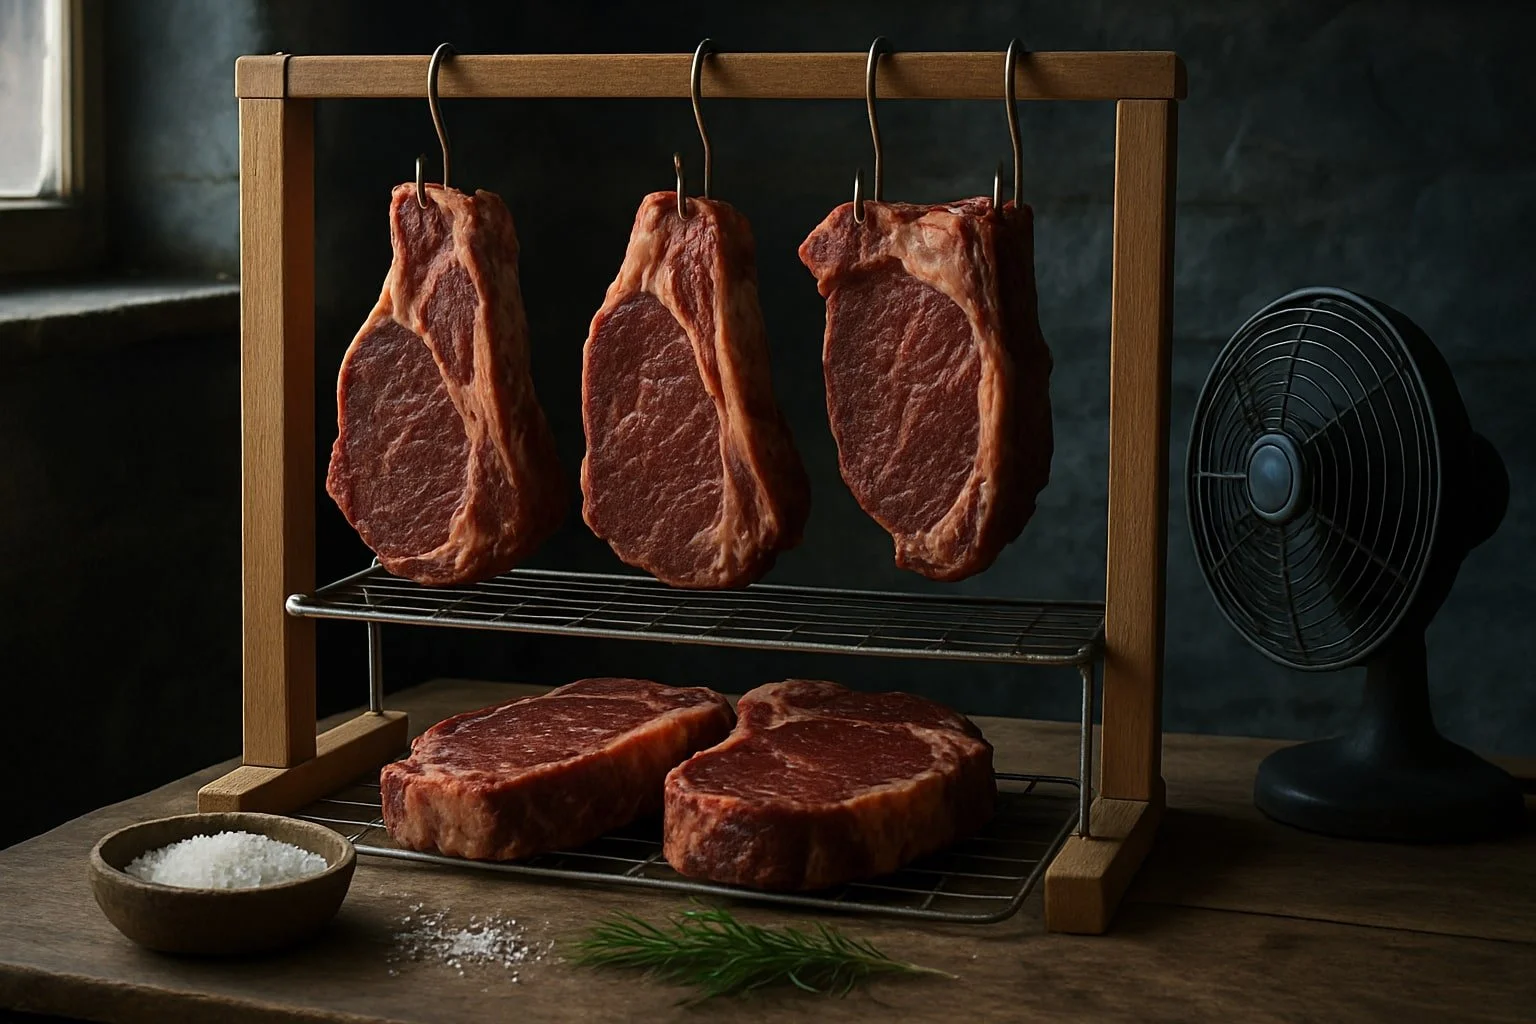
Wire Rack and Airflow Considerations
A wire rack elevates the meat off the shelf, allowing air to flow freely around all sides. This prevents moisture from getting trapped beneath the steak, which could cause spoilage or uneven aging.
Place a tray or pan beneath the rack to catch any drips. It's important to ensure there is at least a couple of inches of space between the steak and the walls of the refrigerator.
Good airflow is essential because stagnant air can lead to unwanted mold and off-odors. The refrigerator fan should be functioning properly. Some home dry-aging setups add a small battery-powered fan for improved circulation if the built-in airflow is weak.
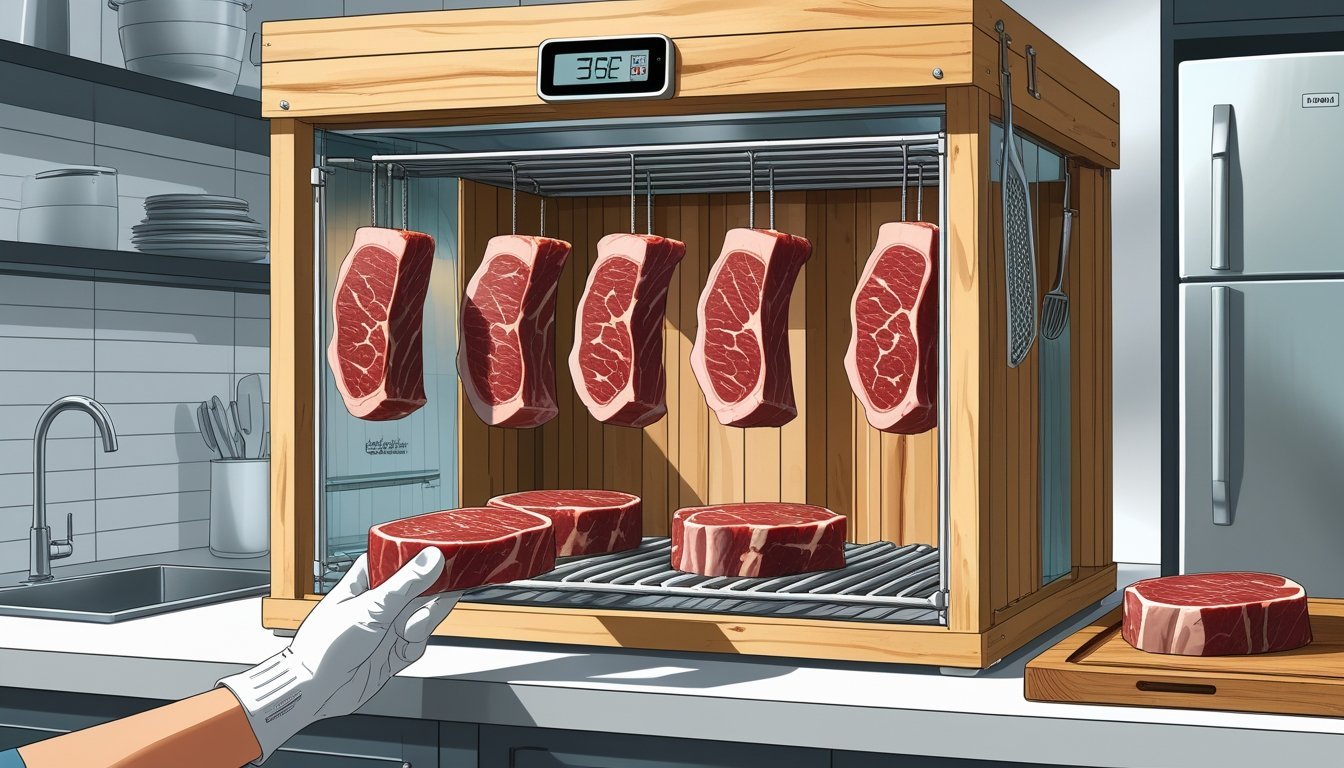
Humidity and Temperature Control Without Fancy Gear
Ideal dry-aging conditions are 80–85% humidity and temperatures between 34°F and 38°F (1°C to 3°C). Most home refrigerators don't display humidity readings, but a digital thermometer with a humidity sensor can be placed inside for monitoring.
If the humidity is too high, open the fridge briefly each day to release moisture. For low humidity, try placing a small bowl of water inside the fridge. Dry-aging bags are optional but may help control conditions by allowing moisture to escape while blocking contaminants.
Staying within safe temperature ranges is essential to prevent bacterial growth. Manual observation and basic gadgets, rather than expensive equipment, are typically enough to manage these variables in a home dry-aging setup.
Dry-Aging Steps at Home Without Special Equipment
Dry aging steak at home can be done safely using simple methods and with careful attention to cleanliness, airflow, and temperature. The core process involves selecting the right cut, setting up a dedicated space, and regularly checking on progress for best results.
Preparing the Beef for Aging
Choose a whole, uncut subprimal cut such as a bone-in ribeye or strip loin. The meat should be fresh, not previously frozen, and ideally sourced from a reputable butcher. Avoid pre-cut steaks; only large roasts maintain quality during extended aging.
Rinse the beef with cold water and pat it dry with paper towels. Do not trim the fat cap or bones, as these help protect the meat's interior. For extra surface protection, loosely wrap the beef in clean, porous cloth or dedicate a clean rack. Avoid plastic wrap or sealed containers, which trap moisture.
Handle all tools and surfaces with clean hands to minimize contamination. Place the prepared cut directly on a wire rack or grid to allow full airflow around all sides.
Setting Up Your Home Aging Space
Select a dedicated spot inside a refrigerator that maintains a consistent temperature between 34°F and 38°F (1°C to 3°C). Using the main fridge is not ideal due to frequent door opening and varying humidity. A small, seldom-used fridge works best.
Ensure steady air circulation. Place a small fan inside the fridge to keep air moving; this helps reduce the growth of unwanted bacteria and mold. Maintain low humidity—ideally around 80%—to prevent spoilage while encouraging the right kind of drying.
Use butcher paper only for brief transfers; never leave meat wrapped during the dry aging process. Meat should be exposed to air, not smothered. Place a tray beneath the rack to catch any drips.
Monitoring and Troubleshooting
Check the beef every few days for signs of spoilage such as rotten odors, sticky or slimy surfaces, and green or dark fuzzy mold. Safe dry-aging usually leads to a firm, dry, and darkened exterior, which is normal.
Monitor temperature and humidity with an accurate fridge thermometer. If condensation forms, the fridge is too humid and may need adjustment or improved airflow. Remove any surface mold that appears white or blue-green with a clean paper towel; discard meat with persistent off-putting odors.
Track the number of days aged. Most home setups yield good results in 21 to 35 days. Slice off the firm, dried outer layer before cooking, leaving only the protected, deeply flavored steak inside.
How to Tell When Dry-Aged Steak Is Ready

Knowing when dry-aged steak is ready depends on careful observation and evaluation. Changes in color, texture, and flavor provide reliable indicators for determining optimal timing.
Visual and Textural Cues
Dry-aged steak develops a dark, sometimes deep red or brown exterior crust as it ages. The surface becomes firmer, and the overall meat may shrink noticeably—often by as much as one-third of its original size.
A thick, hard crust forms on the outside, which is normal and will be trimmed before cooking. Look for even coloration and a clean, dry appearance without sticky or slimy spots.
Inspect for any unusual odors. A mild, nutty, or earthy smell is typical, but any rotten or putrid aroma signals spoilage and the steak should not be consumed. Use a clean knife to check the interior color, ensuring it remains rich and vibrant.
Conducting a Simple Taste Test
As the steak ages, its flavor shifts from standard beefiness to more complex, concentrated, and sometimes a bit nutty or cheesy notes. Many prefer aging for at least 30 days for noticeable changes, but flavor becomes more pronounced at 45 to 60 days.
After the dry-aging period, trim away the hardened crust and cook a small portion. Perform a simple taste test by searing a thin slice and sampling the flavor. Focus on texture—dry-aged steak should be tender but not mushy, with a distinct savory depth.
If the steak tastes pleasantly beefy without sour, rancid, or bitter hints, it is ready to be enjoyed. Discard if any off-putting flavors or aromas are detected, as this may indicate spoilage.
Cooking and Enjoying Your Dry-Aged Steak
Preparing a dry-aged steak for cooking requires some important steps to ensure the best flavor and texture. Attention to trimming and cooking methods highlights the steak’s unique character and helps achieve the desired doneness.
Trimming and Prepping After Aging
Once dry-aging is complete, the outer layer of the steak will be dark, hard, and often covered with a tough crust. This layer must be trimmed away using a sharp knife, removing any dried or discolored meat as well as the fat cap if it has hardened.
Trim until only the fresh, deep-red meat remains. Any dried edges left on can affect taste and texture. After trimming, pat the steak dry with paper towels to remove moisture on the surface, which helps develop a better sear.
Let the steak sit at room temperature for 30–60 minutes before cooking. This promotes even cooking and reduces the risk of a cold center. Season generously with coarse salt and black pepper just before cooking.
Cooking Tips for Best Results
High heat is essential for searing dry-aged steak, as it helps achieve a rich, caramelized crust without overcooking the inside. A cast iron skillet, grill, or broiler works well for this purpose.
Cook to the desired doneness, but keep in mind that dry-aged steaks often benefit from less cooking since they are more tender and flavorful. Chef K.C. Gulbro recommends sautéing with butter, rosemary, salt, and pepper for added aroma.
Use a meat thermometer to check doneness:
Rare: 120–125°F (49–52°C)
Medium Rare: 130–135°F (54–57°C)
Medium: 140–145°F (60–63°C)
Rest the steak for 5–10 minutes after cooking. This allows the juices to redistribute, making the steak juicier and more flavorful. Slice and serve promptly.
Safety and Food Handling Considerations
Successful dry-aging relies on strict control of hygiene and environment. A clean process and proper conditions prevent food safety risks and ensure meat quality.
Preventing Spoilage and Contamination
Dry-aging should always take place in a dedicated environment, like a fridge used solely for this purpose. This helps avoid cross-contamination from other foods. Meat should be placed on a wire rack to promote air circulation and prevent moisture buildup. Common household refrigerators are not designed for dry-aging unless modified for steady temperature and humidity.
Key controlled conditions:
Factor Safe Range Temperature 34–38°F (1–3°C) Humidity 75–85%
Surfaces, tools, and hands must be sanitized before handling meat. Handle steaks with clean utensils rather than hands whenever possible. Inspect meat daily for off-odors or unusual mold. Discard if signs of spoilage appear, as consuming spoiled meat can result in illness.
