
10 Steps to Building Your Own Chicken Coop
A Comprehensive Guide
Building your own chicken coop can be a rewarding and cost-effective project for anyone interested in sustainable living or fresh eggs right from their backyard. This step-by-step guide is designed to make the process straightforward and manageable, even for those with limited carpentry skills. By following these steps, you can ensure your chickens have a safe and comfortable home, tailored to your specific needs and space.
Creating a custom coop allows for the inclusion of features that may not be available in pre-made options, such as specific areas for egg-laying, roosting, and feeding. This article will walk you through essential considerations and practical steps to help you build a coop that is both functional and efficient. Whether you're new to chicken keeping or looking to expand your flock, this guide will provide you with the necessary knowledge to get started.
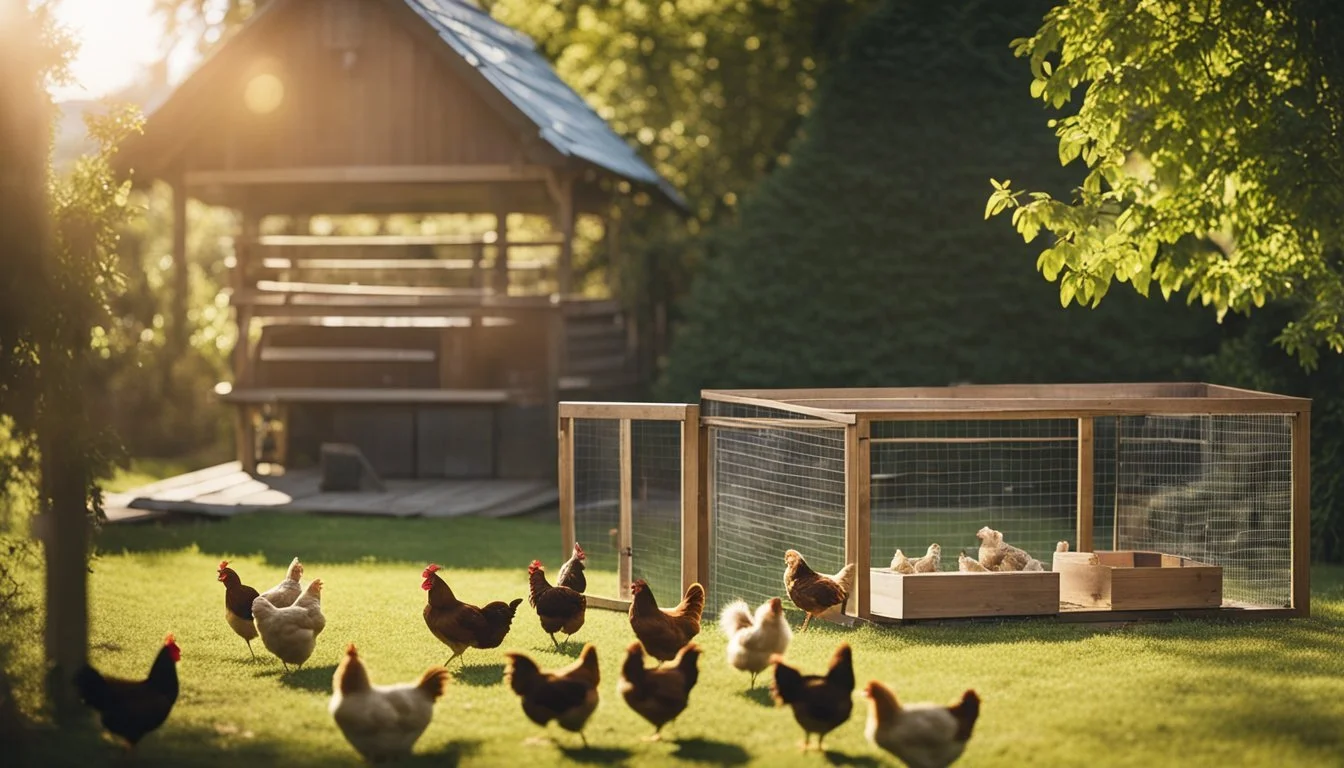
1) Choose Your Location
Selecting the right location for your chicken coop is crucial. A well-chosen site ensures the health and safety of the chickens.
The area should be well-drained to prevent any water accumulation, which can lead to dampness and health issues for the chickens. Elevation is often a good choice to ensure proper drainage.
Sunlight plays a significant role. The coop should get enough sunlight for warmth but also some shade to protect the chickens from overheating. Trees or a roof can provide the necessary shade.
Ensure the location is safe from predators. Situating the coop close to your house can help you monitor it easily. However, avoid placing it directly next to the home to manage odors and noise.
Accessibility is another vital factor. Make sure the coop can be easily accessed for cleaning, feeding, and egg collection. Paths leading to the coop should be clear and easy to navigate, even during bad weather.
Space is also essential. Chickens need ample room to roam, forage, and exercise. A location offering enough space for both the coop and an outdoor run is ideal. This setup allows the chickens to stay healthy and active.
2) Gather Materials

Before beginning construction, it is essential to gather all the necessary materials. This preparation ensures the building process can proceed smoothly and efficiently.
Start by collecting wood for the coop's frame and siding. Plywood and treated lumber are preferred for durability.
Acquire roofing materials, such as shingles or metal sheets, to protect the coop from the elements.
Secure hardware, including screws, nails, hinges, and latches, to assemble and secure the structure. Consider predator-resistant latches for added security.
Ensure you have wire mesh or chicken wire for the windows and ventilation openings. This material keeps the chickens safe from predators and provides airflow.
Gather insulation materials if you live in a colder climate. Insulation helps maintain the optimal temperature inside the coop.
Do not overlook tools such as saws, drills, hammers, and measuring tapes. Having the right tools ready will make the process more straightforward.
Finally, prepare paint or wood sealant to protect the coop from weather damage and prolong its life. Each material plays a significant role in constructing a sturdy and reliable chicken coop.
3) Create a Design Plan
Before purchasing materials, it is essential to develop a comprehensive design plan for the chicken coop.
Determine the size of the coop based on how many chickens will be housed. A general guideline is to provide 3-4 square feet of space per chicken inside the coop.
Consider the type of roof for the coop. A common choice is a gable roof, which allows for good ventilation and runoff.
Plan for necessary features such as nesting boxes, roosting bars, and an access door. Nesting boxes should be easy to access for egg collection.
Decide on materials that will be used for construction. Wood is a popular choice, but consider using weather-resistant and durable materials for longevity.
Include details on the type of flooring. Some opt for a dirt floor, while others might prefer a solid, easy-to-clean surface.
Ensure the coop design includes adequate ventilation to maintain airflow and reduce moisture buildup. Consider the placement of windows or ventilation holes.
Safety measures should also be part of the design. Reinforce against predators using strong wire mesh and secure latches.
Taking the time to create a detailed design plan will make the building process smoother and ensure the final coop meets all needs effectively.
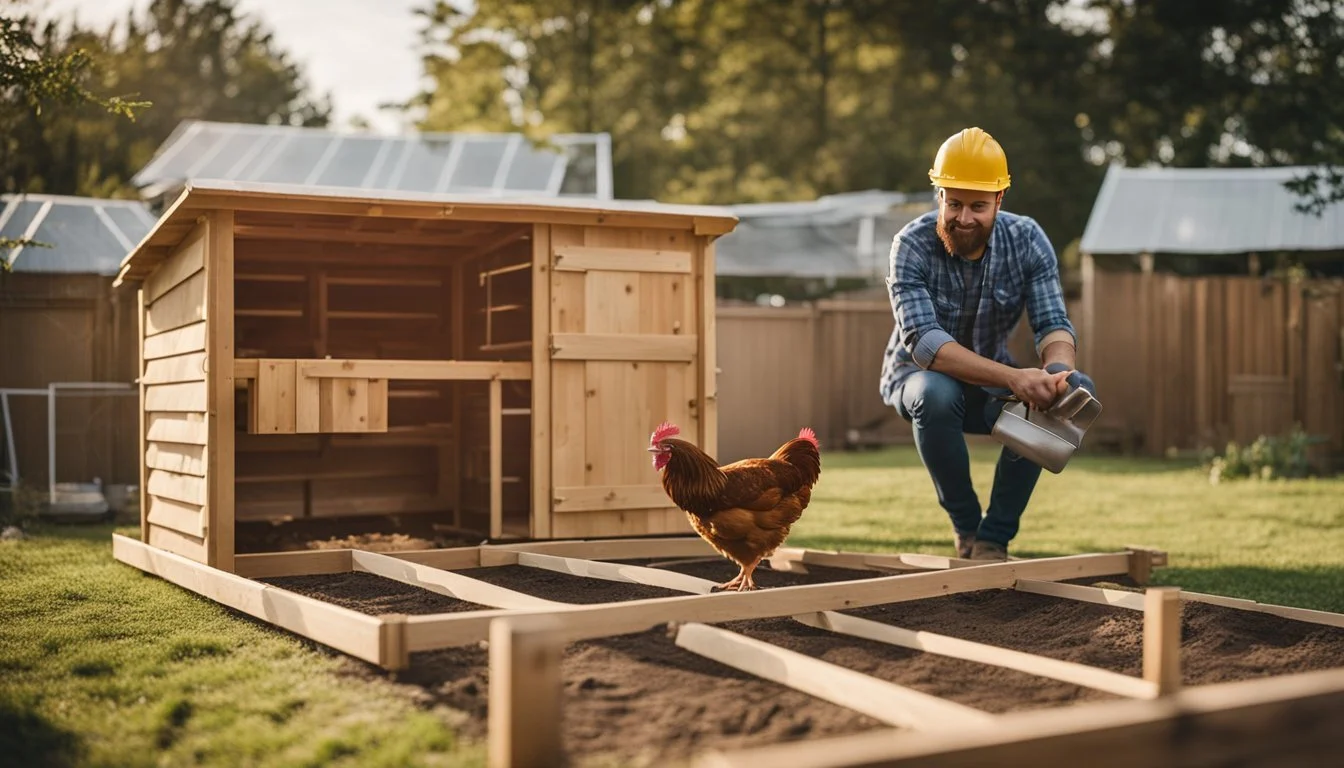
4) Build the Frame
The frame is the backbone of your chicken coop. Begin by gathering all the necessary lumber and confirming you have the right measurements. Use treated wood to ensure durability and longevity.
First, build the base of the frame. Connect the four corners with sturdy screws and brackets. This base will provide a solid foundation for the rest of the coop.
Next, construct the vertical supports. Space these evenly along the base, ensuring they are securely attached. These supports will offer stability and shape to your coop.
Once the vertical supports are in place, add the horizontal beams. These will connect the vertical supports and form the walls. Ensure all beams are level and firmly attached. This step is crucial to maintaining the structure's integrity.
For added strength, consider using corner braces. These will reinforce the joints and help prevent any wobbling or shifting over time.
When the walls are completed, assemble the roof trusses. Angle-cut the ends of the lumber to fit together snugly and provide the necessary pitch for water runoff.
Finally, secure your frame to the ground. Use concrete anchors or heavy-duty stakes to prevent shifting and ensure the coop remains stable even in strong winds.
Building a robust frame is essential for a functional and durable chicken coop.
5) Add Walls and Roof
Once the frame of the chicken coop is complete, it’s time to install the walls and roof.
Start by attaching the wall panels to the frame. Panels can be made from wood, plywood, or repurposed materials like old pallets. Make sure the panels fit snugly to avoid gaps, which can allow drafts or predators inside.
For the roof, create trusses by joining battens at a 45-degree angle to form triangles. Secure these trusses to the top of the frame. You can use wood, metal, or a combination of materials for the roof panels. Ensure that the roof is tightly fastened with roofing screws, ideally those with rubber washers.
A good roof should provide shelter from rain and wind. Proper ventilation can be installed by leaving small gaps near the roofline, covered with mesh to keep out pests.
It’s crucial to check for and seal any small gaps in both the walls and roof once installed. This will keep the chicken coop secure and weatherproof.
6) Install Nesting Boxes
Nesting boxes are essential for a well-functioning chicken coop. Each box provides a private space where hens can lay eggs comfortably. For regular chickens like Leghorns or Sussex, a 12-inch cube is usually suitable.
Each box should be positioned about 18-24 inches off the ground. This elevation helps keep the nests clean and limits access to predators. Attaching the boxes to an inside wall is a common practice.
If your chickens are larger breeds, such as Jersey Giants, opt for a 14-inch wide box while maintaining a 12-inch depth and height. According to best practices, aim for one nesting box per 4-6 hens to prevent overcrowding.
Ensure the boxes are easy to access from the outside for egg gathering. Some designs include a hinged flap or door. Adding a slight slope to the roof of the nesting boxes can prevent birds from roosting on top and making a mess.
Line each box with clean straw or shavings. This provides comfort for the hens and protects the eggs from breaking. Regularly clean and refill the nesting material to encourage hens to use the boxes properly.
Finally, ample lighting in the coop, either natural or artificial, can encourage hens to lay eggs in the boxes.
7) Set Up Perches
Chickens need perches for roosting at night. Perches should be smooth, solid, and comfortably support the weight of the birds.
Install perches about 18 to 24 inches off the ground. Ensure they are horizontal and stable to prevent tipping when chickens hop on and off.
Space perches at least 12 inches apart to give each bird enough room. A diameter of 2 to 3 inches is ideal for chicken feet. Wooden dowels or branches work well.
Secure the perches firmly to the coop structure. This prevents movement and enhances stability. Avoid using metal pipes as they can get too cold for the birds' feet.
Place the perches at various heights if you have limited space. This can accommodate more chickens without overcrowding.
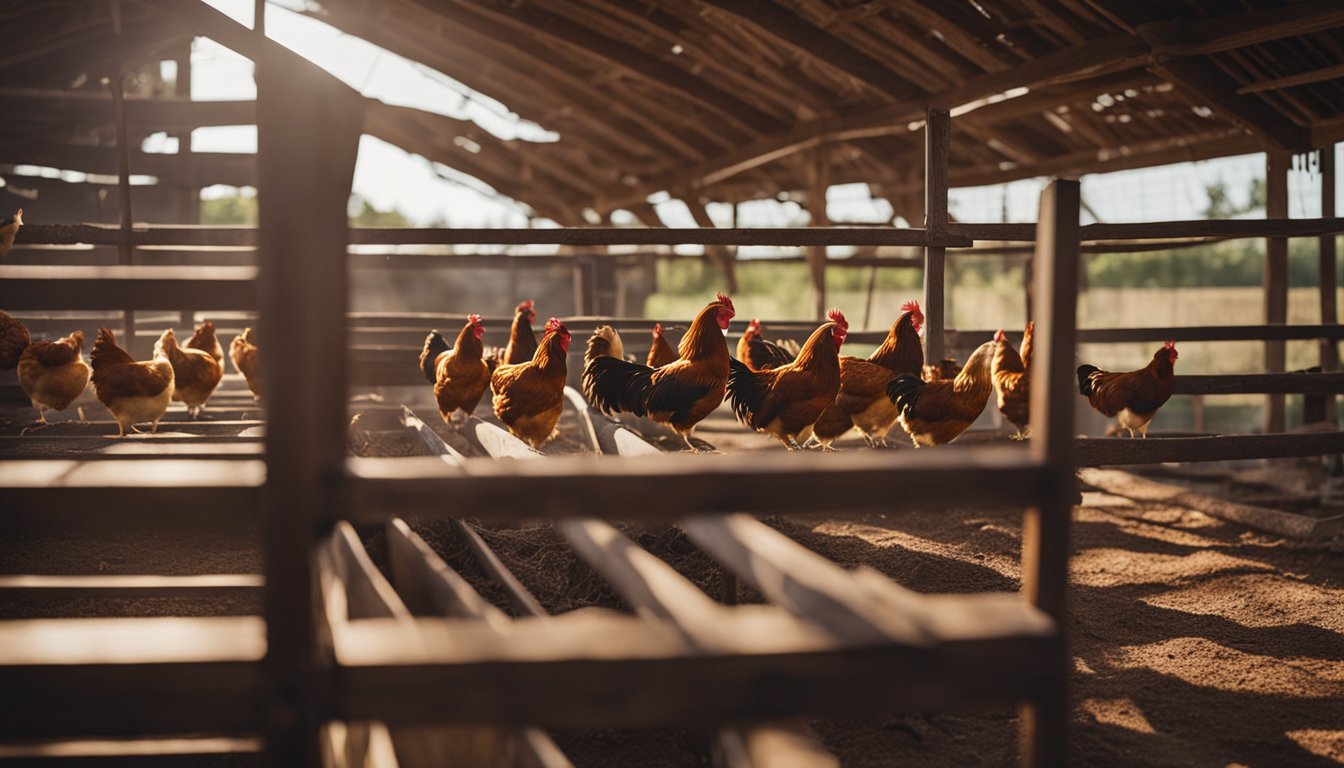
8) Integrate a Ventilation System
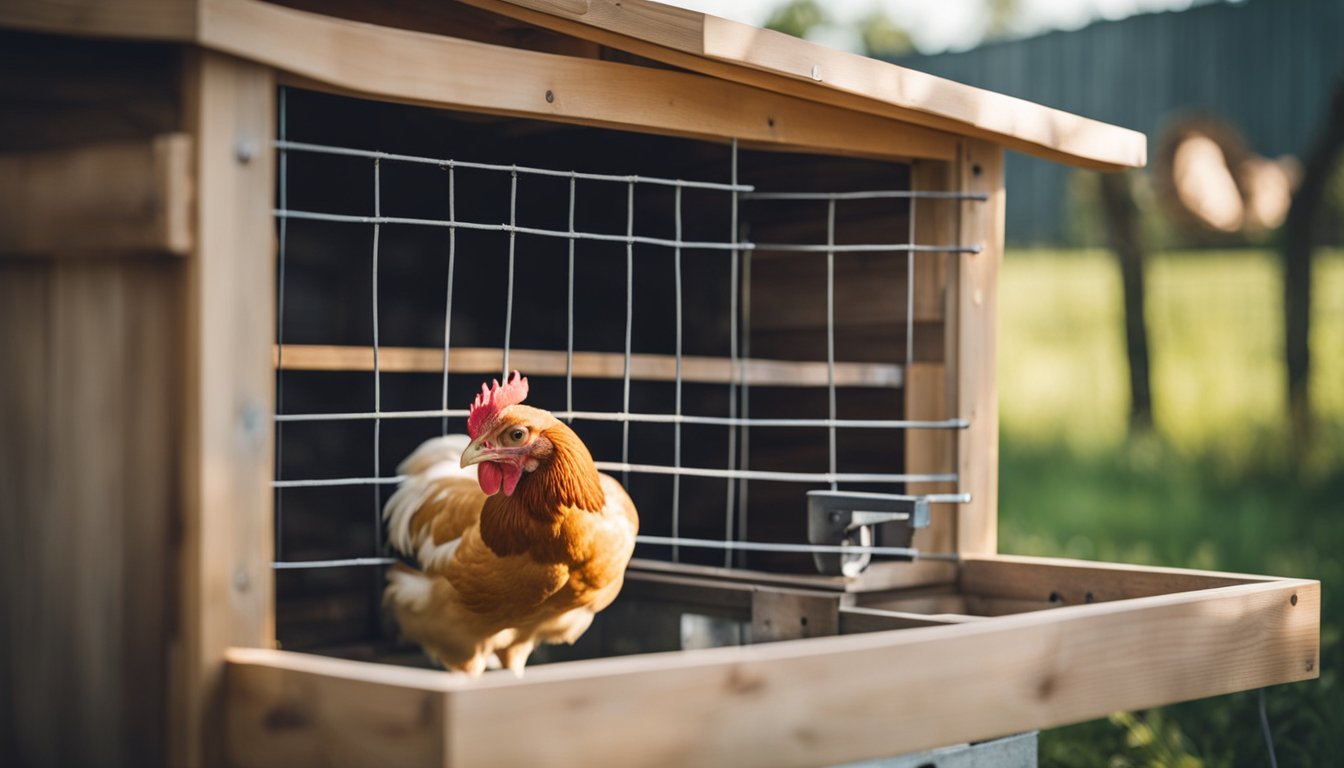
Proper ventilation is crucial for maintaining a healthy chicken coop. It helps eliminate moisture, harmful gases, and excess heat, ensuring the well-being of your birds. Poor ventilation can lead to respiratory issues and increased ammonia levels from droppings.
Roof vents are an effective way to provide year-round ventilation. Positioned high, these vents allow warm, moist air to escape, keeping the coop dry. Netting doors with large-sized meshes can also help; they allow stale air to exit and fresh air to enter.
Louvered gable vents are another option. These vents have downward slats to keep out rain and wind while allowing airflow. They come in various shapes and sizes and can be painted to match the coop's design. Proper positioning is key to their effectiveness.
Using multiple ventilation methods ensures optimal airflow. Combine roof vents, netting doors, and gable vents to create a balanced system. Regularly check and maintain these vents to keep them free from blockages.
Always aim for a ventilation strategy that balances air exchange without creating strong drafts. Proper ventilation not only improves air quality but also helps in temperature regulation. This practice supports healthier and happier chickens.
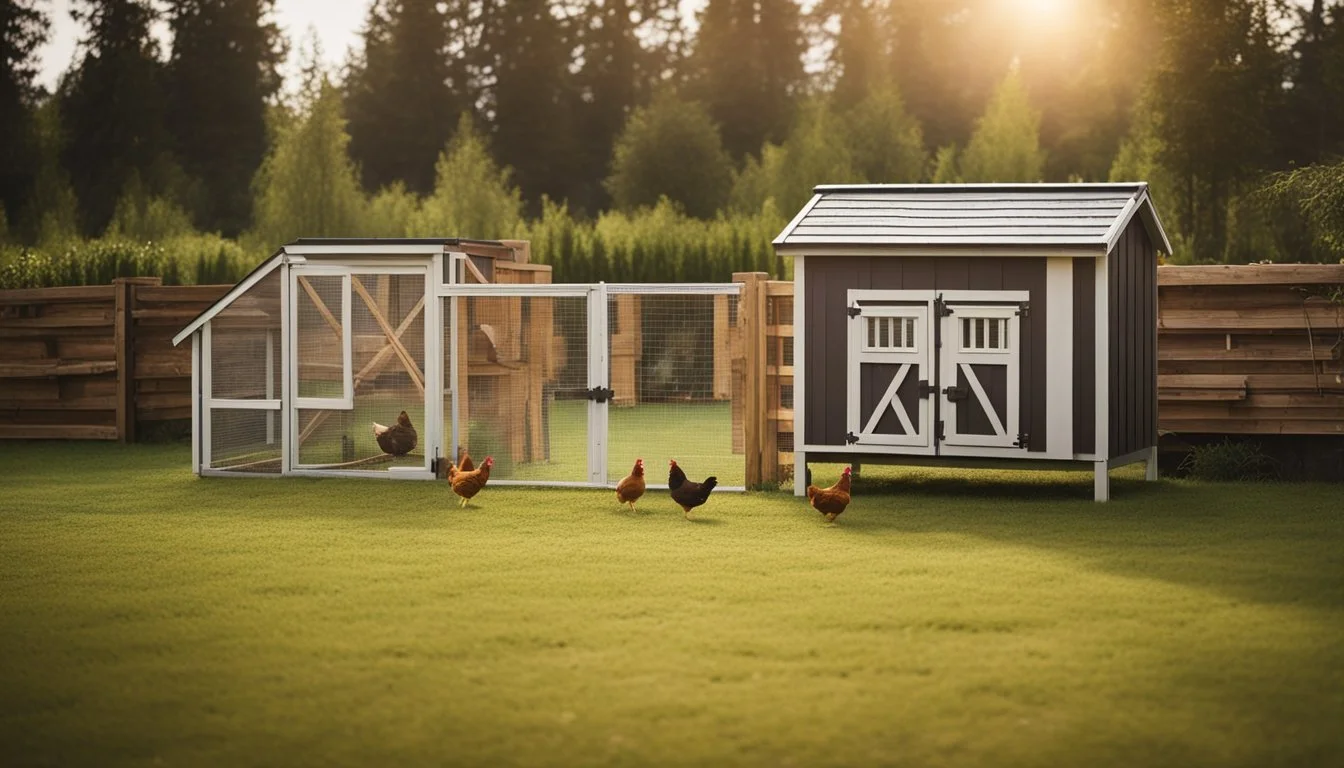
9) Secure the Coop with Fencing
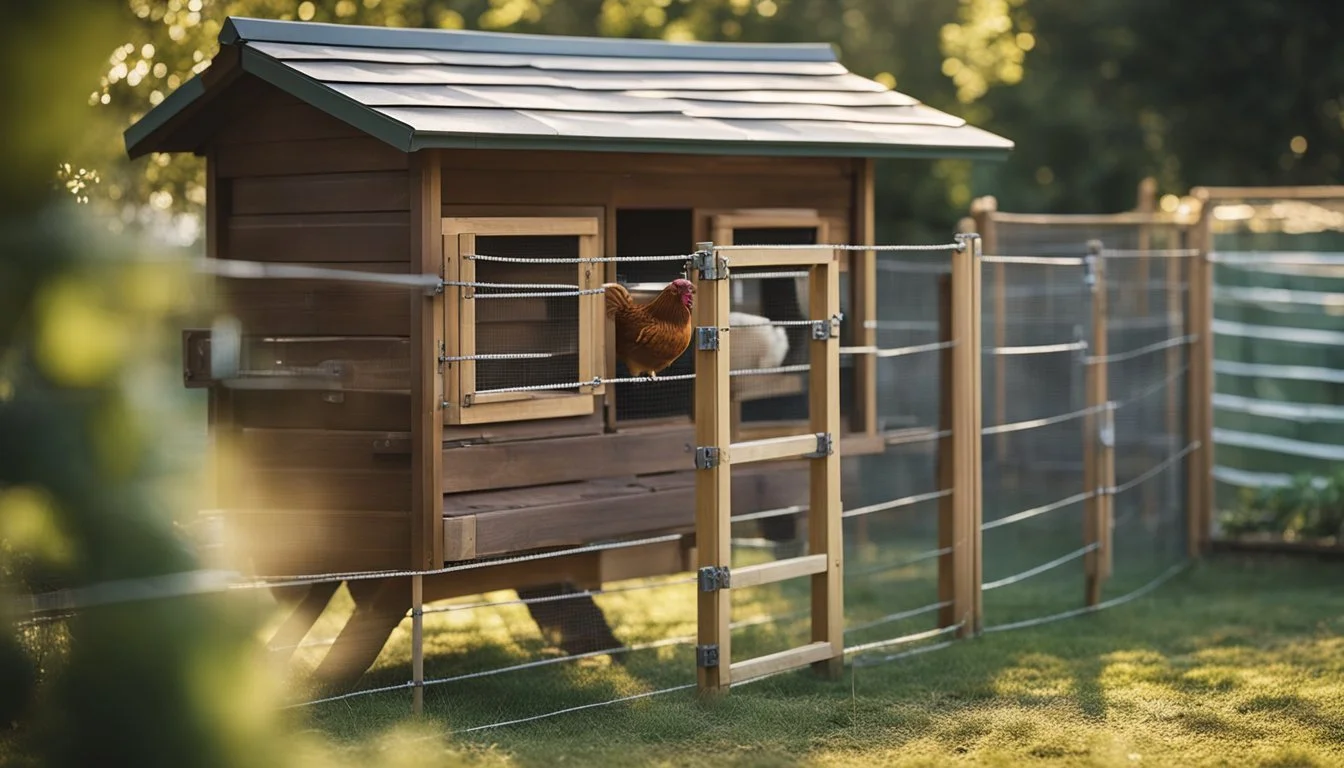
Securing the chicken coop with fencing is essential for protecting the flock from predators. The ideal material for this purpose is wire fencing, which provides durability and security. It should be firmly fastened to the posts to prevent any gaps.
It's important to avoid using chicken wire for predator protection, as it’s primarily designed to contain chickens within a space. Predators can easily tear through chicken wire, so hardware cloth or welded wire mesh is a better choice. These materials offer greater strength and resilience.
The fencing height should be at least six feet to deter climbing predators. Additionally, burying the fence at least 12 inches underground helps prevent animals from digging underneath. Adding an apron of hardware cloth extending outward can further enhance security.
For added protection, consider installing a locking mechanism on the gate that accesses the coop and run. A secure latch keeps determined predators at bay and ensures that the coop remains a safe haven for the chickens.
Regularly inspect the fencing for any signs of damage or wear. Addressing issues promptly can prevent potential breaches and keep the poultry safe.
10) Ensure Predator Protection
To keep chickens safe, predator proofing is essential.
Installing hardware cloth instead of chicken wire is a good start. Hardware cloth is sturdier and keeps out digging and gnawing predators better than chicken wire. For added safety, bury the cloth several inches into the ground around the coop and run.
Securing the floors of coops and runs prevents burrowing animals from gaining entry. Reinforce floorboards and seal gaps to avoid unwanted visitors.
Elevating the coop off the ground also deters burrowing predators. An elevated coop reduces moisture buildup, preventing wood rot and weakening.
Choose a safe location for the coop. Avoid areas near woods or dense vegetation where predators can hide.
Implement secure latches and locks on all doors and windows. Simple latches can be easily figured out by raccoons and other smart animals, so using more complex locking mechanisms increases security.
Covering the run with hardware cloth or durable netting will protect chickens from aerial predators. Ensure the netting is tightly secured to prevent birds of prey from getting inside.
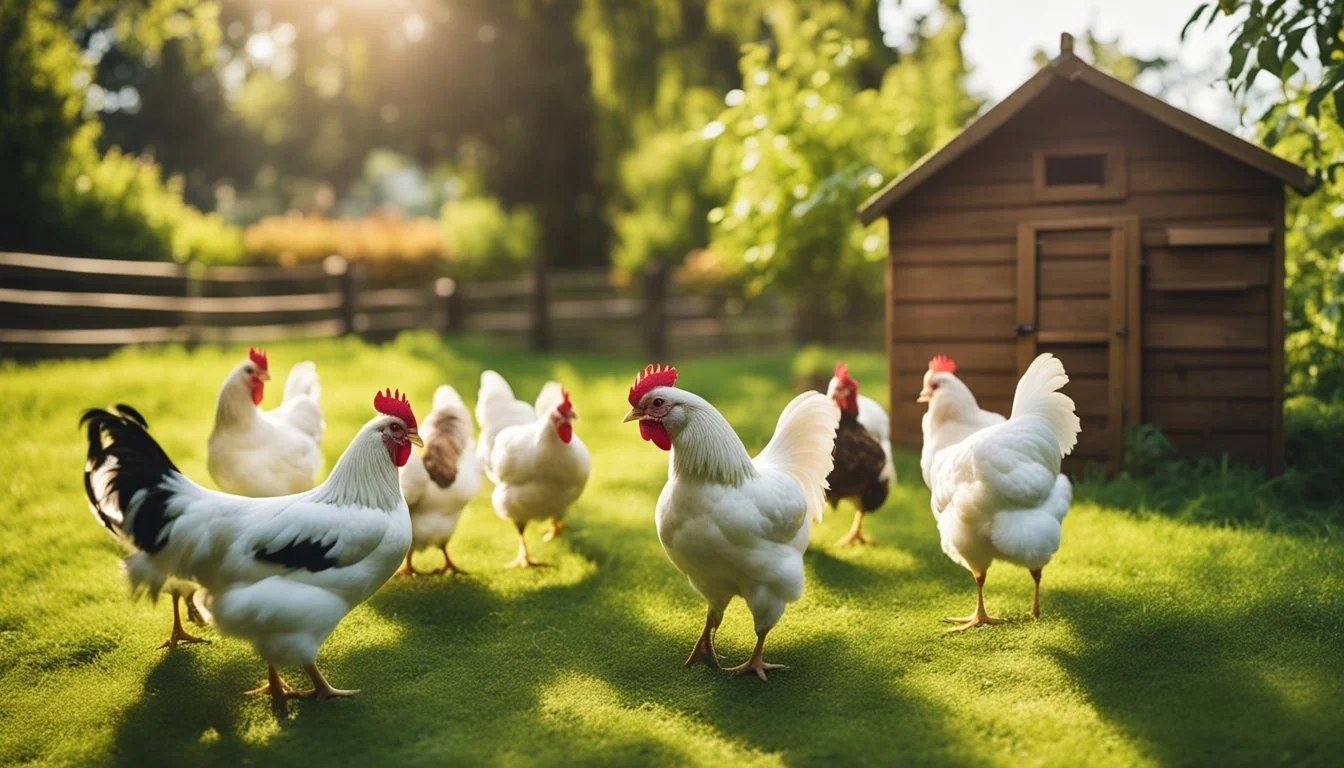
Selecting the Right Location

Choosing the right location for your chicken coop is crucial for the health and happiness of your chickens. The best spot will offer safety from predators, proper drainage, and ideal exposure to sunlight and shade.
Considerations for Outdoor Space
When selecting a location, safety from predators is essential. Coyotes, raccoons, and stray dogs can pose significant threats, so avoid places near dense vegetation or poorly fenced areas.
Elevation is another key factor. A high, well-drained spot prevents water accumulation, reducing the risk of flooding and mud problems. This helps maintain a clean and dry environment, which is vital for your chickens' health.
Lastly, the site should allow for easy access. This makes routine tasks such as feeding, cleaning, and collecting eggs much more manageable.
Climate Factors
Sunlight and shade balance are important for maintaining a comfortable environment. In colder climates, ensure the coop gets ample sunlight to keep it warm. Conversely, in hot climates, significant shade is necessary to prevent overheating.
Wind protection also plays a role in site selection. Placing the coop near a natural windbreak like a row of trees or a building can shield your chickens from harsh winds, especially in colder months.
Consider how seasonal changes affect your location. During rainy seasons, a slightly elevated site will avoid waterlogging. In regions with heavy snow, positioning near a structure can provide additional warmth and protection.
Essential Materials and Tools

Building a chicken coop requires specific materials and tools to ensure stability, safety, and functionality. Key elements include lumber, wire mesh, roofing material, and personal protective equipment to safeguard during construction.
Lumber and Building Supplies
Lumber is the backbone of any chicken coop. Start with 2x4 and 2x3 lumber for framing and supports. These provide structural strength. For the walls, beaded plywood panels are ideal, offering durability. Use exterior-grade screws and nails to ensure longevity against weather elements.
Other necessary materials include:
Wire mesh for ventilation and protection
Roofing material like shingles or metal sheets
Hinges and latches for doors and windows
Screws and nails for assembly
Consider a jigsaw for precise cutting of plywood panels, enhancing fit and finish.
Safety Equipment
Safety during construction is paramount. Equip yourself with essential safety gear to prevent accidents. Begin with safety goggles to protect your eyes from sawdust and debris. Gloves are important for hand protection against splinters and sharp edges.
Hearing protection is necessary when using power tools. A dust mask guards against inhaling sawdust. Also, use closed-toe shoes to protect your feet from falling objects. Safety ensures a smooth construction process, minimizing the risk of injury.
Building Strong Foundations
Creating a reliable chicken coop begins with constructing a strong foundation. This involves careful planning and attention to the durability and stability of the structure.
Designing a Solid Base
A solid base starts with selecting the right materials. Pressure-treated wood or concrete blocks are excellent choices due to their resistance to rot and pests. Ensure the base is level by using a spirit level. An uneven base can compromise the structure's stability.
Consider raising the base slightly off the ground. This provides ventilation under the coop, reducing moisture and deterring pests. Layout floor joists to support the flooring; spacing them 16 inches apart is standard practice. Screws and bolts are preferred over nails for enhanced strength and durability.
Anchoring and Stability
For anchoring, use ground anchors or concrete footings. These methods offer stability and prevent the coop from shifting or toppling over. Ground anchors can be driven into the soil and attached to the coop’s base with sturdy brackets, ensuring it stays in place during strong winds.
Concrete footings involve digging holes at each corner and filling them with concrete to house support posts. This method provides a robust foundation, particularly in areas prone to heavy rains or soft soil. Bracket kits can also be used to secure posts to the concrete, ensuring a secure connection between the ground and the coop.
