
How to Cook with Nilla Wafers for Sweet Pie Crusts
A Step-by-Step Guide

Creating a sweet pie crust from Nilla Wafers is an innovative way to infuse a unique flavor and texture into your favorite dessert pies. The crisp, honey-flavored wafers provide a dependable base that pairs exceptionally well with a variety of fillings, from creamy cheesecakes to tangy fruit tarts. This usage of Nilla Wafers elevates the humble cookie to a key component of an indulgent dessert experience.
To begin, the transformation of the wafers into a crust involves pulverizing them into fine crumbs, which can be achieved with a food processor or by hand in a sealed bag. The resulting crumbs are mixed with a binding agent, typically melted butter, and a touch of sugar to enhance the inherent sweetness of the Nilla Wafers. Once pressed into a pie plate, the crust is baked briefly to set its shape and ensure a crisp finish that can support the weight and moisture of pie fillings.
When crafted correctly, a Nilla Wafer pie crust offers a delightful contrast in texture, with a crumbly, buttery edge that complements the creamy or fruity center of the dessert. This method offers home bakers a simple yet versatile base for their creations, ensuring that each pie is as visually impressive as it is delectably satisfying.
Nilla Wafer Pie Crust Basics
Creating a Nilla wafer pie crust is a straightforward process that involves combining crushed Nilla wafers with butter and sugar. This forms a sweet and firm base ideal for various pie fillings.
Understanding the Ingredients
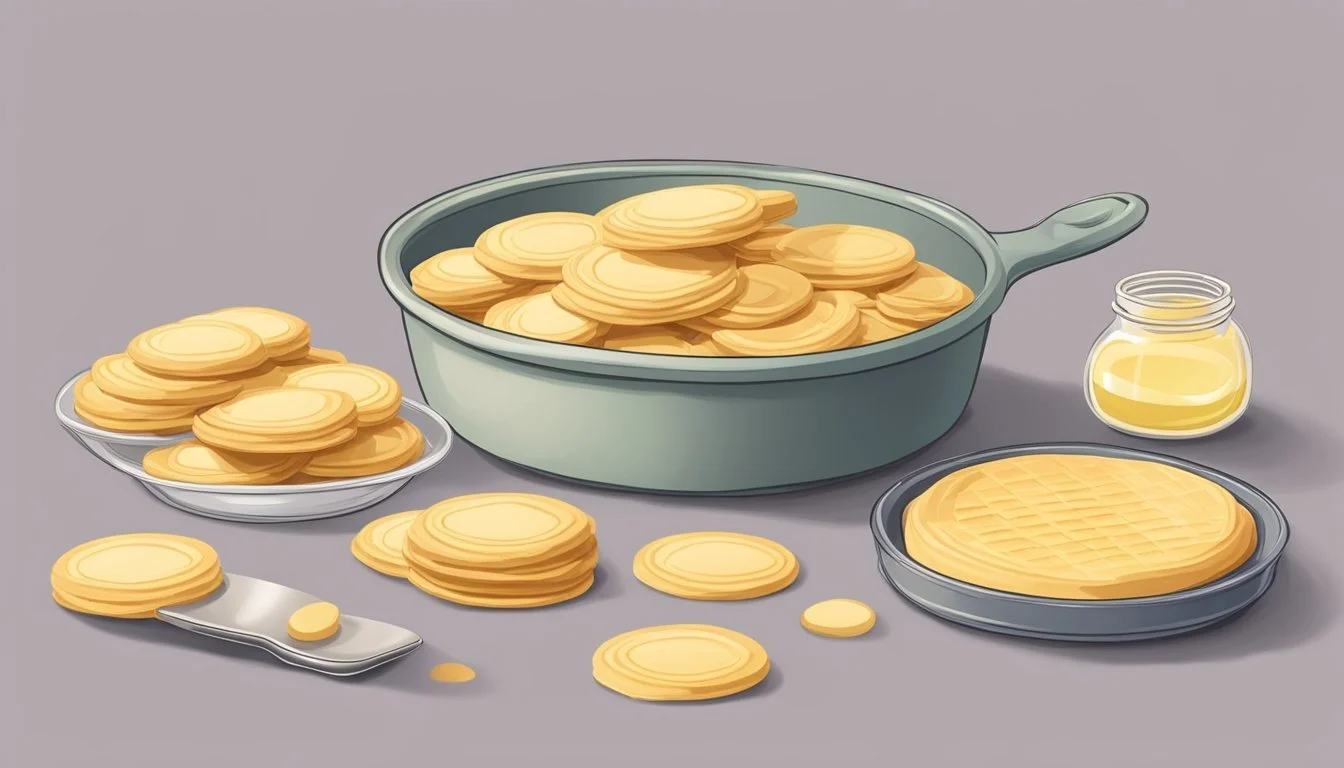
Nilla Wafers: The primary component, Nilla wafers are crushed to fine crumbs to form the crust. One typically needs about 1 1/2 cups of crumbs for a standard 9-inch pie crust.
Butter: It acts as a binding agent. When melted and combined with the Nilla wafer crumbs, it ensures the crust holds together. The approximate amount required is 1/2 cup (or one stick) of butter.
Sugar: Generally, 1/2 cup of sugar is added to the mix. Sugar enhances the sweetness and helps in the caramelization of the crust during baking.
Choosing Your Pie Plate
When selecting a pie plate, one should opt for a standard 9" size, which suits most recipes. It can be made of glass or metal based on personal preference, although glass pie plates make it easier to check the crust's doneness. Before adding the crust mixture, the pie plate should be lightly greased to prevent sticking.
Prep Time: It usually takes 10 to 15 minutes to prepare the mixture.
Cook Time: The crust should be baked in a preheated oven at 350°F for about 8 to 10 minutes.
Total Time: The entire process should be about 20 minutes, from start to finish with a baked crust ready for filling.
Preparation Techniques
Creating a sweet pie crust with Nilla Wafers is a simple process. It requires transforming the wafers into the proper texture and then combining them with the right ingredients to form a cohesive crust.
Making the Crumbs
The foundation of a Nilla Wafer pie crust is the fine crumbs. These crumbs should have a consistent texture, akin to granulated sugar. To achieve this, place Nilla Wafers into a food processor and pulse until fine crumbs are formed. If a food processor is not available, place the wafers inside a sturdy plastic bag and use a rolling pin to crush them, checking periodically for consistency.
Tools: Food processor or rolling pin and plastic bag
Goal: Achieve a fine, sand-like texture
Binding the Crust
For the crust to hold together, a binding agent is needed. Melted butter is mixed with the Nilla Wafer crumbs to create a mixture that will press into a solid form. In a bowl, combine the fine crumbs with melted butter and granulated sugar until the mixture reaches a texture where it can be shaped and will hold together when pressed.
Instructions:
Transfer crumbs to a bowl.
Add enough melted butter to moisten the crumbs (Typical Ratios: 1 1/2 cups of Nilla Wafer crumbs to 5 tablespoons of butter).
Mix in granulated sugar to balance sweetness and improve texture.
Stir until the mixture resembles wet sand.
Test for readiness: The mixture should clump when squeezed in your hand.
Baking and Cooling

Ensuring that the crust is perfectly baked and allowed to cool is crucial for achieving the right texture and firmness. The baking process helps the crust to become crisp and golden, while proper cooling sets the crust, making it strong enough to hold the filling.
How to Bake Your Crust
One should preheat the oven to 350°F (175°C) before starting the baking process. The mixture of Nilla wafer crumbs, sugar, and melted butter should be firmly pressed into the bottom and up the sides of a pie plate. This creates a consistent thickness, which is essential for even baking. Bake the crust in the preheated oven for about 7-10 minutes, or until the edges turn a slight golden brown. Overbaking should be avoided as it can lead to a hard and burnt crust.
Cooling and Setting
After baking, the crust must be allowed to cool to properly set. A wire rack is an ideal place to cool the crust as it allows air to circulate freely around it, speeding up the cooling process. Once the crust is at room temperature, it can be refrigerated to further firm up, which is especially useful if the filling is no-bake and requires a cooler temperature to set. If one is pressed for time, the freezer can be used to expedite the process, but one must ensure that the crust doesn't freeze through, or it may become too hard.
No-Bake Options
No-Bake pie crusts made with Nilla Wafers offer a convenient and delicious foundation for a variety of desserts (What wine goes well with desserts?). These crusts can be quickly prepared without an oven and are perfect for chilled fillings.
Creating a No-Bake Crust
To create a no-bake crust, a food processor is often used to crush the Nilla Wafers into fine crumbs. One then combines the wafer crumbs with melted butter—typically a few tablespoons to ensure the mixture sticks together. It's important to press this mixture firmly into the bottom and up the sides of a pie plate, which may be lightly coated with cooking spray to prevent sticking. The crust should be chilled in the refrigerator or freezer to set, making it sturdy enough to support the filling without baking.
Recommended Fillings for No-Bake Crusts
Various fillings pair well with a Nilla Wafer no-bake crust, especially those that are creamy and set firmly in the refrigerator. Cheesecake filling is a popular choice; simply beat soft cheese with sugar and vanilla and spread it over the crust, then refrigerate until serving. Pudding-based fillings, such as banana cream or coconut cream pie, are also excellent options. They just need to be whisked together and poured into the crust. To ensure the filling sets properly, it usually needs to refrigerate for a few hours before serving. For a lighter option, one could fold whipped cream into the sweetened pudding mixture for an airy texture.
Customization Ideas
Customization is key for any baker looking to elevate a vanilla wafer crust from simply sweet to uniquely indulgent. Whether it's by infusing different flavors or adding artistic garnishes, a few thoughtful tweaks can transform any dessert.
Flavor Variations
One can introduce a variety of flavors into a vanilla wafer crust to match the character of any pie or dessert. Cinnamon and nutmeg are traditional spices that can be mixed directly with the crushed wafers to give a warm and aromatic undertone. For a zestier edge, the addition of lemon zest complements a tart filling beautifully. Here is a simple guide on how to diversify flavors in a vanilla wafer pie crust:
Classic Cinnamon: Add 1/2 teaspoon of ground cinnamon to the crust mixture for a spicy note.
Citrus Twist: Mix in a tablespoon of fresh lemon or orange zest to imbue a citrusy fragrance.
Nutty Accent: Stir in 1/4 cup of finely chopped nuts such as pecans or almonds for added texture and richness.
Decorative Touches
A dessert's appearance is nearly as pivotal as its taste. Bakers can create a rustic or sophisticated finish by experimenting with various toppings and garnishes on their vanilla wafer crust desserts. For a sturdy yet ornate edge, whole vanilla wafers can border the pie before baking. After the dessert cools, consider dressing it up with peaks of whipped cream or artful drizzles of caramel sauce. Below is a list of embellishments to consider:
Whipped Cream Excellence: Pipe whipped cream around the pie's edge for a cloud-like effect.
Strategic Fruits: Delicately place slices of fresh fruit atop the dessert for a pop of color and freshness.
Garnish with Nuts: Sprinkle a medley of chopped nuts for a contrasting finish that offers both visual appeal and a crunchy counterpoint to the creamy filling.
By customizing flavors and adding decorative flourishes, one can elevate the humble vanilla wafer crust to a dessert centerpiece that is as delightful to look at as it is to taste.
Serving and Storage
After baking a pie with a Nilla Wafer crust, understanding how to serve and store it ensures that the dessert maintains its texture and flavor. The right techniques can make a significant difference in enjoying your sweet creation.
Cutting and Serving
To cut the pie, one should use a sharp knife or a dedicated pie server for cleaner slices. Prior to cutting, the pie should be allowed to cool down which makes the crust crispier and less likely to crumble. When serving, gently slide the pie server or knife under the crust to lift each piece out of the dish.
Storing Leftovers
Room Temperature: A Nilla wafer crust pie can be kept at room temperature for up to two days. It should be covered with a dome or inverted bowl to protect it from contaminants.
Refrigerator: For longer storage, covering the pie with plastic wrap or aluminum foil and placing it in the refrigerator is advised. It can be refrigerated for up to five days.
Note: Pies with dairy, eggs, or custard fillings should be refrigerated immediately after cooling and consumed within the shelf life of the filling used.
Nutritional Information

When considering Nilla Wafers for a sweet pie crust, one should understand the caloric content and dietary considerations to make informed choices about incorporating this ingredient into desserts.
Understanding the Caloric Content
Nilla Wafers, a primary component of this pie crust, contribute to the overall calorie count of a dessert. One serving of Nilla Wafers, which is approximately 30 grams or about 8 wafers, typically contains:
Calories: 140
Total Fat: 6g
Saturated Fat: 1.5g
Trans Fat: 0g
Cholesterol: 0mg
Sodium: 115mg
Total Carbohydrates: 21g
Dietary Fiber: 0g
Total Sugars: 11g
Protein: 1g
These values vary depending on the specific brand and formula. It is important to note that when combined with additional ingredients such as butter and sugar to create the crust, the calorie and fat content will increase.
Dietary Considerations
The Nilla Wafer pie crust is composed of ingredients that may impact individuals with specific dietary needs. Here's a breakdown of important nutritional components:
Sugar: The addition of sugar increases the carbohydrate count, which should be monitored by those regulating blood sugar levels.
Fat: Butter contributes saturated fat, which should be consumed in moderation to maintain heart health.
Sodium: Those with sodium-restricted diets should be aware of the added sodium content.
Fiber: Nilla Wafers are not a significant source of dietary fiber.
Protein: The crust provides minimal protein; for a more balanced nutritional profile, serve with fillings containing protein.
Vitamins and Minerals: Nilla Wafers and subsequent crusts are not a rich source of vitamins or minerals like vitamin A, vitamin C, calcium, potassium, or iron.
Individuals should consider these factors in the context of their overall diet to adhere to their nutritional goals and restrictions.
