
How to Make Guanciale at Home
Your Simple Step-by-Step Guide
Guanciale, the Italian delicacy made from cured pork jowl, is a unique ingredient renowned for its rich flavor and versatility in the kitchen. It plays a key role in classic dishes such as pasta all'Amatriciana and pasta carbonara. Crafting guanciale at home is a process of patience and precision, but it is accessible even to beginners who are enthusiastic about traditional charcuterie (What wine goes well with charcuterie?).
The preparation begins with a quality piece of pork jowl, which is a cut from the pig's cheeks. Seasonings typically include salt, black pepper, and a blend of complementary spices such as rosemary, thyme, and bay leaves, though variations exist. The cure mixture is massaged into the meat, ensuring thorough coverage for consistent flavor development.
After curing, the pork jowl is left to air-dry in a cool, controlled environment. This process allows the flavors to mature and the texture to transform, resulting in the distinctively dry and firm character guanciale is known for. Home chefs relish the transformation as the meat transitions from a raw cut to a refined, culinary ingredient over the course of several weeks.
Understanding Guanciale
Before diving into the art of making guanciale at home, one should grasp what guanciale is and appreciate the benefits of crafting this Italian delicacy oneself.
What Is Guanciale?
Guanciale is an Italian cured meat product made from pork jowl, a cut from the cheeks of the pig. Its name is derived from guancia, the Italian word for cheek. The character of guanciale is marked by a significant fat cap, which contributes to its rich flavor and tender texture when cooked. Unlike other cured pork products such as bacon or pancetta, guanciale boasts a more delicate and nuanced taste profile due to the specific fat to meat ratio present in the jowl.
Benefits of Homemade Guanciale
Choosing to make guanciale at home allows for complete control over the quality of pork used in the process. High-quality pork results in superior guanciale, with a focus on the sourcing of meat from well-raised pigs. Homemade guanciale not only elevates the flavor of traditional Italian recipes but also ensures that no artificial preservatives or flavors are added. Through the process of curing their own guanciale, individuals gain a deeper understanding and appreciation for this cornerstone of Italian cooking.
Preparing the Pork Jowl
To achieve the best results in making guanciale, selecting a high-quality pork jowl and gathering the proper tools and ingredients are essential steps. One must handle these initial tasks with care to ensure a successful curing process.
Selecting the Best Pork Jowl
When choosing pork jowl, one should look for meat that is fresh and comes from well-raised pigs. The fat should be firm and white, and the meat should have a bright, pink color. Some signs of quality pork jowl include:
No off-odors, which indicate freshness
An even distribution of fat and meat
One should avoid pork jowls that have discoloration or a slimy texture, as these are signs of poor quality.
Tools and Ingredients Needed
To begin preparing guanciale, one requires a set of tools and ingredients to efficiently handle and cure the pork jowl. Here is a concise list of essentials:
Tools:
Sharp knife: Needed to trim any excess fat or glands from the pork jowl.
Container: Preferably plastic, glass, ceramic, or stainless steel to hold the pork jowl during the curing process.
Ingredients:
Ingredient Purpose Curing salt To cure and preserve the pork jowl Sugar Often used to balance the flavors Pepper For seasoning the meat
All ingredients should be thoroughly mixed and then massaged into every surface of the pork jowl. Consistent coverage is key, as it ensures an even cure.
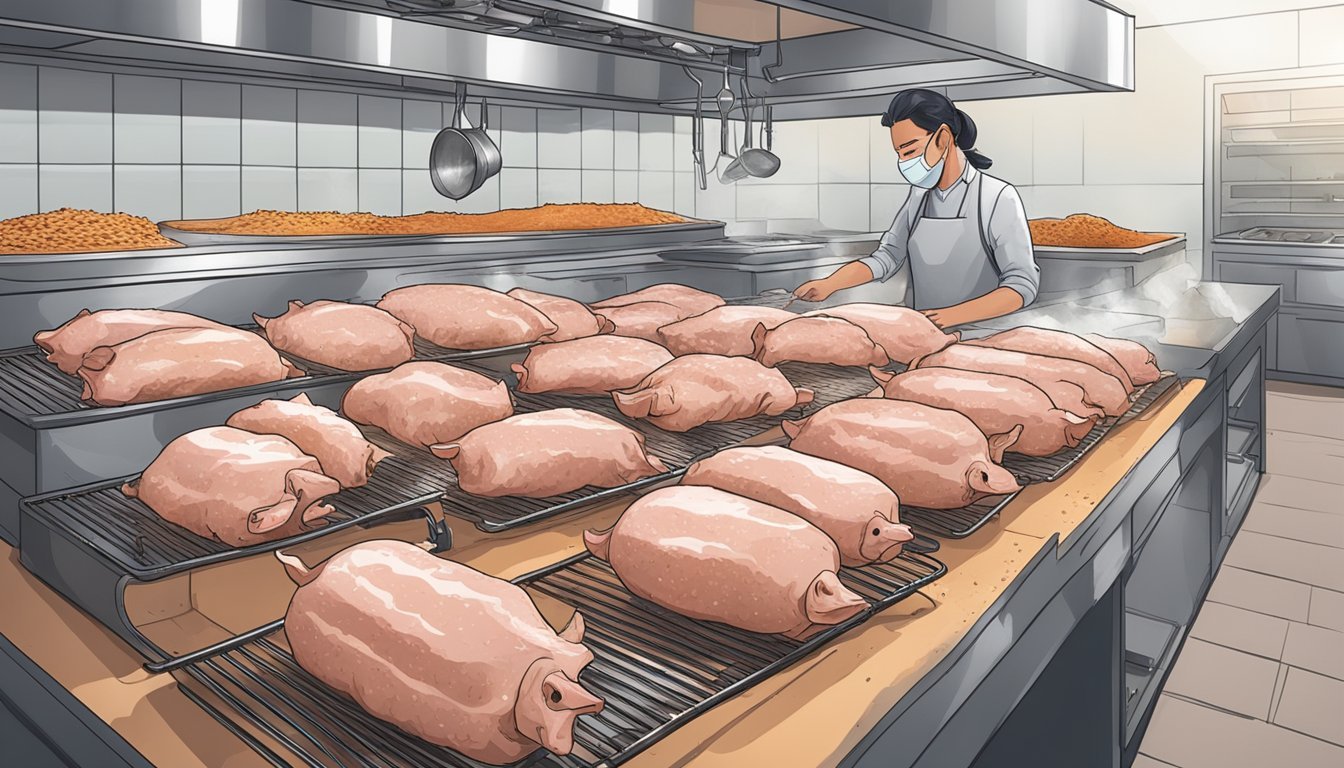
Curing Process
In creating guanciale, the curing process is critical, involving meticulous trimming and cleaning, preparing a tailored curing mix, and the proper application of this mix to the pork jowl.
Trimming and Cleaning
Before any curing begins, one must trim the pork jowl meticulously, removing any salivary glands or lymph nodes that may affect the flavor and texture of the final product. After trimming, the pork jowl should be thoroughly rinsed under cool water and patted dry with paper towels, ensuring a clean surface for the cure to adhere properly.
Preparing the Curing Mix
The curing mix is fundamental to guanciale and often includes a balance of kosher salt, sugar, and aromatics such as crushed black pepper, minced garlic, and thyme. The exact proportions will be:
Kosher salt: 3.5%
Sugar: 0.5%
Black Pepper: To taste
Minced Garlic: To taste
Thyme: To taste
Combine these ingredients until they are fully integrated. The mixture should be uniform in texture and fragrance, indicating a well-distributed blend of all components.
Applying the Cure
With the mix prepared, the next step is to coat the pork jowl thoroughly. One should massage the curing mix into every part of the jowl, ensuring an even and liberal application. To do so, take handfuls of the curing mix and rub them over all surfaces of the meat. For optimal results, the meat should then be placed in a container—preferably plastic, glass, or stainless steel—that snugly fits the jowl. Any leftover cure should be added to the container before it's sealed and refrigerated.
The jowl needs to remain in the refrigerator for a period ranging from 4 to 7 days. During this time, the salts and sugars will draw out moisture, and the seasonings will infuse the meat with flavor.
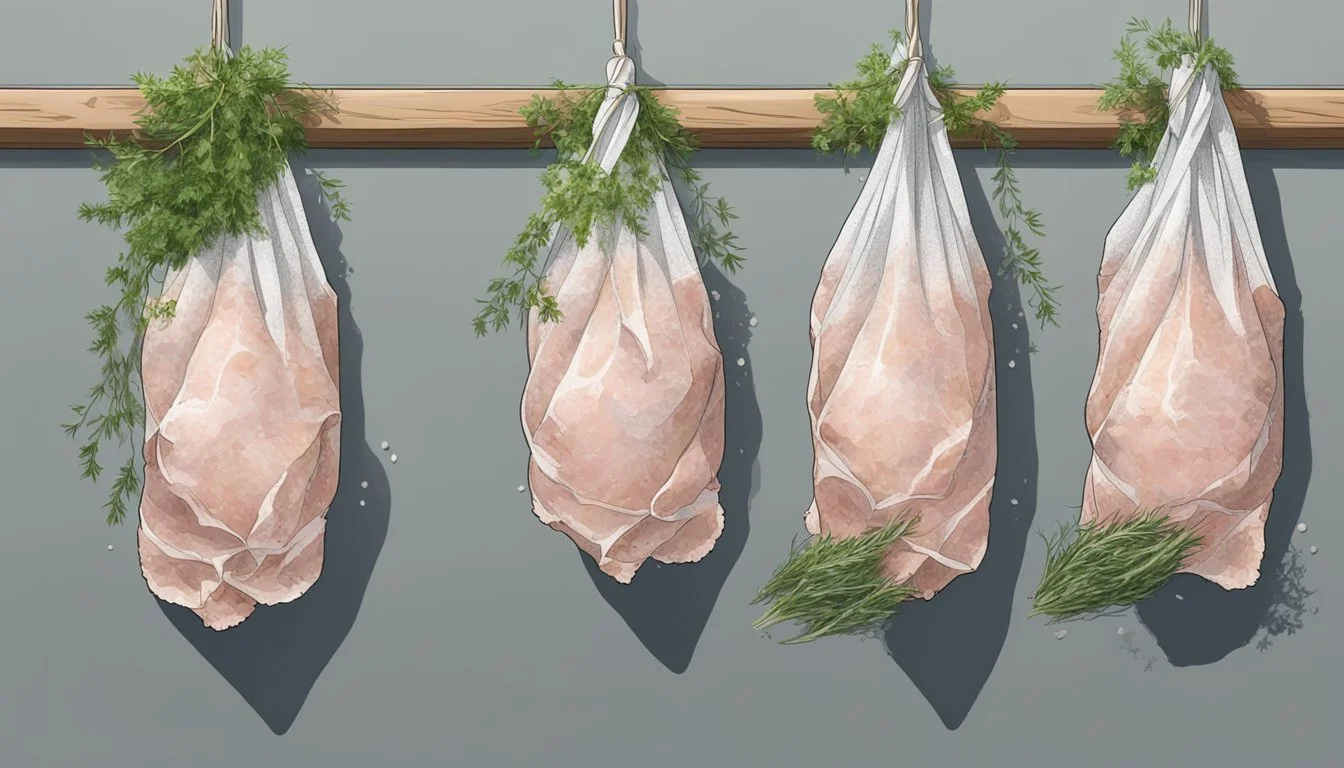
Seasoning and Flavoring
Guanciale's distinctive taste largely depends on the selection and application of seasonings and herbs. The correct balance of these ingredients will infuse the pork with robust flavor during the curing process, laying the foundation for its use in various dishes.
Selecting Seasonings and Herbs
For traditional guanciale, seasoning typically starts with black peppercorns and rosemary, which impart a warm, slightly piney flavor profile. When selecting herbs, fresh is ideal, but dried rosemary can also be used if fresh is unavailable. The choice of additional seasonings can vary, but a classic approach includes:
Peppercorns (whole or crushed): Essential for a spicy kick.
Fresh Rosemary: Adds an aromatic depth.
Seasonings such as juniper, red pepper flakes, mustard seeds, or nutmeg can be included to complement the innate savoriness of the pork.
Applying Seasonings and Herbs
Once selected, combining the seasonings should be done with care. Grinding the peppercorns is recommended to allow the flavors to penetrate more deeply into the pork jowl. If using additional spices like juniper or mustard seeds, they should also be toasted and ground to bring out their essential oils. Application follows a methodical process:
Grind the seasonings using a spice grinder or mortar and pestle.
Mix the ground seasonings with coarsely chopped or ground rosemary to create a homogenous curing rub.
Massage the cure into every surface of the pork jowl generously, ensuring that the meat is thoroughly coated.
Finally, following the application of the rub, the pork should rest, allowing the flavors to permeate before the next stage of the curing process.
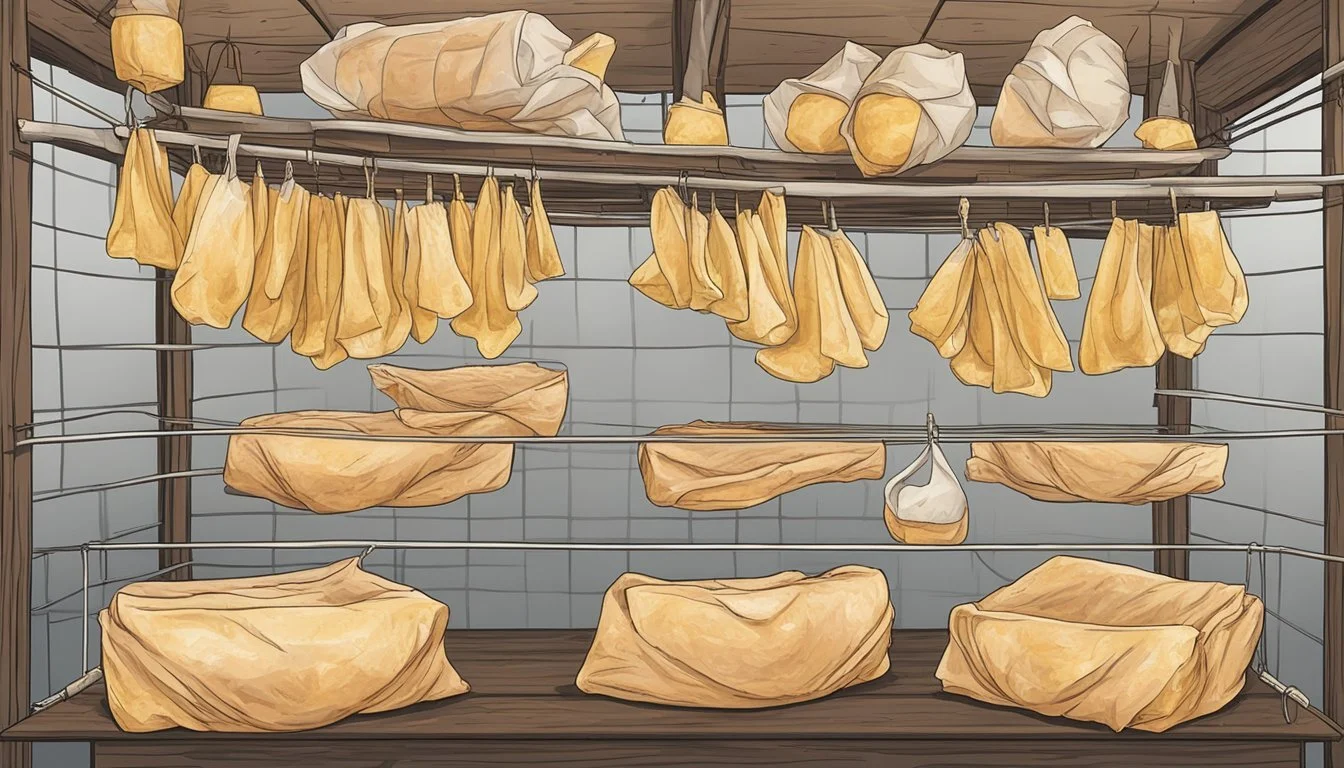
Aging and Drying
After successfully curing the pork jowl in either a dry rub or a brine, the next crucial stage is aging and drying, which requires attention to detail and specific environmental conditions to ensure the proper development of flavors and safe preservation.
Setting Up the Drying Environment
The drying environment for guanciale must be cool, with optimal temperatures ranging from 50 to 60 degrees Fahrenheit (10 to 15 degrees Celsius), and a humidity level around 60 to 70%. It's essential to hang the pork jowl in a location where these conditions can be maintained consistently. An area such as a cellar, a dedicated meat curing chamber, or a refrigerator adjusted for curing purposes can be ideal. The space should be clean and protected from pests. Proper airflow is also necessary to prevent mold development and to ensure even drying.
Temperature: 50-60°F (10-15°C)
Humidity: 60-70%
Airflow: Must be sufficient
To monitor these conditions, one can use a hygrometer and a thermometer. Consistency is key; any significant fluctuations can affect both safety and quality.
Monitoring the Aging Process
During the aging process, it's essential that the jowl is regularly checked for signs of spoilage or undesirable mold. Some white mold is typical and even beneficial, but green or black mold indicates a problem. Should it appear, the affected area can generally be cleaned off with a cloth soaked in vinegar.
Every week, the guanciale should be inspected:
Look for any discoloration or unusual mold.
Feel the meat to check how the drying is progressing. It should become firmer over time.
After a period that typically spans 3 to 8 weeks, depending on size and environmental conditions, the guanciale will have lost approximately 30% of its original weight, a good sign that it's sufficiently dried.
Using a precise scale to weigh the meat at the start and throughout the drying process will aid in determining when it is ready. Once the target weight loss is achieved, the guanciale is ready for consumption or storage.
Storing the Guanciale
Proper storage of guanciale ensures its longevity and maintains its flavors. Attention to moisture levels and fat cap preservation is key during the storage process.
Optimal Storage Techniques
Once the guanciale has finished curing and drying, it can be stored in the refrigerator or a cool pantry. It should be wrapped in parchment paper or cheesecloth to allow it to breathe while still protecting it from excess moisture and contaminants. For extended freshness, one can vacuum seal the guanciale, but it’s important not to compress the fat cap excessively, as this may affect texture and taste.
Refrigerator: Store in the least humid section, typically where the cheeses are kept, to prevent the guanciale from becoming overly moist.
Pantry/Cool storage: A cellar or pantry at around 10-15°C is ideal, provided the area is well-ventilated.
Expected Shelf Life
The dry-cured nature of guanciale allows for a substantial shelf life if stored correctly. When stored in a refrigerator, guanciale can last up to 3 months. For best quality, one should consume it within this time frame to appreciate the delicate balance of flavors. If the guanciale develops a rancid smell, a slimy texture, or any discoloration, these are signs that it is no longer suitable for consumption. It is also important to note that the presence of a white mold on the fat cap can be a normal part of the aging process. If it appears, one can simply trim it before use.
Using Guanciale in Cooking
Guanciale is a key ingredient in various Italian dishes, known for its rich flavor and versatility in cooking. This cured meat elevates the taste of dishes, from sauces to pasta and more.
Cutting and Preparing for Dishes
Proper preparation of guanciale begins with slicing it to the desired thickness. Thin slices are perfect for dishes where guanciale should melt slightly and integrate into the dish, such as sauces or soups. Thicker cuts work well when it is to be featured as a centerpiece in the meal, rendering its fat and contributing a crispy texture. For pasta dishes, dicing guanciale into small cubes allows for an even distribution of flavor.
Popular Guanciale Recipes
Guanciale shines as a main dish component or a flavor enhancer. Below are two popular recipes showcasing its use:
Pasta Carbonara: Traditional carbonara relies on the use of guanciale for its authentic taste. The cured pork is cooked until crisp before incorporating it into the pasta, covered in a sauce made from eggs, Pecorino Romano, pepper, and a pinch of salt.
Steps for Carbonara Description Cook pasta Use salted water to cook pasta until al dente. Render guanciale Cook in a pan until crispy and golden. Combine with beaten eggs Mix eggs and cheese with pasta off the heat. Add cooked guanciale Mix in the crispy pork with pasta and sauce. Serve immediately Best enjoyed freshly cooked and steaming hot.
Main Dish Examples: Aside from carbonara, guanciale can be integrated into stews, risottos, or simply served alongside a vibrant salad. Its addition infuses a depth of flavor that is both unmistakable and profoundly satisfying.
Cooking Tips and Techniques
When making guanciale at home, achieving the desired texture and flavor balance with other ingredients is key. These cooking tips and techniques will guide one through the process.
Achieving the Perfect Crispiness
To ensure guanciale reaches optimal crispiness, one should consider the thickness of the slices. Thin slices will become crispy more quickly, and a medium-high heat is ideal for rendering the fat while crisping the edges. One can utilize a pan on the stovetop or an oven set to a high temperature for roasting. In either method, monitoring is crucial to prevent burning.
Stovetop method:
Heat a pan over medium-high heat.
Place guanciale slices in the pan in a single layer.
Cook until the edges are golden brown and crispy, then flip to crisp the other side.
Oven technique:
Preheat the oven to a high setting (approximately 400°F or 200°C).
Arrange guanciale on a wire rack over a baking sheet for even cooking.
Oven roast until crisp, watching closely to achieve a uniform crispiness.
Pairing with Other Ingredients
Guanciale is known for its rich flavor which pairs well with a variety of ingredients. When used in pasta dishes, its savory notes complement acidic components like tomato sauce. The fat renders down and can be a flavorful base for sautéing vegetables or aromatics.
Ideal pairings:
Pastas: Utilize rendered guanciale fat to enhance sauces, especially in dishes like pasta all'amatriciana.
Vegetables: Sauté onions, carrots, or celery in the fat to create a deeply flavored sofrito.
Beans and Legumes: Combine with cannellini or other beans for a hearty addition to soups or stews.
For best results, balance the saltiness of guanciale by adjusting the seasoning of the accompanying ingredients. Pairing with a crisp white wine or a light red can also elevate the overall dining experience.
Safety and Health Considerations
When making guanciale at home, it is essential to understand the risks associated with curing meat and to adhere to best practices to minimize these risks.
Understanding Risks with Cured Meats
Curing meat involves preserving it through drying, salting, and adding nitrates. This process can present health risks such as bacterial growth if not done properly. Listeria and Salmonella are two bacteria of particular concern. Guanciale requires a precise balance of salt and temperature to ensure safety. The meat must be kept at a temperature below 40°F (4°C) during the curing process to prevent bacterial growth.
Best Practices to Minimize Risks
To minimize risks:
Meat Selection: Only use fresh pork from reputable suppliers.
Hygiene: Maintain a clean environment and use sterilized equipment.
Curing Agents: Use the correct amounts of salt and nitrates, as they inhibit harmful bacteria.
Temperature Control: Regularly monitor the internal temperature of the meat. For guanciale, the meat does not typically reach a high internal temperature as with cooking, but keeping the surrounding environment at the correct temperature is crucial.
Storage Conditions: Store the meat in an area with good airflow and low humidity after curing.
Final Inspection: Before consuming the guanciale, check for any off smells, discoloration, or slime, which may indicate spoilage.
Alternative Ingredients and Variations
When making guanciale at home, some may seek vegetarian options or explore cultural adaptations. The alternatives provided ensure adherence to diverse dietary needs and culinary traditions while maintaining rich flavors.
Vegetarian Substitutes
For a vegetarian twist on guanciale, one can opt for king oyster mushrooms. These mushrooms have a meaty texture and absorb flavors well, making them an ideal choice. They can be sliced and seasoned with a blend of spices to mimic the savory taste of cured pork. Here is how to prepare them:
Ingredients:
King oyster mushrooms
Olive oil
Smoked paprika
Garlic powder
Sea salt
Preparation:
Slice mushrooms into strips.
Coat with olive oil and season generously with smoked paprika, garlic powder, and sea salt.
Bake or sauté until crispy.
Cultural Variations of Guanciale
Cultural adaptations of guanciale can be found in various cuisines, although traditional Italian methods are often closely followed. Some recipes may include different spices or curing times to suit regional tastes. For instance, additional herbs or wine may be used during the curing process to infuse distinct flavors unique to a local palate.
Conclusion
Making Guanciale at home is a rewarding process that produces a unique and flavorful Italian cured meat. Through careful preparation and patience, home cooks can achieve high-quality results. Trimming the pork jowl meticulously to remove glands and ensuring a thorough application of the curing mix are crucial steps.
The importance of curing time cannot be overstated. A period of 4 to 7 days in a refrigerator allows the flavors to penetrate deeply and the meat to cure properly. Turning the meat daily and a consistent temperature are key to an even cure.
Post-curing, the drying stage is where Guanciale develops its characteristic texture and taste. A cool, humidity-controlled environment allows the meat to dry evenly. This process may take several weeks but remains essential for the flavor to mature.
They will find this experience not only enhances their cooking repertoire but also deepens their appreciation for traditional charcuterie-making practices.
Here is a brief checklist for makers to ensure success:
Preparation:
Trim the pork jowl.
Remove any unwanted parts.
Curing:
Mix the spices and curing agents meticulously.
Apply the cure generously, ensuring full coverage.
Curing Duration:
Store in a suitable container for 4 to 7 days.
Turn the meat once a day.
Drying Process:
Hang in a well-ventilated area.
Monitor humidity and temperature closely.
Final Product:
Slice thinly when ready.
Patience and attentiveness during the curing and drying phases reward the maker with a slice of culinary tradition. Enjoy the Guanciale in various recipes or savor it on its own to truly appreciate the fruits of your labor.
