
How to Use a Soil Sifter
Enhancing Seed Starting and Streamlining Debris Removal

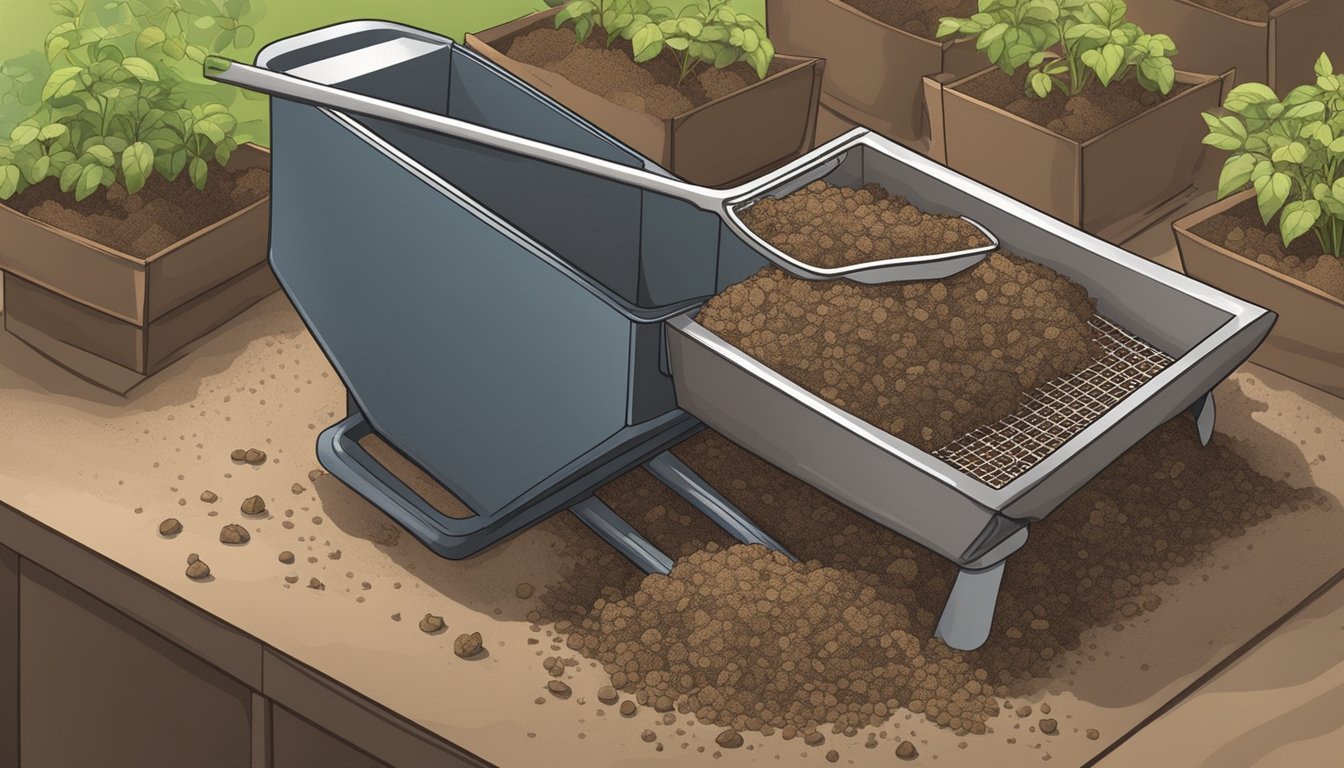
A soil sifter is an indispensable tool for gardeners aiming to optimize their seed starting process and ensure effective debris removal from their soil. This simple device, also known as a garden sifter, facilitates the refinement of compost or soil by segregating larger, unwanted materials such as stones, sticks, and clumps of dirt. This results in a fine, crumbly soil that is ideal for seed starting—the crucial first step in cultivating a healthy and productive garden.
The act of preparing soil through sifting not only aids in creating a more uniform medium for seeds to germinate but also significantly improves soil aeration. This improves water and nutrient flow throughout the soil, making them more accessible to young seedlings. A clean and well-aerated soil structure is paramount for the development of strong, resilient plants. By utilizing a soil sifter, gardeners can ensure that their seedlings have the best possible start, setting a firm foundation for successful growth.
Incorporating a garden sifter into soil preparation routines streamlines the removal of unwanted debris, which could otherwise hinder plant growth or lead to pest and disease issues. By ensuring that only the finest soil comes into contact with the seeds, gardeners can directly influence higher success rates in seed germination and stronger initial seedling development. Whether for small-scale home gardens or larger cultivation endeavors, the soil sifter is a tool that manifests its value through the health and vitality of the garden it nurtures.
Understanding Soil Sifters and Their Purpose
Soil sifters are essential tools for gardeners focused on creating optimal soil conditions for seed starting and for ensuring a garden is free from unwanted debris. They contribute to improved soil structure and healthy plant growth by removing extraneous materials.
Types of Soil Sifters
Stationary Soil Sifters: These are large and typically used in a fixed location.
Rotary Soil Sifters: They rotate to separate debris from soil, often motorized or hand-cranked.
Vibrating Soil Sifters: Utilize vibrations to help sift soil and separate debris efficiently.
Hand-Held Soil Sifters: Small, portable, and suitable for smaller gardening tasks.
Stationary and hand-held soil sifters are commonly used by gardeners to refine soil mixes, particularly for starting seeds where fine soil is crucial.
Benefits of Using a Soil Sifter
Enhanced Soil Quality
Removal of Debris: Separates rocks, sticks, and other unwanted materials.
Improved Soil Mixtures: Ensures a uniform texture that is ideal for seed starting.
Support for Healthy Plant Growth
Optimizes Soil Structure: Promotes better root penetration and water distribution.
Sifted Soil: Offers an aerated environment for seeds, beneficial for initial growth.
Using a soil sifter translates directly to a cleaner, more fertile growing medium, conducive to healthier plant development and a more productive garden.
Materials and Tools Required for DIY Soil Sifters
Building a DIY soil sifter requires careful selection of durable materials and the right tools to ensure a sturdy and efficient device for seed starting and debris removal.
Choosing the Right Materials
Materials for a DIY soil sifter usually consist of:
Wood: A preferred choice for the frame due to its ease of handling. Typically, frames can be crafted from 2x4-inch or 1x3-inch lumber.
Hardware Cloth: Ideal for the sifting surface; select a mesh size appropriate for your seed-starting needs.
Wire Mesh: Alternatively, a galvanized wire mesh can be used, which is highly durable.
One may also consider alternatives such as:
Plastic: Lightweight and potentially less durable compared to metal but can be used for lighter-duty sifting.
Plywood: Can be used for a base or sides if preferred over lumber.
Metal: Certain parts like corners or braces can be reinforced using metal brackets or sheets for greater longevity.
Essential Tools for Assembly
To assemble a soil sifter, one will need:
Saw (Table Saw or Circular Saw): For cutting wood to exact dimensions.
Hammer or Nail Gun: For assembling wood pieces together with nails.
Drill: Necessary for pre-drilling holes to connect parts or to attach hardware cloth.
Tape Measure: Essential to ensure accurate measurements of materials.
Staples and Staple Gun: To secure wire mesh or hardware cloth to the wooden frame.
Wire Cutters: For trimming wire mesh or hardware cloth to size.
Use the tools with precision to create a sifter that is both reliable and effective in sifting and preparing your soil.
Building Your Own Soil Sifter
Building a soil sifter as a DIY project can be simple and cost-effective. With the right materials and tools, one can construct a durable wood frame and create a lightweight solution for seed starting and debris removal.
Step-by-Step Construction Guide
Materials: Gather your materials which include:
2x4 wooden boards for the frame
Hardware cloth with ¼ inch mesh
Wood screws
Corner brackets (optional for added strength)
Frame Cutting: Cut the 2x4 wooden boards using a saw to the following lengths:
4 pieces at 2 feet length for sides
4 pieces at 1 foot length for ends
Assembly:
Lay out the pieces on a flat surface to form a rectangular frame with the ends overlapping the sides.
Secure the corners using wood screws, ensuring each joint is right-angled.
Strengthen corners with brackets if desired.
Attaching the Screen:
Cut the hardware cloth to fit the frame.
Staple the hardware cloth to one side of the frame, pulling it tight as you progress to the opposite side.
Trim any excess mesh from the edges to prevent injury or snagging.
Adding Handles and Support
Handles:
Select a comfortable size for the handles, typically 4 to 6 inches in length.
Attach the handles to the shorter sides of the frame for easy gripping. Ensure they are strong enough to support the sifter's weight when full.
Support Legs:
Cut additional lengths of wood (approximately 1 foot each) for support legs.
Screw the legs to the underside corners of the sifter, providing stability during the screening process.
Final Touches:
Sand any rough edges on the wood to reduce splinters.
A weather-resistant finish can be applied to the wood to extend the life of the sifter.
Preparing Soil for Seed Starting
For successful seed starting, the quality and composition of the soil are paramount. Proper soil preparation ensures seedlings have the nutrients and environment necessary for vigorous growth.
Mixing Components for Optimal Growth
Seed starting mix should provide the essential nutrients while facilitating good drainage and aeration. A recommended blend includes:
Compost: A source of nutrients and beneficial microorganisms.
Worm Castings: These enhance soil structure and provide slow-release nutrients.
Perlite or Pumice: These inorganic materials improve drainage and aeration.
Peat Moss or Coco Coir: These components help to retain moisture and keep the mix light.
A common recipe for a homemade seed starting soil mix might be:
1 part compost to provide nutrients.
1 part worm castings for additional nutrients and soil health.
1 part perlite or pumice to ensure good drainage.
1 or 2 parts peat moss or coco coir to retain moisture and create a light structure.
It's critical to mix these components evenly before use to provide a consistent medium for seedlings.
Achieving the Right Soil Texture
The texture of the seed starting soil must be fine and crumbly, which helps delicate seedlings emerge easily. If the soil contains clumps or large particles, it should pass through a soil sifter to remove debris and create a fine texture.
Materials like perlite and vermiculite contribute to a light and airy texture, while peat moss or coco coir aid in keeping the soil moist but not waterlogged. Seed starting soil should not be compacted; this can hinder seedling growth and root development.
For starting seeds indoors, it's essential that the soil texture allows for sufficient moisture without becoming soggy, as overly moist conditions can lead to seedling diseases. Properly preparing your potting soil or seed starting mix with the right texture is crucial for the healthy development of microgreens and other seedlings.
Using Your Soil Sifter Effectively
A soil sifter is an indispensable tool in garden preparation, streamlining the removal of unwanted material and refining soil texture for different plant needs.
Sifting Techniques for Different Soil Types
When using a soil sifter for various soil types, one must consider the specific characteristics of the soil. Sandy soil, with its large particles, requires a swift shake to dislodge any clumps. Clay soils, being dense and compact, might need to be dried out before sifting and then broken up more vigorously to separate finer particles. The sifter mesh size should correspond to the soil type: a coarser mesh (1/2 inch) efficiently filters rocks and sticks in mixed soil, while a finer mesh (1/4 inch) is better for removing small twigs and roots from finer soils intended for delicate seed starting.
Sandy Soils: Quick shaking, coarse mesh.
Clay Soils: Pre-dry soil, vigorous shaking, appropriate mesh.
Removing Debris and Improving Soil Quality
Effective use of a soil sifter enhances soil quality by eradicating debris such as rocks, twigs, sticks, and roots, which can impede plant growth. This process promotes better drainage and aeration, making it easier for young plants to establish their root systems. The removed organic material, such as twigs and leaves, can be set aside for composting, which, when decomposed, adds vital nutrients back into the garden beds.
Step: Apply even pressure and shaking
Purpose: To ensure consistent soil texture.
Step: Inspect soil as it's sifted
Purpose: To guarantee no debris is overlooked.
Step: Utilize the sifted material immediately
Purpose: To prevent nutrient loss and compaction.
By integrating soil sifting into regular garden maintenance, one ensures that each plant has a clean, debris-free environment for optimal growth.
Caring for and Maintaining Your Soil Sifter
A soil sifter, crucial for removing debris and aiding in seed starting, requires regular upkeep to function effectively. Proper maintenance ensures the sifter's longevity and performance.
Routine Maintenance for Longevity
Monthly Inspections: Regular inspections are essential. The user should check the soil sifter monthly for any signs of wear or damage. Specifically, they should look for:
Worn Mesh: Check for any tears or holes in the wire mesh which can compromise the sifting process.
Loose Screws: Ensure all screws and fasteners are tight.
Wood Frame: Inspect for splits or cracks, especially if the sifter is made of wood.
Rust Formation: If the sifter is metal, look for rust, particularly in hinges or welded areas.
Cleaning After Use: It’s important to clean the soil sifter after each use. The removal of soil and debris will prevent rusting and rot. To clean, they should:
Knock off any clinging dirt.
Rinse with water, if necessary.
Proper Storage: Store the DIY soil sifter in a dry, covered area to protect it from the elements, which can reduce potential drawbacks from exposure.
Troubleshooting Common Issues
Even with meticulous care, owners may encounter issues with their soil sifters. Knowing how to address these problems can save time and extend the sifter's usability.
Sagging Wire Mesh: If the mesh begins to sag, it may require re-tightening. In cases of severe sagging, replacing the mesh might be necessary.
Sticking Frame: Wood frames can swell with moisture; sanding the swollen areas can help. Metal frames might require oil at the joints.
Reduced Sifting Efficiency: This often indicates the mesh is clogged or damaged. They should replace clogged or damaged sections to restore performance.
Regular maintenance and addressing common issues proactively are the keys to prolonging the life of a DIY soil sifter and ensuring it remains an effective tool for gardening tasks.
Optimizing Plant Growth Post-Sifting

After sifting soil, the enhanced quality of the soil significantly benefits the plants. The removal of debris allows for better root growth while also improving germination rates. Through two critical improvements—in drainage and aeration, and water and nutrient retention—the refined soil creates an optimal environment for seed starting and plant development.
Improving Drainage and Aeration
The structure of sifted soil is looser, which substantially helps to improve drainage and aeration. When soil particles are not compacted, water flows through more easily, preventing root rot and diseases related to excess moisture. Additionally, an aerated soil environment allows roots to breathe and grow unhindered, which is crucial for healthy plant development. Specifically, home gardeners should aim for the following characteristics:
Drainage: Rapid enough to prevent waterlogging, but sufficient to avoid quick drying.
Aeration: Enough space between soil particles to allow air to reach the roots.
Enhancing Water and Nutrient Retention
Conversely, the ability of a potting mix or seed starting mix to hold onto water and nutrients is equally important for young plants. Post-sifting, the soil texture can be fine-tuned to aid in moisture retention without leading to waterlogging, thus supplying a steady release of water to the plants. The incorporation of organic matter post-sifting can enhance nutrient retention, offering a gradual supply of essential nutrients. For optimal water and nutrient retention, consider:
Incorporating organic materials: Peat, compost, or coco coir to aid retention without compacting the soil.
Consistency: A balanced potting mix that can retain moisture to sustain root growth without becoming soggy.
Innovative Uses for Soil Sifters Beyond Gardening

While soil sifters are key tools for preparing fine soil for gardening, they have interesting applications beyond the garden bed. These alternative uses take advantage of the sifter's ability to separate fine particles from larger ones in various settings.
Cultivating Specialty Crops
Soil sifters are instrumental in the cultivation of certain specialty crops, like carrots, which require fine, rock-free soil to develop properly. For root vegetables, the absence of debris enables them to grow straight and healthy. By filling a container or wheelbarrow with sifted soil, cultivators can ensure that their crops have the ideal growing medium.
Carrot Cultivation
Sift soil to remove rocks and hard clumps.
Use soil sifters to fill containers, ensuring a debris-free environment.
Within the context of container gardening, soil sifters help create the perfect environment for delicate root systems, supporting consistent growth and development.
Creative DIY Projects with Soil Sifters
Soil sifters can be repurposed for various creative DIY projects. Gardeners and craft enthusiasts alike have transformed these simple tools into functional art pieces and home items.
Home Decoration: A soil sifter frame can be reused as a unique picture frame or decorative lattice.
Organization: Small soil sifters can serve as organizers for small tools or craft supplies.
By thinking outside the traditional gardening box, one can give a second life to soil sifters in creative ways, proving their versatility and utility even beyond their intended use.
