
The Ultimate Guide to Leatherworking Tools
Essential Equipment for Craftsmanship and Restoration

Leatherworking is an age-old craft that marries artistry with functionality, allowing crafters to transform raw hides into beautiful and long-lasting items. Whether one is starting as a novice or navigating the craft with experienced hands, understanding and mastering the use of leatherworking tools is paramount. These tools not only facilitate the creation of leather goods but are also essential for repair and maintenance tasks that prolong the lifespan of these items.
Essential to the leatherworking toolkit are cutting and punching tools such as knives, chisels, and awls which aid in shaping and preparing the leather for assembly. Joining tools like needles and various adhesives ensure parts are held together securely. For enhancing the functionality and aesthetics of leather projects, edge beveling tools, burnishers, and creasers are used to give finished edges and add decorative lines or grooves.
As a practical skill, leather crafting requires precision and patience, and with the right set of tools, the possibilities for creation and customization are vast. From assembling simple wallets to constructing more complex bags and accessories, the craftsperson will find that comprehensive knowledge and adept use of these tools can lead to the production of truly unique and durable leather goods.
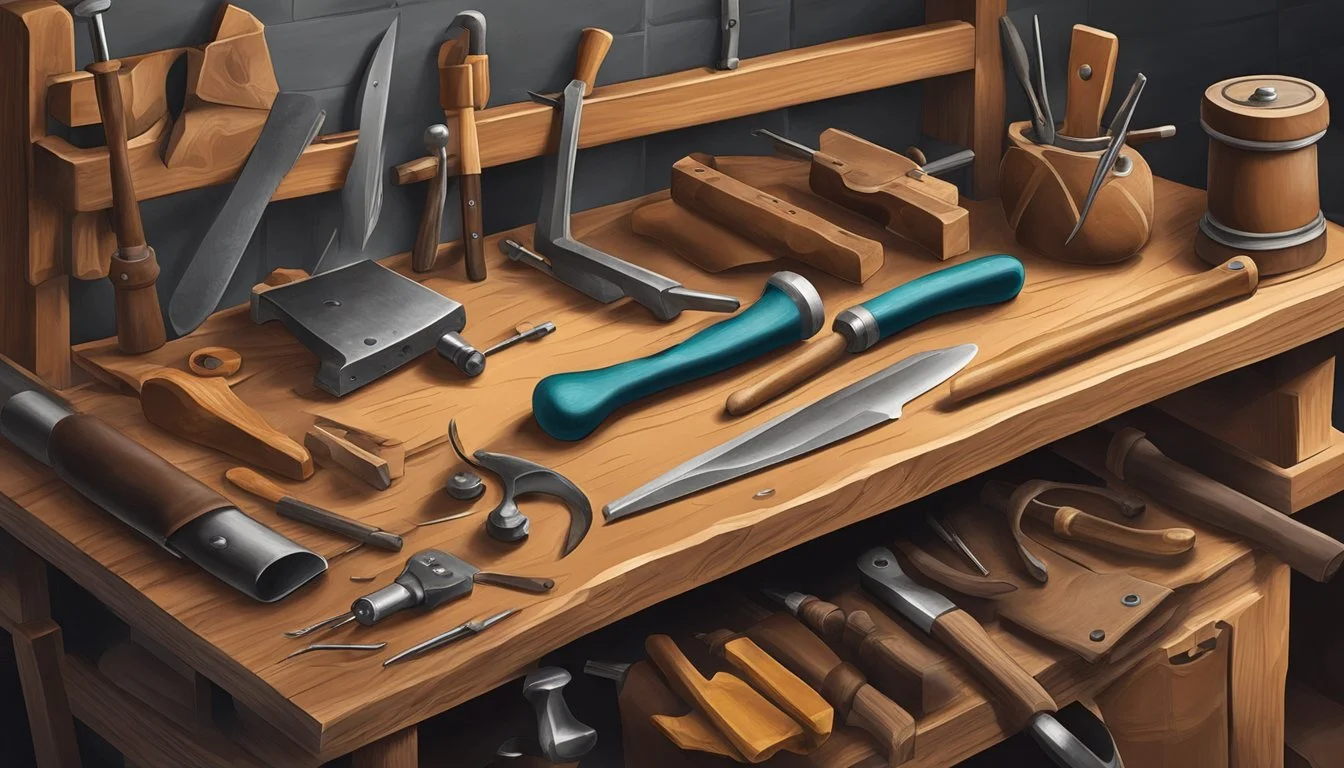
Essential Leatherworking Tools
In leatherworking, precision and durability are key. The following tools are fundamental for cutting, marking, measuring, and stitching leather, thereby ensuring high-quality craftsmanship.
Cutting Tools
The first step in leatherworking often involves cutting raw leather into shapes. A sharp knife is essential, and choices include:
Utility Knife: Ideal for straight cuts.
Rotary Cutter: Best for curved lines and patterns.
Scissors: Useful for thinner leathers and trimming.
Skiver: Thins out the leather for easier bending and joining.
Cutting Mat: Protects surfaces and keeps cuts clean.
A cutting board or mat alongside sharp knives or cutters are crucial to maintain precision and safety.
Marking and Measuring Tools
Accurate measurements and clear markings lead to professional results. Important tools in this category are:
Ruler: A straight edge for precise lines.
Measuring Tape: Flexible for measuring curved surfaces.
Scratch Awl: For marking where to cut or stitch.
Wing Divider: Essential for spacing and repeating patterns.
Square: Ensures right angles and helps with pattern layout.
Leather Thickness Gauge: Determines the material thickness.
These tools assist in achieving the meticulous details required in leatherworking projects.
Stitching and Sewing Tools
Strong, even stitches are vital for the longevity and appearance of leather goods. The tools used include:
Needle and Thread: Basic tools for hand sewing.
Stitching Awl: For piercing leather to make way for the thread.
Stitching Needles: Specialized for working with tough leather.
Sewing Machine: For faster and sometimes stronger stitching, specifically designed for leather.
Stitching Pony: Holds work in place while hand stitching.
Overstitch Wheel: Marks spaces for stitches evenly.
Diamond Chisel/Pricking Irons: Punches even holes, especially for hand sewing.
Whether it's manual or machine stitching, having the right needles, awls, and other tools is essential for efficient and sturdy sewing.
Shaping and Forming Tools
Shaping and forming tools are vital in leatherworking for creating clean edges and intricate designs on leather goods. They allow for precision and enhance the durability and aesthetic appeal of finished leather items.
Edge Treatment Tools
When working with leather, edge bevelers and burnishers are the primary tools used for finishing leather edges. Edge bevelers, also known as edge shavers, have a specific function in removing the sharp edges from cut leather pieces, creating a rounded profile that is more resistant to wear.
Edge Bevelers: Used to bevel and round the edges of leather.
Function: Trims the edges for a uniform look and prevents fraying.
For achieving a polished look, burnishers and slickers are employed. They work through friction, which can be manually produced or with the help of machines.
Burnishers and Slickers:
Function: Smooth and harden the edges of leather by friction.
Use: Often rubbed along the edge, often with added heat or moisture for efficiency.
In many cases, fine-grit sandpaper is also essential in edge treatment to eliminate blemishes before other tools are used.
Sandpaper:
Function: Smoothens leather edges before further finishing steps.
Molding and Stamping Tools
Mallets, hammers, and anvils are foundational tools for molding and stamping leather. The non-marking mallets typically made of wood or rubber are used to vigorously strike stamps or other forming tools without damaging them or the leather surface.
Mallets/Hammers:
Used to apply controlled force on stamps for impressions.
Material of Choice: Primarily wooden, polyethylene, or rawhide for their non-marring qualities.
The stamps themselves come in a myriad of designs, allowing artisans to emboss patterns or letters onto the leather for decorative or identification purposes.
Stamps:
Function: Imprints patterns or letters onto the leather.
For shaping and sculpting, the anvil provides a solid, flat surface, ensuring that blows from mallets and hammers are effective and that tool marks are minimized.
Anvil:
Offers a supportive work surface for various leatherworking processes.
Joining and Fastening Tools
In leatherworking, joining and fastening are crucial steps that require precision tools to achieve durable and aesthetically pleasing results. Punching tools create clean holes for stitching or adding hardware, while setting tools securely attach fasteners without damaging the leather.
Punching Tools
Punching tools are essential for creating uniform holes in leather. They come in various shapes and sizes, tailored to the task at hand.
Hole Punches: These tools come in different diameters to suit the size of the hardware being used. A rotary hole punch has multiple sizes and is a versatile choice for various projects.
Chisels: Leather chisels, also known as pricking irons, are used to create straight or angled slits. They frequently have multiple teeth and create evenly spaced holes for hand-stitching.
Gouges: A gouge is a curved chisel that is designed to carve out small areas of leather, useful for creating space for hardware or decorative purposes.
Setting Tools
Setting tools ensure that fasteners are attached properly, forming a strong bond between leather pieces.
Setters: A setter is a type of tool that helps to properly install grommets, snaps, and rivets. They ensure the fastener is set flush against the leather, minimizing any risk of pulling through or causing damage.
Riveter: This tool is specialized for setting rivets, which are small metal fasteners that join leather pieces together. A good riveter provides a strong join without compromising the leather's integrity.
Tool Type: Hole Punch, Function: Create holes for hardware, Example Uses: Belt holes, attaching buckles
Tool Type: Chisel, Function: Make uniform slits for stitching, Example Uses: Creating decorative seams or repairing tears
Tool Type: Gouge, Function: Carve out leather, Example Uses: Preparing spaces for snap fitting
Tool Type: Setter, Function: Install fasteners securely, Example Uses: Attaching snaps, rivets, or eyelets
Tool Type: Riveter, Function: Fasten rivets firmly, Example Uses: Joining straps, reinforcing stress points
These tools are indispensable for leatherworkers aiming to produce professional-grade leather goods, whether in crafting new items or repairing existing ones.
Finishing Tools

In the leatherworking process, finishing tools are crucial for achieving a high-quality appearance and feel. They play a pivotal role in smoothening the leather’s surface and applying protective layers that enhance durability and aesthetic appeal.
Abrasive Tools
Abrasive tools, such as sandpaper, are indispensable for smoothening edges and surfaces before the application of finishes. They come in various grits, with lower numbers indicating coarser grains suitable for removing larger imperfections and higher numbers for finer finishing touches. The user should progressively move from coarse to fine grits to obtain a smooth, professional edge.
Coarse Sandpaper (Grit 60-100): For removing excess leather and evening out edges.
Medium Sandpaper (Grit 120-180): Ideal for further smoothing the edges.
Fine Sandpaper (Grit 200 and above): Used for the final touch-up on leather surfaces for a polished look.
Applying Finishes
Leather finishes serve to protect the material from moisture and wear while providing a desirable sheen. They can range from leather dyes that impart color to clear finishes that seal and waterproof the leather. Application tools can include sponges, brushes, or cloths, depending on the type of finish being used.
Leather Dye: Employed to color leather, available in water-based, oil-based, and alcohol-based varieties.
Leather Finish: A clear coat applied after dyeing that provides a seal and shine, could be acrylic-based.
Leather cement and various glues are also part of the finishing phase, especially when joining leather pieces. Quality adhesives ensure durable bonds without compromising the leather's integrity or finish.
Leather Cement: Water-based glue that remains flexible after drying, ideal for bonding layers.
Glue Applicator: Typically a brush or a spatula used to spread the glue evenly.
When applying finishes, leatherworkers must ensure an even coat without over-saturation. Different finishes will have specific instructions for best application practices to maintain the integrity of the leather.
Leather Crafting Techniques
Mastering leather crafting techniques is essential for anyone looking to create high-quality and durable leather goods. This section provides a range of methods used in working with leather, from basic stitching to more complex edge finishing and shaping.
Stitching Techniques
In leather crafting, stitching is a fundamental technique that adds both durability and aesthetic appeal to leather goods. Crafters often use waxed or bonded nylon threads for their strength and resistance to weathering. There are various stitching styles, including:
Saddle Stitching: A hand-sewing method where two needles work in tandem to create a durable and symmetrical stitch.
Box Stitching: Commonly used for joining two pieces of leather at a right angle.
Cutting and Skiving Techniques
Effective cutting is crucial for achieving the desired shape and size of leather pieces. Leather skivers and rotary cutters are tools of choice for thinning the leather's edges or reducing its thickness to prepare for joining.
Straight Cutting: Requires a utility knife or rotary cutter for clean edges.
Beveling: A skiver refines the edges before stitching using edge bevelers to create a smooth, beveled edge.
Edge Finishing Techniques
The edges of leather items contribute significantly to the final aesthetics and functionality. Techniques for edge finishing range from simple burnishing to more intricate creasing, involving tools such as creasers and leather groovers.
Burnishing: A process whereby the edges are rubbed vigorously to create a sealed, polished look.
Grooving: A leather groover carves a groove to lay the stitches in, giving them protection and a clean line on the leather surface.
Molding and Shaping Techniques
Molding and shaping leather are advanced techniques that allow the leather to be sculpted into various three-dimensional forms. Utilizing tools like mallets and gouges aids in shaping and adding decorative elements.
Wet Molding: Leather is soaked in water and molded around a form or by hand to create a desired shape, which is then left to dry.
Carving and Stamping: Embellishments are added by carving into the damp leather's surface or by using stamps to imprint designs.
Maintaining Leatherworking Tools
Proper care of leatherworking tools ensures their function and quality remain at their peak, extending their lifespan considerably. Cleaning, storage, and ongoing maintenance such as sharpening and conditioning are essential for any crafter.
Cleaning and Storage
Leather tools require regular cleaning to prevent the build-up of leather particles and adhesives. To clean, they should be wiped with a soft, dry cloth after every use. If moisture is present, it’s crucial to dry them immediately to prevent rust. For tools like sharp blades and awls, gently wiping with isopropyl alcohol can remove stubborn residues.
Storage is key in maintaining tool quality. Tools should be placed in a dry environment and kept organized. Options like uniform hole tool holders or tool boxes protect the tools from damage and make selection efficient. Here is a quick reference for proper storage methods:
Needles and awls: Store in protective sheaths or pincushions.
Skivers and knives: Keep in blade guards or on magnetic strips.
Mallets and hammers: Hang on a rack or rest on a flat surface.
Sharpening and Conditioning
To maintain the function of leatherworking tools, keeping them sharp is not just beneficial, it's imperative. Blades should be honed regularly using a sharpening stone or strop, making sure to follow the original angle of the edge. After sharpening, blades can be lightly oiled to prevent rust.
Conditioning the handles of leather tools improves grip and prevents splintering. A light coat of linseed oil or a beeswax-based conditioner can be applied periodically to wooden handles. For metal components, a silicone-based lubricant can prevent oxidation and keep moving parts functioning smoothly. Here’s a breakdown of conditioning steps:
Wooden handles: Apply conditioner, wait for absorption, then buff.
Metal parts: Clean with alcohol, lubricate lightly, wipe off excess.
By adhering to these maintenance practices, leatherworking tools can be kept in excellent condition, making the crafting and repairing of leather goods more efficient and enjoyable.
Advanced Leatherworking Techniques

In advanced leatherworking, precision and skill are paramount. Crafters utilize a range of specialized techniques to transform leather into high-quality, durable goods with decorative flair.
Decorative Techniques
Decorative techniques in leatherworking serve to enhance the aesthetic appeal of the finished product. Stamping is a common decorative technique where an artisan uses stamps to impress patterns or motifs onto the leather surface. The stamps are often metal tools that feature various designs, from simple shapes to intricate images. Another decorative method includes the application of dye to color the leather and create vivid patterns or gradients. This requires a steady hand and an understanding of color blending.
Stamps Used in Leatherworking:
Background Stamps: To create textures or backgrounds.
Figure Stamps: For detailed pictorial representations.
Alphabet and Numeric Stamps: To emboss letters and numbers.
Dye Techniques:
Solid Dyeing: Applying one color to achieve a uniform finish.
Antique Finish: Utilizing a darker tone to accentuate the grooves and embossed areas.
Ombre Effect: Creating a gradient with shades fading into each other.
Structural Techniques
Structural techniques focus on the durability and functionality of leather goods. Here, stitching is critical, often employing the use of a saddle stitch for strength, where two needles work in tandem from opposite ends of the thread. For attaching larger pieces or reinforcing stress points, rivets are used. These are metal fasteners that join pieces of leather together securely.
Stitching Methods:
Saddle Stitch: A hand-stitching process for added durability.
Box Stitch: A decorative and robust stitch pattern.
Rivets and Their Uses:
Double Cap Rivets: Both ends flattened for a clean finish.
Rapid Rivets: Quick application for utility purposes.
Crafters rely on an array of leather crafting tools to perform these advanced techniques, such as stitching awls, mallets, and burnishers, each designed for specific tasks within the craft. The mastery of these tools and techniques allows for the creation of leather goods that are not only functional but also works of art.
Projects and Patterns
In leathercraft, the success of a project largely depends on the precision of the patterns and the quality of the materials. For each endeavor, from fashionable leather bags to durable belts, appropriate tools ensure the crafting process is efficient and the end product meets expectations.
Leather Bags and Wallets
For bags and wallets, crafting begins with selecting a suitable leather type, usually a supple yet firm variety that can withstand regular use without losing shape. Stitching tools and cutting tools like skivers and mallets are essential for shaping components and assembling them with precision. Patterns should be designed with functionality in mind, accounting for card slots, cash compartments, and seam allowances.
Tools for Stitching: Needles, thread, thimbles
Cutting Tools: Rotary cutters, straight knives, cutting mats
Leather Shoes and Belts
Shoes and belts require patterns that conform to the body's contours. Using a cutting tool to carve out straps and soles ensures an accurate fit, while leather crafting tools help create the decorative elements and functionality, such as holes for belt buckles. Durable leather types are selected for their ability to form to the foot or waist while maintaining their integrity over time.
Tools for Forming: Lasts for shoes, strap cutters for belts
Finishing Tools: Burnishers, edge bevelers
Custom Leather Crafting
Custom leatherwork allows crafters to create unique designs tailored to individual preferences. This requires an array of leatherworking tools, including stamps and punches for personalization. Whether it's embossing initials or crafting a bespoke pattern, custom projects blend creativity with technical skill.
Tools for Custom Work: Stamping tools, custom punches
Design Tools: Pattern papers, styluses for tracing
The right tools paired with well-thought-out patterns are the cornerstones of any leatherworking project, making the difference between a good attempt and a crafted masterpiece.
Leatherworking Safety and Best Practices
When engaging in leatherworking, it is crucial to prioritize safety while handling various tools. Leatherworkers should establish a safe workspace, keeping sharp tools like knives, awls, and chisels properly stored when not in use. Cutting mats should be employed to protect surfaces and ensure a stable cutting environment.
Protective gear is also essential. Eye protection from flying debris during cutting or punching, and a dust mask when sanding or burnishing leather are important. Additionally, using cut-resistant gloves can prevent potential accidents while maintaining a firm grip on tools.
Below are key practices for preventing injury:
Keep tools sharp: Dull tools require more force, increasing the risk of slipping and causing injury.
Mind the fingers: Always cut away from the body, specifically the hands and fingers.
Proper technique is equally important:
Stitching: When using needles and thread, ensure that tools like the diamond chisel and pricking irons are used gently to avoid hand strain.
Adhesive use: When adhesives are involved, work in well-ventilated areas and use the right type for leather to avoid damaging the material.
In summary, leatherworkers should remain vigilant about their environment and the condition of their tools. Maintaining an organized space allows for efficiency and reduces risks. By following these practices, they can ensure a safe and productive craft experience.
Choosing the Right Leatherworking Tools
Selecting appropriate tools is crucial for anyone engaged in leather craft. It ensures not only the quality of the crafted items but also the efficiency and enjoyment of the process.
Quality and Durability
When investing in leatherworking tools, one must prioritize quality and durability. High-quality tools are usually made from materials like carbon steel and are often hand-forged or precision-machined. These practices guarantee tools that can withstand repetitive use and last for generations.
Needles, awls, skivers: Essential for piercing and thinning leather.
Mallets, hammers: Used to strike other tools without damaging them.
Chisels, punches: Necessary for making clean holes.
Edge bevelers, burnishers: Utilized for finishing edges for a polished look.
Tools such as chisels and punches need to maintain sharpness and resist wear. Additionally, mallets and hammers should have a balanced weight to effectively manipulate leather without causing hand fatigue.
Versatility and Price
The versatility and price of tools are also important considerations. Beginners may look for all-in-one kits that offer a variety of basic tools at an affordable price, allowing them to experiment with different techniques.
Tool Type: Awl, Function: Puncture, stitch, Ideal For: Fine work on leather surfaces.
Tool Type: Edge Beveler, Function: Bevel edges, Ideal For: Smoothing the corners of leather.
Tool Type: Burnisher, Function: Polish edges, Ideal For: Giving edges a finished shine.
On the other hand, experienced craftsmen might select individual tools that serve specific functions for specialized tasks. They may invest in more expensive, high-quality tools that offer greater precision and longevity. Price should reflect the tool's build quality and the value it adds to the leatherworking process.
