
The Ultimate Guide to Using an Evaporator Pan
Mastering Maple Sap to Syrup Transformation

The conversion of maple sap to syrup is a time-honored tradition that hinges on the efficient use of an evaporator. The evaporator plays a crucial role in this process. It operates on a simple principle: boiling the sap to remove water content, which concentrates the sugars, leading to the formation of syrup. Precision in this stage is key, as the quality of the final product is greatly influenced by the evaporation process.
An evaporator typically consists of a flat pan and a heat source. The pan is designed to maximize surface area, facilitating a quick and even boil. Care must be taken to maintain a consistent temperature; too high, and the sap may caramelize and burn, while too low a temperature will slow the process and may affect flavor. As water evaporates, the sap thickens, and the sugar concentration increases. Monitoring the sap density through this process is critical to achieve the desired syrup consistency.
Enthusiasts and professionals alike must navigate the complexities of using an evaporator with care. From the initial collection and filtration of maple sap to the final stages of boiling and concentration, each step requires attention to detail. The equipment must be managed properly to ensure the highest quality maple syrup result. This guide focuses on these techniques, using industry insights to help any level of producer refine their craft.
Understanding the Maple Sap to Syrup Process
Transitioning maple sap to syrup requires careful management of sugar density and meticulous attention to quality. These factors are integral in producing the iconic sweet syrup.
Sap Collection and Preparation
Maple sap collection is traditionally done in late winter to early spring. The sap is extracted when the trees are tapped and temperatures induce flow. After collection, preparation involves filtering out debris and ensuring the sap is clean before the boiling process. To initiate production, the sap needs to be transferred to an evaporator pan. This pan is typically shallow and broad to maximize the surface area for evaporation.
The Role of Sugar Density and Quality in Syrup
The boiling stage is critical: transforming sap to syrup hinges on sugar density. To ensure high-quality syrup, one must monitor the temperature and consistency meticulously. As water evaporates, the sugar concentration increases. A hydrometer is used to measure this sugar density, also referred to as the syrup's specific gravity. When the density reaches a specific Brix value—a scale measuring sugar content—the syrup is ready for finishing. Syrup quality is judged by color, flavor, and texture, with varying grades based on these characteristics. Maintaining optimal boiling conditions is essential to prevent burning or excessive crystallization, which can detrimentally affect syrup quality.
Choosing the Right Evaporator
Selecting the right evaporator is essential for efficient maple sap to syrup conversion. It impacts the rate of evaporation, the flavor of the syrup, and the overall efficiency of the operation.
Types of Evaporators and Features
Flat Pan Evaporators:
Consist of a simple, flat stainless steel pan.
Ease of use: Good for beginners due to their simplicity.
Evaporation rate: Less efficient compared to flue pans.
Flue Pan Evaporators:
Feature channels or flues that increase surface area, improving evaporation rates.
Efficiency: They enable quicker evaporation, making them suitable for larger-scale operations.
Hybrid Pans:
Combine flat and flue pan designs to optimize efficiency and versatility.
Features to consider:
Draw-off valves: for easier syrup removal.
Sight glasses: to monitor sap levels.
Preheaters: for warming incoming sap, saving energy.
Materials and Design Considerations
Stainless Steel Pans:
Durability: Resistant to corrosion, long-lasting.
Safety: Non-toxic material ensures the purity of syrup.
Design Factors:
Size: Should match the scale of operation. Example: a 2’ x 3’ pan for small-scale use.
Thickness: Thicker materials offer more durability but at a higher cost.
Reinforcement: Key for larger pans to prevent warping.
In conclusion, when selecting an evaporator, it is important to consider the type that best fits the scale of your operation, whether you prefer the simplicity of a flat pan or the efficiency of a flue pan. Materials like stainless steel are superior due to their durability and safety for food processing. Durability, safety, and capacity are the main considerations when choosing the right evaporator.
The Boiling Process
When converting maple sap to syrup using an evaporator pan, understanding the stages of evaporation and managing boil time and temperature are crucial for achieving the desired syrup consistency and flavor.
Understanding the Stages of Evaporation
During evaporation, water content from the maple sap is boiled off, gradually concentrating the sugars and other components that give maple syrup its characteristic flavor. The process starts rapidly but slows as the sap thickens. There are noticeable changes in boiling behavior as the syrup approaches its finishing point. Observing the evolving process—starting with a light boil and advancing to thicker bubbles—helps in determining the progression towards syrup.
Optimizing Boil Time and Temperature
Achieving the optimal boil time and temperature is a delicate balance that affects the evaporation rate and quality of the final syrup. Proper boil time ensures that the sap has enough contact with heat to evaporate excess water but not so long as to degrade the quality. The ideal boiling temperature for sap is around 219°F (104°C) at sea level. Adjustments need to be made for variations in altitude.
Boil Time: Monitor the process carefully; total time will vary depending on volume and pan size.
Temperature: Use a calibrated thermometer to maintain the target temperature consistently.
By maintaining a vigilant watch over these elements, one ensures a successful transition from sap to fully-flavored maple syrup.
Fuel and Fire Management
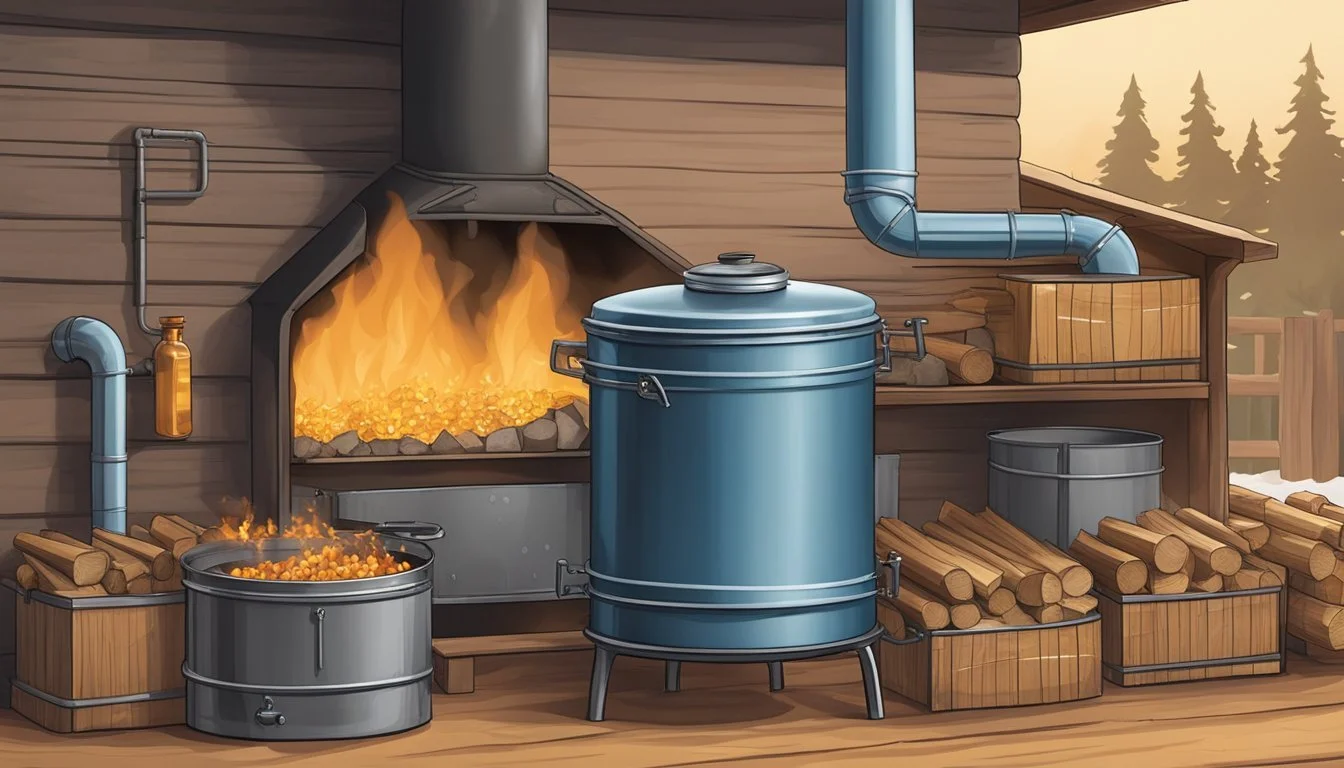
Managing fuel and fire properly is essential for the efficient conversion of maple sap to syrup using an evaporator pan. The choice of fuel impacts the heat generation, which is vital for the boiling process, while the combustion arrangement defines how effectively that heat is used.
Selecting the Right Fuel Type
Different types of fuel can be used to power an evaporator's firebox, each with its own benefits and considerations.
Wood: A traditional choice, ideal for creating a consistent and hot flame. However, wood should be dry and well-seasoned to minimize smoke and maximize heat output.
Oil: Can be a cleaner and more controlled fuel option but may require special equipment to handle and burn efficiently.
Physical Arrangement for Efficient Combustion
The configuration of the fuel and firebox design can significantly influence the combustion efficiency.
Airflow: Ensure the firebox allows for adequate airflow to maintain strong flames and efficient fuel consumption.
Fuel Placement: Distribute wood or other materials evenly for consistent burning. Keep the fuel level maintained to avoid disrupting the intensity of the fire.
Structuring the fuel in a manner that promotes maximum heat transfer to the evaporator pan is crucial in reducing fuel waste and achieving an ideal boil.
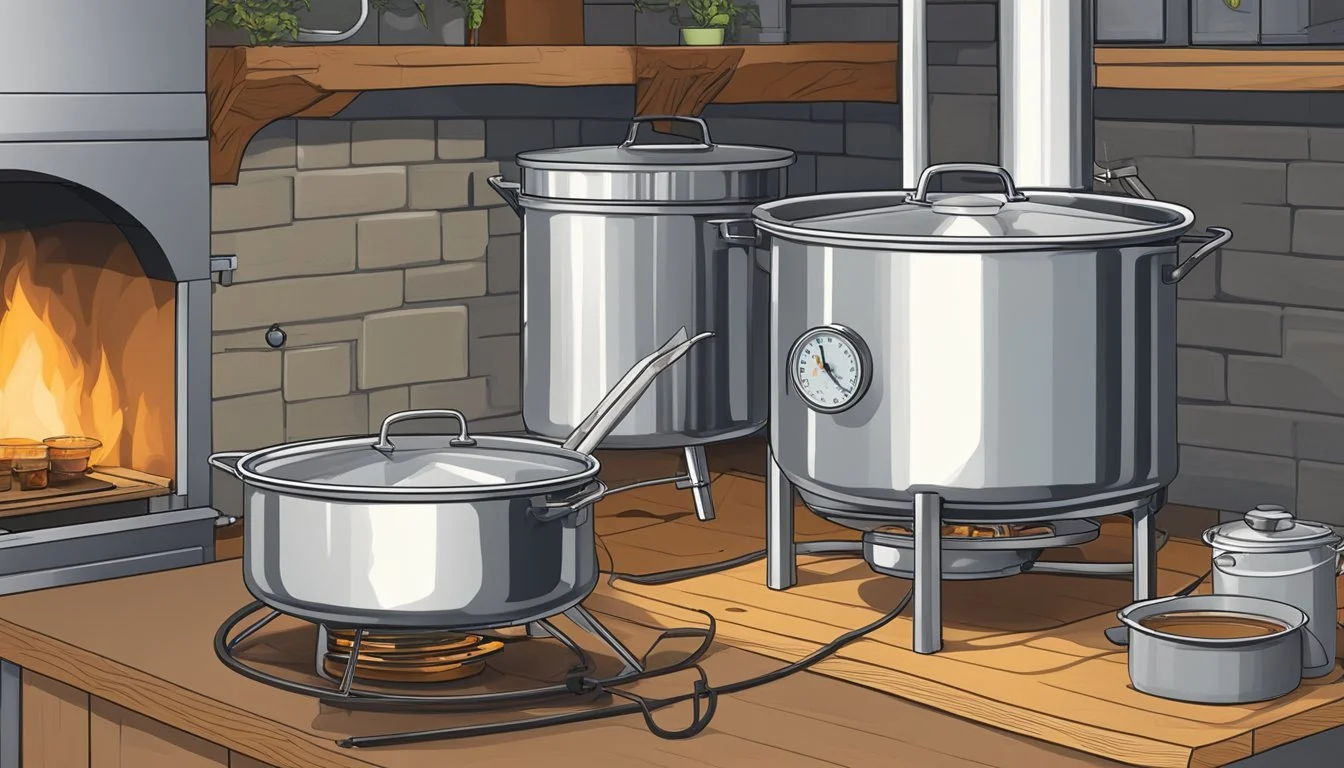
Evaporator Pan Usage and Techniques
Using an evaporator pan correctly is crucial for the efficient conversion of maple sap into syrup. It involves managing the heat and employing strategic pan designs to ensure a consistent and quality syrup product.
Preventing Overheating and Uneven Heating
The depth of the evaporator pan significantly affects the heating process. An optimal pan depth allows for quick evaporation while minimizing the risk of overheating. Overheating can lead to a burnt taste and damage the syrup's quality. Uniform heat distribution is key, as uneven heating might cause inconsistent boiling and potentially spoil the syrup. Regular monitoring and gentle stirring may be necessary to prevent these issues.
Continuous Flow and Divided Pan Strategies
A continuous flow system within a divided pan allows for a more efficient boiling process. This system works by dividing the pan into sections where sap can flow from one compartment to another as it becomes more concentrated. The fresh sap enters the pan at the section farthest from the finished syrup draw-off point, reducing the risk of mixing raw sap with nearly finished syrup. This approach not only improves the evaporation process but also creates a consistent density gradient and helps maintain the boil's intensity. It's essential to manage the flow properly to ensure that the syrup finishes evenly and to avoid over-concentration in any section of the pan.
Efficiency Enhancements
Maximizing the efficiency of the sap-to-syrup conversion process not only saves time but also preserves the quality of the final product. This section focuses on the specific tools and modifications that can enhance the performance of an evaporator pan.
Supplemental Tools and Equipment
Introducing supplemental tools and equipment can significantly streamline the evaporation process. For instance, preheating the sap before it enters the evaporator pan can reduce the time needed to reach boiling temperatures. They could employ a heat exchanger, which uses residual heat from the steam to warm incoming sap. Additionally, using a hydrometer or refractometer helps them to precisely measure syrup density, ensuring consistent product quality without over or under-boiling.
Preheating Equipment: Heat exchangers
Measuring Tools: Hydrometers, refractometers
Modification and Upgrades to Improve Efficiency
Operators might consider modifications and upgrades to their current equipment to enhance efficiency. For example, they can expand the surface area of the pan which increases the rate of evaporation. Implementing a continuous flow system by adding channels or compartments to the pan ensures a consistent density gradient, reducing the need to manually control the addition of sap and potentially creating a more uniform boil.
Pan Modifications: Expanded surface area, compartmentalized channels
Efficiency Upgrades: Automated sap-feeding systems
Finishing and Bottling
The final steps in converting maple sap to syrup are crucial for ensuring the quality and taste of the final product. Proper finishing techniques guarantee the correct density and consistency, while effective filtering and bottling methods ensure the syrup is free of impurities and ready for long-term storage.
Determining Syrup Done-ness and Final Steps
Once most of the water has been evaporated from the sap, producers must determine when the syrup is ready to be drawn off. They typically use a hydrometer to measure the syrup's density. The syrup is done when it reaches a density of approximately 66-67 degrees Brix (a measure of sugar content). To prevent over-concentration, which can lead to crystallization, producers must carefully monitor the temperature and density.
Density Check: Using a hydrometer, confirm syrup reaches the standard density.
Temperature Monitoring: The syrup should be heated until it is approximately 7.1°F above the boiling point of water (adjust for altitude).
If the syrup is too thick or too thin, adjustments must be made. For thick syrup, adding a bit of sap can help reach the desired consistency. The syrup should be finished in a separate pan, not on the main evaporator, to maintain precise control over the final stages of boiling.
Filtering and Bottling Techniques
The syrup can contain various impurities that need to be filtered out before bottling. Producers utilize different types of filters—often made from wool or orlon—to remove these impurities. Ensuring the syrup is hot during this process, typically around 180°F, makes it easier to run through the filters and aids in sterilizing the final product.
Heat the Syrup: Maintain syrup at 180°F for effective filtering.
Filtering Process: Pour syrup through filters to remove sediment and sugar sand.
Bottling must follow promptly after filtering while the syrup is still hot to ensure sterilization. Bottles are pre-heated to prevent shock from the hot syrup, which could cause them to break. Producers then seal the bottles tightly to prevent contamination and ensure the syrup's longevity.
Pre-Heat Bottles: Prepare bottles by warming them slightly before filling.
Filling and Sealing: Fill the bottles with filtered syrup and seal them immediately.
Containers are then labeled with the appropriate grading information, production date, and any pertinent regulatory compliance information. Proper finishing and bottling not only preserve the maple syrup's quality but also showcase the careful craftsmanship that goes into its production.
Maintaining Your Equipment
Proper maintenance of an evaporator pan is vital for efficient and safe operation. Regular cleaning and appropriate storage extend the equipment’s lifecycle and prevent issues during the syrup production process.
Cleaning and Storage
Cleaning: Immediately after the maple syrup season ends, the evaporator pan should be thoroughly cleaned to remove any sugar sand or niter that has accumulated. Sugar sand is a type of sediment, composed mainly of minerals from the sap, that can build up during boiling. To clean, one should:
Drain all remaining syrup from the pan.
Rinse the pan with hot water to dissolve and remove syrup residues.
Use a food-grade pan cleaner or a mix of white vinegar and water for tough spots.
Scrub the pan with a non-abrasive pad to avoid scratching the surface.
Rinse the pan again with hot water until it runs clear.
Dry the pan thoroughly to prevent rust.
Storage: Once the pan is clean and dry, it needs to be stored in a cool, dry place. It is important to protect the pan from exposure to moisture that could cause corrosion. If possible, the pan should be:
Covered with a breathable material to prevent dust accumulation.
Elevated from the ground to avoid contact with any moisture.
Troubleshooting Common Issues
Uneven Boiling: If one notices uneven boiling patterns, this could indicate an issue with heat distribution or the level of the sap in the pan. Solutions may include:
Adjusting the flame or heat source to ensure even heating across the pan.
Maintaining a consistent sap depth of at least 2 inches to ensure uniform evaporation.
Boil-Over: A boil-over can occur when the sap is added too quickly or in large amounts. To prevent this:
Gradually add sap to the pan in smaller increments.
Regulate the fire intensity to maintain a controlled boil.
Corrosion: Corrosion of the pan, particularly common in soldered or welded areas, can lead to leaks. If one sees signs of corrosion:
Inspect the pan regularly for any discoloration or pitting on the surface.
Apply a thin layer of food-safe mineral oil to the pan’s surface after cleaning to protect against oxidation.
By adhering to these maintenance practices, one ensures their maple syrup evaporator pan remains in top condition, ready for the next sugaring season.
Getting Started with DIY Maple Syrup Making

Embarking on the journey of homemade maple syrup making can be both rewarding and delightful. It involves constructing an evaporator for boiling sap and understanding the steps necessary to convert sap into syrup.
Building Your Own Evaporator
For those who enjoy hands-on projects, building a DIY maple syrup evaporator presents an exciting challenge. A basic evaporator setup can be crafted using concrete blocks as the base, with steam table pans or evaporator pans placed on top. This arrangement creates a space for the fire below and a surface for the sap to boil. For efficient heat transfer and evaporation, it is important that the pans fit snugly over the blocks without any gaps.
Materials Needed:
Concrete blocks
Metal flashing or stove pipe for the sides (to contain the heat)
Steam table pans or metal evaporator pans
Stack flange (for smoke exhaust)
When assembling the structure, ensure a strong and stable base is provided for the evaporator pans. To optimize smoke ventilation, correctly align and secure a stack flange on top of the structure, guiding smoke away from the boiling sap.
Basic Steps for the Hobbyist
The fundamental process of converting maple sap to syrup involves a series of methodical steps requiring patience and attention to detail. Here are the crucial stages one must meticulously follow:
Sap Collection: Using taps, also known as spiles, carefully insert them into maple trees to collect sap into buckets.
Sap Filtration: Filter the collected sap through cheesecloth or a fine mesh to remove any impurities or debris.
Boiling Process: Transfer the filtered sap to the evaporator pan and maintain a consistent boil; approximately 40 gallons of sap will yield one gallon of syrup.
Finishing the Syrup: Once the sap reaches the right temperature (7°F above the boiling point of water), it's time to remove it from the heat. The syrup should have a golden-brown color and a rich consistency.
Pro Tips:
Boil sap only outside; the process can create a sticky residue if done indoors.
Consistently skim the surface of the boiling sap to remove foam.
Regularly monitor the fire intensity to ensure a steady boil without scorching the syrup.
By following these steps and tips, anyone can begin the fulfilling task of creating homemade maple syrup, experiencing the pure taste of their handcrafted delight.
Advanced Techniques and Considerations
When tapping into the craft of maple syrup production, there are refined techniques and strategic considerations to ensure high-quality syrup and efficient operations. Producers must pay close attention to flavor development and be strategic about expanding their operations to maintain both quality and scale.
Experimenting with Flavor Profiles
Maple sugaring isn't just about producing syrup; it's an art form that allows for creativity in flavor. Producers can influence the taste by altering the point at which they draw off the syrup or by changing the type of wood used in the evaporation process. Experimenting with these variables enables the creation of unique maple syrup flavor profiles that appeal to a diverse palate. One technique involves boiling the sap at a higher temperature for a brief period to develop a richer flavor, while ensuring the syrup does not burn.
Variables Affecting Flavor:
Boiling temperature
Sap collection timing
Type of fuel used for boiling
Length of the boiling process
Producers often keep detailed records of their methods to replicate or refine the results, leading to signature syrup flavors.
Planning for Expansion and Scale
Scaling up maple syrup production requires careful planning and consideration of both the current site and the future expansion. Producers should assess their evaporator pans' capacity and contemplate the integration of additional or larger pans to accommodate increased sap flow. It's essential to maintain consistency in the depth of sap in the pans, as this influences both the evaporation rate and the syrup's quality.
Factors for Scaling Up:
Capacity: Assessing current evaporator pan size versus anticipated sap quantity
Space: Ensuring that the site can accommodate extra or larger equipment
Efficiency: Optimizing the flow of sap into the pans to maintain quality during higher production
Adopting a continuous flow evaporator can be beneficial, as it allows for a steady introduction of sap, essential for maintaining a gradient that ensures optimum evaporation and flavor. Producers planning for growth must also consider the logistics of sap collection from more trees and the impact on workflow and storage.
