
How to Reheat Gluten-Free Muffins for Perfect Texture and Taste

Reheating gluten-free muffins can be a challenge if you want to maintain their moist and fluffy texture. Many traditional reheating methods can turn a delicious treat into a dry, crumbly disappointment. To preserve the delightful texture, the best method is to use a microwave at a low setting for about 20 seconds. For an even more satisfying bite, consider grilling or toasting the muffins to achieve a lightly browned and slightly crispy exterior.
Microwaving is quick and effective, especially for those busy mornings when time is of the essence. For a twist, splitting the muffins in half and grilling them on a buttered skillet can enhance their flavor profile. Another great option is using a toaster oven or air-fryer to warm the muffins through without drying them out.
Understanding the right technique is key to enjoying gluten-free muffins that taste as good as fresh. Proper reheating can make these easy-to-make delights retain their original taste and texture, ensuring a satisfying gluten-free snack every time. The strategies provided work well across different types of gluten-free muffins, making them versatile and easy to enjoy whenever you crave them.
Understanding Gluten-Free Muffins

Gluten-free muffins require specific ingredients and techniques to ensure they are moist, tender, and flavorful. These muffins cater to those with gluten sensitivities or a preference for gluten-free diets.
Why Choose Gluten-Free?
Opting for gluten-free muffins is crucial for individuals with celiac disease, gluten sensitivities, or those choosing a gluten-free lifestyle. Gluten, found in wheat, barley, and rye, can cause adverse reactions in some people. A gluten-free diet helps avoid digestive discomfort and other health issues associated with gluten intake.
Moreover, gluten-free muffins can be a healthier option as they often include nutrient-dense flours like almond flour and oat flour. These alternatives provide beneficial fats, proteins, and fiber that are sometimes lacking in traditional wheat-based muffins. Gluten-free baking also opens up opportunities for experimenting with diverse ingredients and flavors.
Key Gluten-Free Ingredients
To make gluten-free muffins, special ingredients are used to mimic the texture and structure provided by gluten. Gluten-free flours such as almond flour, oat flour, and gluten-free all-purpose baking flour are staples. Almond flour is rich in protein and adds a moist, dense texture to the muffins.
Oat flour lends a mild flavor and good binding properties. Xanthan gum is another critical additive—it helps bind the ingredients, providing the chewiness typically given by gluten. Using a combination of these flours and xanthan gum ensures that gluten-free muffins have the right consistency and structure.
Commercial blends like Bob’s Red Mill Gluten-Free 1-to-1 Baking Flour simplify gluten-free baking, as they are formulated to replace wheat flour directly. These blends often contain a mix of different gluten-free flours, starches, and gums to create a balanced texture in baked goods like muffins.
Preparation Tips for Gluten-Free Baking

Creating delicious gluten-free muffins requires careful selection and handling of ingredients to achieve the ideal texture and flavor. The following tips cover essential practices for fluffiness, moisture, and flavor variations.
Optimizing Ingredients for Fluffiness
To make gluten-free muffins fluffy, incorporating the right leavening agents is crucial. Baking powder and baking soda work well, especially when combined with an acidic component like sour cream or yogurt. Additionally, separating and whipping egg whites until they form stiff peaks can significantly increase the batter's airiness. Gently fold in the beaten whites to maintain their structure. Ingredients like milk and butter also contribute to a lighter texture by adding moisture and fat.
Achieving Moisture in Gluten-Free Muffins
Maintaining moisture is essential to avoid dry, crumbly gluten-free muffins. Oil is a great addition, offering more stable moisture than butter alone. Combining butter with oil can yield the best results. Adding liquid dairy products like milk, sour cream, or yogurt helps to keep muffins moist and rich. Moreover, allowing the batter to rest for about 30 minutes before baking can help hydrate the flour, contributing to the overall moistness of the muffins.
Mix-Ins and Flavor Variations
Enhancing gluten-free muffins with mix-ins can elevate their taste and nutritional profile. Popular choices include chocolate chips, blueberries, nuts, fruits, and spices like cinnamon. Vanilla extract is a staple for flavoring the batter. For a unique twist, try mixing in coconut flakes or a blend of dried fruits. It's important to fold these ingredients in gently to prevent deflating the batter. Each variation not only boosts flavor but can also influence the texture, making the muffins more enjoyable.
Step-by-Step Gluten-Free Muffin Recipe
This recipe will guide you through making perfect gluten-free muffins. Detailed instructions cover combining ingredients, baking techniques, and testing doneness to ensure success.
Combining Dry and Wet Ingredients
Start with 2 cups of a gluten-free flour blend. Add 1 teaspoon of baking powder, 1/2 teaspoon of baking soda, 1/4 teaspoon of salt, and 3/4 cup of granulated sugar. Stir these dry ingredients until just combined.
In a separate bowl, whisk together 2 room-temperature eggs, 1 cup of milk, and 1/2 cup of melted butter or oil. Gradually incorporate the wet mix into the dry ingredients. Stir gently to avoid overmixing; it’s okay if the batter has some lumps. This ensures a light, tender texture.
Proper Baking Techniques
Preheat your oven to 375°F. Line a muffin pan with paper liners or lightly grease the wells. Carefully spoon the batter into each well, filling about 2/3 full to allow space for rising.
Place the muffin pan in the center of the oven to ensure even baking. Bake for about 18-20 minutes. Keep an eye on the muffins to prevent overbaking. Using room temperature ingredients helps them bake evenly and achieve the desired texture.
Testing for Doneness
To test if the muffins are done, insert a toothpick into the center of one. If it comes out clean or with a few crumbs, they are ready. If batter sticks to the toothpick, give them a few more minutes.
Allow the muffins to cool in the pan for about 5 minutes before transferring them to a wire rack. This prevents them from becoming soggy from steam. Enjoy warm or store in an airtight container. Reheat briefly to regain freshness.
Storing and Freezing Gluten-Free Muffins
Proper storage and freezing methods will extend the shelf life of gluten-free muffins, keeping them fresh and tasty. The following tips provide practical guidance on airtight storage solutions and the best practices for freezing and thawing.
Airtight Storage Solutions
To keep gluten-free muffins fresh, use airtight containers. These containers protect from moisture and air, which can cause muffins to become stale. Ensure the muffins are completely cooled before storing them to avoid condensation.
For short-term storage, place muffins in an airtight container at room temperature. If you plan to consume them within two days, this keeps them perfectly soft. For longer-lasting freshness, consider refrigerating them. Use a sealed container to prevent the muffins from absorbing other odors in the fridge.
Guidelines for Freezing and Thawing
Freezing is an excellent way to preserve gluten-free muffins for an extended period. Wrap each muffin individually in plastic wrap or foil to prevent freezer burn. Then, place the wrapped muffins in a freezer-safe airtight container or a resealable plastic bag.
Label the packaging with the date to keep track of storage time. Gluten-free muffins can typically be frozen for up to three months without a significant loss of quality.
When ready to eat, thaw muffins by removing the wrap and letting them sit at room temperature for an hour. For quicker results, reheat frozen muffins in a 350°F oven for 10-15 minutes or use a microwave on medium power, heating in 30-second increments until warm.
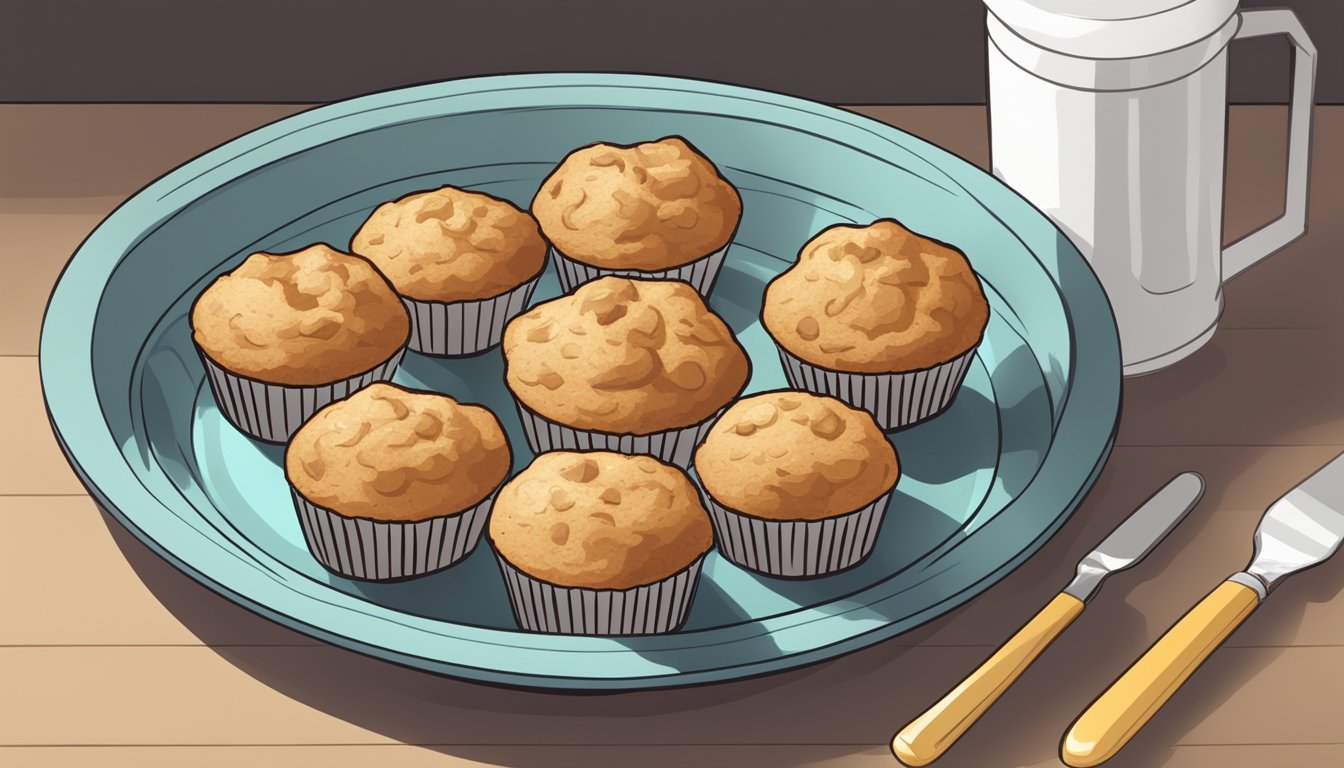
Reheating Gluten-Free Muffins

To ensure gluten-free muffins are warmed evenly and retain their moisture, various reheating methods can be employed. Each method has specific instructions to achieve the best results.
Using the Oven for Even Warming
Preheat the oven to 350°F (175°C). Place the muffins on a baking sheet. Cover them lightly with aluminum foil to prevent drying out. Bake for approximately 10 to 15 minutes. This method ensures the muffins are warmed thoroughly and maintain their original texture.
For best results, bringing the muffins to room temperature before placing them in the oven helps achieve consistent heating. The oven method is especially recommended for multiple muffins, allowing them to heat evenly.
Microwave Heating for Quick Serving
Place the muffin on a microwave-safe plate. Dampen a paper towel and wrap it around the muffin. Microwave on high for 20 to 30 seconds. If the muffin isn't warm enough, heat in additional 10-second increments until desired warmth is reached.
This method is quick but can sometimes result in a slightly rubbery texture. The damp paper towel helps retain moisture, ensuring the muffin remains soft. It’s suitable for single muffins or when time is limited.
Alternative Methods: Air Fryer and Steaming
Air Fryer: Set the air fryer to 300°F (150°C). Place the muffins in the air fryer's basket, making sure they do not touch each other. Heat for 3 to 4 minutes. This method provides a quick way to reheat while maintaining a slightly crisp exterior.
Steaming: Use a stovetop steamer. Bring water to a simmer. Place the muffins in the steamer basket, making sure the water does not touch them. Cover and steam for about 5 minutes. Steaming is an excellent option for maintaining moisture without making the muffins too dry.
Alternative methods like the air fryer and steaming provide unique reheating options. The air fryer is ideal for those who enjoy a slight crunch, while steaming keeps the muffins moist and soft.
Troubleshooting Common Gluten-Free Baking Problems

Achieving perfect gluten-free muffins can be challenging due to issues like dry or gummy textures and inadequate rising. Specific techniques and ingredient modifications can alleviate these common problems.
Preventing Dry or Gummy Textures
Dry or gummy textures in gluten-free muffins often result from imbalanced moisture levels or incorrect mixing. To combat dryness, ensure a higher moisture content by incorporating ingredients like applesauce, yogurt, or even mashed bananas. These items retain moisture during baking.
Using a proper mix of flours, such as combining rice flour with almond flour or tapioca starch, helps improve texture. Avoid overmixing the batter, as it can create a gummy texture. Mix just until the ingredients are combined.
Lastly, adjust the liquid in the recipe. Using a bit more milk or another liquid can make a significant difference. A pinch of kosher salt can also enhance flavors and balance the sweetness.
Ensuring Muffins Rise Properly
Rising is often a concern in gluten-free baking since traditional gluten structures are absent. Increase baking soda and baking powder in the recipe by about 25% to aid the rise. This adjustment creates more lift.
Properly measure your flour using the spoon or leveling method to avoid excess flour. Too much flour can weigh down the batter, preventing a good rise. Ensure your oven is at the correct temperature before placing the muffins inside, as an improperly heated oven can affect rising.
Fill muffin cups about 3/4 full to allow space for rising. Leaving too much or too little room can impact the muffin's final shape. Also, mix the batter just enough to combine ingredients without overworking it.
Special Diet Adaptations
Adjusting gluten-free muffins to cater to various dietary needs can be done seamlessly with the right ingredient substitutions and additions.
Making Muffins Dairy-Free and Vegan
To create gluten-free muffins that are also dairy-free and vegan, replacing traditional dairy products and eggs is essential. Flax eggs can serve as an effective egg substitute. Simply mix one tablespoon of ground flaxseed with three tablespoons of water and let it sit for a few minutes to thicken.
For dairy replacements, coconut oil or dairy-free margarine can be used in place of butter. To substitute milk, options like almond milk, soy milk, or oat milk work well. These changes preserve the texture and flavor, ensuring the muffins remain moist and delicious.
Healthy Gluten-Free Muffin Variations
Incorporating nutritious ingredients can enhance the health benefits of gluten-free muffins. Using apple sauce as a sweetener and moisture provider reduces the need for additional sugar and fats. Zucchini muffins can add a serving of vegetables, boosting fiber content without compromising taste.
Substituting refined flour with almond flour or oat flour increases protein and healthy fat content. Incorporating coconut oil instead of vegetable oil provides healthier fat profiles. These alterations maintain the delectable quality of muffins while enhancing their nutritional value.
