
The Beginner's Guide to Meal Prepping with a Vacuum Sealer
Efficient and Fresh Food Storage Solutions

Meal prepping has become a staple in the pursuit of a healthy and convenient lifestyle. By organizing and preparing meals in advance, individuals can save time, reduce food waste, and ensure they have nutritious options readily available. A vacuum sealer enhances the meal prep process by extending the freshness of food through an airtight sealing method, which reduces exposure to air - the main culprit of food spoilage.
The integration of a vacuum sealer into meal prepping can transform the way one approaches their weekly food routine. This method not only preserves the nutritional value of the food but also offers the convenience of having meals that last longer. Vacuum sealers are designed to accommodate bulk purchases and varied meal sizes, making it an essential tool for those who wish to maintain a healthy diet within a busy schedule.
Understanding how to effectively utilize a vacuum sealer in meal prepping involves recognizing the suitable types of food for sealing, the proper use of the equipment, and the best practices for ensuring an airtight seal. It appeals to those looking to streamline their meal preparation process, with added benefits of maximizing a food’s shelf life and optimizing kitchen storage.
Benefits of Vacuum-Sealed Meal Prepping
Vacuum-sealed meal prepping offers tangible advantages, especially when it comes to maintaining food quality, optimizing time management, and economic efficiency.
Extended Freshness and Food Safety
By extracting air from packaging, vacuum sealing substantially extends the shelf life of food. A vacuum-sealed environment minimizes bacterial growth, ensuring meals stay fresh longer and enhances food safety. This method is particularly valuable for storing perishable items like meats and vegetables, which can otherwise spoil quickly.
Save Time and Simplify Your Routine
Meal prepping with a vacuum sealer can greatly save time throughout the week. Pre-cooking and sealing meals in advance streamlines the process, making it easy to grab a meal, heat, and eat. This simplifies daily routines by reducing the need for frequent cooking and minimizing decisions about what to eat.
Optimize Your Budget and Reduce Food Waste
Efficient food storage through vacuum sealing can impact one's budget positively by allowing bulk purchasing and avoiding the costly habit of eating out. Vacuum sealing also contributes to reducing food waste; with meals preserved up to five times longer than other methods, fewer ingredients are discarded due to spoilage, making the most of every purchase.
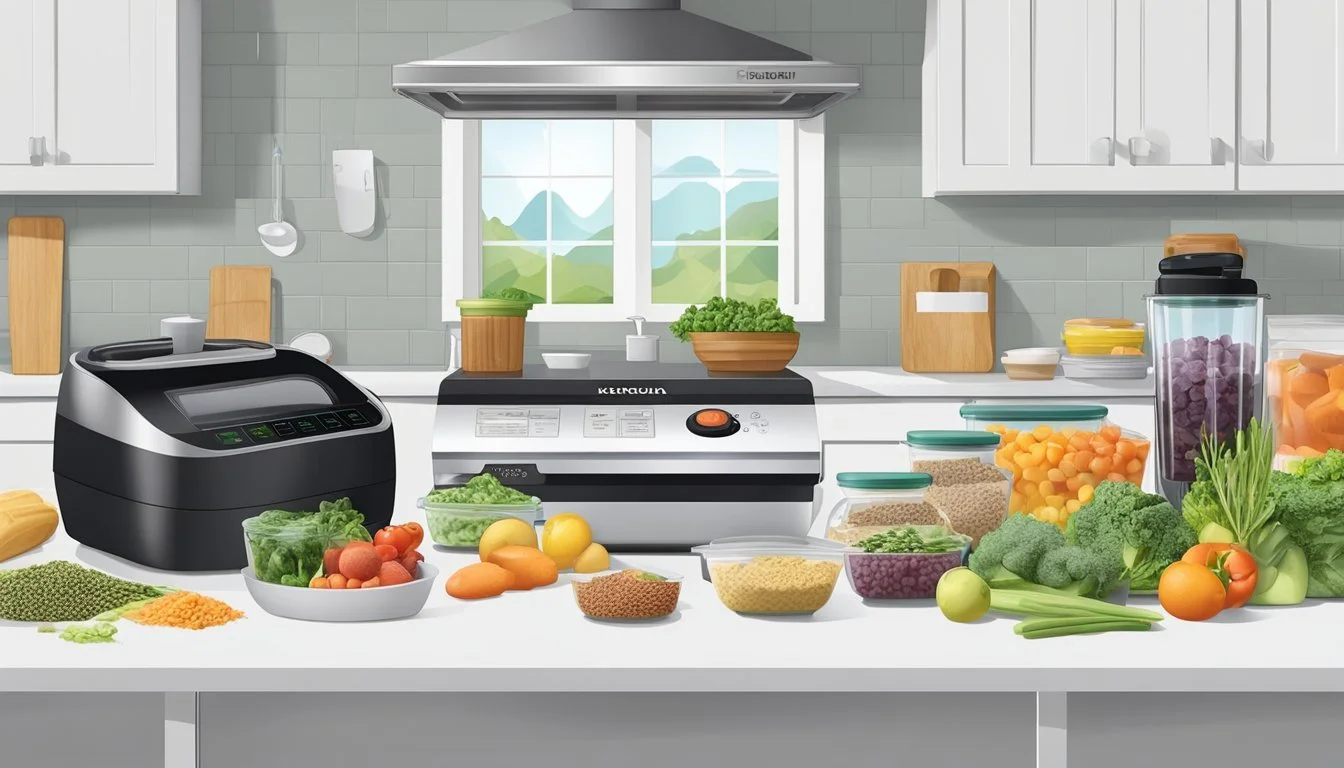
Essential Equipment for Meal Prepping

Equipping one's kitchen with the right tools is a decisive step in efficient meal prepping. A reliable vacuum sealer, durable containers, and a selection of other kitchen utensils are fundamental for proper storage and preparation of food.
Choosing the Right Vacuum Sealer
When selecting a vacuum sealer, one needs to consider the unit's durability, sealing effectiveness, and ease of use. The market offers a variety of models, from handheld to professional-grade. A popular choice is the Vitamix VM0197 Explorian Blender, known for its professional-grade sealing capabilities. Consumers should look for features such as:
Adjustable vacuum strength
Different sealing modes for various food types
A provision to handle wet and dry items
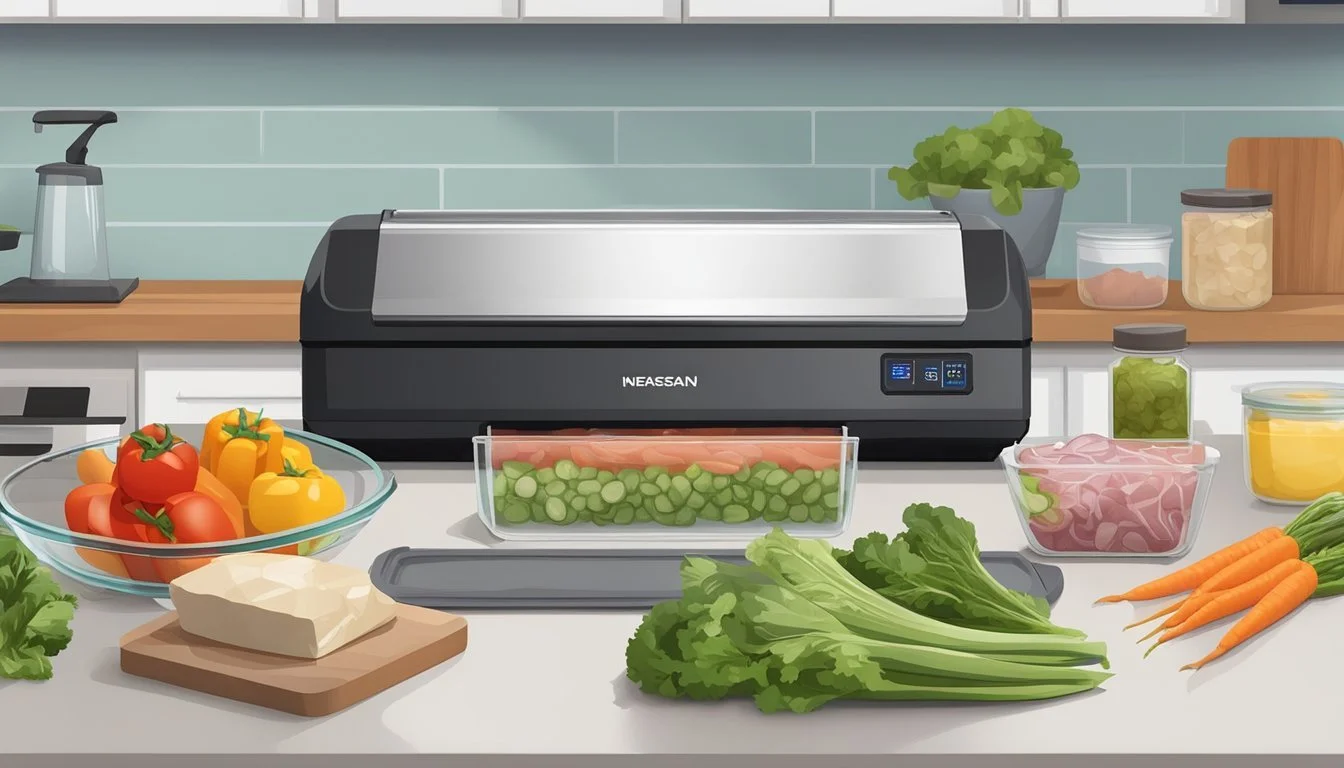
Best Containers for Vacuum Sealing
The choice of meal prep containers is critical to the longevity and freshness of food. While vacuum sealers often come with their own bags, glass containers can be a reusable alternative compatible with many sealers through a hose attachment. Key features for containers include:
BPA-free plastic or high-quality glass
Microwave, freezer, and dishwasher safety
Stackability for space-efficient storage
Container Type Attributes Use Case Plastic Bags Disposable, various sizes Use once for meal portions, snacks, or sous-vide cooking Glass Reusable, sturdy Ideal for microwavable meals and see-through storage Plastic Tubs Durable, often stackable Suitable for bulk meal storage and pre-cut ingredients
Other Kitchen Tools You'll Need
Apart from a vacuum sealer and containers, a well-equipped kitchen includes a range of utensils that facilitate meal prepping. One must have at least:
A large skillet and sauté pan for cooking multiple portions at once
A large pot for soups and stocks
A roasting pan or baking sheet for oven meals
Sharp knives, particularly a chef's knife for efficient chopping
A cutting board for prep work
Spatulas and large spoons for mixing and serving
These tools contribute to an organized meal prepping routine, streamlining the process and ensuring one can handle a variety of recipes.
Planning Your Meal Prep Routine
When embarking on meal preparation with a vacuum sealer, a well-structured plan saves time and ensures a balanced diet. The routine involves strategizing what one will eat, creating an efficient grocery list, ensuring nutritional balance with variety, and setting a concrete cooking schedule.
Creating an Effective Grocery List
An effective grocery list starts with the menu for the upcoming week or month. One needs to list all the necessary ingredients for each meal, accounting for appropriate servings and potential leftovers. A vacuum sealer allows for bulk purchasing and portioning, which is cost-effective and reduces waste. Here is an example of structuring a grocery list:
Chicken breast
Salmon fillets
Black beans
Vegetables:
Broccoli
Spinach
Bell peppers
Grains:
Brown rice
Quinoa
Miscellaneous:
Olive oil
Spices: paprika, oregano, garlic powder
Balancing Nutrition and Variety
Balancing nutrition and variety is key to a successful meal prep routine. Each meal should include a source of protein, carbohydrates, and healthy fats, along with fruits and vegetables for micronutrients. One can use different cooking methods, like steaming or grilling, to diversify texture and flavor without compromising health. Incorporating a range of colors in vegetables and swapping grains weekly can satisfy nutritional needs while keeping meals interesting.
Scheduling Your Prep and Cooking
Planning when to shop, prepare, and cook is crucial for meal prep efficiency. One should choose a consistent day for grocery shopping, such as Sunday morning, and schedule a block of time for meal preparation later that day. Using a vacuum sealer, meals can be batch-cooked and sealed for the freezer or fridge in an organized manner. For instance, if you cook twice a week, your schedule might look like this:
Sunday:
Morning: Grocery shopping
Afternoon: Cook and seal meals for Monday–Wednesday
Wednesday:
Evening: Cook and seal meals for Thursday–Saturday
By adhering to a predetermined routine, one ensures that meal prepping becomes a sustainable part of their lifestyle, offering convenience and contributing to healthier eating habits.
Vacuum Sealer Usage and Tips
Utilizing a vacuum sealer can revolutionize meal prep by extending the shelf-life of food and reducing waste. This section imparts essential tips and insights to harness its full potential, ensure its longevity, and optimize the sealing process for consistent results.
Understanding the Science of Vacuum Sealing
Vacuum sealing involves the removal of air from a bag or container to create an airtight seal that minimizes the oxygen content around food. By reducing the oxygen level, the growth of bacteria and fungi is significantly slowed down, effectively preserving the food's freshness and flavor for longer periods. For the best results, users should select the proper vacuum seal bags that are puncture-resistant and intended for their specific vacuum sealer model.
Maintenance and Care for Your Vacuum Sealer
To ensure a vacuum sealer's durability and optimal functionality,
Cleaning: Clean the vacuum sealer after each use, focusing on the sealing strip and vacuum chamber. Mild soap and a damp cloth are typically recommended, followed by drying to prevent any rust or corrosion.
Inspection: Regularly inspect the seal bar and gaskets for wear and tear. Replace them as necessary to maintain a high seal quality.
Storage: Store the appliance in a cool, dry place and avoid exposure to extreme temperatures. Keep the vacuum sealer's cord loosely coiled to prevent damage.
Helpful Hacks for Efficient Sealing
To maximize efficiency in the vacuum sealing process and achieve consistency, consider the following tips:
Spacing: Leave at least a couple of inches of space between the food and the top of the vacuum seal bag to allow for sufficient room to create a strong seal.
Flat Packages: For quicker freezing and thawing, flatten the contents inside the bag before sealing.
Dry/Wet Mode: If your vacuum sealer has a dry/wet mode, use the appropriate setting based on the moisture content of the food to prevent liquid from being pulled into the sealing mechanism.
Batch Processing: Seal multiple bags at once if the vacuum sealer can accommodate this, saving time and energy.
By adhering to these guidelines, users can make the most out of their vacuum sealer for meal prepping.
Meal Prep Strategies for Different Diets
Tailoring meal prep to specific dietary needs is crucial for maintaining nutrition goals. Different diets have unique requirements for proteins, carbohydrates, fats, and other nutrients, and a vacuum sealer can ensure that prepped meals retain their freshness and nutritional value.
High-Protein Plans for Fitness Enthusiasts
Fitness enthusiasts often focus on high-protein diets to support muscle repair and growth. When prepping meals, they should prioritize:
Proteins: Lean meats like chicken, turkey, and fish are ideal. These can be vacuum-sealed in individual portions.
Vegetables: As a side, one can include non-starchy vegetables like broccoli and green beans, which complement the high-protein component.
Sample Meal:
Grilled chicken breast
Steamed asparagus
Quinoa
Vegetarian and Vegan Prep for Plant-Lovers
Vegetarians and vegans need to ensure they're getting enough protein and essential nutrients from plant sources. Their meal prep could include:
Protein sources: Beans, lentils, and tofu are protein-rich and can be sealed and stored easily.
Leafy greens: Spinach and kale should be prepped for their iron content and vacuum sealed to maintain freshness.
Sample Meal:
Chickpea curry
Brown rice
Mixed leafy green salad
Low-Carb Options for Weight Maintenance
Those on low-carb diets typically aim to reduce insulin spikes and manage weight. Their meal prepping should focus on:
Carbs: Selections of complex carbohydrates like sweet potatoes can be portioned and vacuum-sealed.
Fats and Vegetables: Pairing with healthy fats like avocados and fibrous vegetables ensures satiety and a balance of nutrients.
Sample Meal:
Grilled salmon
Cauliflower mash
Sautéed spinach with garlic
Each diet plan can significantly benefit from the use of a vacuum sealer to extend the shelf life of prepped meals, keeping them fresh and nutritionally intact.
Recipe Ideas and Cooking Techniques
Vacuum sealing is an efficient method that can extend the shelf life of food, lock in flavors and nutrients, and help with portion control. Utilizing a vacuum sealer for meal prep allows individuals to prepare a variety of recipes in advance, and it can be particularly beneficial for maintaining the quality of cooked grains, meats, and roasted vegetables. Below are breakfast, lunch (What wine goes well with lunch?), and dinner options that are perfect for vacuum sealing and reheating later.
Breakfast Options to Start Your Day Right
For breakfast, one can prepare whole grain oatmeal with mixed berries, nuts, and a dash of cinnamon. This can be cooked in large batches and then portioned into single servings for vacuum sealing. The cooking time for oatmeal typically ranges from 10-20 minutes, depending on the type of oats used.
Another nutritious option is a Southwest-style breakfast burrito filled with scrambled eggs, black beans, corn, cheese, and chopped bell peppers. Burritos can be made in an assembly line, then cooled, and vacuum sealed individually. This allows for a quick breakfast that can be reheated in just a few minutes.
Sample Breakfast Meals:
Oatmeal: Cooked for 15 minutes; mixed with fruits and nuts; portioned and vacuum sealed.
Breakfast Burrito: Prepared with cooked ingredients; assembled and rolled in tortillas; vacuum sealed for freshness.
Lunches to Keep You Energized
A sturdy lunch option is quinoa salad with chickpeas, cherry tomatoes, cucumber, feta cheese, and a lemon-herb vinaigrette. To save time, cook a large batch of quinoa, which typically has a cooking time of around 15 minutes, and mix with the rest of the ingredients. After cooling, the salad can be vacuum sealed in servings.
For a more classic lunch choice, prepare chicken breast paired with roasted vegetables like carrots, broccoli, and sweet potatoes. Cook the chicken thoroughly, roast the vegetables until they're caramelized, and allow everything to cool before vacuum sealing, which will capture the freshness of the meal.
Sample Lunch Meals:
Quinoa Salad: Quinoa cooked for 15 minutes; mixed with raw and cooked components; vacuum sealed in portions.
Chicken & Vegetables: Chicken breast oven-cooked until no longer pink inside, paired with roasted vegetables; cooled and sealed for later consumption.
Dinners That Serve as Tomorrow's Lunch
For dinner, a heartwarming beef stew (What wine goes well with beef stew?) with tender chunks of meat, carrots, potatoes, and rich gravy can provide comfort after a long day. Stews are ideal for vacuum sealing since the slow cooking process, often taking several hours, allows flavors to deepen and meats to become particularly tender.
Another excellent dinner choice is salmon fillets with a side of asparagus and wild rice. Cook the salmon to perfection, steam the asparagus, and fluff the rice. After the components have been cooled, they can be vacuum sealed to ensure a moisture-rich fish when reheated.
Sample Dinner Meals:
Beef Stew: Simmered for 3-4 hours with a variety of vegetables and herbs; perfect for sealing and reheating.
Salmon & Asparagus: Salmon fillets baked for 15-20 minutes; served with lightly steamed asparagus and wild rice; ready to seal for a delicious next-day lunch.
Storing and Reheating Your Vacuum-Sealed Meals

When using a vacuum sealer for meal prepping, it's essential to understand the best methods for storing and reheating meals to maintain nutrition and flavor. Proper storage prevents freezer burn and extends shelf life, while correct reheating ensures safety and preserves taste.
Best Practices for Freezer and Fridge Storage
Freezer Storage:
Avoid Freezer Burn: To protect against freezer burn, ensure that meals are sealed without any air pockets. This also helps in retaining the nutrition of perishable items.
Labeling: Label each container with the date of storage to track how long they have been frozen.
Organization: Organize meals in the freezer by type and use date to ensure efficient use of space and consumption within recommended time frames.
Fridge Storage:
Temperature: Store vacuum-sealed meals in the fridge at or below 40°F to slow down bacterial growth.
Accessibility: Keep meals that will be consumed sooner in the most accessible part of the fridge.
Rotation: Rotate stock by placing new meals behind the older ones to use food in proper sequence.
Safe and Delicious Reheating Methods
Stovetop Reheating:
Using a Pot of Water:
Fill a pot with enough water to cover the vacuum-sealed bag.
Heat the water until it starts to simmer; avoid boiling to prevent melting the bag.
Submerge the bag and reheat for a few minutes until warmed through.
Oven Reheating:
For Meals Not in Plastic Bags:
Preheat the oven to a moderate temperature, usually between 350°F and 375°F.
Transfer the meal to an oven-safe dish to reheat. It may vary depending on the meal, but typically, it takes about 10-15 minutes.
Microwave Reheating:
If Time is Of Essence:
Before microwaving, make a small cut in the corner of the sealed bag to allow steam to escape.
Microwave the food using the appropriate setting or timing based on the type of food. Stir the contents halfway through to ensure even heating.
Blender Reheating:
For Soups and Sauces: Gently warm these items using a pot on the stovetop. A blender can be used for cold items like smoothies, which can be consumed directly from refrigeration.
Store pantry staples at room temperature, away from heat and light sources to preserve their longevity after vacuum sealing. Always ensure that storage areas are cool and dry, as consistent conditions help to maintain the quality of vacuum-sealed goods.
Advanced Meal Prepping Techniques
Advanced meal prep techniques focus on efficiency and precision in preparing meals for extended periods. They utilize tools and methods that facilitate the preparation of large batches of food that are portion-controlled and easily stored.
Batch Cooking and Portion Control
Batch cooking maximizes time by preparing multiple portions of meals simultaneously. A vacuum sealer is pivotal in this process, as it allows individuals to store individually portioned meals securely, preventing freezer burn and extending shelf-life. Portion control is easily managed by measuring food before sealing, ensuring consistent serving sizes.
Steps for Effective Batch Cooking:
Prepare a large quantity of a single recipe.
Cool meals to a safe temperature.
Divide into single servings.
Seal with a vacuum sealer.
Label with content and date before freezing.
Preparing Make-Ahead Meals and Mixes
Make-ahead meals are prepared and stored before they’re needed. They can range from full entrees to mixes for baked goods or smoothies. The vacuum sealer helps maintain the freshness and flavors of the ready-to-cook ingredients. An individual can prepare bases for soups, stews, or casseroles, and vacuum seal them for future use.
Example of a Vacuum-Sealed Make-Ahead Meal:
Ingredients: Pre-cooked protein, grains, and vegetables.
Procedure: Layer ingredients, vacuum seal, and freeze.
Tools for Speed: Slow Cooker, Instant Pot and More
Using a slow cooker or an Instant Pot in tandem with a vacuum sealer allows for efficient meal preparation. These appliances are ideal for making make-ahead meals that benefit from slow cooking or pressure cooking. Users seal the ingredients using a vacuum sealer, which are then ready to be placed directly from the freezer into the appliance, making the cooking process seamless and less time-consuming.
Tools for Efficient Meal Prep:
Slow Cooker: For soups, stews, and tender meats.
Instant Pot: For quick cooking of grains and legumes.
Vacuum Sealer: To preserve prepped meals and ingredients.
In utilizing these advanced techniques, meal prep becomes a more streamlined and effective process, adhering closely to an individual’s dietary needs and saving both time and resources.
