
How to Measure Ingredients for a Cake Recipe
Accurate Baking Basics
Measuring ingredients with precision is a fundamental step in crafting the perfect cake. The process of baking is often likened to a science where each component must be added in the exact quantity to achieve the desired chemical reactions and, in turn, the best results. Whether it's the flour serving as the cake's structure, the sugar providing sweetness and texture, or the leavening agents like baking soda or baking powder that contribute to rise, accuracy in measurement is key.
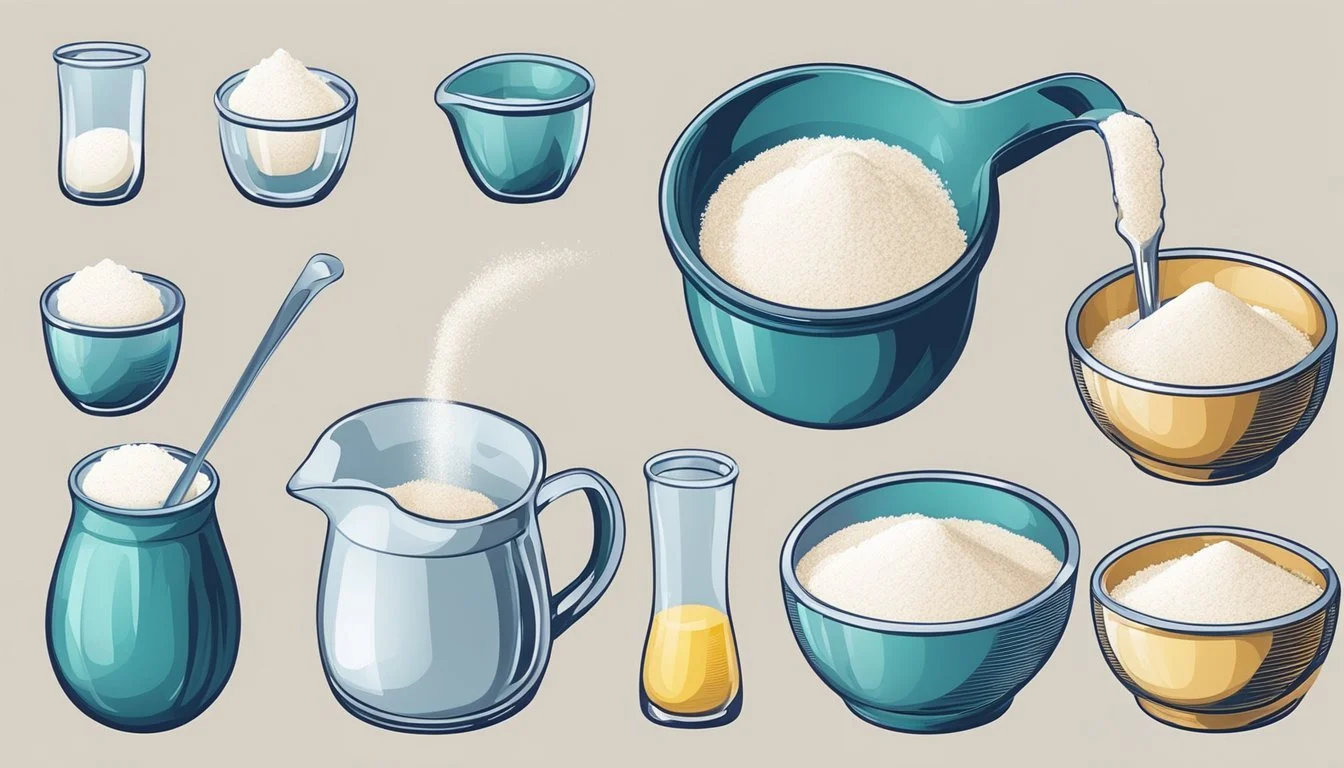
For dry ingredients such as flour and sugar, the spoon and level method is recommended. Using a spoon, ingredients are gently scooped into a measuring cup and then leveled off with the straight edge of a knife to ensure an even and accurate cup. With ingredients like brown sugar that tend to clump, they are often packed into the measuring cup to adhere to the recipe's requirements. Meanwhile, liquid ingredients should be measured in clear measuring cups designed for liquids, ensuring the cup is set on a flat surface and viewed at eye level for precision.
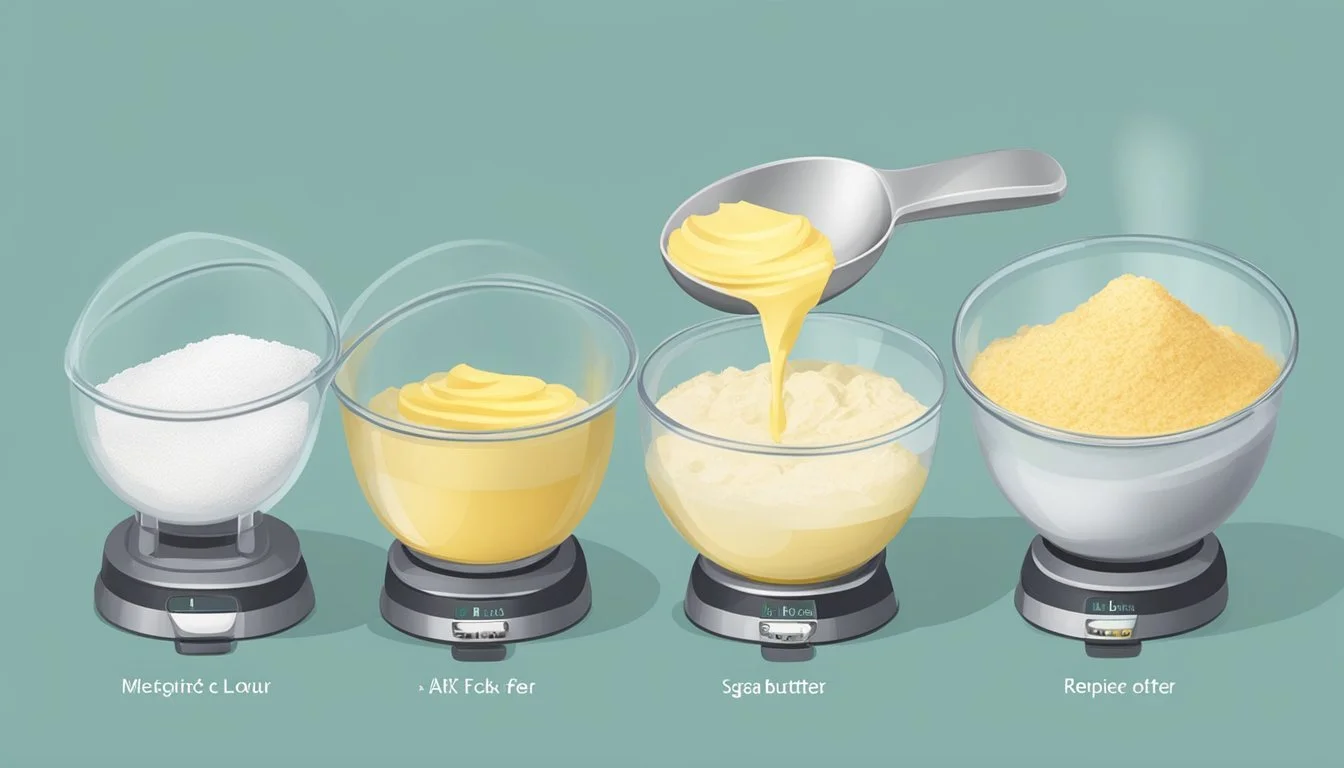
Apart from traditional volume measurements, a kitchen scale can be an essential tool for those who seek consistency and exactness in their baking endeavors. Measuring by weight is often considered more accurate than using volume measurements, as it remains unaffected by factors such as ingredient density or packing method. A scale can thus be a crucial asset in one’s baking arsenal, laying the groundwork for a cake that is as scrumptious as it is aesthetically pleasing.
Essential Baking Tools
Proper measurement of ingredients is crucial for baking a cake successfully. This section will discuss the key tools required for accurate measurements.
Overview of Measuring Tools
The baker should have two types of measuring tools: measuring cups and measuring spoons. These tools come in standard sizes to ensure precise ingredient portions. A basic set of measuring cups typically includes:
1 cup
1/2 cup
1/3 cup
1/4 cup
Measuring spoons are equally important and usually include:
1 tablespoon
1 teaspoon
1/2 teaspoon
1/4 teaspoon
Choosing the Right Kitchen Scale
For bakers seeking precision, a kitchen scale is indispensable. It should allow them to switch between ounces and grams. The scale must have a 'tare' functionality to subtract the weight of the container and measure ingredients accurately. A digital scale is preferred for its ease of reading and precision.
Measuring Cups vs. Spoons
It is important to use measuring cups for larger quantities and measuring spoons for smaller amounts of ingredients. One should use cups for volume measurements, like for flour and milk, while spoons are perfect for smaller measures, such as yeast and salt. Key considerations include:
Use cups for volumes greater than 2 tablespoons (30 ml).
Use spoons for volumes less than 2 tablespoons (30 ml).
By using the correct tools for their intended purpose, the baker ensures each ingredient is measured with confidence and accuracy.
Understanding Measurement Units
Accurate measurement is crucial for the success in baking cakes. The consistency of the results depends on how precisely one follows the recipe, understanding both measurement units and when to use which type.
Volume vs. Weight
Volume refers to the space that an ingredient occupies, typically measured in teaspoons (tsp), tablespoons (tbsp), fluid ounces (fl oz), cups, pints, quarts, and gallons. Liquid ingredients like water, milk, and oils are commonly measured by volume. When measuring dry ingredients such as flour or sugar using volumetric cups, one should fill the cup and level it off with a straight edge for accuracy.
Weight, on the other hand, is the measure of how heavy an ingredient is. This is often considered more accurate and is measured in ounces or grams. Many professional bakers prefer weight measurements as it leads to consistent results, especially for dry ingredients.
Metric and Imperial Systems
The Metric system measures ingredients in liters (L) and milliliters (mL) for volume, and grams (g) and kilograms (kg) for weight. It is the most common system used worldwide and is favored for its simplicity and ease of conversion since it is based on the number 10.
The Imperial system is primarily used in the United States and measures volume in teaspoons, tablespoons, fluid ounces, cups, pints, quarts, and gallons. Weight is measured in ounces and pounds (lbs). These units do not convert as cleanly as the metric system.
Conversion Charts and How to Use Them
A conversion chart serves as a helpful reference to translate units of measurement from one system to another or to scale recipes up or down.
To convert volume measurements, such as cups to liters, use the specific conversion factor (1 cup = 240 mL).
For weight conversions, ounces to grams for instance, use the conversion of 1 ounce = 28.35 grams.
A typical recipe might measure ingredients as follows:
Flour: 1 cup
Milk: 240 milliliters
Sugar: 1/2 cup or 4 fluid ounces
Butter: 8 tablespoons or 1/2 cup
Utilize conversion charts to navigate between these units or adjust quantities according to the recipe. A standard chart might look like this:
Volume Metric 1 teaspoon (tsp) 4.93 milliliters (mL) 1 tablespoon (tbsp) 14.79 milliliters (mL) 1 fluid ounce (fl oz) 29.57 milliliters (mL) 1 cup 240 milliliters (mL) 1 pint (pt) 473.18 milliliters (mL) 1 quart (qt) 946.35 milliliters (mL) 1 gallon (gal) 3.785 liters (L)
Understanding how to accurately convert and measure ingredients is fundamental in the precision-driven process of baking.
Measuring Dry Ingredients
Measuring dry ingredients with precision is fundamental to the success of a cake recipe. Proper techniques ensure accurate ratios and impact the texture and structure of the cake.
The Correct Way to Measure Flour
One should measure flour using the "spoon and sweep" method. First, lightly spoon the flour into a dry measuring cup without compacting it, then sweep off the excess with a straight edge. This method ensures that the flour is not densely packed, which can lead to using more flour than the recipe requires. It's important to note that bread flour, all-purpose flour, and cake flour may all be measured using this same technique.
Dealing with Sugar Variations
Sugar, like flour, requires attention to variation. Granulated sugar should be scooped and leveled in a dry measuring cup, similar to flour. However, when measuring brown sugar, one should pack it tightly into the measuring cup to account for its clumpy nature. Confectioners' sugar and other fine sugars should be sifted before measuring to remove lumps and then gently scooped into the measuring cup and leveled off.
How to Measure Small Dry Quantities
For smaller amounts of dry ingredients such as baking powder, cocoa powder, or salt, measuring spoons are optimal. These ingredients should be lightly scooped and then leveled off with a knife to get an accurate measurement. For ingredients like nuts or oats that don't level well, a "heaping" measure is appropriate.
General Tips for Measuring Dry Ingredients:
Sifted flour: Sift then measure for a lighter consistency, especially with cake flour.
Dry measuring cups: Always use these instead of liquid measuring cups for accuracy.
Dip and sweep: Dip the cup into the ingredient's container and sweep to level for commodities like cornmeal and cocoa powder.
By adhering to these methods, one can measure dry ingredients for a cake recipe with confidence and precision.
Measuring Wet Ingredients
Accurate measurement of wet ingredients is crucial for the consistency and outcome of a cake recipe. Precision ensures the correct ratio of ingredients for optimal taste and texture.
Using Liquid Measuring Cups
Liquid measuring cups are essential for assessing the volume of liquid ingredients. They come in various sizes, typically 1 cup, 2 cups, and 4 cups. When measuring liquids like milk or water, one should pour the liquid into the cup and check the measurement at eye level. The liquid's surface should align with the marking for the intended volume on the cup, observing the meniscus—the slight curve at the surface of the liquid.
Measuring Sticky Liquids
For sticky liquids such as honey, molasses, or maple syrup, a different approach is required. One should lightly coat the inside of the measuring cup with an oil or non-stick spray. This preparation allows the sticky liquid to slide out easily, ensuring an accurate and complete transfer of the ingredient into the mixing bowl.
Tips for Measuring Water and Milk
When measuring water and milk, one should use clear liquid measuring cups to accurately read the volume at eye level. Water and milk are prone to forming a meniscus, so one should ensure the lowest point of the curve meets the correct measurement line. Here are some quick conversion tips for common measurements:
1 tablespoon = ½ fluid ounce
1 cup = 8 fluid ounces
2 cups = 1 pint = 16 fluid ounces
For consistency, always measure water and milk at room temperature unless the recipe specifies otherwise. It's also worth noting that some liquid ingredients, like applesauce, are measured using the same method as water and milk, with the added caution to avoid air pockets by stirring before measuring.
Special Ingredients and Texture

When measuring ingredients for a cake, understanding the nuances of fats, butters, and other special ingredients is crucial for achieving the desired texture. Their consistency, moisture content, and the way they interact with other ingredients dictate the cake's final texture.
Measuring Fats and Butters
Butter: To measure butter accurately, it should be at a cool room temperature unless the recipe specifies otherwise. They should use a flat spatula or a knife to level off the butter in a measuring cup or spoons—this ensures a precise measurement without air pockets or excess.
Shortening and Peanut Butter: Items like shortening and peanut butter should be measured in the same way as butter. They should be pressed into the measuring cup to eliminate air gaps and leveled flat across the top. With peanut butter, they also need to ensure it's well-stirred if it's the natural kind that separates.
Dealing with Uncommon Textures and Ingredients
Chocolate Chips: For ingredients like chocolate chips, a dry measuring cup should be used. Simply pour the chocolate chips into the measuring cup and gently shake to level. There is no pressing down or leveling with a knife needed here.
Granulated and Powdered Sugars: Granulated sugar can be scooped and then leveled, while powdered sugar should be sifted before measuring unless the recipe states otherwise. The sifting removes lumps for a smooth texture and ensures a correct measurement.
Brown and Dark Brown Sugars: Brown sugar and dark brown sugar must be packed into the measuring cup to account for their dense and moist nature which contributes significantly to the moistness and texture of the cake.
Sour Cream, Yogurt, Cream Cheese: For wet ingredients that are thicker like sour cream, yogurt, and cream cheese, they should use a spoon to fill the measuring cup and a spatula for leveling. The ingredient should be added until it's just full without being over-packed.
Chopped Fruits and Other Variable Textures: Ingredients with irregular sizes or textures, such as chopped fruits, are generally less precise, but they should still strive for uniformity in size for even distribution in the batter. They should gently fill the measuring cup without compacting the ingredients.
Precision in Measuring
When preparing a cake, achieving accuracy with each ingredient is critical. Measuring precisely ensures that the chemical reactions within the batter occur as intended, leading to the desired flavor, texture, and rise.
Achieving Consistent Results
Consistency in baking is paramount, and it starts with how ingredients are measured. Dry ingredients like flour, sugar, and baking soda should be measured using the “spoon and level” method. To do this, ingredients should be fluffed up in their container to avoid settling. Spoon the ingredient into the measurement tool, then level it off with a straight edge, such as the back of a knife, to ensure an exact measurement. Wet ingredients should be measured in clear cups designed for liquids. To accurately read the volume, one must look at the meniscus, the curve seen at the top of the liquid, ensuring the measurement aligns at eye level.
Avoiding Common Mistakes
To avoid the common pitfalls in measuring baking ingredients, remember to stir ingredients like flour before spooning them into a measuring cup to prevent compaction. Do not pack ingredients unless the recipe specifically calls for it, as this alters the intended ratio. With ingredients like butter, which comes in sticks, use the markings on the wrapper for guidance or place it on a scale for an accurate weight reading. For baking powder and baking soda, a precise level measurement is essential since they act as leavening agents and too much or too little can affect the cake's rise and texture.
When to Use a Scale for Weighing
Weighing ingredients by weight is often noted for its precision, surpassing the accuracy of volume measurements. Most professional bakers use scales to ensure the exactness needed for consistent results. Ingredients like flour, sugar, and butter can vary greatly when measured by volume, so a digital scale can provide a more accurate reading. Measuring by weight is straightforward: place a bowl on the scale, tare it to zero, and add the ingredient until the desired weight is reached. This method eliminates the variability of how tightly an ingredient might be packed into a measuring cup, providing a uniformity that leads to reliable baking outcomes.
Baking With Alternative Ingredients
When baking cakes with alternative ingredients, it's important to consider the unique properties of each substitute to ensure the desired texture and flavor. Precise measurement is crucial for the success of these non-traditional recipes.
Gluten-Free Flours and Mixes
Gluten-free flours often require different quantities compared to regular flour to achieve the right cake consistency. One should measure gluten-free flour using the spoon-and-level method: spoon the flour into the measuring cup and level it off with a knife without compacting it. Here's a brief guide on how much gluten-free flour to use when substituting:
Almond flour: Replace 1 cup of wheat flour with 1 cup of almond flour. It's denser, so you might need to increase rising agents.
Coconut flour: Highly absorbent, use only 1/4 cup of coconut flour for 1 cup of wheat flour and add an extra egg for moisture.
Rice flour: Substitute 7/8 cup of rice flour for 1 cup of wheat flour.
Measuring for Vegan Baking
When adapting a cake recipe for vegan baking, certain ingredients must be measured carefully to replicate the function of their non-vegan counterparts:
Flax eggs: A common egg substitute is a flax egg, made from 1 tablespoon of ground flaxseed mixed with 3 tablespoons of water, representing one egg.
Dairy-free milk: Use unsweetened varieties and measure as a one-to-one replacement for cow's milk.
Vegan butter: Often measured the same as regular butter, ensuring it is at the correct temperature for the recipe.
Substituting Sugars and Sweeteners
Different sugars and sweeteners can alter the texture and sweetness of the cake, so substitution should be done thoughtfully:
Granulated sugar: Can often be substituted one-to-one with coconut sugar or raw cane sugar.
Liquid sweeteners: Like maple syrup or agave nectar; use 3/4 cup for every 1 cup of sugar, and reduce other liquid ingredients by a few tablespoons.
Stevia or erythritol: They are much sweeter than sugar; use a conversion chart specific to the brand as potency varies widely.
Final Tips for Baking Cakes
When baking cakes, precision is key. One should always begin by reading the recipe thoroughly to ensure they have all ingredients and understand the procedure. Ingredients should be at the correct temperature; typically, this means room temperature unless otherwise specified.
Measuring Ingredients:
Dry Ingredients: Use a spoon to gently fill the measuring cup to the brim without packing the ingredient down. Level off with a straight edge for accuracy.
Wet Ingredients: Pour liquids into a transparent measuring cup with a spout to the desired mark, checking at eye level.
Avoid over-mixing the batter once the flour is added, as it can lead to a dense or tough cake.
If the recipe calls for folding in delicate ingredients such as whipped cream or beaten egg whites, one should use a light hand to maintain their structure.
Baking:
Preheating the oven to the correct temperature is crucial.
Positioning racks in the center can promote even baking.
They shouldn't open the oven door frequently as temperature fluctuations can affect the cake's rise.
Pasta Note: While not commonly associated with cake baking, if a recipe incorporates pasta, such as a pastiera napoletana, ensure the pasta is cooked al dente and cooled before adding to the cake mix to maintain texture.
Pan Preparation:
Grease and line cake pans as directed to prevent sticking.
If using flour to coat the pans, tap out excess to avoid a floury residue on the baked cake.
Every element, from ingredient preparation to the baking process, influences the final product when baking cakes. By adhering to these recommendations, bakers will enhance their chances of producing a delectable cake with a desirable texture and appearance.
