
How to Make a Simple Goat Milk Lotion Bar
Your Solution for Dry Skin

Goat milk lotion bars offer a convenient and natural way to address the common problem of dry skin. Made with nourishing ingredients such as goat milk, beeswax, and various oils, these lotion bars provide a concentrated dose of moisture without the additives found in many commercial products. The milk's high fat content, along with its naturally occurring vitamins and minerals, helps to hydrate and replenish the skin, leaving it feeling soft and smooth.
Creating a goat milk lotion bar at home allows individuals to enjoy the benefits of a DIY approach, tailoring the ingredients to their skin's specific needs. By handcrafting these bars, users can select natural oils and butters that complement the moisturizing properties of goat milk. The process also provides an opportunity to avoid synthetic fragrances or preservatives, resulting in a product that is gentle and suitable for those with sensitive skin.
The simplicity of crafting these lotion bars makes them accessible to even novice DIY enthusiasts. As they solidify at room temperature, users can conveniently apply the bar directly to the skin without the mess of traditional lotions. The bars are also portable and can be used on-the-go, ensuring that skin can remain hydrated throughout the day. With a straightforward method of melting and mixing, these bars can be customized with essential oils, offering additional therapeutic benefits and personalized scents.
Understanding Goat Milk Lotion Benefits
Before diving into the specifics, it's important to understand that goat milk lotion taps into the rich composition of goat milk, which is fortified with essential skin-friendly vitamins, minerals, and lactic acid, offering profound benefits for skin health and nourishment.
Goat Milk: A Treasure Trove of Skin Benefits
Goat milk is replete with a variety of vitamins and minerals that are essential for maintaining skin health. High in vitamin A, goat milk has been known to improve skin complexion and overall skin health. It also contains important minerals like selenium, which can help protect the skin from daily environmental damage.
Lactic acid, a naturally occurring alpha hydroxy acid in goat milk, gently exfoliates the skin. This component removes dead skin cells, promoting a smoother and more youthful appearance. It's particularly helpful in keeping the skin's surface clean and free from impurities that can lead to dryness and irritation.
The Nourishing Properties of Goat Milk in Skincare
When incorporated into skincare, goat milk offers deep hydration, a key factor in maintaining soft and resilient skin. The moisturizing qualities of goat milk are attributed to its fat molecule content, which helps to improve the skin's moisture barrier and retention, leading to more supple and hydrated skin.
Furthermore, the richness of goat milk in proteins helps to protect the skin's surface and can assist in the regeneration of collagen fibers, making the skin firm and elastic. The presence of lactic acid in goat milk also aids in the preservation of the skin's natural pH balance, leaving it feeling refreshed and revitalized.
Selecting Quality Ingredients
Creating a goat milk lotion bar requires careful selection of high-quality ingredients that nourish the skin and ensure the longevity of the product. Superior fats, oils, and natural preservatives are pivotal in crafting an effective and stable lotion bar.
Choosing the Right Fats and Oils
Shea Butter: Renowned for its moisturizing properties, shea butter is a cornerstone for lotion bars. It's rich in fatty acids and vitamins that hydrate and soothe dry skin. Seek unrefined shea butter for its natural benefits.
Coconut Oil: Coconut oil is a versatile fat that serves as an excellent moisturizer and provides a solid base for the lotion when at room temperature. Always opt for virgin coconut oil to utilize its full skin-conditioning potential.
Almond Oil: Almond oil is praised for its lightweight, non-greasy feel on the skin. It’s a source of Vitamin E, which helps in skin repair and protection.
Cocoa Butter: Another fabulous option is cocoa butter, which is solid at room temperature but melts upon contact with the skin, offering a luxurious feel. Its fat content helps to lock in moisture.
Beeswax: Beeswax not only thickens the lotion bar but also adds a protective layer to the skin, preventing environmental damage. It should be 100% natural beeswax for the best quality.
Fats and Oils Checklist:
Unrefined Shea Butter
Virgin Coconut Oil
Natural Almond Oil
Pure Cocoa Butter
100% Natural Beeswax
The Role of Natural Preservatives
Vitamin E: A natural preservative, Vitamin E extends the shelf life of the lotion bar while also offering antioxidant benefits to the skin. It's essential to use naturally sourced Vitamin E for both preservation and skincare purposes.
Rosemary Oleoresin Extract (ROE): Although not as commonly used, ROE is an effective natural antioxidant that helps in preventing rancidity, especially in products containing oils. Just a small amount of ROE can be significantly beneficial.
Natural Preservatives Checklist:
Vitamin E (Tocopherol)
Rosemary Oleoresin Extract (ROE)
Using high-quality fats, oils, and natural preservatives is crucial for the efficacy and stability of a homemade goat milk lotion bar. They ensure the lotion bar not only benefits the skin but also remains fresh and usable over time.
Required Equipment for Lotion Making

In the process of creating goat milk lotion bars, having the right equipment is crucial for both safety and precision. This necessitates tools for both the correct heating of ingredients and the accurate measurement and transfer of the lotion into containers.
Mixing and Heating Tools
For the heating and mixing stages, one would need a double boiler or a similar arrangement to gently heat the ingredients without scorching them. This setup is essential for melting solids such as beeswax and butters. An immersion blender or a stick blender is indispensable for ensuring a smooth and homogenous mixture, helping to emulsify the oils and milk.
Measuring and Pouring Utensils
Precision in lotion making is key, which means a digital scale is critical for measuring out each ingredient to the correct weight. As for transferring the lotion, jars or bottles made of glass are ideal, as they do not react with the lotion and are easy to sterilize. When pouring the lotion into containers, a spatula may be used to ensure that every bit is scooped out of the mixing bowl.
Detailed Goat Milk Lotion Recipe
Creating a goat milk lotion bar is a straightforward process that delivers a natural and hydrating product ideal for dry skin. By following a detailed recipe and incorporating preferred essential oils, one can craft a soothing lotion bar at home.
Step-by-Step Guide to the Goat Milk Lotion Recipe
Ingredients:
1/2 cup of goat milk
1/2 cup of beeswax
1/2 cup of coconut oil
1/4 cup of shea butter
1/4 cup of almond oil
1 teaspoon of vitamin E oil
Instructions:
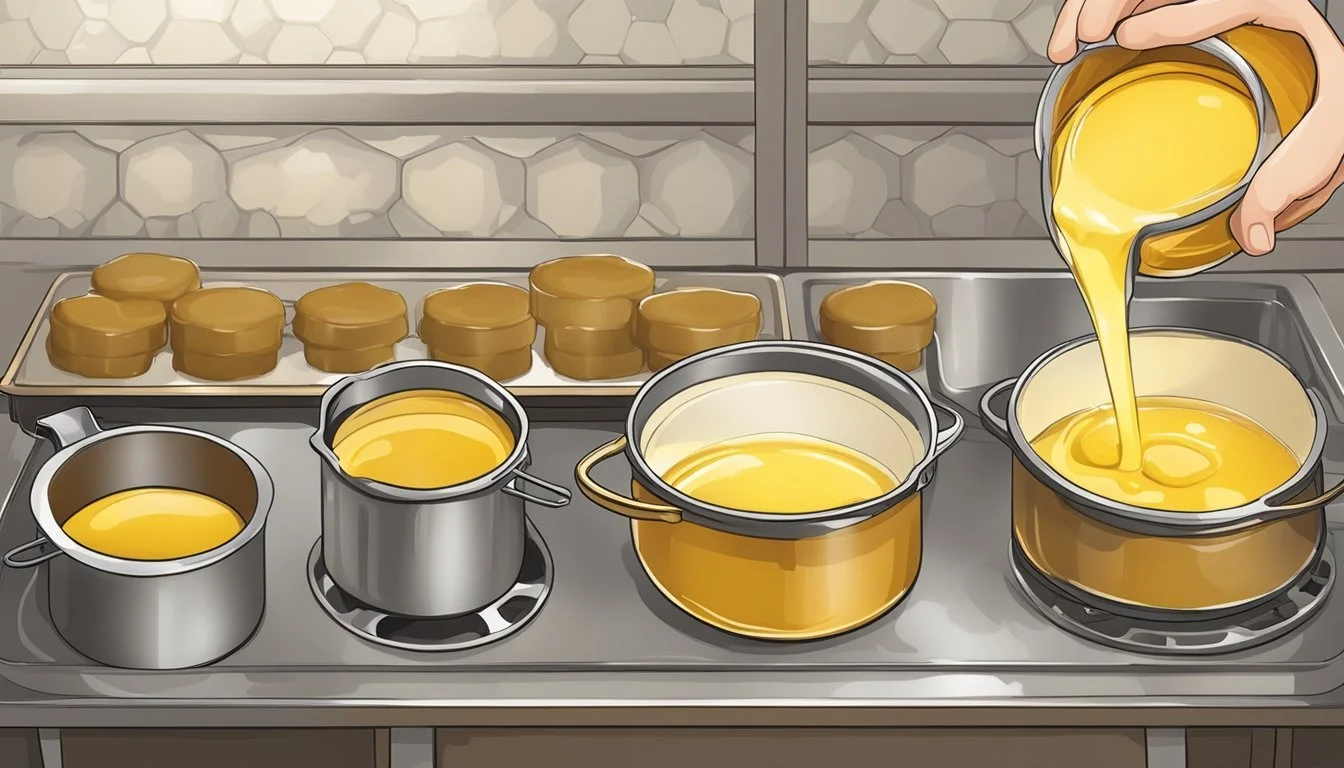
Step 1: In a double boiler, combine beeswax, shea butter, and coconut oil. Heat until fully melted and well mixed.
Step 2: Gently warm the goat milk in a separate pot, being careful not to scorch it.
Step 3: Slowly add the warm goat milk to the oil mixture while stirring continuously.
Step 4: Remove from heat and stir in almond oil and vitamin E oil.
Step 5: Pour the mixture into moulds and allow it to cool and solidify.
Adding Fragrance and Essential Oils
To enhance the lotion bars with scent and additional skin benefits:
Selecting Oils: Opt for skin-safe essential oils like lavender for relaxation or rose for its hydrating properties.
Incorporation: After removing the oil and milk mixture from heat, add a few drops of essential oil for fragrance.
Note: Essential oils are potent; use sparingly and always conduct a patch test to ensure there is no reaction before applying broadly.
Preparing the Lotion Base
Creating a simple goat milk lotion bar requires careful preparation of the base, which involves melting solid ingredients and then integrating liquid components effectively to ensure a consistent final product.
Melting the Solids
Begin by melting the solids; this includes an emulsifying wax, such as beeswax, which acts as a stabilizer and texture enhancer for the lotion bar. Alongside the wax, incorporate solid butters, like mango butter, that offer rich moisturizing properties. One typically uses a double boiler for this step to gently melt these components together—preventing any burning or degradation of the delicate butters and waxes.
Materials Needed:
Emulsifying wax
Mango butter
Any additional solid oils
Method:
Combine solids in a double boiler.
Heat until fully melted, stirring occasionally.
Incorporating Liquid Ingredients
Once the solids are liquified, it's time to incorporate the liquid ingredients. Add oils, such as coconut or almond oil, which provide additional moisturizing benefits to the skin. Gradually mix in the goat milk, ensuring it has been heated to blend smoothly with the oils. Goat milk should be treated with care to avoid scorching. If using distilled water, add it during this phase to the melted mixture, blending steadily for a homogenous emulsion.
Materials Needed:
Melted base from previous step
Goat milk and/or distilled water
Liquid oils
Method:
Slowly mix in the liquid oils to the melted base.
Carefully add the warm goat milk and distilled water, stirring consistently.
Safety and Preservation

When crafting a goat milk lotion bar, safety is crucial to protect the skin from irritation and spoilage. Preservation ensures that the product stays free from harmful bacteria over time.
Reducing Bacterial Growth
Bacteria can thrive in lotion bars containing water or milk, such as goat milk. To reduce bacterial growth, it's essential to use sterile equipment during the manufacturing process and to incorporate a broad-spectrum preservative like linatural. Linatural is a natural alternative to synthetic preservatives and is effective against a variety of bacteria, yeast, and molds. However, users must ensure correct dosage and thorough incorporation.
Sterilize equipment before use.
Measure the preservative accurately.
Mix preservatives thoroughly.
Choosing and Using Preservatives
Preservatives are a non-negotiable addition to lotion bars with water-based ingredients such as goat milk. A preservative extends the shelf life and ensures the lotion bar does not become a breeding ground for bacteria and fungi. Preservatives should be:
Broad-spectrum: It should protect against bacteria, yeast, and mold.
Compatible: Not all preservatives work with every formulation, so choose one that is effective in the pH range of your lotion bar.
Efficient: Ensure that the chosen preservative is proven to be effective in small concentrations.
Preservative: Linatural
Effective Against: Bacteria, Yeast, Mold
Use-rate: 1-2%
One should follow the manufacturer's instructions for both storage and application to ensure safety and efficacy.
Pouring and Curing

In the creation of goat milk lotion bars, the pouring and curing stages are critical. They ensure that the mixture takes the desired shape and achieves the right consistency for use.
Molding the Lotion Bars
Once the goat milk lotion bar mixture is thoroughly melted and combined, it's time to pour it into containers. Care must be taken to pour the mixture steadily to avoid air bubbles and ensure uniform bars. Containers can be silicone molds specifically designed for lotion bars or any small container that can withstand the warmth of the melted mixture. Pouring at a steady rate helps achieve a smooth finish on the lotion bars.
Curing and Hardening Process
After pouring, the lotion bars must harden. This process involves setting the filled containers in a cool, dry place undisturbed for several hours or until completely solid. Curing times can vary depending on the size of the bars and the ambient temperature. It's essential for the bars to fully harden to hold their shape and deliver the intended skin benefits. Once cured, they can be gently removed from their molds and are ready for use.
Storage and Packaging

When crafting a goat milk lotion bar, the effectiveness and longevity largely depend on ideal storage and packaging. Selecting appropriate containers and proper labeling can effectively preserve the lotion bars' quality and maximize their shelf life.
Selecting the Right Containers
The choice of containers is crucial in safeguarding homemade lotion bars from moisture, air, and light. Size and material are the key considerations. For homemade goat milk lotion bars, one should opt for containers that are just the right size, neither too big allowing excess air, nor too small causing the bars to be cramped. Ideal containers could be metal tins, glass jars, or plastic containers with secure lids. Materials like amber glass can offer additional protection from light, which is especially beneficial for preserving the integrity of the oils within the bars. For those environmentally conscious, biodegradable or reusable containers are excellent choices.
Labeling and Storing the Lotion Bars
Once the lotion bars are sealed in their respective containers, labeling becomes essential. Labels should include the ingredients, batch number, and the date they were made. Transparency is important, especially in case of any allergens or to track shelf life. Store in a cool, dry place away from direct sunlight to prevent melting and degradation of the ingredients. If the lotion bars contain no preservatives, storing them in the refrigerator can prolong their lifespan. For those planning to sell or gift them, labels should also comply with local regulations, including clearly readable ingredient lists and contact information.
Using appropriate containers and labeling allows both homemade and store-bought goat milk lotion bars to retain their natural benefits, ensuring they remain effective and enjoyable for as long as possible.
Additional Tips and Techniques
Creating the perfect goat milk lotion bar requires more than just following a basic recipe. By customizing and troubleshooting, one can ensure their lotion bars not only moisturize dry skin but also cater to individual preferences and skin types.
Customizing Your Lotion Bars
For those looking to tailor their goat milk lotion bars, the addition of essential oils or fragrance oils can provide a personalized scent and may offer additional skin benefits. For example, lavender essential oil is not only calming but can also be suitable for sensitive skin due to its soothing properties. When incorporating oils, one should consider the fatty acid profile, as certain oils can offer more occlusive or emollient effects, which are beneficial for different skin types.
Troubleshooting Common Issues
When issues arise, such as a lotion bar being too greasy or not sufficiently moisturizing, there are practical solutions. For a less greasy feel, one might incorporate a small amount of starch, like arrowroot, to absorb excess oil. If a bar is not moisturizing enough, adjusting the ratio of oils, potentially increasing those with higher fatty acid content, can improve the bar's hydrating properties. Always keep in mind that sensitive skin may react differently to adjustments, requiring more cautious changes and testing.
Benefits of DIY Skincare
Exploring the realm of DIY skincare provides enthusiasts with a sense of empowerment and a closer connection to natural living. One crafts products like lotion bars tailored to individual skin needs while often finding substantial savings in their budget.
DIY vs. Commercial Products
Homemade skincare products offer numerous advantages over their commercial counterparts. Firstly, they give consumers complete control over the ingredients, enabling a person to avoid chemicals and preservatives that can cause skin irritations or allergic reactions. A DIY goat milk lotion bar, for example, can be made using simple, skin-loving components such as shea butter and almond oil, ingredients known for their moisturizing properties and suitability for sensitive skin.
Additionally, homemade beauty preparations can be more budget-friendly. Store-bought products often have high markups to cover marketing and packaging costs. In contrast, creating a DIY lotion bar involves purchasing raw ingredients, which, when bought in bulk, can lead to significant cost savings over time.
Promoting Natural Living
DIY skincare aligns perfectly with a natural living lifestyle. Crafting your own beauty products at home encourages a connection to the origin of ingredients and more sustainable practices. For instance, someone might use organic goat milk from a local farm, supporting local agriculture and reducing the environmental impact associated with transporting goods.
Moreover, engaging in DIY beauty product creation decreases dependency on commercially produced items, fostering a more self-sufficient and mindful approach to personal care. It also opens up the possibility to customize skincare routines that respect the body's natural rhythms and promote holistic wellness.
Supporting Information and Resources
For those interested in crafting their own goat milk lotion bars, a wealth of resources is available. From detailed books and blogs offering intricate recipes to YouTube channels filled with visual step-by-step guides, enthusiasts can find multiple platforms to enhance their knowledge and skills.
Books and Blogs to Learn More
Books: They can turn to Amazon for a variety of books on homemade skincare and lotion bar recipes. These books often provide in-depth knowledge about ingredients, techniques, and offer step-by-step guides.
Blogs: Blogs are crucial for learning and inspiration, and they usually offer more than just recipes. For example, Heart's Content Farmhouse offers a Goat Milk Lotion Bar Recipe with precise measurements and clear instructions.
Following Expert YouTubers and DIY Enthusiasts
YouTube Channels: Visually engaging YouTube channels like The Rustic Elk feature Homemade Goat Milk Lotion Recipes and can help viewers understand the process through video demonstrations.
DIY Enthusiasts: Connecting with DIY enthusiasts on social media and forums also facilitates a rich exchange of tips and experiences necessary for perfecting the art of making lotion bars.
