
Fresh vs. Frozen Berries: Crafting the Perfect Pie Filling

Baking a delicious berry pie doesn't require waiting for fresh berries to come into season. Both fresh and frozen berries can produce excellent results in pie recipes, allowing bakers to enjoy berry pies year-round. Frozen berries offer convenience and consistency, while fresh berries provide a vibrant flavor when in season.
Using frozen berries in pie recipes is a practical option that saves time and effort. These berries are typically picked at peak ripeness and flash-frozen, preserving their nutrients and flavor. Frozen berries also tend to hold their shape better during baking, resulting in a pie with a more uniform texture and appearance.
Fresh berries, when available, can add a special touch to pies with their bright flavors and juicy texture. They often require less baking time and may produce a slightly different consistency in the finished pie. Whether opting for fresh or frozen, berry pies remain a beloved dessert that showcases the natural sweetness and vibrant colors of raspberries, blueberries, blackberries, and strawberries.
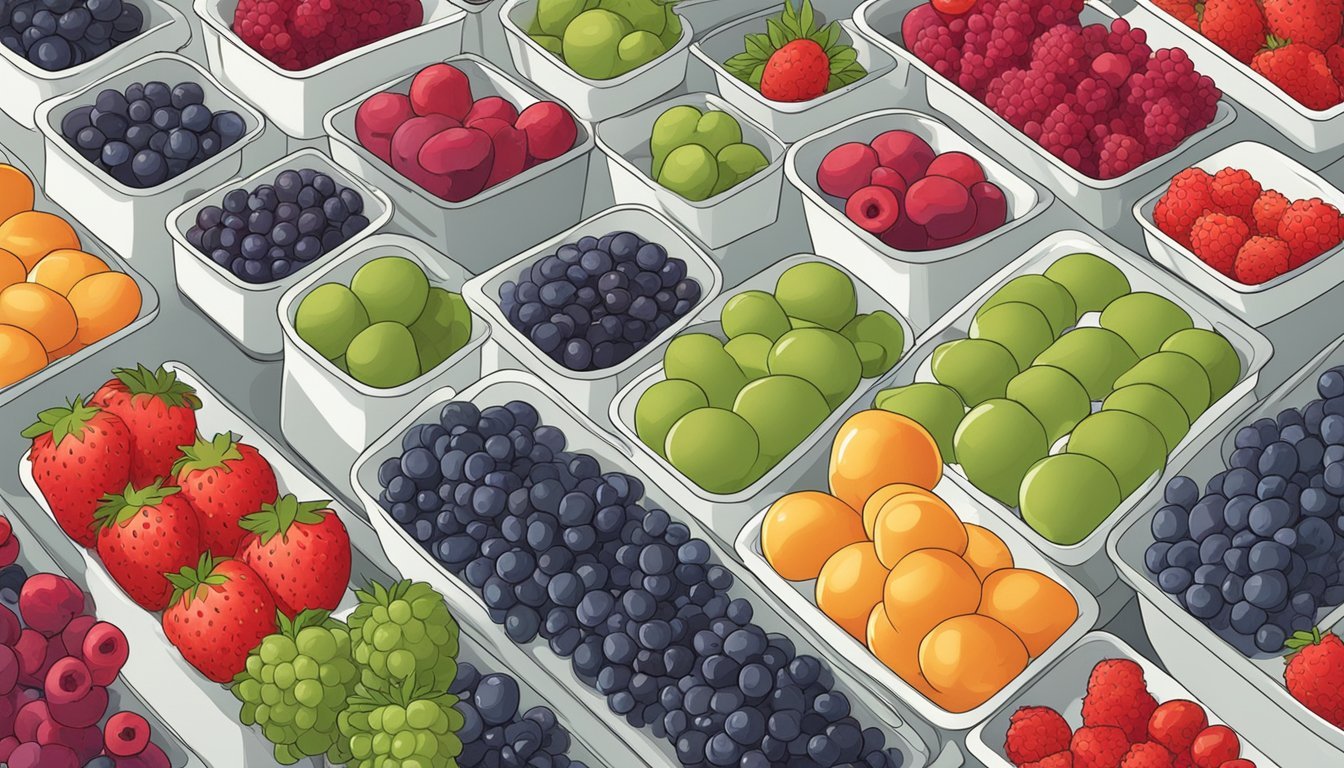
Choosing Berries for Your Pie

Selecting the right berries is crucial for creating a delicious pie. Both fresh and frozen options offer unique advantages, while different varieties contribute distinct flavors and textures.
Benefits of Fresh Berries
Fresh berries provide vibrant flavors and appealing textures in pies. They retain their shape well during baking, creating attractive slices. Strawberries, blueberries, raspberries, and blackberries are popular fresh choices.
Fresh berries allow bakers to inspect quality before purchasing. This ensures only the best fruit goes into the pie. Seasonal fresh berries often have superior taste compared to out-of-season options.
Using fresh berries supports local farmers and promotes sustainability when bought in season. They're ideal for showcasing in open-topped pies or galettes where appearance matters.
Advantages of Frozen Berries
Frozen berries offer convenience and year-round availability. They're picked at peak ripeness and flash-frozen, preserving nutrients and flavor. This makes them a reliable choice for consistent pie quality.
Frozen berries are often more affordable, especially when fresh berries are out of season. They come pre-washed and ready to use, saving preparation time. Frozen berries release more juice during baking, creating a juicier filling.
Mixed berry blends are readily available in frozen form, offering a variety of flavors in one package. Frozen berries work well in double-crust pies where appearance is less critical.
Berry Variety Considerations
Different berry varieties contribute unique characteristics to pies. Blueberries offer a sweet-tart flavor and hold their shape well. Raspberries provide a tangy taste and break down easily, creating a smooth texture.
Blackberries add a bold, slightly tart flavor and create a deep purple hue. Strawberries bring sweetness and a bright red color to pies. Combining berry types can create complex flavor profiles and interesting textures.
Consider the sugar content when selecting berries. Sweeter varieties like strawberries may require less added sugar, while tart berries like raspberries might need more. The chosen variety also affects thickening requirements for the filling.
Preparing the Berries
Proper berry preparation is crucial for achieving the perfect pie filling texture and flavor. The process differs slightly depending on whether you use fresh or frozen fruit.
Washing and Handling Fresh Berries
Start by gently rinsing fresh berries under cool water. Use a colander to strain them, then pat dry with paper towels. Remove any stems, leaves, or damaged fruit.
For strawberries, hull and slice them into quarters or halves depending on size. Leave smaller berries like blueberries and raspberries whole.
Toss the berries with sugar and a splash of lemon juice. The sugar draws out juices, while lemon enhances flavor and helps thicken the filling. Let the mixture sit at room temperature for 30 minutes to macerate.
Thawing and Draining Frozen Berries
Place frozen berries in a colander set over a bowl. Allow them to thaw at room temperature for about 30 minutes. Gently shake the colander occasionally to help drain excess liquid.
Once thawed, transfer the berries to a mixing bowl. Add sugar and lemon juice, stirring gently to combine. Let the mixture sit for 15-20 minutes to release more juices.
To thicken the filling, sprinkle cornstarch or tapioca starch over the berries. Stir carefully to coat evenly without crushing the fruit. This step helps absorb excess moisture and prevents a runny pie filling.
Creating the Perfect Pie Crust

A great pie crust is the foundation of any delicious berry pie. The right crust provides a flaky, buttery contrast to the sweet fruit filling.
Homemade Pie Crust Essentials
To make a homemade pie crust, start with cold ingredients. Use chilled butter, cut into small cubes. Combine flour and salt in a large bowl. Cut the butter into the flour mixture until it resembles coarse crumbs.
Add ice water gradually, mixing until the dough just comes together. Don't overwork the dough, as this can make it tough. Form the dough into a disk, wrap in plastic, and chill for at least 30 minutes.
When rolling out the dough, use a lightly floured surface. Roll from the center outward, rotating the dough to ensure even thickness. For a flaky texture, some bakers incorporate a small amount of shortening along with the butter.
Using Store-Bought Crusts
Store-bought pie crusts offer convenience and consistency. Look for all-butter crusts in the refrigerated section for best flavor. Allow the crust to come to room temperature before unrolling to prevent cracking.
To enhance store-bought crusts, brush with an egg wash before baking for a golden sheen. For added flavor, sprinkle the crust with sugar or cinnamon before adding the filling.
Some bakers prefer to par-bake store-bought crusts to ensure a crisp bottom. Simply line the crust with parchment and fill with pie weights or dried beans, then bake for 10-15 minutes before adding the berry filling.
Making the Pie Filling
Creating the perfect pie filling involves balancing flavors and textures. The key is selecting quality ingredients and using proper techniques to achieve the ideal consistency.
Combining the Right Ingredients
Start with 4-5 cups of berries, fresh or frozen. Mix them in a large bowl with 1/2 to 3/4 cup granulated sugar, depending on desired sweetness. Add 2-3 tablespoons of lemon juice to enhance flavor and preserve color.
For frozen berries, thaw and drain excess liquid before use. This prevents a watery filling. Fresh berries can be used straight away.
Gently fold ingredients together to avoid crushing the fruit. This maintains the berries' shape and ensures a juicy filling.
Sweetness and Thickening Agents
Adjust sugar levels based on berry tartness. Taste test before adding to the crust. For a thicker filling, use 1/4 to 1/3 cup cornstarch. Mix it with the sugar before adding to berries to prevent clumping.
Cook the berry mixture in a saucepan over medium heat for 5-10 minutes. Stir gently until it thickens to a jam-like consistency. Remove from heat and let cool slightly.
For a richer flavor, add 1-2 tablespoons of butter to the warm filling. This creates a silky texture and enhances the buttery taste. Pour the mixture into the prepared crust and smooth the top.
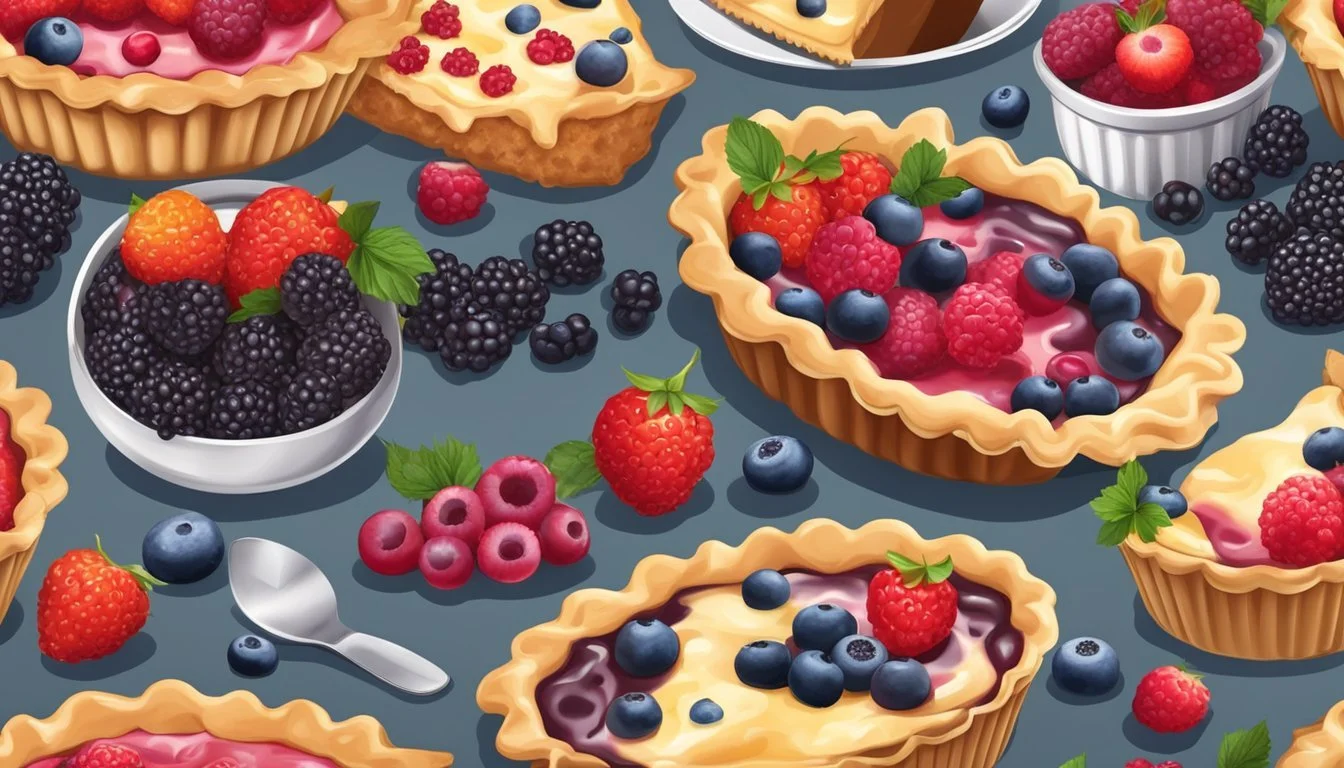
Assembling the Pie

Assembling a berry pie involves carefully layering the filling and creating an attractive top crust. Proper assembly ensures even baking and an appealing presentation.
Layering the Filling and Crust
Place the bottom crust in a 9-inch pie dish, gently pressing it into the corners. Trim excess dough, leaving a small overhang. Pour the prepared berry filling into the crust, spreading it evenly.
For a double-crust pie, cover the filling with the second crust. Trim and crimp the edges to seal. Cut several slits in the top to allow steam to escape during baking.
Place the assembled pie on a baking sheet to catch any drips. This makes cleanup easier and prevents oven messes.
Creating Lattice and Other Top Crust Designs
A lattice design adds visual appeal to berry pies. Cut the top crust into strips and weave them over the filling. Alternately lay strips horizontally and vertically, lifting every other strip to create the woven pattern.
For decorative touches, use small cookie cutters to cut shapes from the dough. Arrange these on top of a solid upper crust or between lattice strips.
Brush the top crust with an egg wash (beaten egg mixed with a little water) for a golden sheen. Sprinkle with coarse sugar if desired for extra crunch and sparkle.
Baking Techniques
Proper baking techniques are crucial for achieving the perfect berry pie. The right oven temperature, placement, and methods ensure even cooking and a delicious result.
Oven Temperature and Placement
Preheat the oven to 375 degrees Fahrenheit for optimal berry pie baking. This temperature allows the crust to become golden brown while thoroughly cooking the filling.
Place the pie on the middle rack of the oven. This position promotes even heat distribution and prevents burning.
For pies with frozen berries, bake with an open lattice top or no top at all. This allows excess moisture to evaporate during cooking.
Ensuring Even Baking
To prevent over-browning, cover the edges of the pie crust with aluminum foil. Remove the foil during the last 15-20 minutes of baking to achieve a golden color.
Check the pie's progress through the oven window rather than opening the door frequently. This maintains a consistent temperature and prevents heat loss.
Look for bubbling fruit filling and a golden-brown crust as signs of doneness. The filling should thicken as it cools.
Allow the pie to cool on a wire rack for at least 2-3 hours before serving. This helps the filling set properly and makes slicing easier.
After Baking

Properly handling a berry pie after baking is crucial for optimal texture and flavor. The cooling process allows the filling to set, while thoughtful serving enhances the overall experience.
Cooling and Setting
Once the pie is removed from the oven, allow it to cool completely on a wire rack. This process typically takes 2-3 hours. Cooling is essential for the filling to thicken and set properly. During this time, the starches in the filling continue to absorb moisture, helping the pie hold its shape when sliced.
Avoid cutting into the pie too soon, as the filling will be runny and may not hold together well. Patience pays off with cleaner slices and a more satisfying texture.
For faster cooling, place the pie in front of a fan on low speed. However, avoid refrigerating the pie immediately, as this can lead to a soggy crust.
Serving Suggestions
Once cooled, serve the berry pie at room temperature or slightly warm. To reheat, place individual slices in a 350°F oven for 5-10 minutes.
Enhance the pie with complementary toppings:
A scoop of vanilla ice cream
Fresh whipped cream
A dusting of powdered sugar
A drizzle of warm caramel sauce
For a breakfast treat, serve a small slice alongside yogurt and granola. Leftover pie can be stored at room temperature for 2 days or refrigerated for up to 5 days. Cover loosely with foil to prevent the crust from becoming soggy.
To freeze, wrap the cooled pie tightly in plastic wrap and aluminum foil. It will keep for up to 3 months. Thaw overnight in the refrigerator before serving.
Storing and Preservation
Proper storage methods are crucial for maintaining the quality and safety of berry pies. Freezing offers a convenient option for long-term preservation, allowing families to enjoy homemade pies even out of season.
Proper Storage Methods
Berry pies can be stored at room temperature for 1-2 days if covered properly. For longer storage, refrigeration is recommended. Cover the pie tightly with plastic wrap or tinfoil to prevent moisture loss and contamination. In the refrigerator, berry pies can last up to 4 days.
For mixed berry pies, ensure they cool completely before storage to prevent condensation. This helps maintain the integrity of the crust and filling. If serving within a day, keep the pie at room temperature, covered with a clean kitchen towel.
Freezing and Reheating
Freezing is an excellent option for preserving berry pies for up to 4 months. To freeze, allow the pie to cool completely. Wrap it tightly in plastic wrap, then in tinfoil to prevent freezer burn. Label with the date and contents.
To reheat a frozen berry pie, preheat the oven to 350°F (175°C). Remove the wrapping and place the pie on a baking sheet. Bake for 30-40 minutes or until heated through. Cover the edges with tinfoil if they start to brown too quickly.
For best results, freeze whole pies rather than individual slices. This method helps preserve the structure and flavor of the pie, making it a convenient option for families to enjoy homemade desserts anytime.
Additional Berry Pie Variations
Berry pies offer endless possibilities for customization and creativity. Bakers can experiment with different combinations of fruits, crusts, and dietary accommodations to create unique and delicious desserts.
Gluten-Free and Vegan Options
Gluten-free berry pies use alternative flours like almond, coconut, or gluten-free all-purpose blends for the crust. These options provide a crisp texture and nutty flavor that complements the berries. Vegan berry pies replace butter with plant-based alternatives such as coconut oil or vegan margarine. Chia seeds or cornstarch can substitute eggs as a thickener for the filling.
To sweeten vegan pies, bakers often use maple syrup, agave nectar, or coconut sugar instead of traditional white sugar. These alternatives add depth to the flavor profile while maintaining the pie's sweetness.
Seasonal and Exotic Berry Pies
Seasonal berry pies showcase the best fruits available throughout the year. Spring pies might feature strawberry-rhubarb combinations, while summer brings classics like blueberry and blackberry. Fall and winter pies can incorporate cranberries or lingonberries for a tart twist.
Exotic berry pies introduce unique flavors to traditional recipes. Boysenberry pie offers a complex taste, combining raspberry and blackberry notes. Gooseberry pie provides a tangy contrast to sweeter berries. Acai or goji berries can be mixed with more familiar fruits for antioxidant-rich desserts.
Bumbleberry pie, a Canadian favorite, typically includes a mix of strawberries, raspberries, blueberries, and blackberries. This variety allows bakers to use whatever berries are in season or readily available.
Share Your Creations

Baking a mixed berry pie is an accomplishment worth celebrating. Snap a photo of your creation and share it on social media platforms to inspire others.
Facebook provides an ideal space to post pie pictures and recipes. Join baking groups to connect with fellow pie enthusiasts and exchange tips.
Instagram's visual focus makes it perfect for showcasing your pie's vibrant colors and intricate lattice work. Use relevant hashtags like #mixedberrypie or #homemadepie to increase visibility.
Pinterest allows you to create boards dedicated to pie recipes and decorating ideas. Pin your own creations alongside other inspiring pies for a comprehensive collection.
Consider starting a baking blog to document your pie-making journey. Share detailed recipes, step-by-step photos, and personal anecdotes about your experiences with fresh and frozen berries.
Encourage your followers to try the recipe and share their results. This fosters a sense of community and provides valuable feedback on your pie-making techniques.
Remember to credit any recipe sources you've used and tag the original creators when sharing adaptations of their work.
