
How to Cook Dried Chickpeas
From Soaking to Perfectly Tender
Dried chickpeas are a versatile and nutritious legume that can elevate many dishes. These small, beige spheres pack a powerful punch of protein, fiber, and essential nutrients, making them a favorite among health-conscious eaters, vegans, and vegetarians alike. Cooking dried chickpeas from scratch allows for better control over texture and flavor, resulting in superior taste and quality compared to canned varieties.
The process of preparing dried chickpeas involves soaking and simmering. While it may seem time-consuming, the end result is well worth the effort. Soaking helps soften the beans and reduces cooking time, while proper simmering ensures tender, flavorful chickpeas ready to be used in a variety of recipes.
From creamy hummus to hearty soups and crispy roasted snacks, chickpeas offer endless culinary possibilities. By mastering the art of cooking dried chickpeas, home cooks can unlock a world of delicious and nutritious meals that cater to various dietary preferences and needs.
Benefits of Cooking Dried Chickpeas

Cooking dried chickpeas offers numerous advantages for health-conscious and budget-minded individuals. These versatile legumes provide exceptional nutritional value and culinary flexibility.
Economic and Nutritional Advantages
Dried chickpeas are significantly cheaper than their canned counterparts. A small bag can yield several servings, making them an economical choice for families and meal preppers.
Nutritionally, dried chickpeas shine. They boast higher levels of protein, fiber, and essential minerals compared to canned varieties. The absence of added preservatives makes them a natural, wholesome option for health-focused diets.
Vegans and vegetarians particularly benefit from dried chickpeas' protein content. A single cup provides nearly 15 grams of plant-based protein, supporting muscle health and satiety.
Texture and Flavor Benefits
Home-cooked dried chickpeas offer superior texture. When properly prepared, they become tender yet maintain a pleasant bite, avoiding the mushy consistency sometimes found in canned versions.
The cooking process allows for flavor infusion. Adding herbs, spices, or aromatics to the cooking water enhances the chickpeas' taste. This customization is not possible with pre-cooked canned options.
Dried chickpeas absorb flavors more effectively in recipes. Their fresher, cleaner taste serves as an excellent base for hummus, falafel, and various Mediterranean dishes.
Preparing Dried Chickpeas
Proper preparation is key to achieving perfectly cooked chickpeas. Soaking dried chickpeas helps reduce cooking time and improves digestibility. There are two main methods for soaking: quick soak and traditional overnight soak.
Soaking Methods
Soaking chickpeas softens them and reduces cooking time. It also helps remove some of the compounds that can cause digestive discomfort. Always start by sorting through the chickpeas to remove any debris or damaged beans.
Rinse the chickpeas thoroughly under cool running water. Place them in a large bowl or pot, as the chickpeas will expand during soaking. Add enough water to cover the chickpeas by at least 2 inches.
For every cup of dried chickpeas, use 3 cups of water. This ensures they have enough space to expand fully.
Quick Soak Method
The quick soak method is ideal when time is limited. Place rinsed chickpeas in a large pot and cover with water. Bring the water to a boil over high heat.
Let the chickpeas boil for 2 minutes. Remove the pot from heat, cover it, and let the chickpeas soak for 1 hour.
After soaking, drain and rinse the chickpeas. They are now ready for cooking. This method is convenient but may result in slightly less evenly cooked chickpeas compared to the overnight method.
Traditional Overnight Soak
The overnight soak is the most effective method for preparing dried chickpeas. Place rinsed chickpeas in a large bowl and cover with water. Let them soak at room temperature for 8-12 hours or overnight.
Chickpeas will double in size, so ensure there's enough water. After soaking, drain and rinse the chickpeas thoroughly.
This method produces the most consistently textured chickpeas. It's ideal for planning ahead and yields beans that cook more evenly. The extended soak also makes the chickpeas more digestible.
Cooking Techniques
Dried chickpeas can be transformed into tender, flavorful legumes using various cooking methods. Each technique offers unique advantages in terms of time, texture, and convenience.
Stovetop Simmering
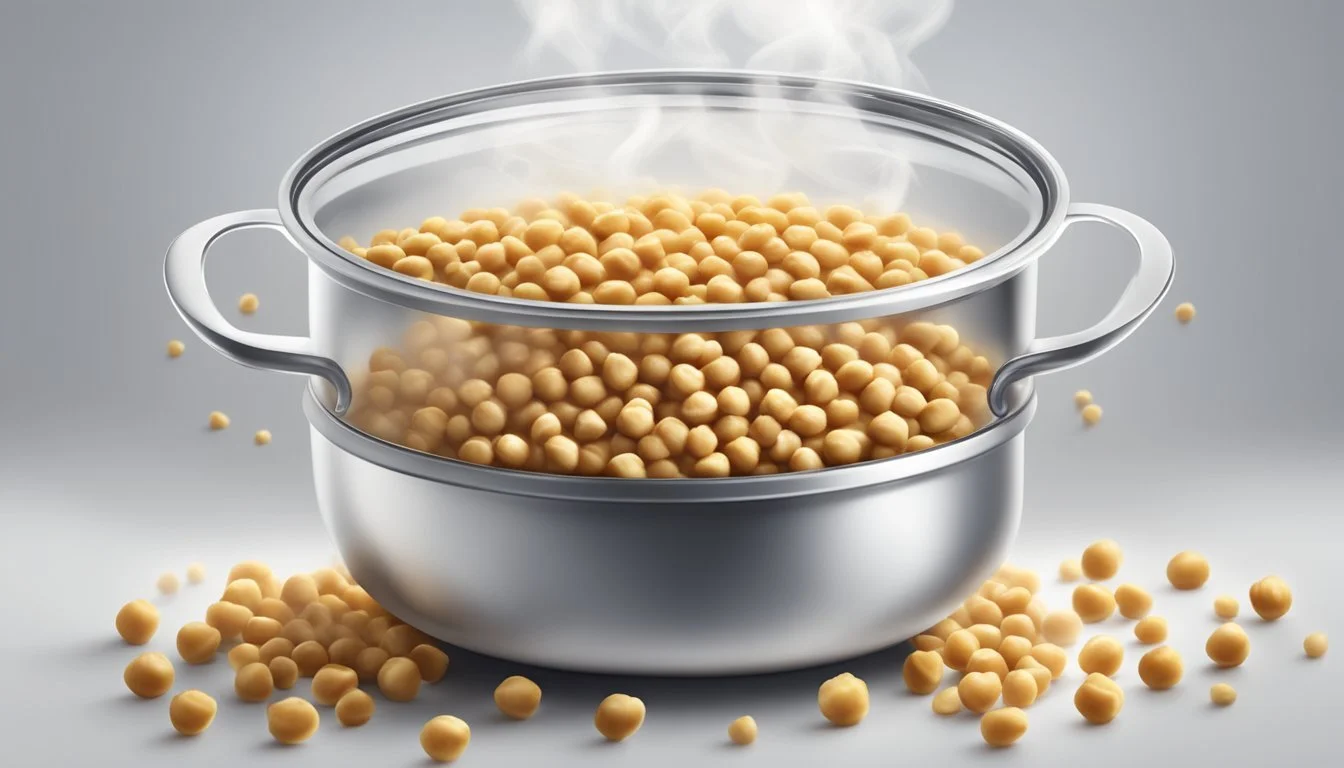
Simmering chickpeas on the stovetop is a traditional and reliable method. Start by soaking the dried chickpeas overnight or for at least 8 hours. Drain and rinse the soaked chickpeas, then place them in a large pot. Cover with fresh water, ensuring the chickpeas are submerged by several inches.
Bring the water to a boil, then reduce heat to maintain a gentle simmer. Cook for 1.5 to 2 hours, stirring occasionally. Add more water if needed to keep the chickpeas covered. Test for doneness by squeezing a chickpea between your fingers - it should be soft and easily mashed.
For added flavor, consider adding aromatics like garlic, bay leaves, or onions to the cooking water. Once cooked, drain the chickpeas and they're ready to use in various recipes.
Using a Pressure Cooker
A pressure cooker significantly reduces cooking time for dried chickpeas. Soak the chickpeas overnight or use the quick-soak method. Drain and rinse, then add to the pressure cooker with fresh water, covering by about 2 inches.
Lock the lid and cook at high pressure for 12-15 minutes for soaked chickpeas, or 35-40 minutes for unsoaked. Allow natural pressure release for 10 minutes, then manually release remaining pressure.
The cooking time may vary slightly depending on the chickpea freshness and desired tenderness. Always consult your pressure cooker's manual for specific instructions and safety guidelines.
Slow Cooker Method
The slow cooker offers a hands-off approach to cooking dried chickpeas. Place soaked chickpeas in the slow cooker and cover with water or broth, adding about 2 inches above the chickpeas. Set the slow cooker to low and cook for 6-8 hours, or on high for 3-4 hours.
This method is ideal for those who want to start the cooking process in the morning and return to perfectly cooked chickpeas in the evening. The slow, gentle cooking produces chickpeas with a creamy texture.
Check the chickpeas periodically and add more liquid if needed. Once tender, drain and use as desired in your favorite recipes.
Instant Pot Technique
The Instant Pot combines the speed of a pressure cooker with the convenience of a slow cooker. For soaked chickpeas, add them to the Instant Pot with water or broth. Use a 1:3 ratio of chickpeas to liquid. Set to high pressure for 12 minutes, followed by a 10-minute natural release.
For unsoaked chickpeas, increase the cooking time to 35-40 minutes. The Instant Pot's pressure cooking function ensures evenly cooked chickpeas with minimal effort.
After cooking, allow the pressure to release naturally for 10 minutes, then manually release any remaining pressure. Drain the chickpeas and they're ready to use in salads, hummus, or other dishes.
Post-Cooking Processes

After cooking dried chickpeas, proper storage and preservation techniques ensure their longevity and convenience for future use. These methods allow you to enjoy your homemade chickpeas for extended periods.
Storing Cooked Chickpeas
Cooked chickpeas can be refrigerated for short-term use. Allow them to cool completely before transferring to an airtight container. Store the chickpeas in their cooking liquid to maintain moisture and prevent drying out.
Refrigerated chickpeas typically last 3-5 days. For optimal freshness, use within the first 2-3 days. Always check for signs of spoilage before consuming.
If you plan to use the chickpeas within a day, draining and storing them dry is acceptable. This method works well for salads or recipes requiring dry chickpeas.
Freezing for Long-Term Use
Freezing cooked chickpeas extends their shelf life significantly. Drain the chickpeas and spread them on a parchment-lined baking sheet. Place the sheet in the freezer for 1-2 hours until the chickpeas are frozen solid.
Transfer the frozen chickpeas to freezer-safe bags or containers. Remove as much air as possible to prevent freezer burn. Label the containers with the date and contents.
Frozen chickpeas can last up to 6 months. To use, thaw in the refrigerator overnight or add directly to hot dishes. Frozen chickpeas may have a slightly softer texture when thawed.
Converting to Homemade Canned Chickpeas
Creating homemade canned chickpeas allows for long-term storage without freezing. This process requires proper canning equipment and techniques to ensure food safety.
Sterilize canning jars and lids in boiling water. Fill jars with cooked chickpeas, leaving 1 inch of headspace. Add hot cooking liquid or fresh boiling water, maintaining the 1-inch headspace.
Remove air bubbles and wipe jar rims clean. Place lids and bands on jars, tightening to fingertip-tight. Process in a pressure canner according to manufacturer's instructions, typically 75 minutes for pints and 90 minutes for quarts.
Properly canned chickpeas can last up to a year when stored in a cool, dark place. Always inspect cans for signs of spoilage before use.
Advanced Cooking Tips
Mastering dried chickpea preparation involves key techniques for optimal texture, flavor, and digestibility. These tips elevate your chickpea dishes to new levels of culinary excellence.
Achieving Desired Tenderness
Add 1/4 teaspoon of baking soda per cup of dried chickpeas during cooking. This alkaline ingredient softens the skins, promoting even cooking and a creamier texture.
Conduct regular taste tests throughout the cooking process. This ensures you achieve the perfect tenderness without overcooking.
For firmer chickpeas ideal for salads, reduce cooking time slightly. For a softer consistency suitable for hummus, extend the cooking duration.
Use a pressure cooker to significantly reduce cooking time while maintaining texture integrity.
Enhancing Flavor
Replace plain water with vegetable or chicken broth for a richer taste profile. This infuses the chickpeas with depth and complexity.
Add aromatics like bay leaves, garlic cloves, or a quartered onion to the cooking liquid. These impart subtle flavors without overpowering the chickpeas.
Experiment with herb bundles. Tie together thyme, rosemary, and parsley with kitchen twine and add to the pot during cooking.
Season the cooking water with salt in the last 20 minutes of cooking. This prevents tough skins while still allowing flavor absorption.
Reducing Digestive Issues
Thoroughly rinse chickpeas before and after soaking to remove excess starch and reduce gas-causing compounds.
Skim off any foam that forms during cooking. This foam contains oligosaccharides that can cause digestive discomfort.
Consider adding a strip of kombu seaweed to the cooking water. It contains enzymes that break down complex sugars, making chickpeas more digestible.
Gradually introduce chickpeas into your diet to allow your digestive system to adapt. Start with small portions and increase slowly over time.
Chickpea Recipes and Variations
Cooked chickpeas offer endless culinary possibilities. From creamy dips to hearty stews, these versatile legumes shine in a variety of dishes across cuisines.
Hummus and Dips
Hummus reigns as the most popular chickpea-based dip. To make classic hummus, blend cooked chickpeas with tahini, lemon juice, garlic, and olive oil until smooth. Experiment with add-ins like roasted red peppers, sun-dried tomatoes, or herbs for flavor variations.
For a twist, try making chickpea-based baba ganoush by combining mashed eggplant with chickpeas. Another option is chickpea guacamole, incorporating mashed avocado for a protein-packed dip.
Serve these dips with fresh vegetables, pita bread, or crackers for a satisfying snack or appetizer.
Soups and Stews
Chickpeas add protein and texture to soups and stews. A classic chickpea soup combines the legumes with vegetables, herbs, and broth for a comforting meal.
For a heartier option, try Spanish garbanzo bean stew with chorizo and spinach. Middle Eastern-inspired chickpea and lentil soup offers a nutritious, filling dish perfect for cooler weather.
Chickpeas also work well in vegetarian chili recipes, providing a meaty texture without the meat. Add them to minestrone or pasta e fagioli for an Italian-inspired meal.
Salads and Sides
Chickpeas make excellent additions to salads, providing protein and fiber. Toss cooked chickpeas with chopped vegetables, feta cheese, and a lemon vinaigrette for a quick Greek-inspired salad.
For a warm side dish, sauté chickpeas with garlic, olive oil, and spinach. Season with lemon juice and red pepper flakes for extra flavor.
Chickpea tabbouleh offers a protein-packed twist on the traditional bulgur wheat version. Mix chopped parsley, tomatoes, and onions with cooked chickpeas and a lemon-olive oil dressing.
Baking with Chickpeas
Chickpea flour, also known as besan, is a versatile gluten-free flour option. Use it to make savory pancakes or flatbreads like socca from Southern France.
For a sweet treat, try chickpea blondies. Blend chickpeas with nut butter, honey, and chocolate chips for a healthier dessert option.
Chickpea meringue, made from aquafaba (chickpea cooking liquid), serves as a vegan alternative to egg whites in baking recipes.
Snacking Options
Roasted chickpeas make a crunchy, satisfying snack. Toss cooked chickpeas with olive oil and your choice of seasonings, then bake until crispy. Try flavors like salt and vinegar, ranch, or cinnamon sugar.
Falafel, deep-fried chickpea patties, are a popular Middle Eastern street food. Serve in pita bread with tahini sauce and fresh vegetables for a complete meal.
For a no-cook option, mash chickpeas with avocado, lemon juice, and herbs for a quick sandwich spread or dip.
Alternatives to Dried Chickpeas
Dried chickpeas aren't always the most practical option. Fortunately, there are convenient alternatives that can save time and effort in the kitchen.
Using Canned Chickpeas
Canned chickpeas offer a quick and easy substitute for dried ones. They come pre-cooked and ready to use, eliminating the need for soaking and long cooking times.
One 15-ounce can of drained and rinsed chickpeas equals about 1 cup of dried chickpeas. The texture may be slightly softer than home-cooked dried chickpeas.
While convenient, canned chickpeas often contain added sodium and preservatives. Rinsing them thoroughly can help reduce sodium content.
Some chefs prefer the flavor and texture of dried chickpeas, but canned versions work well in many recipes like salads, dips, and soups.
Comparing Bulk and Packaged Options
Bulk bin chickpeas offer advantages over pre-packaged varieties. They're often fresher and allow buyers to purchase exact amounts needed.
Bulk bins may have higher turnover rates, ensuring newer stock. This can result in beans that cook more evenly and have better texture.
Pre-packaged dried chickpeas provide consistency and convenience. They typically have longer shelf lives and are readily available in most stores.
Quality can vary between brands, so it's worth experimenting to find preferred options. Proper storage in airtight containers helps maintain freshness for both bulk and packaged chickpeas.
Health and Nutrition
Chickpeas offer an impressive array of nutrients and health benefits. They provide essential vitamins, minerals, and plant-based protein while being naturally low in fat and cholesterol-free.
Nutritional Profile of Chickpeas
Chickpeas are nutrient-dense legumes packed with protein and fiber. A 1-cup serving of cooked chickpeas contains approximately 15 grams of protein and 13 grams of dietary fiber. They are an excellent source of folate, manganese, copper, and iron.
Chickpeas also provide significant amounts of:
Potassium
Magnesium
Zinc
Vitamin B6
The high fiber content aids digestion and helps promote feelings of fullness. Their low glycemic index makes them a smart choice for blood sugar management.
Incorporating Chickpeas into a Healthy Diet
Chickpeas are versatile and can easily be added to many dishes. They work well in salads, soups, stews, and curries. Roasted chickpeas make a crunchy, nutritious snack.
Some simple ways to enjoy chickpeas:
Add to green salads for extra protein
Blend into hummus for a healthy dip
Use in place of meat in vegetarian dishes
Toss into pasta or grain bowls
Chickpeas can help increase overall nutrient intake as part of a balanced diet. Their protein and fiber content promotes satiety, which may aid in weight management when substituted for higher-calorie foods.
