
The Ultimate Guide to Using a Grain Mill
Mastering Homemade Flour Production on Your Homestead
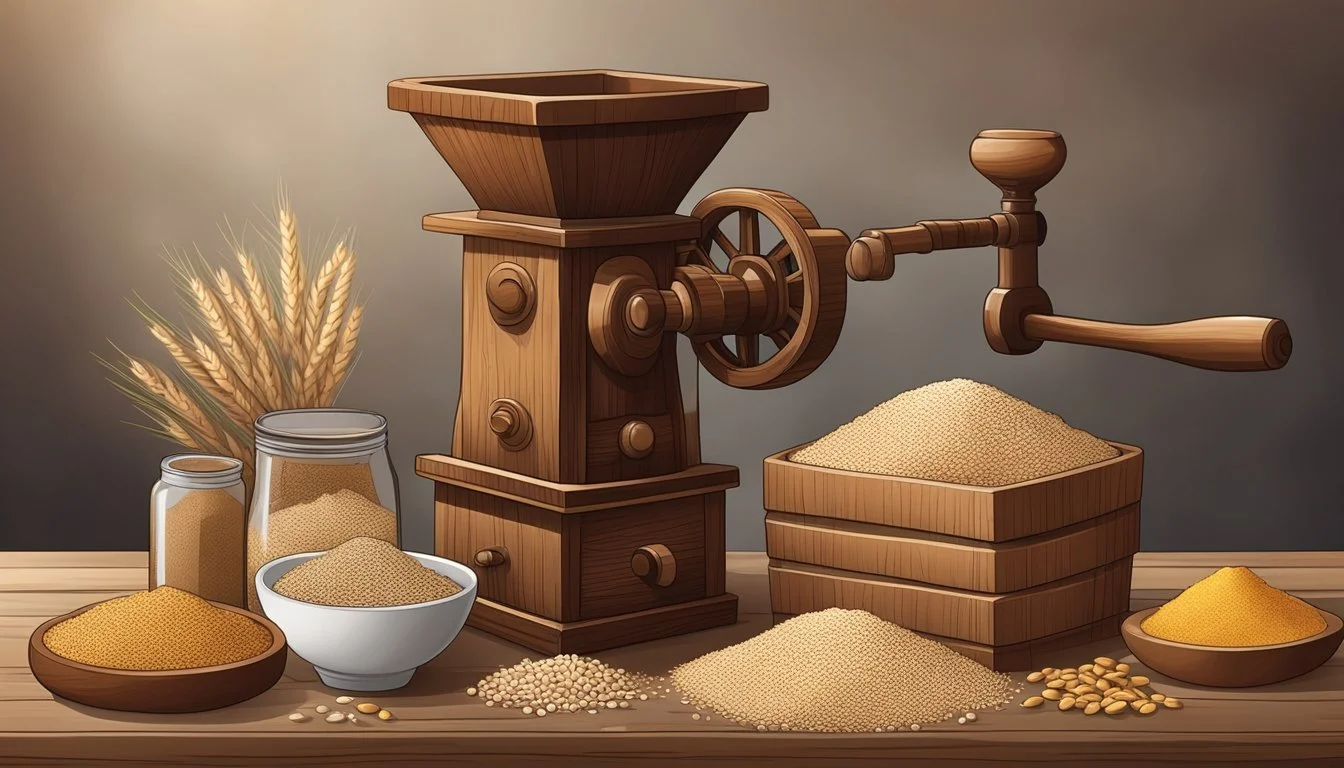
A grain mill is a valuable tool for homesteaders aiming to produce their own flour from various types of grains, such as wheat berries. These devices transform whole grains into fresh flour, preserving nutrients and allowing for control over the consistency and purity of the final product. Whether baking bread, crafting pastries, or preparing wholesome meals, freshly milled flour offers a level of freshness that store-bought varieties often lack.
Modern homesteaders have a range of grain mills to choose from, encompassing both manual and electric designs. Manual grain mills bring a hands-on approach to milling and are often more affordable, while electric grain mills offer convenience and speed. Users pour grains into the mill's hopper, and through either manual cranking or the push of a button, grains are ground into flour. The type of mill chosen—be it an impact mill with fast-moving steel heads or a stone mill that crushes grains between two stones—impacts the texture and temperature of the flour, thus potentially affecting its taste and baking properties.
Using a grain mill effectively requires some learning and adaptation. Understanding the various settings allow homesteaders to achieve the desired flour coarseness, from fine to coarse. Some mills are adept at processing a wider variety of grains, including oily or moist varieties, which provides more versatility in homestead cooking and baking. With the right grain mill, homesteaders can unlock the full potential of their harvest, turning a simple grain into a multitude of wholesome, nourishing possibilities.
The Importance of Grinding Grains on Your Homestead
Grinding grains into flour on a homestead provides numerous benefits, from enhancing the flavor and nutritional content of homemade baked goods to promoting cost-effectiveness and self-sufficiency.
Benefits of Freshly Milled Flour
Freshly milled flour retains the original oils, flavors, and textures that can be lost in commercially processed flours. Homesteaders often find that flour ground at home offers a more robust taste and texture in baking, leading to superior end products.
Nutritional Advantages of Home-milled Grains
When one mills grains at home, it ensures the retention of maximum nutritional value. The entire grain, including the germ, bran, and endosperm, is used, preserving essential vitamins, minerals, and proteins. In contrast, store-bought flours are often stripped of these components during processing.
Flavor and Quality in Homemade Breads and Baking
Flour milled on the homestead is frequently prized for its impact on flavor and overall quality in baked goods. The freshness contributes to a noticeable improvement in taste and structure in products like breads, pastas, and cakes, which is often unachievable with store-bought options.
Cost-Effectiveness and Self-Sufficiency
The initial investment in a grain mill can save money in the long term by reducing reliance on commercially milled flours which continually rise in cost. Additionally, milling at home contributes to a lifestyle of self-sufficiency, allowing homesteaders to produce their own staple ingredients.
Types of Grain Mills
Choosing the right grain mill for your homestead is crucial for getting the best results in flour production. From manual to electric, the type of mill you pick will heavily influence the texture of your flour, the speed of grinding, and the range of grains you can process.
Stone Grain Mills
Stone grain mills typically utilize a pair of circular stones to crush and grind whole grains. They are often favored for their ability to produce a fine, consistent flour while maintaining a low operating temperature, which helps preserve the nutritional content and flavor of the grains. Stone burr mills are a common subset of stone mills, prized for their thoroughness in grinding and the autonomy they give the user to adjust the fineness of the flour.
Burr Grain Mills
Burr grain mills operate with two abrasive surfaces, known as burrs, which rotate to crush the grains into flour. Burr mills can be further categorized into two types: steel and stone burr mills. Steel burrs are durable and effective for a wide variety of grains, making them versatile for home milling, whereas stone burrs offer a finer ground and are traditionally used for wheat and other dry grains.
Manual Grain Mills
Manual grain mills require the user to turn a handle or crank to grind the grains. These are often preferred for their portability, affordability, and lack of need for electricity. Manual mills can come with either burr or stone grinding mechanisms, and they are an excellent choice for those looking for a more hands-on milling experience or who may need to mill flour in areas without power.
Electric Grain Mills
Electric grain mills are powered by motors and are capable of grinding larger quantities of grains more rapidly than their manual counterparts. An electric grain mill is the most hands-off milling solution, perfect for individuals who prioritize efficiency and convenience. They might use either stone or burr mechanisms for the grinding process and usually offer adjustable settings to control the coarseness of the flour.
Selecting the Right Grain Mill for Your Needs
Selecting the ideal grain mill requires understanding the different types and their distinct features. A buyer must assess their kitchen needs, weigh cost against quality, and determine which mill offers ease of use without compromising output.
Comparing Electric and Manual Mills
Electric Mills:
Convenience: Electric mills are more convenient as they use a motor to grind grains quickly.
Capacity: Ideal for grinding large amounts of grains.
Price: Generally more expensive than manual mills due to the technology contained.
Manual Mills:
Control: Manual mills offer more hands-on control over the grinding process.
Price: Less expensive and don't require electrical power.
Physical Effort: Grinding requires physical effort, which might not be suitable for everyone.
Understanding Milling Mechanisms and Their Impact
Impact Mills:
These function using two stainless steel heads with teeth that work at high speeds to turn grains into fine powder.
Best suited for non-oily grains as oily seeds can clog the mill.
Burr Mills:
Utilize two grinding plates, one stationary and one rotating, to crush grain.
Burr mills can handle a variety of grains, including oily seeds.
Features to Consider When Choosing a Mill
Grain Variety: Some mills can grind multiple types of grains including wheat, rye, and barley.
Grinding Quality: Options range from coarse textures to very fine flours.
Adjustability: Look for a mill that offers easy texture and fineness adjustments.
Durability: A robust construction ensures longevity and consistent performance.
Maintenance: Consider the ease of cleaning and maintaining the mill after use.
By carefully considering these factors, one can ensure they choose a grain mill that is well-suited to their specific kitchen needs and preferences.
Preparing to Mill Grains
Prior to milling, one must select suitable grains, properly store them, adjust the mill for the desired texture, and follow safety guidelines to ensure optimal results.
Recommended Grains for Milling
When choosing grains for milling, the most popular options are wheat, rye, corn, oats, spelt, einkorn, and barley. These grains provide a variety of flavors and nutritional profiles. Beans, although not a grain, can also be milled for different culinary uses. It is important to ensure the grains are dry and clean before milling to avoid damaging the grain mill.
Storage and Preservation of Grains
For long-term storage, grains should be kept in a cool, dry place, optimal for preserving their shelf life. Grains like wheat berries are considered shelf stable and, if stored properly, can last for several years. Use airtight containers to protect the grains from moisture and pests.
Grain Type: Wheat, Storage Container: Airtight Bin, Expected Shelf Life: Up to 6 years
Grain Type: Rye, Storage Container: Cloth Bag, Expected Shelf Life: Up to 4 years
Grain Type: Oats, Storage Container: Plastic Container, Expected Shelf Life: 1-2 years
Grain Type: Barley, Storage Container: Glass Jar, Expected Shelf Life: Up to 5 years
Adjusting for Desired Coarseness
Grain mills often come with the ability to adjust the coarseness of the flour. For finer flours, a tighter adjustment is necessary, whereas for more coarse grinds like meal or cracked grains, a looser setting will do. Each pass through the mill can further refine the texture.
Fine Setting: Ideal for cakes and pastries.
Medium Setting: Good for bread and muffin recipes.
Coarse Setting: Best for rustic breads or cereal.
Safe Operation and Handling Instructions
To ensure safe operation of a grain mill, always read and follow the manufacturer's instructions. Keep hands clear of moving parts while the mill is in operation. Do not introduce wet grains into the mill, as this can damage the mechanism. If milling beans, ensure they are completely dried to avoid clogging. After use, properly clean the mill to prevent any residue buildup, which can attract pests or lead to mold.
Operating Your Grain Mill
When it comes to operating a grain mill on your homestead, precision and care are key. The user must ensure a consistent grind while maintaining their mill and troubleshooting any issues that arise. Proper operation maximizes the quality of the flour and extends the lifespan of the mill.
Step-by-Step Milling Process
Preparation: Before starting, the user should ensure all parts of the grain mill are clean and dry. Checking all connections and settings is crucial to prevent any contamination of the grains.
Feeding the Mill: Grains must be poured into the hopper and should flow consistently into the grinding mechanism. Home millers should maintain a steady feed to avoid overloading the mill.
Grinding: They can adjust the mill setting to control the fineness of the flour. The ground flour is typically collected in a container placed beneath the mill.
End of Milling: After grinding, remaining grains should be cleared from the mill to avoid heat buildup and potential damage.
Maintaining Consistent Grinding Quality
Users should check and calibrate the mill's grinding settings regularly to ensure uniform particle sizes. A routine inspection for wear and tear on the burrs or blades helps maintain a quality grind.
It is essential to monitor the flour output for consistency. If variation is observed, the miller may need to adjust settings or perform maintenance.
Troubleshooting Common Milling Issues
Clogging: A common issue where grains do not pass smoothly. Users often can resolve this by cleaning the mill and ensuring no foreign objects are present. Adjusting the grind size could also prevent clogging.
Excessive Heat: If the mill produces too much heat during operation, it may damage the flour's quality. Users should allow their grain mill to cool down as recommended, especially after extensive use.
Operating a grain mill requires attention to detail and a systematic approach to produce high-quality flour. Regular maintenance and prompt troubleshooting ensure the longevity and reliability of the milling process on a homestead.
Incorporating Milled Grains into Your Cooking
Utilizing freshly milled flour introduces a superior depth of flavor and provides control over the nutritional content in cooking. By directly incorporating the flour into recipes, one can ensure that the meal benefits from the flour's full-bodied taste and nutritional advantages like higher fiber and iron content.
Delicious Recipes Using Freshly Milled Flour
Freshly milled flour can be a game-changer in baking, imparting a nutty flavor and richness that store-bought flour often lacks. Here are a few recipes to consider:
Homemade Bread: Wheat flour from hard red wheat berries provides robust flavor and excellent structure for bread dough.
Muffins and Pastries: Soft white wheat yields a lighter, finer flour suitable for tender baked goods like muffins, where a delicate crumb is desirable.
Each recipe will capture the freshness and enhance the overall eating experience when using home-milled grains.
Mixing Ratios for Optimal Texture and Taste
The ratio of milled flour to other ingredients is crucial for both texture and taste:
Bread Baking: A typical ratio for sandwich bread might be 3 cups of freshly milled flour to 1.25 cups of water.
Pastries: Lighter pastries might require a more delicate balance, such as 2 cups of flour to ¾ cup of butter or fat.
Maintaining the correct ratios ensures that every creation has just the right mouthfeel and flavor.
Creating Unique Blends for Special Diets
Unique blends cater to specific needs while ensuring enjoyable taste:
Gluten-Free Options: Combine rice flour, potato starch, and xanthan gum to create a gluten-free mix for sensitive diets.
High-Fiber Diet: Incorporate millet or barley flour with wheat to boost fiber content without compromising taste.
By experimenting with various grains, one can create flavorful blends that cater to individual diet preferences and requirements.
Understanding the Role of Grain Parts in Milling
When milling grains, one must take into account the different parts of the grain—germ, bran, and endosperm—as they each contribute to the nutritional profile and final outcome of the milled product.
The Anatomy of Grains: Germ, Bran, and Endosperm
Germ refers to the nutrient-rich embryo of the grain, which if allowed to sprout, gives rise to a new plant. It is a source of vitamins, such as Vitamin E, B vitamins, and healthy fats. During milling, the germ is often removed to increase the flour's shelf life, as its high oil content can lead to spoilage.
Bran, the outer layer of the grain, is high in fiber, minerals, and antioxidants. Bran's inclusion in milled flour increases its nutritional value, particularly due to its high fiber content, which can aid in digestion.
Endosperm is the largest portion of the grain, making up the bulk of its structure and consists mostly of carbohydrates and some proteins. The endosperm provides the body with energy and is primarily what white flour is made from after the bran and germ have been removed.
Health implications of Milling Different Grain Parts
Milling grain involves separating the germ and bran from the endosperm, affecting the nutritional value of the final product. Whole grain flour, which includes the endosperm, germ, and bran, offers a richer nutritional profile compared to refined flour, which contains only the endosperm.
Germ and bran contain most of the grain’s nutrients, such as essential fatty acids, enzymes, vitamins (mostly B vitamins), and minerals. These nutrients can be lost if the germ and bran are discarded during milling.
The refinement process not only strips away valuable nutrients but also reduces the fiber content. Fiber, abundant in the bran, is vital for maintaining a healthy digestive system.
By understanding the role of each grain part, one can utilize a home grain mill to produce flour that retains most of the grain's original nutritional value, offering a healthier alternative to store-bought, refined flour.
Maintaining and Cleaning Your Grain Mill
Proper care and cleaning ensure the longevity and optimal performance of a grain mill, whether it utilizes stone burrs or is made of cast iron. By adhering to maintenance routines and cleaning practices, users can maintain consistent grinding efficiency and prevent flavor cross-contamination.
Regular Maintenance for Longevity
Regular maintenance is crucial for preserving the functionality of a grain mill and extending its lifespan. Burr mills, especially those with stone burrs or cast iron components, require attentive upkeep.
Check for Wear: Inspect the burrs for signs of wear or dulling, which can compromise the quality of the grind. Replace burrs according to the manufacturer's recommendations.
Tighten Connections: Periodically check and tighten screws and fasteners to ensure the stability of the mill's construction.
Lubrication: Apply food-grade mineral oil to moving parts as needed to keep them running smoothly and to prevent rust on cast iron parts.
Best Practices for Mill Cleaning
Cleaning a grain mill is imperative to prevent old grain particles from molding and affecting the taste of future grinds.
Unplug and Disassemble: Begin by disconnecting power sources and removing detachable parts such as hoppers, plates, or rollers.
Clean Exterior: Wipe the external surfaces with a dry, lint-free cloth to remove dust and flour residue.
Interior Cleaning:
Use a brush to gently remove stuck grains and flour from the burrs and other interior surfaces.
Follow with a dry cloth to pick up any remaining particles.
Avoid using water or damp cloths, particularly on cast iron elements, to prevent rusting.
By consistently performing these maintenance and cleaning steps, one ensures that their grain mill remains a reliable tool for grinding fresh flour on their homestead.
Long-Term Storage of Milled Grains
Proper storage of milled grains is crucial for maintaining their freshness and nutritional content. To keep flour shelf-stable and retain its quality, one must consider the type of container used and the conditions of the storage environment.
Preserving the Freshness and Nutritional Content
Freshly ground flour contains the entire grain kernel, including the bran, germ, and endosperm. The presence of natural oils and nutrients makes freshly milled grains more susceptible to spoilage. To preserve their freshness and nutritional value, it’s essential to store flour in an environment that minimizes exposure to air, moisture, and light.
Temperature: Keep the flour in a cool, dry place, ideally below 68°F (20°C).
Light: Store flour away from direct sunlight which can degrade the quality.
Moisture: Ensure the storage area is dry to prevent mold growth.
Airtight Containers and Ideal Conditions
Airtight containers are non-negotiable for long-term storage of milled grains. They prevent the ingress of pests, moisture, and air, all of which can degrade the quality of the flour.
Containers: Use vacuum-sealed bags, food-grade buckets with lids, or glass mason jars.
Oxygen Absorbers: Consider including oxygen absorbers to prolong shelf life.
Pantry: Store the airtight containers in a pantry or cupboard away from frequent temperature changes.
By thoroughly implementing these storage practices, one can extend the shelf life of their milled grains and maintain a consistent supply of high-quality flour on the homestead.
Advancing Your Skills in Homestead Grain Milling
Elevating one's proficiency in homestead grain milling involves not only perfecting the fundamental techniques but also embracing technological innovations that enhance efficiency. This section delves into developing advanced milling skills and understanding the technological advancements in grain mill equipment.
Mastering Milling Techniques and Variations
A homesteader striving for excellence in grain milling should first understand how to adjust the coarseness of flour. This skill allows for a range of textures, from fine flours suitable for baking delicate pastries to coarser grinds perfect for rustic breads. While electric mills often offer simple knob or button adjustments, manual mills might require more intricate handling, such as tightening or loosening of the burrs or stones for the desired consistency.
Versatility in milling also demands a good grasp of working with various grains beyond the common wheat, like barley, rye, or ancient grains such as spelt and teff. Each grain has distinct properties and may require different milling approaches. For instance, softer grains typically mill at a faster rate and might clog the mill if ground too quickly.
Innovations and Advanced Grain Mill Technology
The landscape of grain mills has evolved tremendously, with new technologies making milling more accessible and efficient. Advanced electric mills often feature powerful motors, superior to a 360 watt motor, ensuring a consistent flour feed rate and the capability to handle tougher grains without overheating.
A more sophisticated grain mill might offer smart features such as programmable settings, which allow a user to set up the grain mill for different grains and flours effortlessly. Innovative materials like ceramic or stainless steel milling surfaces have also surfaced, which are both durable and easy to clean.
To summarize, a homestead miller keen on honing their milling skills should focus on mastering the fineness adjustments and versatility in working with different grains. Additionally, staying updated with the latest milling technologies can greatly contribute to their milling expertise.
Adapting Grain Milling to Modern Homesteading

Modern homesteading combines the time-honored tradition of milling with advances in technology to enhance self-sufficiency. The integration of both traditional methods and modern equipment yields a balance of authenticity and efficiency in grain milling.
Combining Traditional and Modern Milling Methods
Traditional stone grinding remains a favored technique among homesteaders for its ability to produce nutrient-rich flours. Stone mills often utilize a hand-cranked mechanism, which allows for the preservation of the grain's quality and nutritional content. However, the manual effort required can be considerable. By incorporating electric mills, one can harness the power of electricity to speed up the process, making it more practical for larger batches while still retaining the flexibility to produce various textures of flour.
Advantages of Stone Grinding:
Retains nutrients and flavor
Customizable grain coarseness
Advantages of Electric Mills:
Greater speed and efficiency
Less manual labor required
Energy Efficiency and Sustainability in Grain Milling
Energy efficiency plays a crucial role in the modern approach to grain milling on the homestead. Electric mills, which can be more energy-efficient than traditional methods, minimize the effort and time spent on milling grains. Homesteaders often seek out models that offer sustainable energy options, such as solar-powered or other renewable energy sources, to power their mills. This commitment to sustainability is aimed at reducing the environmental impact of grain milling, making it a harmonious part of a self-sufficient lifestyle.
Sustainable Energy Options:
Solar-powered mills
Mills that can connect to alternative energy sources
Energy-saving Practices:
Choosing energy-efficient mill models
Using mills during off-peak energy hours to reduce demand on the grid
