
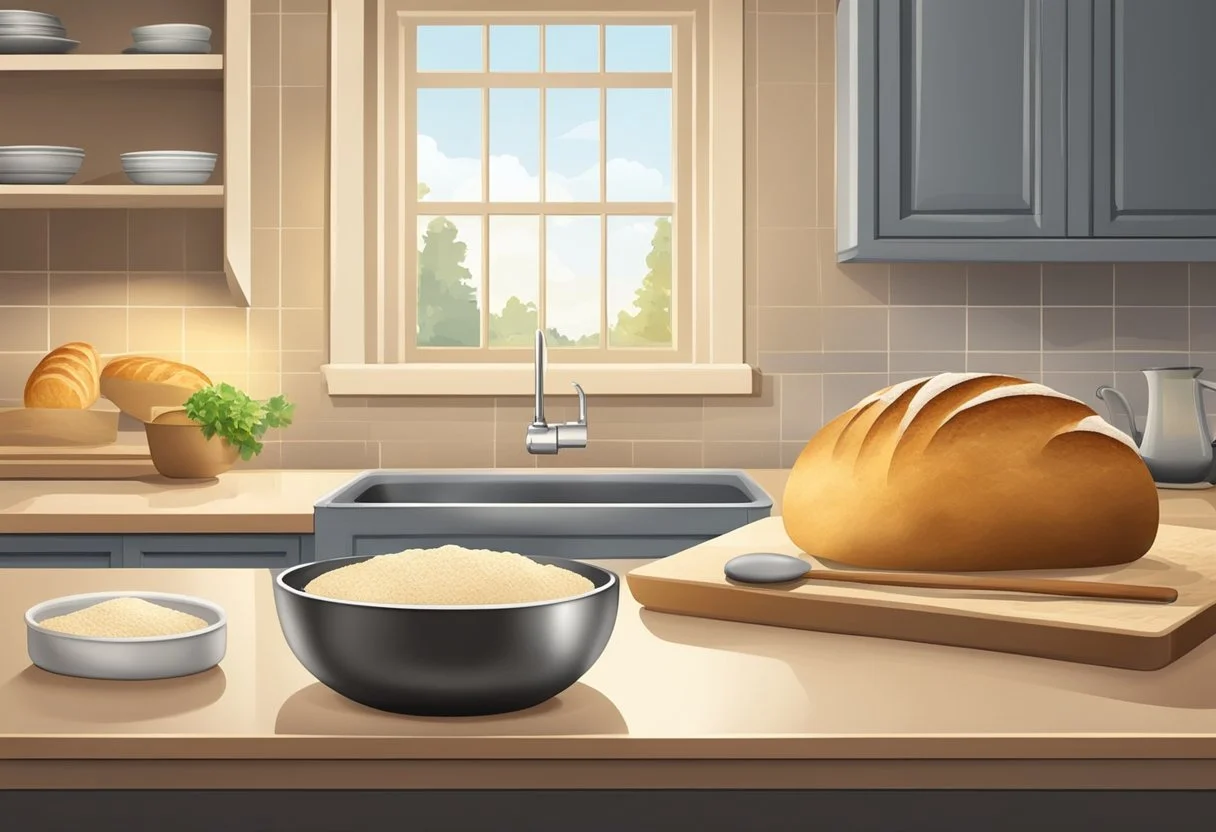
Baking Bread at Home
Simple Tips for Perfect Loaves
Discover > Homesteading > Baking Bread at Home
Baking bread (What wine goes well with bread?) at home has become increasingly popular, as it allows for creativity, customization, and control over the ingredients. The process of baking bread involves mixing together simple ingredients such as flour (how long does flour last?), water, salt, and yeast, followed by a series of steps like kneading, rising, shaping, and baking. By learning the basics, one can produce delicious home-baked loaves and experiment with various flavors and textures.
Beginners in bread baking can start with straightforward recipes that require minimal equipment and techniques. As they gain more experience, they can venture into more complex recipes with different types of flour, natural fermentation, and various shaping methods. Online resources, like those mentioned in the search results, provide step-by-step instructions, tutorials, and tips to help aspiring bakers improve their skills.
Remember that practice makes perfect. The more one bakes, the better they become at understanding the nuances of the dough, judging the right amount of kneading, and determining the ideal proofing times and temperatures. With persistence, home-baked bread can become a staple in one's kitchen, providing a fresh and nutritious addition to any meal.
Choosing The Right Ingredients
Baking bread at home requires careful selection of ingredients to ensure a successful loaf. The primary ingredients include flour, water, salt, and yeast. Let's discuss the role each plays and their variations.
Flour is the backbone of bread, providing structure and texture. There are two common types of flour used in bread-making: bread flour (how long does bread flour last?) and all-purpose flour. Bread flour has a higher protein content, creating a chewier and crustier loaf, while all-purpose flour yields a slightly softer bread. It's important to choose the right flour based on the desired outcome.
Next, water must be added to the mix. The temperature of the water plays a critical role in the bread-making process. Warm water, around 100°F, activates the yeast, while hot water may kill it, and cold water could slow down the fermentation process.
Salt improves the flavor of bread and helps to strengthen the gluten structure. The commonly used types of salt include table salt, sea salt, and kosher salt. (how long does kosher salt last?) It's essential to measure the salt accurately, as too little or too much can affect the dough's texture and taste.
Yeast is responsible for fermentation, which creates carbon dioxide and causes the dough to rise. There are three types of yeast available: active dry yeast (how long does active dry yeast last?), instant yeast (how long does instant yeast last?), and fresh yeast. Active dry yeast requires proofing in warm water before use, while instant yeast can be added directly to the flour. Fresh yeast is perishable and can be more challenging to find but yields excellent results. Home bakers can choose the most convenient type based on availability and preference.
Other ingredients commonly used in bread-making include sugar, milk, butter, oil, and eggs. Sugar and alternative sweeteners like honey can provide additional flavor and aid in the browning of the crust. Milk creates a softer and richer crumb, while butter introduces a delicious flavor. When it comes to oils, versatile options like canola oil and olive oil can be used for different types of bread.
Lastly, special ingredients like baking soda (how long does baking soda last?) or baking powder (how long does baking powder last?) may be added for specific bread recipes that do not rely on yeast for rising, such as soda bread or quick breads.
In summary, selecting the right ingredients is key to successful bread-making. By understanding the roles flour, water, salt, yeast, and additional elements play, home bakers can create delicious and satisfying loaves.
Essential Tools for Baking Bread at Home
Baking bread at home can be a fulfilling and therapeutic experience. To achieve consistent results and ease the process, having the right tools in hand is crucial. Below is a list of essential tools for baking bread that home bakers should consider.
Bread Machine: A bread machine simplifies the bread-making process by handling the mixing, kneading, and baking steps. This appliance is especially helpful for those with limited time or experience in bread-making.
Scale: A digital scale ensures precision when measuring ingredients, which is vital in bread-making. The OXO Stainless Steel Food Scale, for example, allows for accurate measurements, ensuring consistent results each time you bake.
Mixer or Stand Mixer: A mixer or stand mixer helps combine ingredients more efficiently and prevents overwork compared to manual mixing. Stand mixers often include a dough hook attachment, making it easy to knead dough without straining your hands.
Tool Purpose Loaf Pan A loaf pan shapes the dough during baking, giving it a uniform look. Measuring Cups Measuring cups ensure accurate volumes of liquid and dry ingredients. Oven Thermometer An oven thermometer checks oven temperature to avoid over or under-cooking. Cooling Rack A cooling rack allows air to circulate around the bread, preventing sogginess.
In addition to these essential tools, a well-stocked kitchen should also include some basic bread baking supplies, such as flour, yeast, salt, sugar, and a variety of optional add-ins like nuts (how long do nuts last?), seeds, or dried fruit (how long does dried fruit last?).
By ensuring your kitchen is equipped with these essential tools and supplies, you'll be well prepared to explore the wonderful world of home bread baking.
Understanding The Process of Bread-Making
Bread-making is a satisfying process that, when done correctly, can lead to delicious homemade bread. In this section, we will discuss the essential steps in bread-making, which include kneading the dough, proofing the dough, and baking the bread.
Kneading The Dough
Kneading is a critical step in bread-making, as it helps develop gluten, the protein network that gives bread its structure and elasticity. To knead the dough, you will need to work it with your hands or a dough hook, using a pressing and folding motion for about 10-12 minutes. A well-kneaded dough should be smooth, elastic, and pass the windowpane test, where a small piece of dough can be stretched to form a translucent film without tearing.
Here are a few bread-making tips for kneading:
Keep your hands and work surface lightly floured to prevent the dough from sticking.
Be patient and avoid adding too much flour, as this can lead to dense and heavy bread.
Monitor the dough's texture throughout the process, adjusting as needed.
Proofing The Dough
Proofing is the process of allowing the dough to ferment and rise, which is essential in promoting a light and airy texture in the finished bread. During proofing, yeast consumes sugars, releasing carbon dioxide that causes the dough to expand. To proof yeast, dissolve it in warm water (around 110°F) with a bit of sugar; it should become bubbly within a few minutes, indicating it's still active.
Divide the proofing process into two stages:
First proofing: After kneading, let the dough rest in a warm and humid environment, covered with a damp cloth, for about 1 to 2 hours, or until it doubles in size.
Second proofing: After the first rise, shape the dough into its final form. Let the dough proof again for another 45 minutes to an hour, or until approximately doubled in size, before baking.
Baking The Bread
The final step in bread-making is baking. Preheat your oven to the correct temperature, generally between 375°F to 425°F for most bread recipes. The duration of baking will depend on the type of bread and its size, so follow your recipe closely.
During baking, the heat causes carbon dioxide in the dough to expand, creating the crumb or interior texture of the bread. As the bread bakes, the crust forms and the Maillard reaction produces a desirable golden-brown color.
Keep these points in mind when baking:
Use a preheated oven for consistent results.
Monitor the internal temperature of the bread (generally, it should reach about 190°F to 210°F when fully baked).
Rotate loaves during baking for an even crust.
By following these steps and tips, you will gain a better understanding of the bread-making process, and with practice, you'll be well on your way to baking perfect homemade bread.
Different Varieties of Bread Recipes
Baking bread at home can be a rewarding and delicious experience. There are several varieties of bread recipes that can be broadly categorized into three types: yeast breads, quick breads, and sourdough breads. Each category offers a variety of textures and flavors, making it possible for home bakers to create a wide range of breads.
Yeast Breads
Yeast breads rely on yeast as the primary leavening agent, and they typically require longer proofing times. A classic example includes white bread, which can be used for sandwiches. The variations of yeast breads can be seen in French bread, artisan bread, and even pizza dough. For those who like a bit more flavor and texture, they may opt for whole wheat bread.
Some popular yeast bread recipes include:
Basic Homemade Bread: A simple white bread made with all-purpose or bread flour
French Bread: A crusty loaf with a fluffy interior
Breadsticks: Thin, crunchy sticks often served with pasta (how long does pasta last?) dishes
Quick Breads
Quick breads, as the name suggests, do not require lengthy proofing times. This is because they use baking powder or baking soda as leavening agents instead of yeast. Common quick breads include cornbread, pumpkin bread, monkey bread, and herb quick bread. They can be sweet or savory, making them a versatile option.
Here are some examples of quick breads:
Cornbread: A dense, crumbly bread made with cornmeal (how long does cornmeal last?)
Pumpkin Bread: A moist, mildly sweet bread made with pumpkin purée
Herb Quick Bread: A savory bread flavored with herbs like rosemary, thyme, and parsley
Sourdough Breads
Sourdough breads are unique because they use wild yeast and bacteria present in the environment for leavening. They have a distinctive tangy flavor and chewy texture. Creating a sourdough bread at home requires maintaining a sourdough starter, which is a mixture of flour and water that has been allowed to ferment naturally.
A few popular sourdough bread recipes are:
Basic Sourdough Bread: A rustic loaf made with sourdough starter
Whole Wheat Sourdough: A hearty loaf made with whole wheat flour (how long does whole wheat flour last?)
Artisan Sourdough: A crusty bread made with a mixture of flours and a long fermentation time
In conclusion, homemade bread recipes can be broadly categorized into yeast breads, quick breads, and sourdough breads. Each category offers an array of flavors and textures that cater to different preferences and occasions. Whether you want to bake a classic white bread for sandwiches or experiment with an artisan sourdough, there's a bread recipe for every home baker.
Special Techniques In Bread Making
Baking bread at home has become increasingly popular due to the satisfaction it brings and the ability to control the ingredients used. Below are some special techniques to elevate your at-home bread-making experience.
No-Knead Method: This technique is ideal for beginners, as it requires minimal effort but still produces a delicious, crusty bread. To achieve this, simply mix the dough ingredients and let it rest for a longer period (12-18 hours) before baking. The extensive resting time allows the gluten in the dough to develop without the need for manual kneading.
Using a Starter: Sourdough breads utilize a natural yeast and bacteria culture, called a starter, to ferment the dough. This lends a unique tangy flavor and improves the texture of the finished loaf. Creating a sourdough starter requires mixing flour and water, allowing it to ferment and "feeding" it regularly over several days. Once a mature starter is established, it can be used in various bread recipes.
Choice of Baking Vessels: The vessel used to bake your bread can impact its final texture and appearance. Here are some options:
Loaf Pans: These rectangular pans are perfect for baking sandwich bread and producing uniform slices. For functionality, opt for non-stick or silicone-based loaf pans.
Dutch Ovens: Known for their excellent heat retention, Dutch ovens help create a crispy crust by trapping steam from the dough during baking. Preheat the Dutch oven before placing the dough inside to ensure an even bake.
Bread Makers: For those seeking convenience, bread makers are an all-in-one solution; they mix, knead,-proof, and bake the dough. Many also offer preset options for different types of breads, including gluten-free varieties.
Adjusting Baking Temperature: To achieve the desired crust color and internal texture, it's essential to use the right baking temperature. For most bread recipes, preheating the oven to 425°F (220°C) is a good starting point. However, if the surface color is too dark, reduce the temperature slightly or tent the loaf with aluminum foil to protect the crust.
Bread Types: Different types of breads might require alternative techniques. For instance, cake-like breads, such as banana or zucchini bread, usually have added sugar and fat that make the dough denser and more moist. These breads typically bake at lower temperatures (around 350°F or 175°C) to prevent overbrowning.
By incorporating these special techniques and experimenting with various approaches, you can create a wide range of delicious homemade breads. Embrace the learning process and enjoy the satisfaction of baking one-of-a-kind creations in your own kitchen.
Using and Storing Homemade Bread
Making homemade bread can be a delightful and rewarding experience. Whether you are crafting a warm and scrumptious bread loaf, flavorful dinner rolls, or wholesome muffins with nuts, it is essential to familiarize yourself with proper storage techniques to ensure your baked goods remain as fresh as possible.
Cooling and wrapping: After removing your homemade bread from the oven, allow it to cool completely on a cooling rack. The doneness of the bread is crucial in determining its storage life. It should be thoroughly cooked with a crispy crust and moist interior. Once the bread has cooled, wrap it tightly using plastic wrap or aluminum foil to protect it from direct air exposure, which can cause staleness.
Short-term storage: For bread that will be consumed within a few days, consider storing the wrapped loaf in a brown paper bag or bread box. This method will help maintain its freshness while keeping the crust crisp. Dinner rolls, muffins, and varieties like zucchini bread can also be stored similarly.
Freezing for long-term storage: If you don't plan on consuming your homemade bread immediately, freezing is an excellent option for preserving its quality. Wrap your bread or rolls tightly in plastic wrap or aluminum foil. Then, place them in a resealable plastic freezer bag, squeezing out as much air as possible before sealing the bag tightly. This step minimizes the risk of freezer burn. Label the bag with the date of freezing to track storage duration.
ICO Timetable Wrapped in foil, paper bag, or breadbox Up to 5 days Freezer Up to 3 months
To defrost and enjoy your homemade bread, simply remove it from the freezer and let it thaw at room temperature. Your bread will taste fresh and delicious, ready to be paired with your favorite spreads or to accompany a meal.
By utilizing these storage techniques, you can confidently enjoy homemade bread, dinner rolls, and muffins, knowing they'll remain fresh and delicious for when you and your loved ones gather around the table.
