
How to Butcher a Hog
Comprehensive Guide for Home Processing
Discover > Hunting for Dummies > How to Butcher a Hog

Butchering a hog can be a daunting task for many when raising pigs, particularly those new to processing their own pigs. However, with the right knowledge, tools, and techniques, it can be done efficiently and safely. A well-executed butchering process not only ensures that the meat is preserved correctly, but also maximizes the yield, allowing you to make the most out of the animal.
The first step to successfully butchering a hog is understanding the various stages involved and ensuring the necessary equipment is on hand. These include dispatching the animal, hanging, and skinning or scalding, followed by breaking down the carcass into individual cuts. Throughout the process, maintaining high standards of cleanliness and safety is essential to ensure the quality of the meat.
In this article, we will explore the different methods and techniques employed in butchering a hog, drawing from expert advice and tried-and-tested practices. With careful planning and preparation, even novices can learn to tackle this challenging yet rewarding process, reaping the benefits to eat meat such as farm-raised, sustainable pork.
Preparation
Choosing the Right Hog
When butchering pigs it is crucial to choose carefully to obtain the best quality meat. A well-fed, healthy pig that has reached an ideal weight of around 250 pounds is a good candidate. Keep in mind that it is essential to process the hog humanely with minimal stress, as this can impact meat quality. Utilizing a .22 caliber rifle can ensure a swift and humane end for the hog.
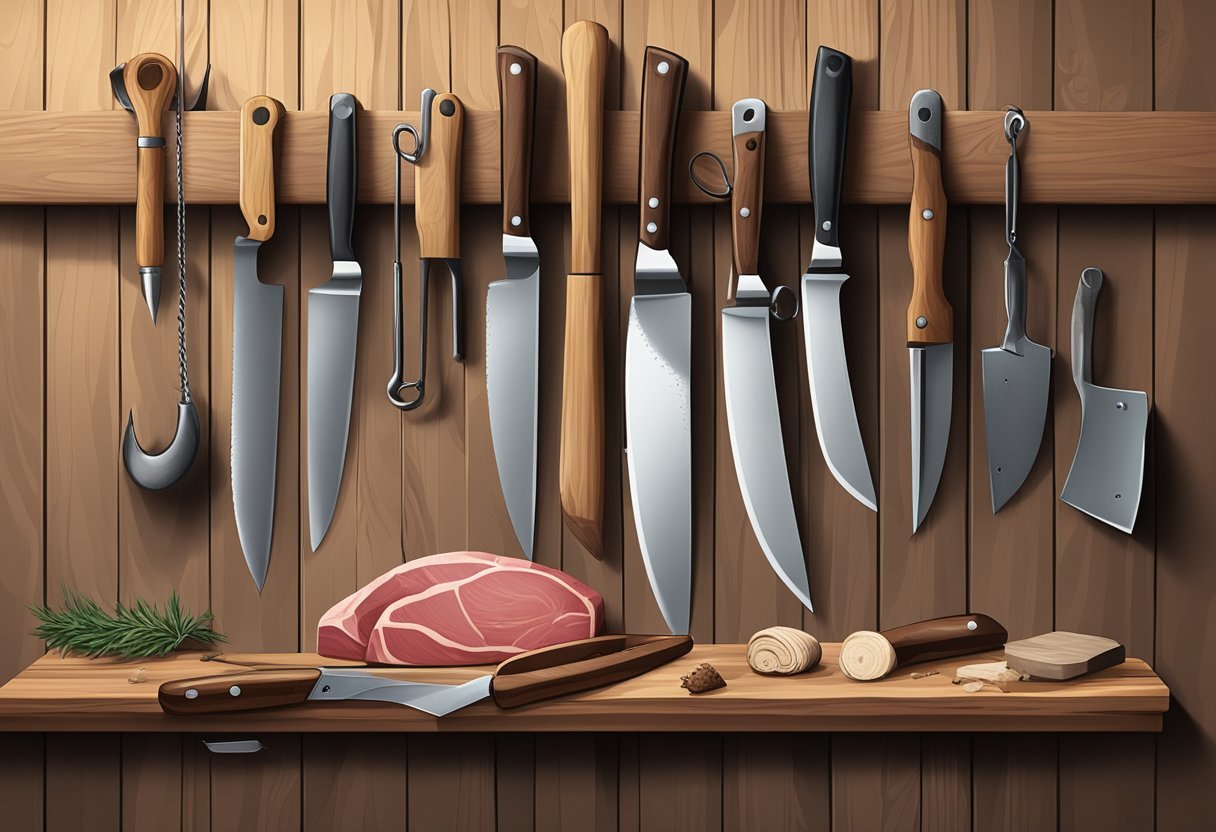
Tools Needed for Butchering
Having the right tools on hand is vital for successfully butchering a hog. The necessary tools include:
.22 caliber rifle: To dispatch the hog quickly and humanely.
Sharp knife: Needed for skinning, trimming, and various cutting tasks.
Cleaver: Used for splitting joints and cutting through bones.
Meat saw: Essential for breaking down larger sections of the carcass, such as when dividing the hog into halves or quarters.
Various sized boning and filleting knives: For precision cuts and separating meat from bones.
Meat grinder: If planning on making ground meat or sausages.
Table and surface area: For laying out and processing the meat, preferably a stainless steel table or easily cleanable surface.
Containers: Required for storing the butchered cuts and scraps.
Before starting the butchering process, make sure all the tools are clean, sharp, and ready to use. Preparing a work area with enough space and adequate lighting will make the task easier, ensuring safety and efficiency.
Remember that properly butchering pigs requires practice, and it is important to handle the tools correctly. By investing time in preparation and selecting the right hog, a more streamlined butchering experience can be achieved, resulting in high-quality meat for consumption.
Killing and Bleeding Out
Proper Use of .22 Caliber Rifle
When it comes to humanely slaughtering a hog, using a .22 caliber rifle is an efficient method. Aim for the hog's skull, specifically the spot between the eyes and slightly above. Doing this carefully will assure a quick and humane death. It is crucial to have a steady hand to avoid causing unnecessary pain to the animal. The importance of using a .22 caliber rifle is because it provides an effective, instant kill with less risk of over-penetration or ricochet.
Once the hog has been shot and is completely unconscious, it's time to bleed it out.
Cutting the Jugular for Bleeding Out
To properly bleed out a hog, it's essential to locate and sever the jugular vein. This will help to prevent any blood from remaining in the meat which can affect the taste and quality. First, make sure the hog carcass is properly secured, typically using a hoist or suspension setup to lift the animal off the ground. Next, follow these steps:
Sharpen your knife: Ensure your knife is sharp, clean, and sanitized before use. This will help in making precise cuts.
Locate the jugular vein: You can find the jugular vein close to where the head connects to the neck. Feel for the indentation alongside the hog's throat to locate the correct spot.
Make a deep cut: With your knife, make a deep, quick, and straight cut across both jugular veins. It is important to avoid cutting too deep into the neck to minimize the risk of puncturing the esophagus or windpipe.
Allow the blood to drain: Allow the hog to bleed out completely. This process should take a few minutes, and during this time, the blood should be collected in a clean container if you plan to use it for blood sausage or other purposes.
Following these procedures will ensure a humane and efficient process when slaughtering and butchering a homestead hog on your property. Proper technique and preparation can make a significant difference in the quality and taste of the final product.
Scalding and Skinning Process
Scalding Process
The scalding and scraping process has two stages. Firstly, the scalding to loosen the pigs hair and secondly, scraping, where the loose hair is scraped away using a knife. Scalding is a preferred method for pig butchering, as it helps remove the hair and keeps the skin intact. To begin the scalding process, first heat a large container of water to a temperature of 145-165°F (63-74°C). Carefully lower the hog into the hot water for approximately 3-5 minutes to effectively loosen the hair. Make sure to agitate the hog gently, ensuring that the hot water reaches all areas of the skin.
After scalding, remove the pig from the water and place it on a clean surface. Using a sharp scraper, remove the hair from the skin by applying firm, even pressure across the surface. Be cautious not to dig too deeply and damage the skin.
Removing the Skin
If you prefer to butcher the hog by removing the skin, here is a step-by-step guide to skinning:
Hang the pig: Securely hang the hog upside-down using strong hooks or gambrels connected to its hind legs.
Make incisions: With a sharp knife, create shallow incisions around the pig's ankles and just below the hocks. Make additional cuts along the inside of each leg and around the genitals.
Detach the skin from the front legs and hind legs: Gently pull the skin from the front and back legs by pulling it away from the muscle, using your knife, carefully cut through any connective tissue.
Remove the skin from the body: Starting at the back legs, carefully pull the skin away from the muscle with your hands, using the knife to sever any remaining connective tissue. Proceed down the back and sides of the pig toward the front legs and head.
Remember that proper scalding or skinning requires patience and attention to detail, ensuring all the necessary steps are completed accurately for the best outcome in your butchering process.
Breaking Down the Carcass
Splitting the Carcass
With a farm raised pig, start with the process of breaking down the carcass, first, split the carcass down the middle. This can be achieved using a saw or a sawzall. It's important to be precise and aim to cut down the spine as gently pull evenly as possible, as this will make the butchering process smoother in the long run.
When splitting the carcass, be prepared for some bone dust to be produced. To minimize the amount of bone dust, it's crucial to use a sharp, clean saw and apply even pressure while cutting.
Identifying Muscle Groups
After splitting the carcass, the next step is to identify the main muscle groups, as this will dictate the cuts of meat. Pay attention to details when separating muscles, as it helps to preserve the integrity of the meat. Here is a brief overview of the primary muscle groups in a pig and their respective cuts:
The key is to maintain cleanliness and hygiene throughout the butchering process to preserve the quality of the meat. After breaking down the carcass, ensure proper storage of the various cuts to extend their shelf life and usability.
Processing Different Parts
Butchering the Shoulder
The shoulder of a hog is made up of two main cuts: the Boston butt and the picnic shoulder. The Boston butt is located on the upper part of the shoulder, while the picnic shoulder is found on the lower part. To start, remove the shoulder from the rest of the carcass, and then separate the Boston butt by cutting through the joint where it connects to the ribs. You can turn the Boston butt into shoulder roasts, or grind the meat for sausage. Similarly, the picnic shoulder meat can be deboned and roasted, or used for pulled pork.
Cutting the Ham
The ham comes from the back leg of the hog. Firstly, separate the back leg from the rest of the hog carcass. Then, remove the skin, trim excess fat, and clean any silver skin. You can divide the ham into sub-primal cuts like spiral-sliced hams, shank end, and butt end. These ham cuts are ideal for roasting, smoking, or slicing into steaks.
Slicing the Belly
The belly is located below the ribs and connects to pelvic bone and the front shoulder. After separating the belly from the carcass, you will find popular cuts like bacon (how long does bacon last?) and spare rib. When processing the belly, trim as much fat as you can, and remove the bones carefully. You can slice the belly into bacon strips and cure them, or turn the spare rib into a delicious, cooked dish.
Extracting the Tenderloin
The tenderloin is a muscle located within body cavity of the loin of the hog, adjacent to the backbone. Remove the entire loin, and then carefully separate the tenderloin from the surrounding muscles. The tenderloin, once cleaned from any silver skin and all the fat, can be sliced into pork medallions or cooked whole as a succulent roast. Remember to handle this delicate cut with extra care to ensure the best quality possible.
Dealing with the Trotter
Trotters, or the pig's feet, can also be used in a variety of culinary preparations. To process trotters, first, remove them from the carcass, clean them thoroughly, and trim any excess fat. You may need a meat grinder or sharp knife to separate all the bones out from the meat. Trotters can be pickled, braised, or used to make a rich and flavorful stock.
Here's a summary on how to process different parts of a hog:
Shoulder Meat: Separate into Boston butt and picnic shoulder, and use for roasts or ground meat.
Ham: Divide into sub-primal cuts, and use for roasting, smoking, or steaks.
Belly: Trim and slice for bacon or spare ribs.
Tenderloin: Carefully extract and clean, and use for medallions or roasts.
Trotter: Clean, separate bones, and use for pickling, braising, or stock.
Creating Byproducts
Rendering the Lard
One valuable byproduct when butchering a hog is lard, which is rendered pork fat. There are two main types of lard: leaf lard and fatback. Leaf lard or leaf fat is the highest quality and is found around the pig's kidneys. Fatback is found on the back of the animal and is a bit harder in texture.
To render lard, first trim the fat from the kidneys, and chop it into small pieces. Then, heat the fat slowly in a pot or slow cooker, letting it melt without burning. Strain the liquid through a cheesecloth or fine mesh strainer, removing any solid bits. The final product liquid lard can be used in various recipes, including pie crusts and other baked goods.
Making the Bone Broth
Another useful byproduct from butchering a hog is bone broth, a nutritious and versatile base for soups, sauces, and other dishes. To make bone broth, begin by roasting all the bones in the oven for about 30 minutes at 350°F (175°C) for better flavor development. Next, place the roasted bones in a large pot or slow cooker and fill it with water. Add a tablespoon or two of vinegar to help extract the minerals from the bones.
Simmer the bones on low heat for at least 12 hours, occasionally skimming off any impurities or foam that rises to the surface. During the last hour of cooking, you may add vegetables and herbs for added flavor. Once the bone broth is done, strain it through a fine mesh strainer to remove the solids. Store the broth in the refrigerator or freeze it for later use.
Producing Gelatin
Gelatin is a valuable byproduct derived from the connective tissues, such as skin, tendons, and ligaments, and bones of the hog. It is most commonly found in products like jellies, desserts, and some savory dishes. To extract gelatin, first, clean and carefully cut up the connective tissues and bones into smaller pieces.
You will then need to soak the pieces in cold water for several hours, which helps soften the tissues. After that, simmer the pieces in a pot for several hours, until the liquid has reduced and thickened. The liquid should eventually have a jelly-like consistency when cool.
Once done, strain the liquid through a fine mesh strainer to remove any solid particles. The resulting gelatin can be used on its own as a food thickener and also added to various recipes.
Storing and Cooking

Preserving the Meat
After butchering a hog, it's essential to store the various cuts of meat properly to maintain their quality and taste. Cuts such as ham, bacon, ribs, sausage, pork chops, roasts, and belly can be preserved using different methods. Here's a brief overview of some popular options:
Freezing: Make sure to vacuum seal or tightly wrap each piece of meat in plastic wrap or freezer paper before placing it in the freezer. Label with the cut and date for easy identification. This method can last 6-12 months, depending on the cut.
Curing: Hams and bacon are often cured to extend their shelf life and enhance their flavor. Curing involves rubbing the meat with salt, sugar, and other seasonings, then allowing it to age for a specified period.
Smoking: Smoking adds flavor and helps to preserve meats like ribs, ham, and bacon. Use a smoker according to the manufacturer's instructions, and ensure the internal temperature of the meat reaches a safe level for consumption.
Cooking Suggestions
Different cuts of pork lend themselves to various cooking techniques, and knowing the best approach can help you bring out the full flavor and texture of the meat when you eat pork. Here are some cooking suggestions for popular cuts:
Ham: Hams can be baked, boiled, or grilled and are often glazed with sweet or savory mixtures. Bake at 325°F (163°C) for 20-30 minutes per pound, or until the internal temperature reaches 145°F (63°C).
Bacon: Cook bacon in a frying pan or bake it in the oven at 400°F (204°C) for 15-20 minutes. Always cook bacon until it reaches a crispy, golden-brown texture.
Ribs: Slow cooking is the key to tender, juicy ribs. Cook them in a slow cooker or oven at a low temperature (250°F / 121°C) for 2-3 hours, or grill them over indirect heat for a similar amount of time.
Sausage: Sausages can be grilled, pan-fried, or cooked in the oven. Grill or pan-fry for 8-10 minutes, turning occasionally, or bake at 350°F (177°C) for 25-30 minutes.
Pork Chop: Grilling, pan-searing, or baking are all viable cooking methods for pork chops. Cook them to an internal temperature of 145°F (63°C) and let them rest for 3-5 minutes before slicing or serving.
Roasts: Roasting is the ideal method for cuts like tenderloin, shoulder, and butt. Cook at 325°F (163°C) for around 20-25 minutes per pound, or until the internal temperature reaches 145°F (63°C).
By following these storage and cooking guidelines, consumers can enjoy a variety of delicious and tender pork dishes from their freshly-butchered hog.
Safety Measures and Consideration

When it comes to butchering a hog, safety is of utmost importance. It is important to be knowledgeable about the process and adhere to safety guidelines to prevent accidents and ensure quality meat processing. This section will cover essential safety aspects related to butchering hogs, including preventing cross-contamination, proper handling of raw meat, and disposing of unused parts.
Preventing Cross-Contamination
Cross-contamination occurs when harmful bacteria or viruses are transferred from one surface to another, potentially contaminating the meat. To prevent this, follow these guidelines:
Cleanliness: Keep all surfaces, knives, and other equipment clean and sanitized throughout the process.
Separation: Keep raw meat and any other food products separated, both during storage and while working.
Gloves: Wear clean, disposable gloves when handling raw meat to avoid direct contact and the possibility of cross-contamination.
Proper Handling of Raw Meat
Proper handling of raw meat is essential for maintaining the quality of the meat and ensuring safety. Here are a few guidelines to follow:
Temperature Control: Keep the meat chilled (below 40°F/4°C) throughout the butchering process. Speed is essential for efficient butchering and maintaining meat quality, so work quickly and efficiently.
Sharp Tools: Use sharp boning knives to make clean cuts, minimizing the risk of injury. A .22 caliber rifle is often used for stunning the hog before butchering.
Hygiene: Wash hands frequently, especially after touching raw meat or equipment used for processing it, and avoid touching your face or other surfaces.
Disposing of Unused Parts
During the butchering process, there will be some parts of the hog that may not be used, such as bones, fat, and organs. It is essential to dispose of these parts properly to maintain a clean environment and adhere to local regulations.
Composting: Some unused parts, like bones, can be composted or fed to animals. Check with your local regulations to ensure this practice is allowed.
Disposal: Contact your local waste management service to find out the proper procedure for disposing of animal byproducts in your area.
Offal: Dispose of offal (internal organs) properly, as they can harbor bacteria. Keep intestines to make sausage casings, which need to be cleaned very throughly. Either compost them, following local guidelines, or contact your waste management service for proper disposal methods.
