
How to Reheat Gluten-Free Pierogies for Perfect Texture and Taste
Reheating gluten-free pierogies can be straightforward and enjoyable, ensuring that your delightful pockets of dough filled with mashed potatoes or cheese retain their deliciousness. Achieving the perfect texture and flavor when reheating is essential to savoring these comfort food favorites once again. For those who follow a gluten-free diet due to celiac disease or personal preference, mastering the art of reheating these pierogies is worthwhile.
Whether baked, boiled, or pan-fried, gluten-free pierogies need careful attention to maintain their structure and avoid becoming dry or mushy. Methods such as using a skillet with a bit of butter or oil can bring back their crispy exterior while keeping the filling warm and satisfying. Microwaving can work for a quick fix but might not give the same crispy results.
To truly enjoy your gluten-free pierogies, consider pairing them with your favorite sauces or toppings, enhancing the flavors and textures. Reheating might seem daunting, but with the right approach, it's possible to enjoy gluten-free pierogies that taste just as good as when they were freshly made.
Understanding Gluten-Free Pierogies

Gluten-free pierogies require specific ingredients and careful dough handling to achieve the desired texture and taste. Key considerations include using gluten-free flours and understanding the role of binding agents.
What Makes Pierogies Gluten-Free
Gluten-free pierogies are made by substituting traditional wheat flour with gluten-free alternatives. Common substitutes include rice flour, tapioca starch, and cornstarch. These flours are crucial for those who have celiac disease or gluten sensitivity.
In many gluten-free pierogi recipes, xanthan gum or psyllium husk is added. These ingredients help bind the dough, imitating the elasticity provided by gluten. Proper proportions ensure the dough is neither too sticky nor too crumbly.
A gluten-free pierogi recipe might include a base of 2 cups of gluten-free all-purpose flour and add binding agents like xanthan gum to achieve a cohesive texture that holds together when boiling.
The Importance of Proper Dough Handling
Handling gluten-free dough requires a different approach compared to traditional dough. Gluten-free dough is often more delicate and can easily crack or tear if not treated carefully.
To maintain the structure, the dough needs to be kneaded sufficiently. This helps integrate all ingredients thoroughly, ensuring a smooth and pliable consistency. Kneading by hand or using a mixer with dough hooks for about 5 minutes can yield a proper texture.
After kneading, the dough usually benefits from resting. Covering it with a damp towel and letting it sit for at least 30 minutes allows the ingredients to meld. This rest period makes rolling and filling the pierogies easier, preventing the dough from drying out or becoming too brittle.
Preparation Before Reheating

Proper preparation ensures that your gluten-free pierogies are reheated to perfection without losing their texture or flavor. This involves thawing frozen pierogies and organizing your workspace efficiently.
Thawing Frozen Gluten-Free Pierogies
Thawing is a crucial step for frozen gluten-free pierogies. Remove them from the freezer and place in the refrigerator for several hours or overnight. This gradual thawing method helps maintain their structure.
If you’re short on time, use the microwave. Place the pierogies on a microwave-safe plate, cover with plastic wrap, and use the defrost setting for 2-3 minutes, checking periodically. Avoid using high heat as it can cause the pierogies to become too soft or mushy.
Setting Up Your Workstation
A well-organized workstation makes the reheating process smooth and efficient. Start by clearing enough space on your counter and gather all necessary materials: a non-stick frying pan, baking sheet, aluminum foil, microwave-safe bowl, and tongs.
Gathering the tools beforehand prevents mid-process interruptions. Ensure you have utensils for flipping and monitoring the pierogies while reheating. Keeping everything within arm's reach streamlines the reheating process and reduces any potential kitchen mess.
Reheating Techniques
There are several methods to reheat gluten-free pierogies, each offering unique textures and flavors. Whether you prefer boiling for softness or frying for crispiness, each method has its distinctive process.
Boiling Gluten-Free Pierogies
To ensure soft and tender gluten-free pierogies, boiling is a reliable method. Start by filling a large pot with water and bringing it to a boil. Add a tablespoon of salt to enhance the flavor. Once the water reaches a rolling boil, carefully place the pierogies into the pot.
Boil the pierogies for about 4-5 minutes. They're ready when they float to the surface and have a soft texture. Use a slotted spoon to gently remove them from the water. This method keeps the pierogies moist and helps maintain their gluten-free structure.
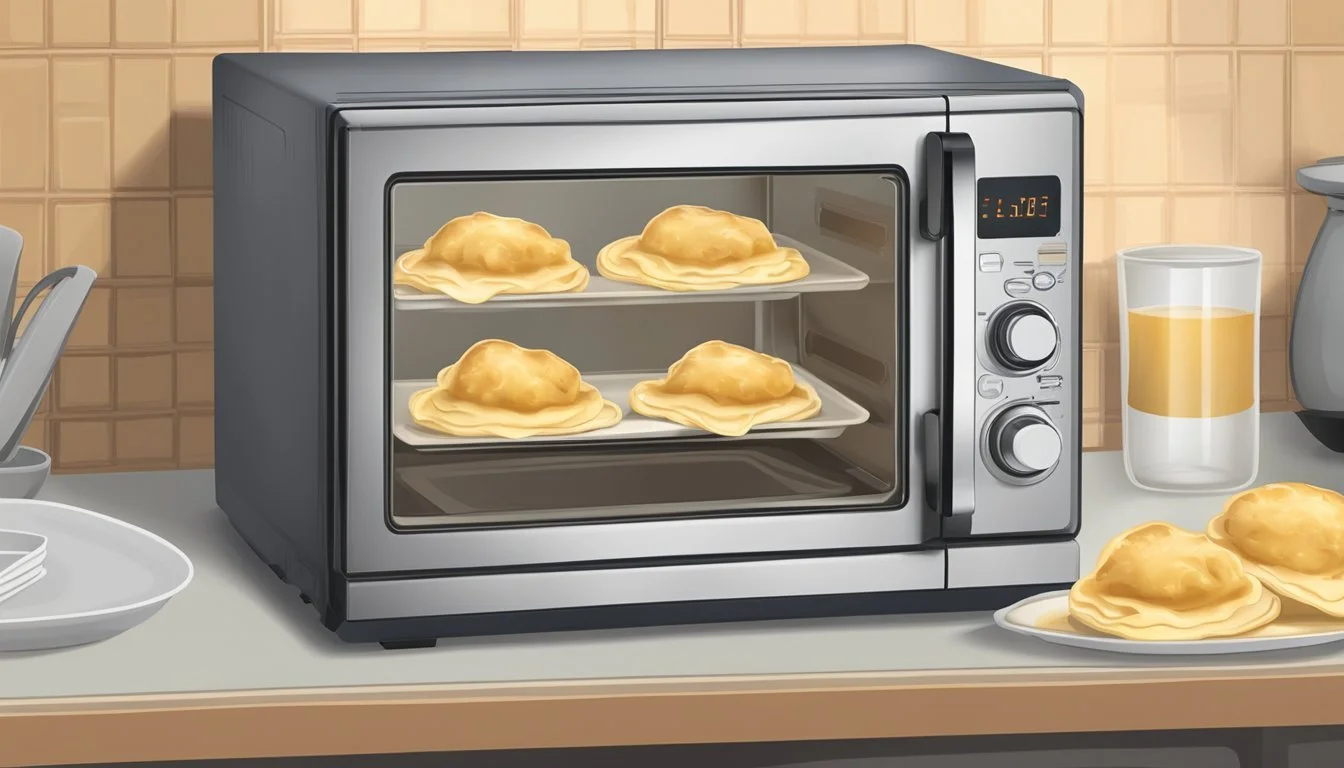
Baking in the Oven
Baking provides a uniform heat that ensures the pierogies are warmed through evenly. Begin by preheating the oven to 350°F (180°C). Lay the pierogies on a baking sheet lined with parchment paper or a lightly greased surface.
Cover the pierogies with aluminum foil to retain moisture, preventing them from drying out. Bake for 15-20 minutes, flipping them halfway through to ensure even heating. This method works well for maintaining the integrity of the gluten-free dough and adding a slight crisp to the exterior.
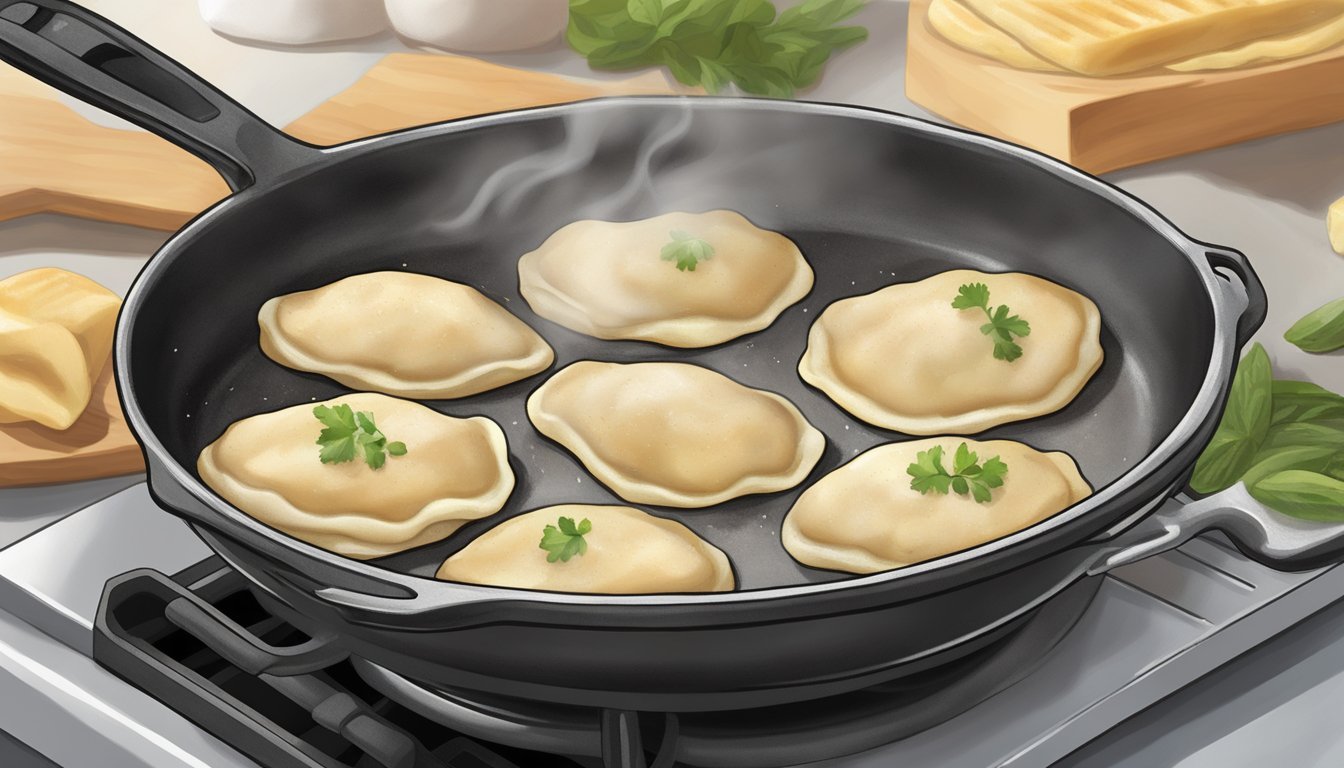
Frying for a Crispy Texture
For those who enjoy a crispy texture, frying is the best option. Heat a non-stick skillet over medium-high heat and add a couple of tablespoons of oil (such as olive oil) or butter. Once the oil or butter is hot, place the pierogies in the skillet.
Fry them for about 4-5 minutes on each side until golden brown and crispy. Use a spatula to flip them gently. This method adds a rich flavor and a beautiful crunch to the pierogies, making them a delectable treat.
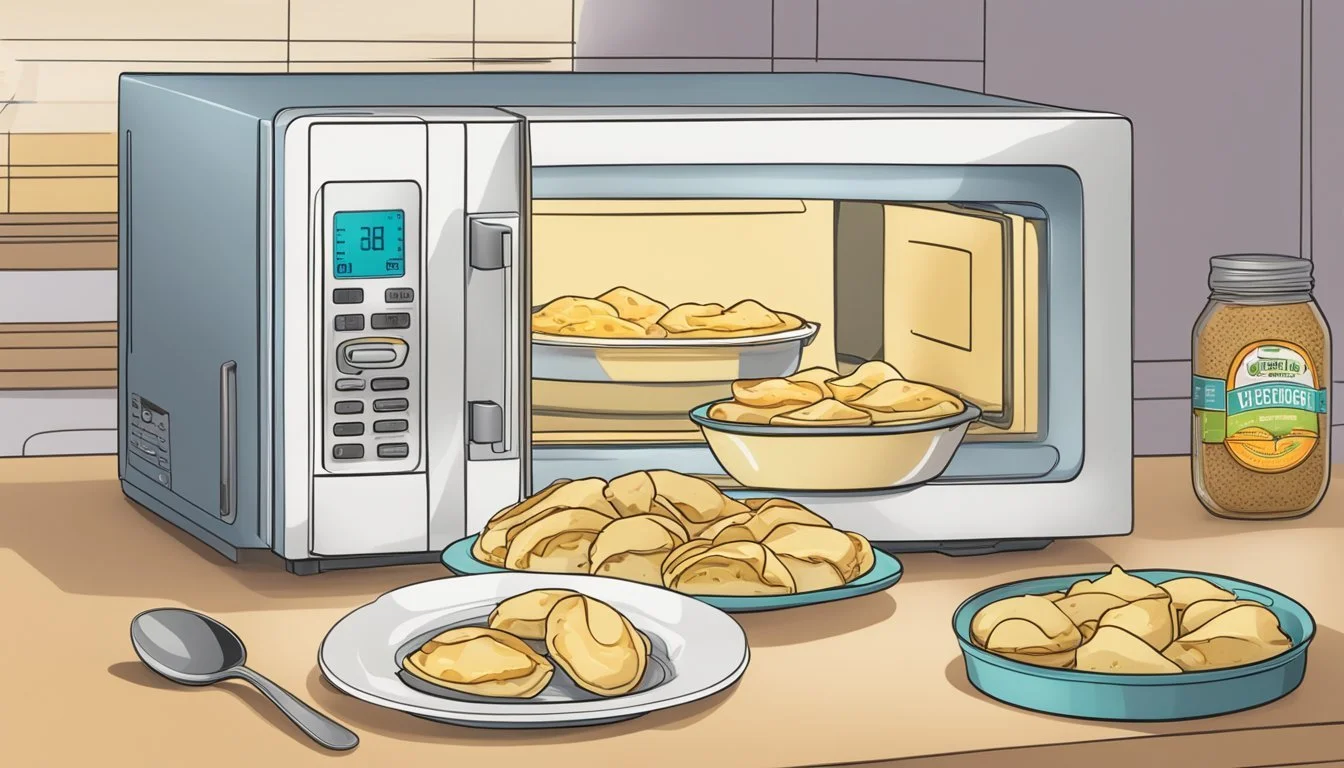
Microwave Method
The microwave method offers a quick and convenient way to reheat pierogies. Place the pierogies in a microwave-safe bowl and cover them with a damp paper towel to prevent them from drying out. Microwave on high for 2-3 minutes, checking them halfway through to ensure even heating.
Microwave times may vary depending on the wattage of your microwave. While this method is the fastest, it may not provide the same texture as boiling or frying. Adjust the time as necessary to achieve the desired temperature and softness.
Each method provides a unique texture and flavor profile, allowing flexibility based on your preference and available time.
Enhancing Flavor and Presentation
Elevating gluten-free pierogies involves selecting complementary toppings and mastering presentation techniques. The right choices can transform a simple dish into a culinary delight.
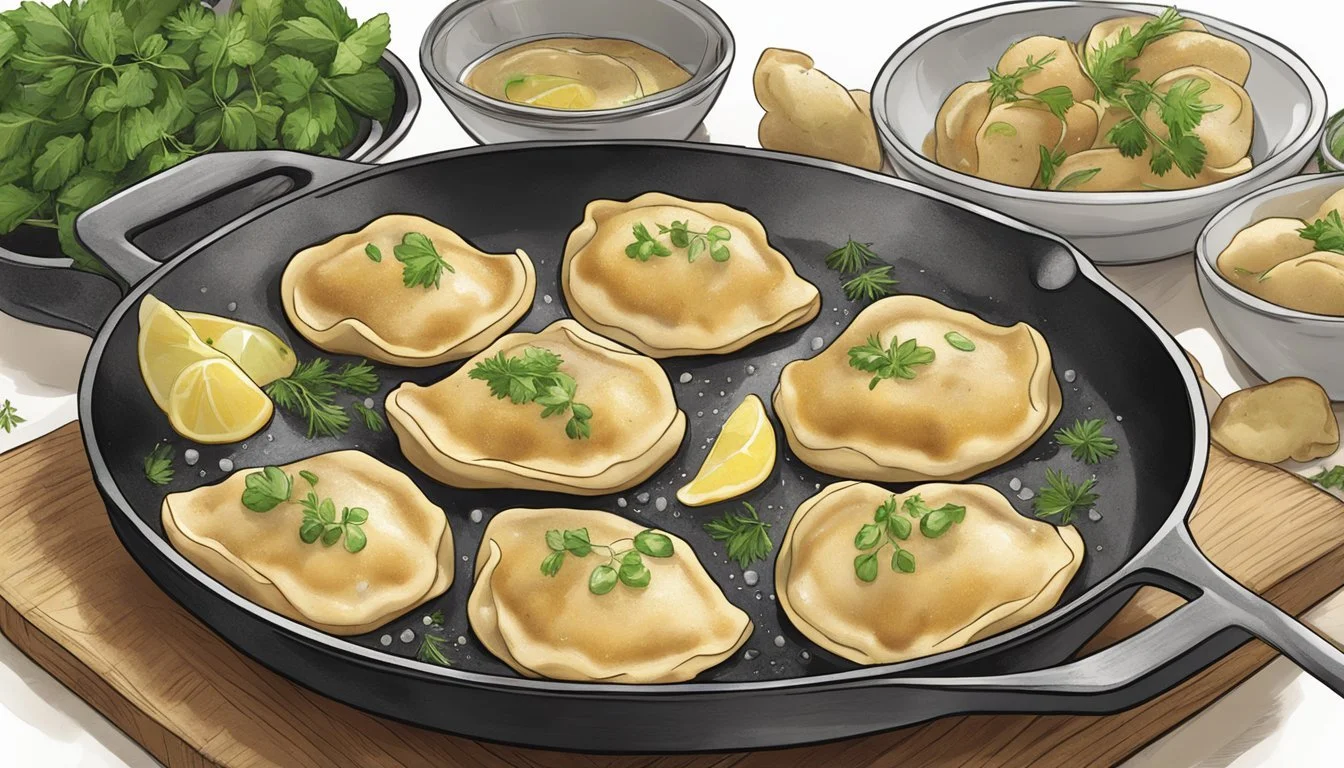
Selecting the Right Toppings and Accompaniments
Choosing toppings enhances the flavors of gluten-free pierogies. Caramelized onions add a sweet, rich taste, while sour cream offers a cool, tangy contrast.
Cheddar cheese can be melted on top for a creamy finish. Bacon bits provide a crunchy, savory element. For a fresher note, sprinkle with dill or scallions.
Accompaniments like buttered sweet potatoes or mashed potatoes served alongside pierogies can make the meal heartier. A side of scrambled eggs can complement the dish, turning appetizers into a main course.
Presentation Tips for Serving
Presentation plays a crucial role in making pierogies appealing. Arrange the pierogies neatly on a plate in a fan or circular pattern. Garnish with fresh herbs like dill for a pop of color and a hint of flavor.
Consider using a colorful platter or wooden board to enhance the visual appeal. Drizzle a bit of melted butter over the pierogies for a glossy finish.
Sprinkle lightly with salt and pepper to complete the look. Adding a small dish of sour cream on the side not only offers a dipping option but also completes the presentation. This attention to detail can turn a simple meal into a memorable dining experience.
Storing Leftover Pierogies
Proper storage of leftover pierogies ensures they remain fresh and safe to eat. Both refrigeration and freezing present viable options for extending the shelf life of your gluten-free pierogies.
Refrigeration Best Practices
When refrigerating leftover pierogies, store them within two hours of cooking to prevent bacterial growth. Place the pierogies in an airtight container or wrap them in plastic wrap to maintain moisture and flavor. It's best to keep them at the back of the refrigerator where the temperature is more consistent.
Labeling the container with the date helps keep track of freshness. Pierogies can be safely stored in the refrigerator at or below 40°F (4°C) for up to three days. Follow these steps to ensure they maintain their texture and taste.
Freezing for Long-Term Storage
For longer storage, freeze the pierogies. First, arrange them in a single layer on a baking sheet and freeze them until solid, around 2-3 hours. This step prevents them from sticking together.
Once frozen, transfer the pierogies to a freezer-safe container or a resealable plastic bag. Label with the date for reference. Stored at 0°F (-18°C) or below, frozen pierogies can last up to three months without significant loss of quality. Be mindful of freezer burn, which can happen if they aren’t well-sealed, affecting taste and texture.
Tips for Perfect Gluten-Free Pierogies Every Time

Perfect gluten-free pierogies require attention to detail in preparation and cooking techniques. This involves avoiding common mistakes and mastering the dough for the best texture and taste.
Common Mistakes to Avoid
Overworking the Dough: Gluten-free dough tends to become tough if overworked. Knead the dough until just combined to avoid this issue.
Skipping Rest Time: Allow the dough to rest for at least 15 minutes. Resting the dough makes it easier to roll out and handle.
Incorrect Ratios: Using the wrong ratios of ingredients can affect the consistency. For example, too much flour can make the dough dry, while too little xanthan gum might prevent it from binding properly.
Not Flouring the Surface: Always use a lightly floured surface to roll out the dough. This prevents sticking and helps achieve an even thickness.
Making Gluten-Free Pierogies from Scratch
Ingredients: Start with a base of gluten-free flour. Add xanthan gum if the flour blend doesn’t contain it, as it helps the dough's elasticity.
Mixing: Combine dry ingredients in a stand mixer with a paddle attachment. Add wet ingredients like whisked eggs, milk, and butter gradually.
Kneading: Knead the dough briefly just until it forms a smooth ball. Use a rolling pin to roll the dough out to about 1/8-inch thickness.
Cutting and Filling: Use a round cutter like a cookie cutter, glass, or biscuit cutter to form circles. Place a small amount of filling, such as mashed potatoes or cheese, in the center. Fold into semi-circles and seal the edges.
Cooking: Boil the pierogies until they float, then sauté in butter for a crispy exterior. Serve immediately with a side of sour cream.
