
How to Measure Ingredients for a Homemade Glaze Recipe
Accurate Techniques for Perfect Results

Creating a homemade glaze can elevate baked goods to a professional level, adding both flavor and aesthetic appeal. Whether the goal is to achieve a glossy chocolate coating or a thin, sweet drizzle, the success of a glaze comes down to precision in measurement and ingredient balance. A glaze with the correct consistency and taste not only enhances the texture of desserts (What wine goes well with desserts?) but also complements their core flavors.
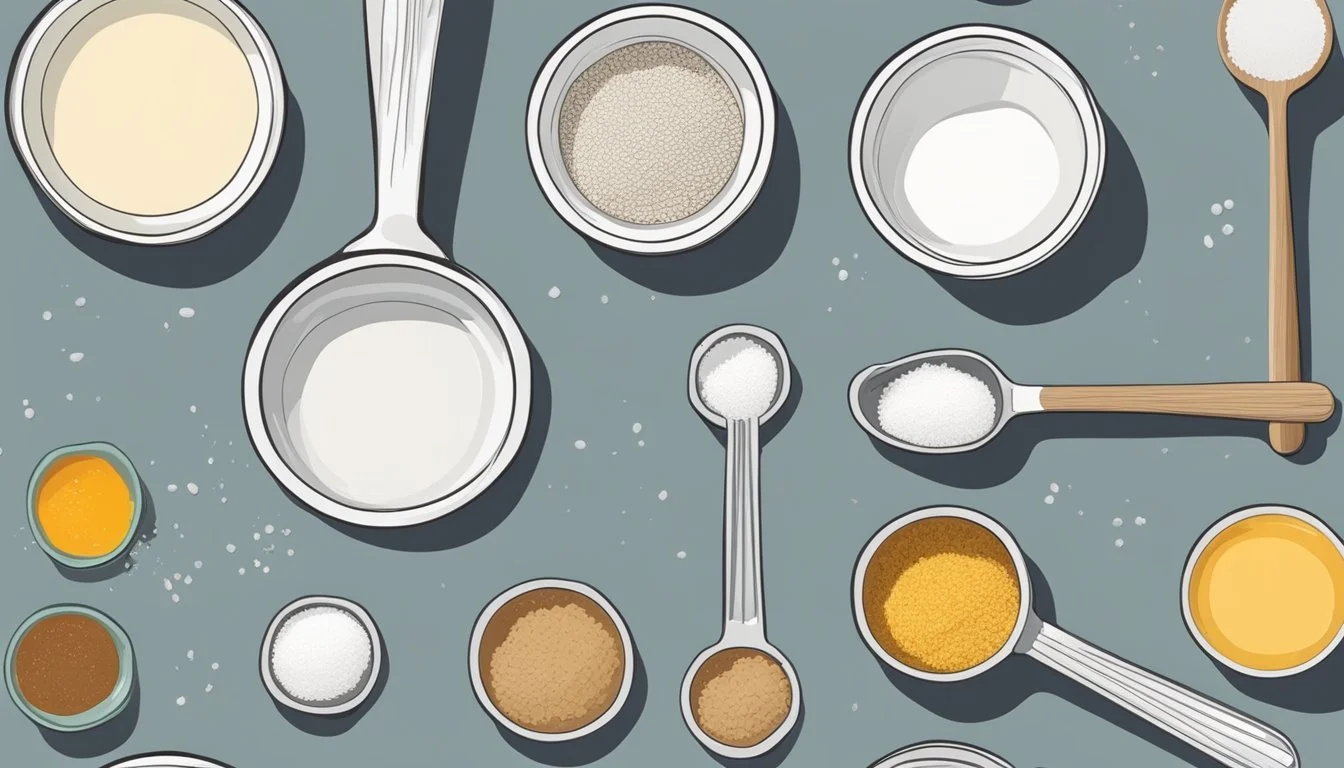
To ensure the best results, bakers must measure ingredients meticulously. The process begins with having the right tools, such as measuring cups and spoons, kitchen scales, and mixing utensils that facilitate accuracy. A scale is particularly recommended for dry ingredients, as it provides a precise measurement regardless of the ingredient’s density or particle size.
Using a kitchen scale also helps in maintaining consistency across batches, ensuring each iteration of the glaze maintains the same thickness and sweetness, contributing to a reliable final product. Understanding the role each component plays, from the base liquid to the sugar, and how they interact can assist bakers in adjusting the recipe as needed, using the correct ratios for the desired result.
Understanding Glaze Basics
When preparing homemade glaze recipes, it is crucial to grasp the fundamentals of glaze and identify the type suited for the intended use. Understanding these basics ensures proper application and results in finished pottery or baked goods.
Defining Glaze and Its Purpose
A glaze serves as a protective and aesthetic coating; in pottery, it vitrifies when fired, forming a glassy layer. The purpose of the glaze is two-fold — it seals the porous surface of the clay, making it watertight and food-safe, and also provides a decorative finish that can enhance the pottery's texture and color. A glaze recipe typically contains a balance of silica, alumina, and a flux, reflecting different properties once fired.
Types of Glazes for Pottery and Baking
For pottery, glazes come in various types, such as:
High-Fire Glazes: Withstand temperatures above 1200°C (2192°F).
Mid-Range Glazes: Mature at around 1160°C to 1200°C (2120°F to 2192°F).
Low-Fire Glazes: Fire at temperatures below 1160°C (2120°F).
Each type reacts differently to temperature and can produce distinct surface finishes, ranging from glossy to matte.
In baking, a glaze typically refers to a sweet, thin icing or syrup applied to pastries or confections. Recipes for baking glazes usually consist of powdered sugar, milk or water, and flavorings, adjusted to achieve desired thickness and flavor.
Essential Ingredients for Glaze

The precision and selection of ingredients in glaze recipes are paramount to achieving the desired finish on pottery pieces. Each component has a specific role, impacting the glaze's melting properties, color, and texture.
Common Ingredients in Glaze Recipes
Glaze recipes vary widely, but most share a set of common ingredients that serve as the foundation for the mixture. Typically, these ingredients include:
Silica (SiO2): Provides the glassy quality of the glaze.
Alumina (Al2O3): Stabilizes the glaze, preventing it from running off the pottery.
Fluxes: Reduce the melting temperature of the silica.
Colorants: Such as metal oxides or stains, add color.
Modifiers: Adjust the texture and behavior of the glaze.
Ingredient lists may also include more specific or unique additives depending on the desired effects, such as:
Whiting (calcium carbonate)
Feldspar (a source of silica and alumina)
The Role of Fluxes in Pottery Glazes
Fluxes are a critical group of ingredients in glaze recipes, influencing the melting behavior of the glaze. Different fluxes bring various characteristics to the glaze:
Lead (Pb): A traditional flux, now less used due to toxicity.
Boron (B2O3): Common in low-temperature glazes.
Sodium (Na2O) and Potassium (K2O): Found in feldspars, they are high-temperature fluxes.
Each flux affects the glaze's melting temperature and the final appearance. For food-safe glazes, it is crucial to opt for non-toxic flux alternatives. A basic understanding of the chemistry of these ingredients allows potters to experiment and create custom glaze recipes that suit their artistic vision.
Ingredient Measurement Techniques
Accurate ingredient measurement is crucial for the success of a homemade glaze recipe. It ensures the right proportion of thickness and consistency in the final mix.
Weighing vs. Volumetric Measurements
When preparing a glaze, chefs often need to decide between weighing ingredients and using volumetric measurements.
Weighing: It involves using a kitchen scale to measure ingredients by weight, which is considered more accurate. Glazes require precise ratios for optimal thickness, making weight measurement the preferred method.
Measurement Type When to Use Weighing When precision is crucial Volumetric Simpler recipes or less precision
Volumetric Measurements: This uses measuring cups and spoons. Volumetric measurement is quicker and commonly used. However, it may introduce more variance in consistency.
Using Measuring Tools Accurately
Utilizing measuring tools correctly can have a significant impact on the consistency of a glaze.
Measuring Cups: There are separate cups for dry and wet ingredients. For dry ingredients, one should fill the cup and level it off with a straight edge.
Measuring Spoons: Precision is key for small quantities. Use the correct spoon size and fill it to the brim for accuracy.
Note: Always use measuring tools designed for the ingredient type (liquid vs. dry) as this can affect the accuracy of the measurement.
Adjusting Consistency and Thickness
Once ingredients have been measured and mixed, the consistency of the glaze might require adjustments.
To Thicken: Add more powdered ingredients in small increments, using appropriate measuring tools for precision.
To Thin: Incorporate liquid ingredients gradually. This should be done meticulously to avoid making the glaze too thin.
Adjustment should be done slowly and carefully, evaluating the glaze after each addition to avoid over-correction.
Mixing and Applying Glazes

Successful glaze application hinges on precise mixture preparation and the use of proper techniques tailored for various surfaces.
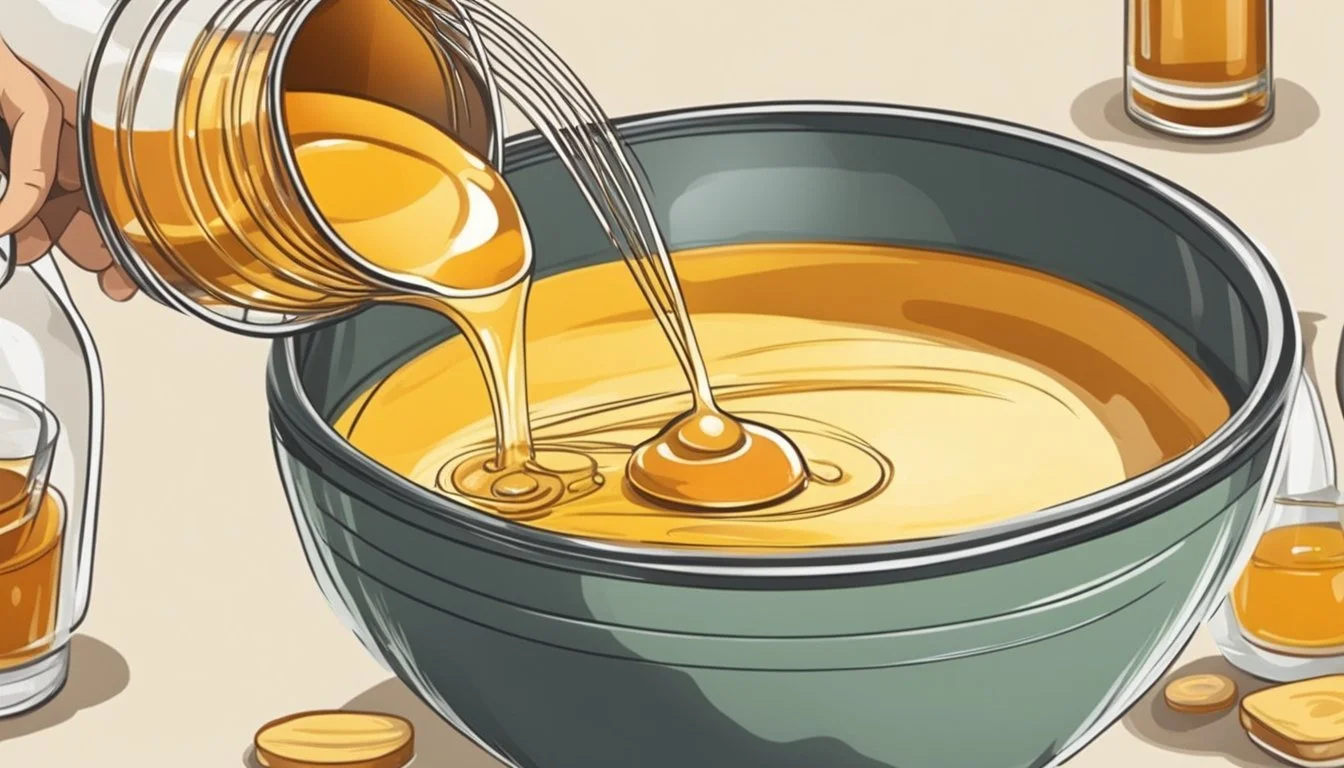
Creating a Smooth and Glossy Mixture
A critical step in achieving a smooth and glossy glaze is to mix the dry ingredients uniformly. To start, one must measure the components accurately and sieve them to prevent clumping. Consistency is vital; the glaze mixture should have the viscosity of heavy cream to ensure a flawless coat. A reliable mixing tool such as a mechanical mixer or a hand whisk is essential for creating a homogenous slurry free of lumps.
Measure ingredients precisely.
Sieve to remove clumps.
Aim for heavy cream-like glaze consistency.
Use a mixer or whisk to create a smooth mixture.
Techniques for Glaze Application on Different Surfaces
Glaze application varies based on the pottery's surface and the artisan's desired effect. Brushing, dipping, and spraying are three common methods. It's important to apply thin, even coats, especially when brushing, to avoid drips and uneven coverage. For dipping, immerse the piece quickly and steadily to coat it uniformly. Spraying requires a spray gun, allowing for even glaze distribution even on complex shapes. Each technique requires practice to master the timing and movement essential for high-quality results.
Brushing: Apply thin, even layers using a soft, wide brush.
Dipping: Submerge the piece into the glaze smoothly, ensuring even coverage.
Spraying: Use a spray gun for consistent coats, ideal for complex pieces.
Customizing and Experimenting with Glazes

Crafting a unique glaze involves customization and experimentation, intertwining precise chemistry with creative exploration. This journey allows potters to refine colors, textures, and finishes, adjusting variables such as firing temperatures and chemical mixtures to achieve striking results.
Experimenting with Colors and Textures
One can create a myriad of hues and textures in glazes by altering the types and quantities of oxides and colorants. Common colorants include:
Cobalt oxide: for blues
Iron oxide: for greens and browns
Copper carbonate: for greens and reds in reduction
Rutile: for tans and browns, often yielding speckled textures
For texture variations, materials like ilmenite or coarse grog can be added to the glaze. For instance, to achieve a matte finish, a potter might mix in silica or alumina in higher quantities. Conversely, a glossy finish may call for more fluxes such as frit or boron.
Tips for Color Experimentation:
Always test in small batches.
Keep detailed records of the types and amounts of materials used.
Note the impact of kiln atmosphere on final colors, especially for reds and purples.
Adjusting Firing Temperatures and Chemical Mixtures
The firing temperature significantly affects the final appearance of the glaze, as does the precise chemical mixture used. Here are specific factors to consider:
Firing Temperature: High-fire glazes (Cone 9-10) provide durability and rich colors but require a kiln that can reach higher temperatures. Mid-range firing (Cone 5-6) is more accessible and still offers a wide color palette.
Chemical Mixtures: The base glaze recipe can be modified by changing the silica to alumina ratio, which will influence the fluidity of the glaze during firing.
Chemical Adjustments for Textural Effects:
More silica: smoother texture
More alumina: stiffer, less fluid glaze
Addition of zinc oxide: can enhance certain colors and surface qualities
When experimenting with chemical mixtures, safety is paramount. Handling materials that can be toxic or harmful when ingested or inhaled requires wearing protective equipment like gloves and masks. Always adhere to health and safety guidelines when handling glaze ingredients.
Advanced Glaze Dynamics

In the art of glaze creation, the interplay of melting points and the strategic layering of glazes are pivotal for achieving dynamic visual effects. Crafters must consider the specific properties of each glaze to ensure the end result is both aesthetically pleasing and structurally sound.
Layering and Combining Different Glazes
Layering glazes can introduce depth and complexity to the surface of a piece. When layering, one must take into account the transparency and opacity of each glaze:
Transparent Glazes: Apply as a top layer to allow underlying colors to shine through.
Opaque Glazes: Best used as a base or middle layer, as they will obscure layers beneath them.
To prevent undesirable interactions, it is crucial to conduct test firings. Layering should be meticulously recorded, and the following should be observed:
One's application technique—brushing or dipping—can alter the final outcome.
The thickness of the glaze, as uneven layers can lead to inconsistent results.
A binder may be required for some glaze mixtures to improve adhesion between layers.
Understanding Melting Points and Glaze Interactions
The melting point of a glaze dictates how it interacts with others and the pottery body itself. Consider the following factors:
Low-Fire Glazes: Typically melt at Cone 018 up to Cone 02.
Mid-Range Glazes: Usually melt at Cone 4 through Cone 6.
High-Fire Glazes: Melt at temperatures exceeding Cone 8.
Pottery glazes within similar melting point ranges tend to interact predictably. Below is a table that outlines compatibility based on melting points:
Glaze A Glaze B Expected Interaction Cone 06 Cone 06 Compatible Cone 6 Cone 10 Caution - Test Required Cone 6 Cone 6 Compatible Cone 1 Cone 06 Incompatible
Adjusting a glaze's melting point may involve altering its silica, alumina, or flux content, but one must be aware that even minor changes can significantly impact the result. The potter must continuously test and document variations to understand the full scope of interactions.
Problem-Solving and Troubleshooting
When making homemade glaze, precision is key, but issues may arise. This section will help you address these issues confidently and make necessary adjustments to achieve the perfect consistency and flavor.
Addressing Common Glazing Issues
Crazing: This is the occurrence of small cracks on the surface of the glaze. To address crazing, ensure that measurements are precise. If crazing occurs, it may indicate an imbalance in the sugar-to-liquid ratio. Adjust by slightly increasing liquid or reducing sugar until the right balance is reached.
Runny Glaze: If the glaze is too thin and runny, add more powdered sugar, a bit at a time, until the desired thickness is achieved. It is essential to sift the sugar to prevent lumps.
Too Thick: Conversely, glazes that are too thick benefit from the addition of a small amount of milk or water. Start with 1/4 teaspoon at a time, stirring thoroughly after each addition to avoid over-thinning the glaze.
Uneven Texture: The glaze should be smooth. If it's uneven, make sure all ingredients were at room temperature and adequately whisked to integrate air for a smooth finish. Strain the glaze through a fine-mesh sieve if necessary.
Making Substitutions and Corrections
Substitutions: Home cooks may need to make ingredient substitutions on occasion. Use corn syrup in place of glucose with a 1:1 ratio if the latter isn't available. Lemon juice can often be swapped for other citrus juices when acidity is needed. However, be aware of flavor variations.
Making Corrections: Corrections should be made incrementally. If a substitution changes the flavor or consistency, return to the recipe's original ratios by adding small amounts of the intended ingredient or adjusting accompaniments.
To counteract oversweetness: Add a pinch of salt or a few drops of lemon juice to balance the flavor.
For color correction: If the glaze’s color is off, consider using food coloring judiciously.
For flavor adjustments: Pure vanilla extract or a splash of liqueur can be introduced to enhance the glaze's flavor.
By being meticulous with measurements and understanding the nature of each ingredient, one can effectively troubleshoot and correct glazing issues that may arise during the preparation.
Storing and Preserving Glazes
Proper storage and preservation are crucial to maintain the quality and usability of homemade glazes over time. These methods ensure that the glaze's properties remain stable, ready for future pottery projects.
Best Practices for Storing Glazes
When storing liquid glazes, potters should use airtight containers such as buckets with tight-fitting lids to prevent the evaporation of water and the ingress of contaminants. It's essential to label each container with the glaze name, date, and any safety information. Storing glazes in a cool, dry place away from direct sunlight and heat sources helps to maintain consistency. The refrigerator can be used for short-term storage to inhibit bacterial growth, especially for glazes mixed with fresh ingredients or those that are prone to spoilage.
Storage Checklist:
Airtight containers: Prevents evaporation and contamination.
Labeling: Date, name, and safety info.
Cool, dry environment: Stability of properties.
Freezing and Thawing Techniques
Some glazes can be effectively frozen to extend their shelf life. However, this process is best suited for glazes that do not contain materials prone to separating or settling in extreme temperatures. To freeze glazes, one should pour the liquid mixture into smaller, freezer-safe containers, leaving some headspace for expansion. Upon freezing, the container must be sealed and labeled.
To thaw, the glaze should be placed in the refrigerator to slowly come to temperature, which reduces the risk of temperature shock that could affect the glaze's properties. Once thawed, the glaze must be thoroughly mixed to ensure that all components are uniformly distributed before use.
Freezing Guidelines:
Smaller, freezer-safe containers: Prevents waste, easier to manage.
Headspace in containers: Allows expansion.
Slow thaw in refrigerator: Minimizes thermal shock.
Mix thoroughly post-thaw: Ensures consistency.
Adhering to these techniques will help potters preserve the integrity of their glazes for prolonged periods, ensuring they are ready for use when needed.
Applying Glaze to Food
When glazing food, one must select the appropriate technique for desserts and pastries, considering both the aesthetic appeal and the balance of flavors. Glazing not only adds a finishing touch but also enhances the dessert's appeal, making it visually enticing.
Glazing Techniques for Desserts and Pastries
For cakes and pastries:
Pour Over: For a smooth finish, chefs often pour glaze evenly over cakes, ensuring the sides are covered uniformly. This method is ideal for cakes that require a sleek and glossy appearance.
Dip & Drip: Cookies and individual pastries can be partially dipped in glaze, allowing excess to drip off for a clean look.
For consistency and coverage:
The glaze should be of the right viscosity; a runoff is a test used where the glaze is poured from a spoon and should form a continuous flow, which indicates it's not too thick.
Two coats may be applied if a single coat doesn't give full coverage; the first coat acts as a primer for the second.
Decorative Tips and Topping Ideas
To elevate visual appeal:
Patterns: Using a piping bag, intricate patterns can be drawn with glaze on desserts. This requires a steady hand and a thinner consistency to achieve precision.
Swirls: Adding a second colored glaze and using a toothpick to swirl creates a marbled effect, adding sophistication to simple desserts.
Topping with additional elements can complement the glaze:
Topping Dessert Suggestion Method Chopped Nuts Glazed Cookies Sprinkle on top before glaze sets Fresh Fruit Iced Cakes Place neatly after glazing Chocolate Shards Eclairs with Icing Insert gently into wet glaze Edible Flowers Cupcakes Adorn on glaze for a natural look
Each topping should complement the flavors of the glaze and the dessert itself, balancing taste and texture.
Health and Safety Considerations
When preparing homemade glaze recipes, it is crucial to prioritize health and safety. The handling of materials and understanding their food safety implications are key aspects to ensure the wellbeing of both the artisan and the end user.
Handling Pottery Glaze Materials Safely
Materials and Equipment: When working with glaze materials, individuals should wear personal protective equipment such as gloves and masks to prevent skin contact and inhalation of fine particles. All materials should be clearly labeled to avoid any confusion.
Dust and Chemicals: Glaze materials often come in the form of fine powders that can be hazardous when inhaled or if they come into contact with the skin or eyes. Work in a well-ventilated space to minimize exposure to dust.
Safe Storage: Store all glaze materials in airtight containers, away from food and out of reach of children and pets.
For example, the handling of a common glaze ingredient like silica would require careful measures due to its fine particulate nature, which can be harmful when inhaled.
Food Safety with Edible Glazes
Non-Toxic Materials: For glazes intended for surfaces in contact with food, only use materials classified as food-safe. Avoid lead-based or other toxic compounds that can leach into food.
Proper Firing: Ensure glazes are fired to the correct temperature as under-fired glazes may not properly vitrify, leaving them porous and potentially harmful if used with food. Use a kiln thermometer or cones to verify temperatures.
For instance, a glaze intended for a baking dish should withstand high temperatures without cracking or releasing harmful substances into the food during baking.
Final Thoughts and Best Practices
When approaching the precise measurement of ingredients for a homemade glaze, one can feel confident in achieving consistent results by adhering to established best practices. Below are key tips to ensure simplicity and accuracy throughout the process:
Weighing Ingredients: Always use a digital scale for measuring dry components. Precision is vital, and scales provide the exactness required for a successful glaze.
Liquid Measurement: For water and other liquids, a measuring jug with clear markings is the best choice. Ensure that measurements are made at eye level to avoid inaccuracies.
Batch Size: Start with small quantities to allow for testing and adjustment. Beginners will find this step-by-step approach less daunting and more manageable.
Mixing Procedure: Mix dry ingredients thoroughly before slowly introducing water. Continuous stirring during this process can prevent the formation of lumps, leading to an even-textured glaze.
Safety First: Remember that some glaze ingredients can be hazardous. Use personal protective equipment such as gloves and masks and work in a well-ventilated area.
Documentation: Keep a detailed record of all ingredients and their proportions for each batch. This habit is not only a cornerstone of replication but also helps in refining the glaze over time.
Here is a simple format for documenting a glaze recipe:
Ingredient Amount (grams) Notes Silica 100 Feldspar 150 Clay Body 50 eg. Kaolin Clay Colorant 10 Optional Water (ml) 200 Adjust as needed
To maintain the integrity of the glaze, one must be meticulous and patient. The process is approachable for beginners who are encouraged to embrace the step-by-step learning curve. With these practices, artisans can confidently craft glazes that are both beautiful and functional.
