
Perfecting the Art of the Dutch Oven Campfire Chili
A Guide to Hearty Outdoor Cooking

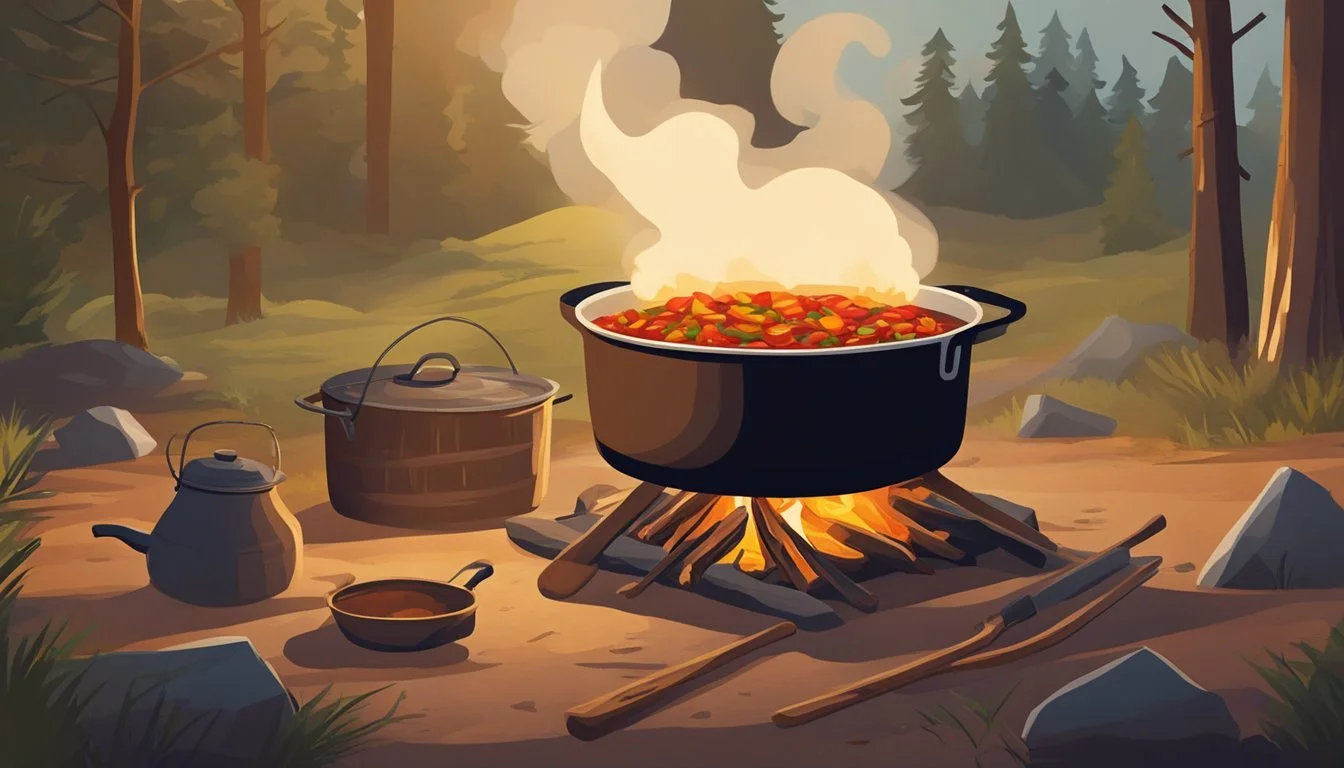
Cooking over an open fire, one dish stands as a hearty symbol of outdoor culinary tradition: chili. Whether it’s under the canopy of green woods or a starlit desert sky, the Dutch oven campfire chili offers a combination of simplicity and a depth of flavor that few campfire meals can rival. The Dutch oven, a thick-walled cooking pot with a tight-fitting lid, is revered for its durability and versatility, making it an indispensable tool for any outdoor adventurer seeking to elevate their campfire cooking.
The creation of the perfect Dutch oven campfire chili is an art that marries the ruggedness of outdoor cooking with the fines of gourmet flavors. The process begins with choosing quality ingredients that blend well together – various meats, beans, seasonings, and vegetables – all playing a crucial part in building the chili's complex flavor profile. The Dutch oven's ability to retain and evenly distribute heat makes it an ideal vessel for simmering chili, allowing all the ingredients to meld together beautifully as they cook slowly over the glowing embers.
Every chili cookout is an opportunity to refine technique and flavor. From the initial browning of the meat to the final simmer, attention to detail is critical. Tasting and seasoning at various stages allow the chef to balance the flavors to their preference, ensuring that each pot of campfire chili is as unique as the setting in which it's cooked. The result is a sumptuous and satisfying meal that stands as a centerpiece of any camping experience, offering a warm and inviting dish to gather around as the embers crackle and the night sky unfolds.
Essentials of Dutch Oven Selection
When preparing for the perfect campfire chili, having the right Dutch oven is integral. This section focuses on the selection process, the materials, and the size required for campfire cooking perfection.
Selecting the Right Dutch Oven
A 12-inch Dutch oven is the ideal size for a standard campfire chili recipe. The depth of the oven is also crucial; a deeper oven allows for ample space to mix ingredients without spillage. It’s important to select a Dutch oven with a snug-fitting lid to retain heat and moisture, which are essential for even cooking and full flavor development.
Understanding Oven Materials
Dutch ovens are made predominantly from cast iron due to its exceptional heat retention and durability, which are essential qualities for outdoor cooking. When selecting a cast iron Dutch oven, ensure that it is pre-seasoned to prevent sticking and to make cleaning easier. A well-seasoned Dutch oven also contributes to the complexity of flavors in the chili.
Sizing and Dutch Oven Capacity
The capacity of a Dutch oven is measured in quarts. A 12-inch cast iron Dutch oven can hold up to 6 quarts, making it suitable for feeding a group of 4-6 people. Here's a quick guide:
2-4 quarts: Small, suitable for 1-2 people
5-7 quarts: Medium, suitable for 4-6 people (standard size for chili)
8+ quarts: Large, suitable for larger groups
For a campfire chili, the medium size is usually perfect as it provides enough room for the ingredients to simmer together and develop a rich, hearty flavor.
Preparation Before Cooking
Preparing a perfect Dutch Oven Campfire Chili involves meticulous ingredient preparation and precise campfire setup. Ensuring the Dutch oven is well-seasoned before cooking is also crucial.
Gathering and Preparing Ingredients
Beans: If using dried beans, they should be rinsed and soaked overnight prior to the day of cooking. This will reduce cooking time and ensure they're tender.
Proteins: High-quality beef, whether chuck or ground, should be used for a rich flavor base. Pork sausage can also be added for complexity. Before leaving for the campsite, measure and pack the proteins in cooled containers.
Vegetables: Dice onions, tomatoes, bell peppers, and mince garlic in advance. Use fresh produce to enhance the chili's flavor profile.
Spices: Measure out the required amount of chili powder, cumin, paprika, and any other desired spices into a small container.
Oil: A neutral oil, like canola or vegetable, is ideal for searing meat and sautéing vegetables. Carry enough to accommodate these steps.
Campfire Setup and Maintenance
Building the Fire: Start with small kindling and gradually add larger logs to create a steady, medium-high heat source suitable for cooking.
Coal Preparation: For an even cook, prepare a bed of hot coals that can provide consistent heat beneath the Dutch oven.
Heat Regulation: Keep extra coals handy to maintain the temperature, adding them as necessary during the cooking process.
Seasoning Your Dutch Oven
Inspection: Before heading out, inspect the Dutch oven for rust or any signs of wear.
Seasoning: If the Dutch oven isn't pre-seasoned, coat it with a thin layer of oil and heat it until the oil starts smoking to create a non-stick layer.
It's imperative to approach each step with attention to detail to enhance the chili's overall flavor and ensure a successful campfire cooking experience.
Mastering the Chili Recipe
Creating the ultimate campfire chili in a Dutch oven requires attention to detail in the selection of base ingredients and spices, meat and vegetable variations, and cooking methods to ensure a flavorful and satisfying dish.
Base Ingredients and Spices
The foundation of a hearty chili begins with the right base ingredients and spices. A combination of kidney beans and black beans provides texture and protein, while diced tomatoes and tomato paste add richness and depth to the base. The flavor profile of the chili is built with a mix of chili powder, cumin, oregano, and a pinch of sugar to balance the acidity. Using either olive oil or vegetable oil is essential for sautéing the initial aromatic ingredients like onions and garlic.
Aromatic Base:
Olive oil or vegetable oil: 2 tablespoons
Onion: 1 large, diced
Garlic: 4 cloves, minced
Spice Mix:
Chili powder: 2 tablespoons
Cumin: 1 teaspoon
Oregano: 1 teaspoon
Sugar: 1 teaspoon (optional for balance)
Meat and Vegetable Variations
The choice of meat can greatly influence the chili's overall taste and texture. Options include ground beef, pork, turkey, or a mixture of meats for complexity. For a deeper flavor, browning the meat is crucial before it is simmered with other ingredients. Additionally, including a variety of vegetables like red bell pepper, jalapeño, and additional beans boosts the nutritional value and adds layers of flavor. One can adjust the level of heat by modifying the amount of jalapeño used.
Meat Choices:
Ground beef
Pork sausage
Turkey (as a leaner option)
Vegetables and Legumes:
Red bell pepper: 1, diced
Jalapeño: minced, to taste
Beans: 1 can each of kidney and black beans, rinsed and drained
Cooking the Chili to Perfection
The chili should be cooked slowly and steadily over the campfire coals to maximize flavor infusion. It begins with cooking the meat until it is properly browned and then adding in the aromatic vegetables until they are soft. The spices are introduced next, cooked briefly to release their fragrant oils. The beans and tomatoes follow, with everything allowed to simmer together, letting the flavors meld. The correct simmering time depends on the desired consistency, as a longer cook will yield a thicker chili. While the chili cooks, occasional stirring is necessary to prevent sticking and to encourage even cooking. Just before serving, optional toppings like sour cream or shredded cheese can be added for additional flavor and texture.
Cooking process:
Sauté meat until browned, then remove excess fat.
Add vegetables and cook until softened.
Stir in spices and cook briefly.
Mix in beans, tomatoes, and enough water to cover the mixture.
Simmer over campfire coals, stirring occasionally.
By carefully selecting and preparing the ingredients and giving the chili time to cook to perfection, anyone can become adept at crafting an unforgettable campfire chili experience.
Cooking Techniques and Temperature Control
Crafting the quintessential Dutch oven campfire chili hinges on mastering the proficient use of coals and understanding the meticulous nature of simmering, while deftly managing the oven's temperature.
Utilizing Coals and Charcoal Briquettes
To ensure consistent heat, one starts by creating a bed of hot coals or charcoal briquettes under the Dutch oven. The intensity of the heat is controlled by the number of coals used:
Light Simmer: Place a smaller quantity of coals beneath the oven.
Rolling Boil: Increase the number of coals accordingly.
The lid of the Dutch oven can also be covered with coals to circulate heat from the top, simulating an oven environment.
Simmering and Stirring Methods
The essence of a good chili is its texture and flavor, achieved through a slow simmer. The simmering process allows flavors to meld and deepens the complexity of the chili. Stirring is crucial to:
Prevent sticking: Regularly stir the chili to avoid burning at the bottom.
Distribute heat: Stirring helps evenly distribute temperature throughout the chili.
The Dutch oven should remain covered to retain steam and moisture, only opening to stir.
Regulating Dutch Oven Temperature
Temperature control is paramount in Dutch oven cooking. Here are steps to maintain an ideal cooking temperature:
Increase Heat: Add more coals or briquettes.
Decrease Heat: Remove coals or spread them further apart.
Rotate the Dutch oven and lid in opposite directions every 15 minutes to avoid hot spots and ensure even cooking.
Avoid cooking directly over an open flame, as it can cause unpredictable temperature spikes and scorch the food. Using a heat source like a bed of coals provides a steady, controllable heat essential for perfect Dutch oven campfire chili.
Dutch Oven Care and Maintenance
A well-maintained Dutch oven provides longevity and consistency in all your campfire cooking endeavors. Key to this maintenance is proper cleaning, storage, and regular care practices.
Cleaning Your Dutch Oven After Use
After enjoying your campfire chili, it's essential to clean your cast iron Dutch oven while it's still warm. Empty the pot and wipe it down with a paper towel to remove excess food particles. For tougher residue, boil water in the pot to loosen the bits. Avoid using soap, as it can strip the seasoned coating. Use a non-abrasive sponge or brush to clean the surface gently. Once cleaned, dry the pot and lid thoroughly with a clean towel.
Steps to Clean Your Dutch Oven:
Wipe with a paper towel while warm.
Boil water to loosen tough residue (if needed).
Scrub gently with a non-abrasive sponge.
Dry thoroughly with a towel.
Proper Storage Tips
Storage is crucial in preventing rust and maintaining the integrity of your Dutch oven. Ensure both the pot and lid are completely dry before storing. To keep air circulating, place a paper towel between the lid and the pot before stowing it away. This prevents moisture buildup and helps to ward off rust. If possible, use a storage bag or cover to protect it from dust and pests.
Dutch Oven Storage Checklist:
Ensure pot and lid are dry.
Place a paper towel between pot and lid.
Store in a dry place with a cover.
Longevity Practices for Your Oven
To prolong the life of your Dutch oven, one must adhere to regular seasoning. After each cleaning, apply a thin layer of vegetable oil to the pot and lid's surface. Heat the Dutch oven upside down over a campfire or in your home oven to allow the oil to penetrate the cast iron. This process will protect and renew the non-stick surface. Always use proper tools like tongs or a lid lifter when handling the hot pot and lid to avoid burns and maintain a safe cooking environment.
Seasoning Process:
Apply a thin layer of vegetable oil to the pot and lid.
Heat the Dutch oven upside down to allow for oil penetration.
Utilize tongs or a lid lifter for safe handling.
Serving and Presentation of Chili
When serving campfire chili, one's focus should concentrate on enhancing the flavors with the right toppings and accompaniments, presenting it in a visually appealing manner, and ensuring practicality at the campsite.
Toppings and Accompaniments
A bowl of chili gains another dimension when topped with shredded cheddar cheese, adding a creamy texture and rich flavor. For those who prefer a spicy kick, a sprinkle of jalapeños or a dash of hot sauce can elevate the heat. Pairing the chili with sides like cornbread, biscuits, or tortilla chips not only complements the dish but also provides a delicious textural contrast. Here's a simple list of suggested toppings:
Shredded cheese: Cheddar or a spicy pepper jack
Sour cream: A dollop can cool down spiciness
Green onions or cilantro: For a fresh flavor boost
Lime wedges: A squeeze adds a zesty note
Plating Techniques
To attain a rustic yet appealing presentation, ladle the chili into pre-warmed bowls to maintain its temperature. A swirl of sour cream and a scatter of green onions on top can add a touch of elegance. If one opts for a communal serving, place the Dutch oven at the center of the table for an inviting display that emphasizes the homestyle cooking.
Serving the Chili at Campsite
The key to serving chili at a campsite lies in its simplicity and efficiency. Use heat-resistant, durable bowls for easy handling near the campfire. A communal table setting where diners can customize their chili with a range of toppings creates a shared dining experience. Keep a stack of napkins or paper towels handy to manage any spills or drips, and ensure that sturdy utensils are available for both serving and eating.
Experiencing Chili Variations
When crafting Dutch Oven Campfire Chili, embracing various ingredients can profoundly impact the flavor, texture, and dietary friendliness of the dish. The choice of meats, beans, and adjustments for different diets offer a spectrum of experiences to suit any preference.
Alternative Meat Selections
Chili enthusiasts often start with ground beef due to its rich flavor and fat content which contributes to a hearty chili. However, they can elevate their chili by experimenting with different meats such as pork shoulder, which provides a robust foundation, or chorizo, adding a spicy twist. Others prefer ground turkey for a leaner option. One can also mix meats to balance flavor and texture.
Beef Chuck Roast: cut into 1-inch cubes, provides a tender chew.
Pork Shoulder: slow-cooked to break down connective tissue.
Chorizo: offers a spicier, more distinctive taste.
Ground Turkey: a healthier option that's lower in fat.
Incorporating Different Bean Types
Traditional chili often includes kidney beans, yet one can experiment with black beans and pinto beans, altering not only the visual appeal but the nutritional profile and flavor depth as well. Here's a brief comparison:
Kidney Beans: robust, hold their shape well.
Black Beans: smaller, with a slightly sweeter taste.
Pinto Beans: creamier texture, often used in Mexican dishes.
Adapting the Chili for Various Diets
Chili can easily be adapted for various dietary requirements without compromising on taste. Vegetarians may substitute meat with additional veggies such as bell peppers, jalapeno peppers, and green chilies. For those following a low-carb diet, reducing beans and increasing meat and vegetables is an effective approach. To cater to these needs, varying the types of vegetables and beans, as well as the meats used, can greatly enhance the nutritional profile of the chili while keeping it delicious and satisfying.
Vegetarian Variant: Replace meat with a variety of peppers.
Low-Carb Focus: Minimize beans, emphasize on meats and non-starchy vegetables.
Use cilantro as a garnish for an added fresh flavor profile.
Accessories and Utensils
A well-prepared campfire chili experience hinges upon having the right cooking accessories and utensils. These tools ensure that the cooking process is not only efficient but also safe.
Must-Have Tools for Dutch Oven Cooking
Lid Lifter: Essential for safely checking on chili without spilling ash into it.
Tongs: Useful for handling hot ingredients and coals with precision.
Dutch Oven Liners: Facilitates easy cleanup; available in parchment or sturdy aluminum.
Heavy-duty Gloves: Protects hands while manipulating the hot dutch oven or coals.
When cooking with a Dutch oven over a campfire, chefs rely on these items:
Lid Lifter: A tool designed to remove the hot lid of the Dutch oven to check on food without disturbing the coals.
Tongs: A versatile utensil ideal for arranging coals and serving food directly from the hot Dutch oven.
Additional Equipment for Complex Recipes
For those aiming to expand their campfire culinary skills beyond chilli to include recipes that require frying or grilling, these items come in handy:
Skillet: A flat-bottomed pan ideal for frying up breakfast items or sides.
Griddle: Perfect for even cooking over irregular campfire flames; great for pancakes or toasting buns.
Grill: A grill grate that can be set over a fire provides the quintessential barbecue flavour.
Lid Holder: An accessory to securely keep the lid off the ground.
Cooking complex campfire recipes often requires additional utensils:
Skillet: For frying food items other than chili, such as eggs or bacon.
Griddle: Offers a solid cooking surface for a variety of food items.
Grill: When grilling is preferred, a grill grate is useful for achieving smokey flavors.
Remember that precision in cooking and safety are enhanced with the right tools, making the investment in these accessories and utensils a worthwhile consideration for any outdoor chef.
Dutch Oven Cooking Beyond Chili

The Dutch oven is a versatile cookware that opens up a world of possibilities for campfire cuisine, from hearty meals to baked goods. It excels in heat retention and even cooking, making it suitable not only for chili but also for a range of other recipes and baked treats.
Exploring Other Campfire Dutch Oven Recipes
Campers can easily expand their outdoor menu with a variety of Dutch oven recipes. A crowd-pleaser is the classic tomato soup, which can be simmered to perfection over a campfire. One can sauté onions and garlic in the Dutch oven, add crushed tomatoes and stock, and let it cook until flavors meld together. Another family favorite is a Dutch oven stew, combining meat, vegetables, and potatoes in a rich, hearty broth. Below is an example of an easy-to-make campfire recipe:
Ingredients:
1 lb beef stew (What wine goes well with beef stew?) meat
2 diced carrots
2 diced potatoes
1 chopped onion
4 cups beef stock
Salt and pepper to taste
1 tsp of thyme
Instructions:
Brown the meat in the Dutch oven over the campfire.
Add the vegetables and sauté briefly.
Pour in beef stock and seasonings.
Cover with the lid and let simmer for approximately 2 hours.
Baking Bread and Desserts in a Dutch Oven
The Dutch oven isn't limited to savory dishes; it’s also perfect for baking. For those who are new to baking bread in a Dutch oven, the process can be straightforward. An easy to make campfire recipe for bread involves mixing a simple dough and letting it rise, then placing it into the pre-heated Dutch oven to bake until golden brown and crusty.
Desserts are also not to be overlooked. Cobblers and crisps become an effortless Dutch oven meal under the stars. Simply layer fruit with a crumble topping or a quick batter and let the Dutch oven work its magic until the dessert is bubbly and fragrant. Here's a succinct guide to baking a scrumptious fruit cobbler:
Cobbler Ingredients:
4 cups of fruit (peaches, berries, etc.)
1 cup flour
1 cup sugar
1 beaten egg
½ cup melted butter
Baking Instructions:
Spread the fruit in the bottom of the Dutch oven.
Mix flour, sugar, and egg until it forms a crumble and sprinkle it over the fruit.
Drizzle melted butter over the top.
Bake with coals on the lid and beneath the oven until golden brown, about 45 minutes.
Advanced Tips and Tricks
Mastering Dutch oven campfire chili requires attention to detail and creative flair. These advanced tips and tricks will elevate the humble campfire chili into a gourmet experience, focusing on flavor, aroma, and personal touches.
Enhancing Flavors with Aromatics and Seasonings
To infuse the chili with complex flavors, one must strategically incorporate aromatics and seasonings. Begin by sautéing a blend of chopped onions and garlic in bacon fat until translucent, releasing a flavorful base that permeates the chili. Key spices include:
Ground Cumin: Adds a warm, earthy note; use approximately 1 tablespoon.
Garlic Powder: Complements fresh garlic, providing a concentrated burst; a teaspoon will suffice.
Cayenne Pepper: Brings a spicy kick; adjust according to heat preference.
Ground Black Pepper: Enhances overall flavor profile; use generously.
A combination of these aromatics and seasonings laid down on the foundation of the sauté process ensures a fully rounded flavor profile.
Utilizing Alcohol for Depth of Flavor
Introducing alcohol such as beer into the chili can add a phenomenal depth of flavor. The maltiness of the beer complements the richness of the meat and intensifies the overall taste. One might consider adding a cup of a dark or amber ale after the aromatics have softened, allowing the alcohol to cook off and leave behind its robust essence. Always opt for beer over stronger spirits to avoid overpowering the dish.
Creating Signature Chili Variations
Chili affords an excellent opportunity for personalization. Craft a signature campfire Dutch oven chili recipe by experimenting with ingredients and their ratios. For a unique twist:
Crushed Tomatoes: A 28-ounce can offers a tangy and sweet tomato base.
Beef Broth: Instead of water, add beef broth for a richer liquid base.
Special Ingredients: Consider unusual additions like a dash of coffee or dark chocolate.
Every chili cook has a signature move—finding and refining that move is part of the chili mastery journey. Cooks should feel free to share their perfected recipes on platforms like Facebook to inspire others.
Community and Sharing
Creating Dutch oven chili while camping brings people together and offers a delightful opportunity to connect with others. Campers often find joy in not just the act of cooking, but also in the exchange of ideas, recipes, and experiences that come with it.
Joining Online Groups and Forums
Campers looking to expand their culinary horizons can join online communities to learn and share information on Dutch oven chili recipes. Facebook hosts a variety of groups where members post about their cooking experiences, offer tips, and give feedback on Dutch oven recipes. Enthusiasts can join groups such as "Dutch Oven Campfire Cooking" or search for forums dedicated to camping recipes to find a supportive environment.
Benefits of Joining:
Exposure to a multitude of recipes and cooking techniques
Opportunity to ask questions and get advice from seasoned campers
A chance to participate in events and contests related to Dutch oven cooking
Sharing Your Campfire Chili Creations
After mastering their Dutch oven chili, campers are often eager to share their culinary successes. When a recipe turns out exceptionally well, taking high-quality photos and posting them to culinary or camping groups can inspire others. It's also an excellent way to obtain constructive criticism that can help refine cooking skills. A simple, easy-to-make Dutch oven chili can become a signature dish and a means of connecting with fellow campers.
Sharing Platforms:
Facebook and Instagram: Good for sharing images and engaging with a broader audience
Campfire Cooking Blogs: A place to provide detailed explanations and stories behind the chili recipes
YouTube: Ideal for showcasing video walkthroughs of the cooking process
