
DIY Soap Making with Cold-Pressed Oils
A Step-by-Step Guide
Soap making is a craft that marries chemistry with artistry. Engaging in do-it-yourself (DIY) soap making with cold-pressed oils can be a rewarding and creative experience for beginners and seasoned crafters alike. Cold-pressed oils retain more of their natural nutrients and are prized for their purity and skin nourishing properties. By incorporating these oils, DIY enthusiasts can craft soaps that are not only personal and unique but also boast superior moisturizing benefits.
The basic process of soap making involves a chemical reaction called saponification, where fats, such as cold-pressed oils, react with an alkali like lye to form soap. While working with lye requires careful handling and respect for safety procedures, the actual process of creating soap can be quite straightforward. When cold-pressed oils are combined with lye and water at the correct temperatures, they can create a soap batter that is poured into molds, then cut and cured over several weeks, resulting in fully homemade soap bars.
For beginners, the adventure into DIY soap making starts with gathering the necessary materials and gaining a solid understanding of the steps involved. Selecting high-quality cold-pressed oils is essential, as they will determine the final soap's properties and skin benefits. The art of soap making allows for considerable experimentation; through it, individuals can customize their soap with a diverse range of fragrances, colors, and additional ingredients, creating a product that reflects personal preferences and style.
Understanding the Basics of Soap Making

Soap making is both an ancient craft and a science, involving a saponification process where oils and lye water combine to create soap. The cold process method is one of the primary methods used today, highly esteemed for its simplicity and the quality of soap it produces.
History and Science of Soap Making
Soap making has a storied history dating back thousands of years, with the basic science remaining unchanged. At its core, soap is the result of a chemical reaction known as saponification, where fatty acids from oils react with an alkali to produce soap and glycerin. This transformation occurs through the careful mixing of oils, such as cold-pressed oils, which are known for their purity and skin-nourishing properties, with sodium hydroxide, commonly referred to as lye.
Crucial Points of Saponification:
Fatty Acids + Alkali (Lye) → Soap + Glycerin
Temperature and measurements must be precise.
The process demands patience, as saponification can take several days to complete.
Overview of the Cold Process Method
The cold process method is a popular choice for soap making enthusiasts due to its control over the ingredients and the natural end product. This process involves mixing lye water with oils at a specific temperature, usually around 100-110 degrees Fahrenheit. Upon mixing, the blend is stirred—often using a stick blender in short bursts—to facilitate the saponification process.
Key Steps in Cold Process Soap Making:
Prepare Lye Solution: Carefully measure and mix lye with water.
Melt and Mix Oils: Heat solid oils to melt, then combine with liquid oils.
Combine and Blend: Pour lye solution into oils when both reach desired temperature, then blend using short blender pulses.
Reach Trace: Continue blending until soap batter reaches a consistency known as 'trace', where it leaves a visible trail on the surface.
The cold process method does not require external heat once the mixing begins, hence the name. The soap will naturally heat up due to the exothermic reaction of saponification and then cool down over time. After pouring the soap into molds, it requires several weeks of curing before it's ready to use. During this time, the soap hardens, and the saponification process completes, resulting in a milder and more skin-friendly product.
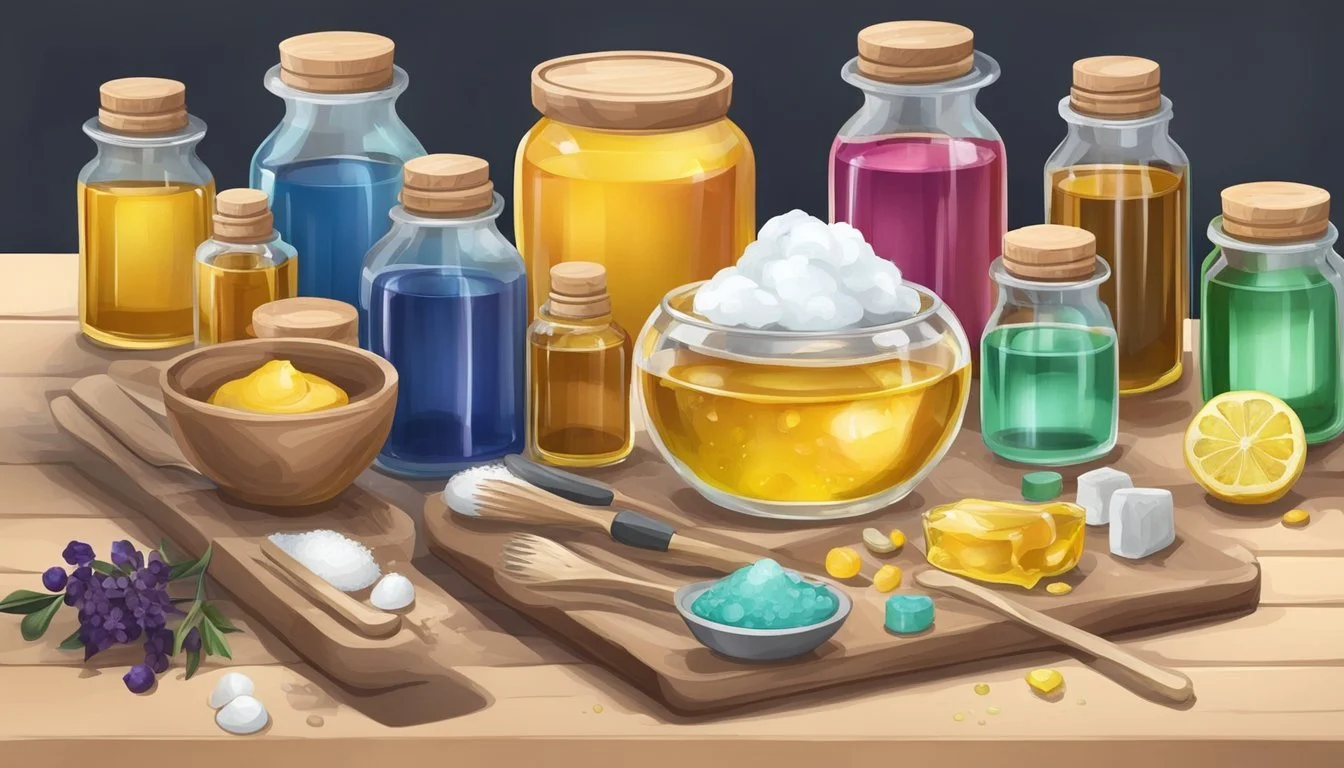
Preparing Your Workspace and Materials

When delving into DIY soap making with cold-pressed oils, the preparation of one's workspace and materials is as crucial as the soap-making process itself. A meticulously arranged workspace and carefully selected materials ensure a safe and efficient soap-making experience.
Selecting Quality Cold-Pressed Oils
One must choose high-quality cold-pressed oils to create a soap that is rich and nourishing. Commonly used oils include olive oil, coconut oil, and palm oil, each contributing unique benefits to the soap. For example, olive oil is known for its moisturizing properties, while coconut oil offers a rich lather.
Gathering Essential Equipment
The soap maker will require several key pieces of equipment. They should use a digital scale for precise measurements of ingredients, ensuring consistency and safety in their soap formula. A stick blender is crucial for thoroughly mixing the lye and oils, which is necessary to achieve the right trace. Other essential equipment includes:
A thermometer to monitor the temperature of lye and oils
Mixing bowls (preferably stainless steel or heat-resistant glass)
A mold for shaping the soap
A spatula for stirring and transferring soap
A cutter for slicing the soap into bars
Safety Measures Before Starting
Safety must not be overlooked. One should don appropriate safety gear including safety goggles and rubber gloves to protect against lye burns. Additionally, ensuring good ventilation can mitigate the risk of inhaling fumes during the soap-making process. It is advisable to keep vinegar on hand to neutralize any lye should spills occur.
Crafting Your Cold Process Soap Recipe
Creating your own cold process soap allows for a customized blend of oils and additives to fit your specific skincare needs. This process requires careful calculation and selection of ingredients to produce a high-quality bar of soap.
Understanding Lye Calculations
The foundation of cold process soap making involves understanding the role of lye (sodium hydroxide). Lye is a necessary ingredient that saponifies the oils, turning them into soap. To ensure the right amount, one must use a lye calculator, which takes into account the types of oils used and their specific saponification values. A common superfat level is 5% to ensure the soap is extra moisturizing and does not leave any unreacted lye. Superfat is the excess fat that remains unsaponified, which provides a buffer to ensure the soap is gentle on the skin.
Choosing Oils for Your Soap
Selecting the correct balance of solid and liquid oils is crucial for the texture and moisturizing qualities of your soap. Traditional soaps often include olive oil, known for its gentle cleansing properties, and coconut oil, for lather and hardness. Palm oil is another common solid oil that contributes to the soap's firmness. For those seeking alternatives to palm oil, shea butter, tallow, or other solid plant-based fats can be used. Each oil brings its own qualities to the soap, and one must weigh them with a scale to ensure precise measurements. Here's a simple guide to choosing oils:
Olive oil: Creates a gentle, moisturizing soap. Ideal for castile soap.
Coconut oil: Adds hardness and plentiful lather. Use up to 30% to prevent drying.
Palm oil: Provides a hard bar and stable lather.
Shea butter: Offers a luxurious, creamy feel and is great for sensitive skin.
Determining Additives and Superfat
Additives enhance the soap with colors, textures, and skin benefits. For cold process soap, additives can include coconut milk, herbs, clays, or essential oils for fragrance. It's important to mix these into your trace (the point when oils and lye solution have emulsified) carefully to ensure even distribution.
Determining the right level of superfat can also drastically change your soap. A standard rate is 5% superfat, which ensures moisture without leaving the skin feeling greasy. This extra oil is unreacted in the final product, acting as an emollient in the soap. Remember, too high of a superfat percentage can lead to a soap that's too soft and less cleansing.
By following these guidelines and understanding the roles each ingredient plays in your soap-making process, you can craft a unique cold process soap recipe perfectly suited to your preferences.
The Soap Making Process Step-by-Step
Making soap through the cold process involves a precise series of steps, from combining lye water and oils to pouring and curing the soap. It's essential to follow step-by-step instructions for safety and to achieve the best results.
Mixing Lye Water and Oils
One begins the soap making process by carefully mixing lye (sodium hydroxide) with water to create lye water. This reaction is exothermic and will generate heat and fumes, so it should be done in a well-ventilated area. The mixture must be allowed to cool to around 100°F. Simultaneously, one needs to combine cold-pressed oils, which can include a blend of coconut oil, olive oil, or other natural oils, and also bring them to approximately the same temperature. Once both lye water and oils are at similar temperatures, the lye water is slowly added to the oils while stirring.
Reaching Trace and Blending Additives
The term 'trace' refers to the point in soap making where the mixture is emulsified and thick enough to leave a trace or trail when drizzled on itself. To reach this stage, one typically uses an immersion blender, alternating between blending and stirring by hand. When the soap reaches trace, it's time to add any additives such as essential oils for fragrance, natural ingredients for texture, or colorants. These should be blended in thoroughly but gently to avoid over-mixing.
Pouring and Curing Your Soap
After achieving trace and incorporating all chosen additives, the soap maker pours the mixture into molds. The soap will need to set in the molds for approximately 24-48 hours. Following this, one unhinges the soap from the molds and cuts it into bars. The bars require curing, a process that takes about four to six weeks. Curing allows water to evaporate, resulting in a harder, gentler bar of soap. During this time, the soap should be stored in a cool, dry place with ample airflow.
Finishing Touches and Variations

After crafting the base of your homemade soap using cold-pressed oils, the finishing touches are where creativity shines. Customizing your soap with colorants, fragrances, exfoliants, and decorative elements can transform a simple bar into a luxurious experience.
Customizing with Colorants and Fragrances
Colorants: To infuse your natural soap with vibrant hues, one can utilize a variety of soap colorants. It's vital to choose colorants that are safe for skin contact and won't bleed or fade. Here's a brief overview:
Natural Soap Colorant: Items like clays, spices, and botanicals offer subtle shades and are gentle on the skin.
Micas and Oxides: These mineral-based colorants deliver brighter colors and are often used for more vivid effects.
Fragrances: Incorporating scents into your soap enhances the sensory experience. You have two primary options:
Essential Oils: For a natural fragrance, essential oils provide scents derived from plants.
Fragrance Oils: These are synthetic options that offer a wider array of scents.
When adding fragrance, ensure the oils are specifically formulated for soap making to avoid skin irritants.
Adding Exfoliants and Decorative Elements
Exfoliants: Natural exfoliants can be sprinkled throughout the homemade soap to gently remove dead skin cells. Some common natural exfoliants include:
Ground coffee
Oatmeal
Crushed seeds and nuts
It's important to evenly distribute the exfoliants and consider the abrasiveness to ensure a pleasant use.
Decorative Elements: For a visually appealing bar, one can embed items such as:
Flower Petals: Suitable for a delicate appearance and light texture
Spices: Can create interesting patterns and offer mild exfoliation
As you embellish your soaps, be mindful of their final use to ensure all components are skin-safe and enhance the bathing experience.
Troubleshooting and Tips for Success
In the world of DIY soap making with cold-pressed oils, the craft involves a delicate balance of science and artistry. Perfecting the craft necessitates an understanding of common issues and the application of best practices to achieve soaps with the ideal saponification value, conditioning properties, and creamy lather.
Common Soap Making Problems
Acceleration: Soap batter may thicken too quickly, hindering design work. To combat this, avoid overmixing; use a stick blender in short bursts interspersed with hand stirring.
Separation: The soap separates into layers or the oil floats on the top, which can be due to a variety of factors, including incorrect temperatures.
Cracking or Volcanoes: When soap overheats in its mold, cracking can occur. Using a candy thermometer to monitor the temperature can prevent overheating.
Partial Gel: A phenomenon that creates an uneven texture or color because the soap didn’t gel completely. Insulating the soap and monitoring the temperature can promote an even gel phase.
Ensuring Quality in Your Handmade Soap
Saponification Value: Understanding the saponification value of cold-pressed oils is crucial as it determines the amount of lye needed during the soapmaking process.
Curing: Allow the soap to cure properly to ensure optimal hardness and a lovely creamy lather. It usually takes 4-6 weeks for the process to complete.
Testing: It's important to test recipes in small batches first, which saves materials if adjustments are needed.
Natural Additives: For a touch of luxury and added benefits, incorporate ingredients like lovely greens for color and additional conditioning properties.
Soapmakers should arm themselves with these troubleshooting tips and quality assurance measures to craft beautifully crafted bars of soap in every batch.
Beyond the Basics
As a soap maker progresses from basic techniques, they encounter advanced methodologies that can transform their homemade soaps. This can include experimenting with hot process soap making and exploring various advanced techniques that offer more control and creativity in soap making.
Advanced Techniques in Soap Making
Layering and Swirling: These techniques add visual appeal to soap by creating patterns. To achieve layers, one must pour soap batter in stages, allowing each to set slightly before adding the next. Swirling involves using a tool to artfully mix colored soap batter within the mold for a marbleized effect.
Incorporating Additives: Experienced soap makers often enhance their soaps with additives like:
Clays for color and skin benefits.
Exfoliants such as poppy seeds or ground oatmeal.
Herbs and botanicals for visual flair and properties.
Controlling Trace: Advanced soap makers can manipulate the 'trace,' or the thickness of the soap batter, to create different textures. A light trace is ideal for intricate designs, while a thicker trace is suitable for texturing the top of the soap.
Exploring Hot Process Soap Making
Basic Differences: Unlike cold process, hot process soap making involves cooking the soap mixture. This accelerates the saponification process and allows for immediate use after cooling and cutting, though a cure time can improve the product's quality.
Equipment for Hot Process: Making hot process soap requires a slow cooker or double boiler to maintain a gentle, consistent heat. Safety remains a priority with gloves and goggles necessary.
The Process:
Mix lye and water, then combine with oils in the cooker.
Cook the mixture, watching for stages like applesauce and mashed potatoes.
Add additives after cook time and pour into a loaf mold.
A benefit of the hot process is the ability to add heat-sensitive ingredients once cooking is complete, preserving their properties. A loaf mold ensures uniform bar sizes after the soap is set and cut.
Safety and Storage

When creating soap at home, safety during the process and proper storage thereafter are critical. One's health can be protected by handling ingredients properly and maintaining a clean, organized workspace, while the longevity and quality of the soap can be enhanced by correct storage methods.
Proper Handling and Storage of Soap
Lye Safety:
Lye, or sodium hydroide, must be handled with extreme care, as it is a caustic substance that can cause severe burns.
It should always be stored in a clearly labeled, child-resistant container and kept in a cool, dry place out of reach of children and pets.
Protective Gear:
When working with lye or raw soap mixtures, one must wear protective gear, including gloves, goggles, and long-sleeved clothing to prevent skin and eye contact.
It is essential to work in a well-ventilated area to avoid inhaling any fumes.
Soap Molds:
Soap molds should be made of a material that can withstand the caustic nature of raw soap, such as silicone or certain types of plastics.
Keep them clean and store in a place free from dust and contaminants.
Plastic Pitchers:
Use a dedicated plastic pitcher for lye solution to avoid cross-contamination with kitchenware.
It should be heavy-duty and clearly marked to avoid any mix-ups.
Maintaining a Safe Soap Making Environment
The area where soap is made should be clean, organized, and free from distractions that could lead to accidents.
Keep all soap making supplies and equipment in a designated area:
Ingredients: Stored in clearly labeled containers.
Equipment: Cleaned after each use and stored neatly to avoid any potential contamination or damage.
After soap is made, it should be cured in an area that is well-ventilated, out of direct sunlight, and where it will not be disturbed.
By adhering to these safety and storage guidelines, soap makers can ensure a safe process from start to finish and quality results in their soap crafting endeavors.
Soap Making for Business

Crafting handmade soap from all-natural ingredients can evolve from a hobby into a profitable business. With careful planning and strategic marketing, soap makers can establish a niche in the competitive beauty market.
Turning Your Craft into an Enterprise
A flourishing enterprise begins with understanding the legalities of starting a business, including permits, licenses, and health regulations. Soap makers should emphasize the quality of their all-natural ingredients and the unique aspects of their products. Crafting exceptional products is just the beginning; they also need to focus on comprehensive business planning and effective financial management. Utilizing a variety of sales outlets such as online stores, local markets, and retail partnerships can diversify revenue streams.
Business Plan: A detailed roadmap for business operations, growth, and financial forecasts.
Quality Assurance: Establishing consistent processes to ensure every batch of soap meets high standards.
Branding: Developing a memorable brand identity that reflects the natural and handcrafted nature of the soaps.
Sales Outlets: Leveraging online platforms, farmers' markets, and local stores to sell products.
Marketing Your Handmade Soaps
Marketing plays a crucial role in the success of any handmade soap business. A well-crafted marketing strategy should highlight the benefits of all-natural ingredients and the artisanal quality of the soaps.
Online Presence: A well-designed website and active social media accounts can reach a broader audience.
Packaging and Design: Attractive and eco-friendly packaging can appeal to consumers' preferences for sustainable products.
Networking: Building relationships with local businesses and participating in community events can increase brand visibility.
Customer Engagement: Encouraging customer feedback and creating engaging content helps to build a loyal customer base.
By emphasizing the handcrafted nature and natural ingredients of their products, and harnessing the power of targeted marketing, soap makers can transition their crafting passion into a successful business venture.
Final Thoughts
When one engages in the art of making soap, they harness a blend of science and creativity. Crafting soap from cold-pressed oils brings a sense of accomplishment and offers numerous benefits.
Purity & Customization: Homemade soap made with cold-pressed oils lacks commercial additives, ensuring a pure product. The maker controls the ingredients, tailoring the formula to personal or consumer needs.
Cost-Effectiveness: Although some perceive soapmaking as expensive, over time, it can be cost-efficient. The initial investment in supplies is offset by the long-term savings from home-produced bars.
Therapeutic Activity: The process of soapmaking is therapeutic for many. It presents an opportunity to relax, focus, and create something of use.
Sustainability: By selecting eco-friendly oils and materials, one contributes to a healthier planet. Reusing oil containers, and molds reduce waste, further enhancing the wholesome appeal of the soap.
Benefits Considerations Customized formulations Initial cost of materials Environmentally friendly Learning curve Therapeutical crafting Precision in measurements
For those who engage in it, soapmaking is not just a hobby; it's a foray into an ancient and practical craft. The makers enjoy the ability to infuse their values into a consumable product—an alchemy of oils transforming into something both beautiful and functional.
