
How to Make Homemade Breakfast Popovers
Mastering Brunch with Ease
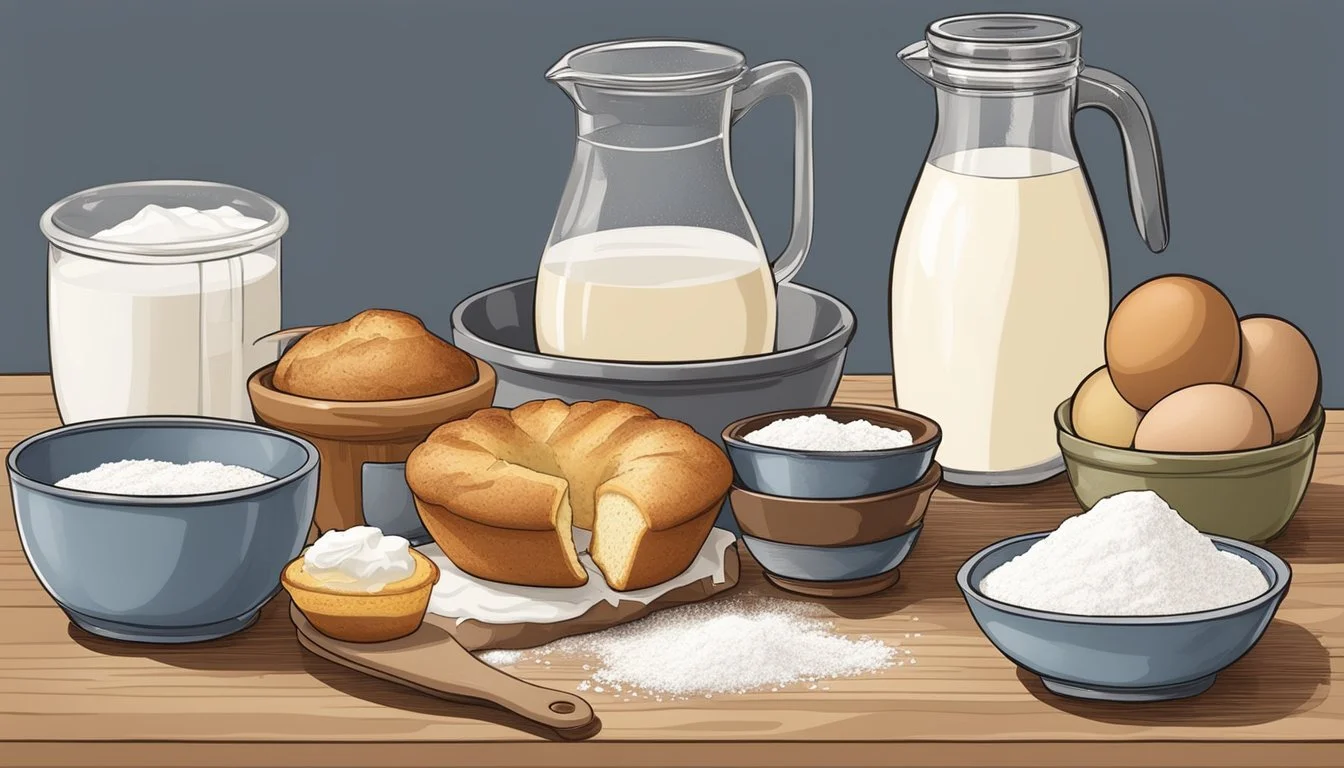
Homemade breakfast popovers are a distinctively light and airy delight that can elevate any morning meal into an impressive brunch experience. These egg-rich pastries puff up in the oven, forming a golden-brown crust with a tender, almost hollow center, perfect for filling with sweet or savory accompaniments. They are simple yet sophisticated, offering a versatile canvas for a variety of flavors and pairings.
The key to a perfect popover lies in the balance of ingredients and the baking technique. The batter is a simple mixture of milk, flour, and eggs, with some recipes calling for a touch of sugar or butter for additional richness. It is vital to whisk the ingredients just enough to combine them, as overmixing can lead to dense popovers. The batter benefits from resting, which allows the flour to absorb the liquid and results in a more consistent rise.
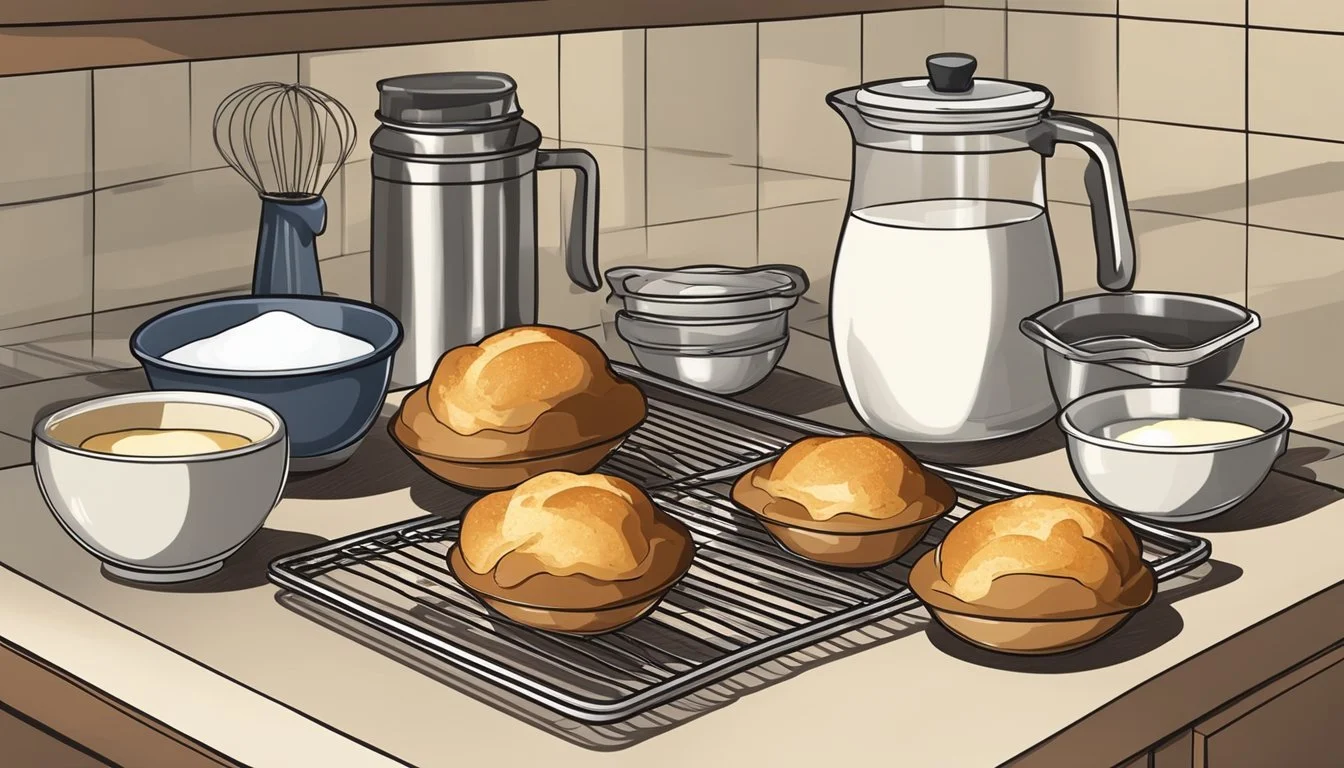
Baking is a critical stage in achieving the popover's characteristic puff. The oven should be sufficiently preheated to encourage rapid steam formation which lifts the batter dramatically. Using a dedicated popover pan or a muffin tin can affect the shape and size, yet both work well when heated before filling with batter. Consistency in oven temperature and the avoidance of premature opening of the oven door ensure the popovers reach their full potential, ready to be served straight from the oven with a pat of butter, a drizzle of honey, or a spoonful of jam.
Understanding Popovers
Popovers are a delightful and airy pastry that surprise many with their hollow interior and impressive rise. Grasping their culinary magic and background enriches the baking experience.
History and Origin
Popovers are a relative of Yorkshire pudding, a traditional British dish. Yorkshire pudding, typically served with roast beef, consists of a batter similar to that of popovers, which is cooked until puffy and dry. American cuisine adapted this concept, but the popover is typically served as a bread accompaniment or breakfast treat. They gained popularity in the United States in the 19th century and have since become a brunch (What wine goes well with brunch?) staple, delighting diners with their light, crispy exterior and tender inside.
What Makes a Popover 'Pop'
The magic of popovers lies in the simple yet precise combination of eggs, flour, and milk. Air and steam are the essential elements that drive the popping mechanism. Here's a quick breakdown:
Temperature: A very hot oven is crucial. It should be preheated to between 400°F and 450°F, causing the liquid in the batter to create steam rapidly.
Moisture: The eggs and milk provide the liquid needed to generate steam when exposed to high heat.
Batter Consistency: The batter must have enough liquidity to allow steam to form and expand.
Pan Preparation: Pans are often preheated with a coating of butter or cooking spray to enhance the popover's ability to climb the sides of the pan, creating a higher rise.
When heated, the batter's moisture turns to steam, pushing upwards and causing the popover to rise dramatically. The high heat of the oven then sets the outer structure, ensuring that the popover maintains its shape as it cools and the steam dissipates. This process results in a treat with a crispy exterior and a light, airy interior that is characteristic of a well-made popover.
Required Kitchen Tools
To create delightful breakfast popovers, one needs the proper bakeware and mixing tools. A few specialized items can make the job easier and ensure consistent results.
Popover Pan Versus Muffin Tin
Design: Specifically designed for popovers, it features deeper wells than a muffin tin, which allow popovers to rise and get their characteristic puff.
Material: Often made of metal that conducts heat well to promote even cooking.
Muffin Tin:
Versatility: While not ideal, a muffin tin can be used as a substitute for a popover pan, though the shape and size of the popovers will be slightly different.
Preparation: If using a muffin tin, it should be well-greased or sprayed with non-stick cooking spray to prevent sticking.
Mixing Equipment
Blender/Mixer:
Blender: A powerful kitchen blender ensures that the popover batter is thoroughly combined, yielding a smooth and frothy consistency.
Stand Mixer/Electric Mixer: Alternatively, one can use a stand mixer with a whisk attachment or an electric hand mixer to achieve similar results.
Manual Whisking:
Wire Whisk: For those who prefer or only have access to manual tools, a sturdy wire whisk can be used to mix the ingredients, although it requires more effort to get the right consistency.
Ingredient Breakdown
Every ingredient in breakfast popovers plays a crucial role. The right selection ensures a delicious texture and flavor.
Flour Choices
For popovers, all-purpose flour is the standard as it provides the perfect balance of protein content that allows the popover to rise beautifully and have a light, airy structure. One can consider alternatives like bread flour for a chewier texture, but all-purpose flour remains the go-to for most popover recipes.
Selecting the Right Milk
Whole milk is preferred for its fat content, which contributes to the richness and tenderness of the popover. The fat in the milk also aids in achieving a nicely browned crust. One could use lower-fat milk or non-dairy alternatives, but the results may vary, as these will alter the popover's richness and final texture.
Eggs: Freshness Counts
Popover recipes require large eggs, which should be as fresh as possible. Fresh eggs help provide structure and stability to the batter and ensure maximum rise. The freshness impacts the popover's consistency, giving it the signature puffiness that is sought after in a well-made popover.
Butter: Unsalted Versus Salted
The choice between unsalted butter and salted butter boils down to control over the sodium content in the popover. Unsalted butter is typically recommended because it allows the baker to precisely add the amount of salt required by the recipe. Butter also provides flavor and aids in the formation of a golden-brown crust upon baking.
Step-by-Step Recipe Guide
Crafting homemade breakfast popovers is a simple process that is divided into key steps: preparing your batter, preheating your oven correctly, filling the pan, and baking to golden-brown perfection. Following this guide ensures that each popover is airy, fluffy, and delightfully crispy.
Preparing the Batter
To start, one combines milk and eggs at room temperature to ensure a smooth batter, which produces popovers with the best texture. Whisk these together until just combined. Then, sift together flour, salt, and a touch of powdered sugar and add to the liquid mixture. Stir until the batter just comes together; remember, a few lumps are perfectly fine and overmixing will lead to dense popovers.
Preheating the Oven: Why It's Vital
Preheating the oven is a critical step and should not be skipped. Popovers require a high starting temperature to expand properly. The oven should be set to 425°F - 450°F. For convection ovens, set the temperature at the lower end of the spectrum. Allow the popover pan to heat up in the oven during this stage to aid in the initial rise of the popovers when the cold batter hits the hot pan.
Filling the Pan
Once the oven has reached the desired temperature, carefully remove the hot popover pan. Generously butter or grease the cups to prevent sticking and ensure easy release after baking. Pour the batter into the cups, filling each about three-quarters full. For an added touch, sprinkle in some fresh herbs or cheese for extra flavor.
Baking to Perfection
Place the filled popover pan back into the oven quickly to maintain the high temperature. Bake for about 15-20 minutes at 425°F, then reduce the temperature to 350°F and continue baking until the popovers are golden brown and fully set, roughly 15-20 additional minutes. Avoid opening the oven during the first phase of baking to prevent collapse.
By following these steps, you will achieve impressive and delicious popovers that are perfect for any brunch.
Popover Variations
Popover versatility allows for a myriad of delightful combinations, transforming the simple popover into a customizable treat. Whether opting for savory fillings to accompany eggs and bacon at brunch or sweet toppings to satisfy a morning dessert craving, the possibilities are extensive.
Savory Fillings
For those who prefer a hearty, savory start to their day, incorporating fillings like crisp bacon bits or melted cheese can elevate the humble popover to a satisfying breakfast dish. These fillings can be added to the batter or used as a stuffing after baking:
Bacon: Small crisp pieces can be mixed into the batter before baking or sprinkled on top of the baked popovers.
Cheese: Consider bold cheeses like sharp cheddar or Gruyère to add before baking, allowing it to melt and ooze within the pastry.
Sweet Toppings
Popovers can double as a canvas for sweet toppings, turning them into a dessert-like indulgence. Sweet toppings can be added after baking, with a light dusting of powdered sugar or a drizzle of maple syrup:
Honey: A generous drizzle of honey complements the popover's buttery taste.
Cinnamon and Sugar: Mix together and sprinkle over hot, buttered popovers for a classic flavor twist.
Maple Syrup: A light pour of pure maple syrup adds a touch of luxurious sweetness.
Through imaginative fillings and toppings, popovers can be effortlessly tailored to suit any palate, making them a versatile choice for any breakfast or brunch occasion.
Serving and Presentation

For a visually appealing and tasty experience, presenting breakfast popovers requires attention to detail. The right plate and sides not only complement the golden-brown and crispy exterior of the popovers but also elevate the overall brunch experience.
Plating Ideas
To showcase their impressive rise and crisp exteriors, one should use a flat, white plate for serving popovers. The simplicity of the plate allows the golden hue of the popovers to stand out, making them very photogenic for platforms like Instagram. Positioning them slightly off-center with one popover leaning onto another creates an appealing display that also suggests an inviting casualness.
Side Suggestions
Breakfast popovers pair exceptionally well with a variety of sides.
Sweet Options:
Fresh fruit or berry compote
A drizzle of honey or maple syrup
Savory Choices:
Scrambled eggs or smoked salmon
Sautéed vegetables or a light salad
The popover itself can be served directly on the plate alongside these options, or for a more interactive serving, one can arrange the sides in small bowls around the plate. A popover can be sliced open, allowing guests to fill it with their side of choice. This not only adds a tactile element to the meal but also allows guests to customize their flavor experience, which can be particularly engaging for content on food-focused YouTube channels.
Storage and Reheating Tips

Ensuring your homemade breakfast popovers remain as delectable as when first baked requires proper storage and reheating techniques. The reader will find straightforward guidance here to maximize freshness and preserve the unique texture of their popovers.
How to Store Leftovers
Leftover popovers should be stored promptly after cooling to room temperature. For short-term storage, placing them in an airtight container or resealable plastic bag helps maintain their texture for up to two days. To freeze, wrap each popover individually in plastic wrap and place them in a freezer bag before sealing and freezing. This method will keep them fresh for up to one month.
Reheating Instructions
In the oven: Preheat the oven to 350°F (175°C). For optimal texture, reheat the popovers on a baking sheet covered loosely with aluminum foil for about 5 minutes. Then, remove the foil and continue to heat for another 3 to 5 minutes until they are thoroughly warm.
In the microwave: While not optimal, it can be done in a pinch. Place a popover on a microwave-safe plate and cover it with a damp paper towel. Microwave on high for 15 to 20 seconds. Be cautious as microwaving may slightly alter the texture.
By following these steps, the reader can enjoy popovers that are almost as good as when they were first made.
Nutritional Information

When preparing homemade breakfast popovers, one should be attentive to their nutritional content, especially considering calories and fats. Understanding the nutritional profile helps maintain a balanced diet.
Counting Calories
A standard homemade popover generally contains approximately 150-200 calories per serving. These values can fluctuate based on the ingredients used, such as the addition of sugar or cheese. Popovers provide a moderate caloric content, which fits into a typical breakfast allocation for those tracking their daily caloric intake.
Calories: 150-200 per serving
Carbohydrates: 20-30g
Protein: 5-7g
Fiber: Less than 1g
Understanding Fats and Cholesterol
Popovers typically have a relatively low fat content, but it's mostly attributable to saturated fat due to the butter and eggs. One popover may contain:
Total Fat: 5-10g
Saturated Fat: 2-3g
Trans Fat: 0g (if using fresh, natural ingredients)
Since eggs are a primary ingredient, cholesterol is inherent to popovers. However, it is important to note that dietary cholesterol's impact on blood cholesterol levels varies among individuals. For those concerned with cholesterol intake:
Cholesterol: 70-140mg
Popovers are low in sodium and contain no trans fats when made from scratch with fresh ingredients. RaisedButton for readability. The lack of trans fats and the versatility in adjusting the sodium content make homemade popovers a suitable choice for those looking to manage their fat and cholesterol intake responsibly.
Popover Troubleshooting
Making popovers involves precise techniques to ensure they rise beautifully and have the desired texture. This troubleshooting section addresses common issues and provides solutions to avoid underwhelming results.
Common Baking Issues
Uneven Rising: If popovers don't rise evenly, the oven temperature may not be consistent. Use an oven thermometer to verify the heat setting and adjust if necessary. Ensure the rack is positioned in the lower third of the oven for optimal heat distribution.
Unpopped Popovers: For popovers to pop properly, ingredients must be at the right temperature. Cold batter tends to resist expansion, so always bring milk and eggs to room temperature before starting.
Tough Texture: Over-mixing the batter can lead to gluten development which makes popovers tough. Mix just until the dry ingredients are incorporated; lumps are fine and expected.
How to Avoid Soggy Popovers
Preheat Your Pan: A hot pan is crucial. Place the greased pan in the oven during preheating. It ensures a rapid initial rise, which is essential for crisp exteriors.
Grease Properly: To prevent sticking and to enhance crispiness, adequately grease popover tins with butter or cooking spray. Do not skimp on this step.
Let the Batter Rest: Allowing the batter to rest for at least 30 minutes can result in lighter popovers. This pause allows the flour to hydrate properly and can help reduce the presence of lumps.
Don’t Peek: Resist the urge to open the oven door during the first 20 minutes of baking. The draft can cause the temperature to drop, which might lead to soggy popovers.
Further Reading and Resources
For those eager to expand their baking expertise, particularly in mastering the art of breakfast popovers, a wealth of information awaits. Below are curated resources for both beginners and seasoned bakers seeking to refine their popover craft.
Cookbooks and Guides
Cookbooks: Dedicated sections on popovers can be found in many general baking cookbooks. Specialty books, such as Popovers: Easy and Delicious offer an in-depth look at popover recipes, including classic and creative variations. Readers can also find tips on achieving the perfect crispy exterior and soft inside.
Yorkshire Pudding Guides: British cookbooks often feature Yorkshire pudding, a savory cousin to the popover. Learn about authentic recipes and techniques on making them fresh from the oven for brunch or dinner.
Online Communities and Sharing
Facebook Groups and Instagram Pages: Social media platforms like Facebook and Instagram host communities of popover enthusiasts where members can post photos of their baked goods, share recipes, and review each other's creations. Search for #popovers on Instagram for a visual feast.
Baking Blogs and Newsletters: Many bakers have online blogs where they share their recipes, complete with personal tips and tricks. Subscribing to a newsletter from a well-regarded baking blog can provide regular updates and inspiration for variations like honey butter or bacon jam popovers.
Online Reviews: Before trying out a recipe or investing in a new cookbook, bakers can look at reviews to gauge the recipes' reliability regarding yield and ease. Online forums provide firsthand accounts and advice on avoiding common mistakes, like deflated popovers or issues with gluten in the batter.
Keep in mind that while it's tempting to dive into advanced techniques and exotic variations, sometimes the most satisfying results come from mastering a simple, fast popover recipe. Whether it is adjusting the amount of saturated fat for a lighter version, or utilizing a baking sheet correctly to avoid soggy bottoms, every small tip can make a big difference. Also, remember to let the popovers cool on a wire rack to preserve their crispy exteriors. Leftovers, if any, can usually be stored and enjoyed the following day, and are a delightful addition to any meal.
Final Thoughts and Encouragements
Making breakfast popovers can be an exciting addition to any family brunch. They are a delightful treat that can impress guests and become a favorite among kids and adults alike. Cooking together as a family can build confidence in the kitchen and offer a joyful experience that strengthens bonds.
Should one hesitate to attempt this dish due to inexperience, it is important to remember that even the most seasoned chefs started as novices. A few simple pointers can ensure success:
Ingredients Prep: Gather all the ingredients before starting. This simple step streamlines the process.
Oven Temperature: Ensure the oven is properly preheated. Consistent heat is key for the popovers to rise beautifully.
Batter Resting: Allow the batter to rest if the recipe calls for it. This can make for lighter, airier popovers.
Pan Preheating: Whether one opts for a muffin tin or a dedicated popover pan, heating it first can help create a crispier exterior.
Encourage children to help with tasks suited to their age, such as whisking the batter or brushing the pan with butter. It's a wonderful way to teach them and make them part of the process.
Above all, relax and enjoy the process. Not every popover will be perfect, and that is perfectly fine. Each batch is an opportunity to learn and improve. With some practice and patience, anyone can master the art of making homemade popovers for their next brunch gathering.
