
Grilling Perfect 1/3 Pound Burgers
Tips and Techniques
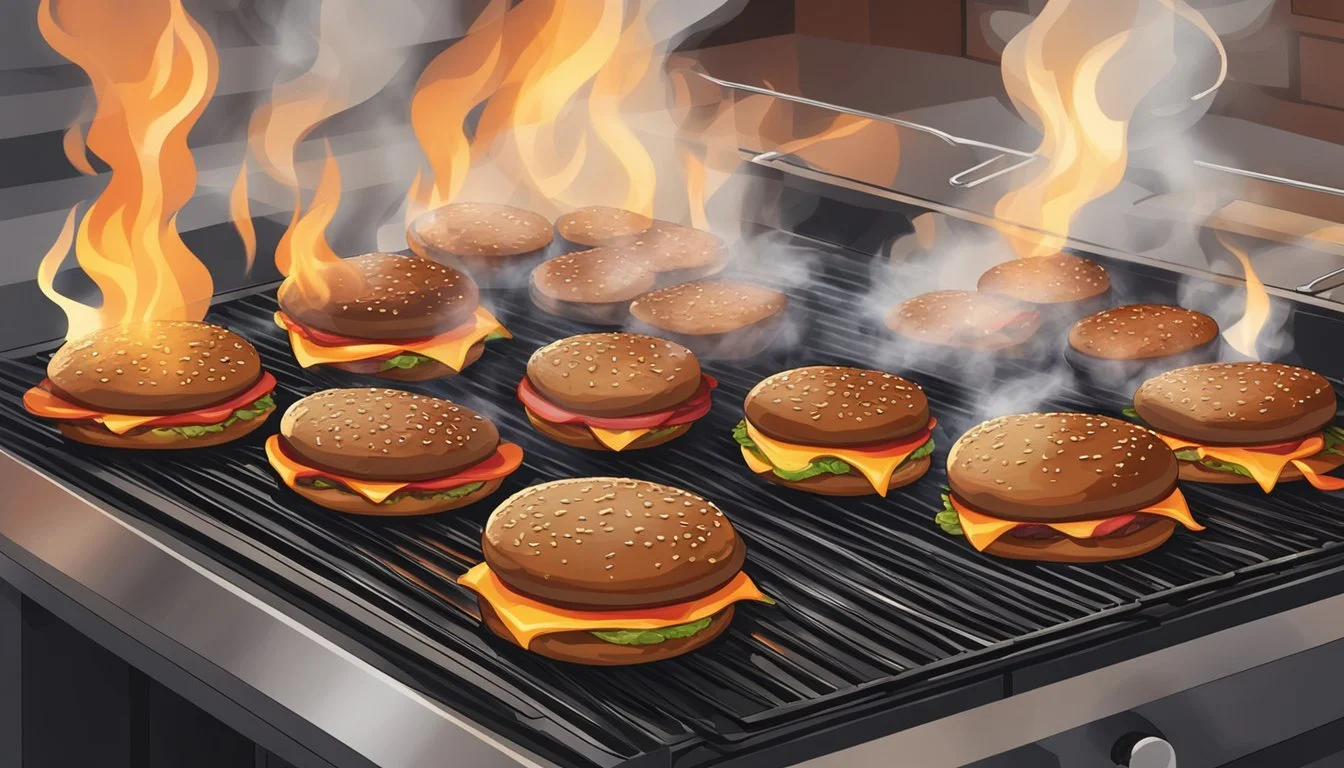
Grilling the perfect burger is an art form that many backyard chefs strive to master. When it comes to cooking 1/3 pound burgers on the grill, timing is crucial for achieving juicy, flavorful results. The recommended cooking time for a 1/3 pound burger on the grill is approximately 4-5 minutes per side for medium-rare to medium doneness.
Temperature control plays a significant role in burger perfection. Grilling at 450°F to 500°F ensures a nice crust while keeping the interior moist. Factors like patty thickness and grill temperature can affect cooking times, so it's essential to monitor the burgers closely and adjust as needed.
For optimal results, use 80/20 ground beef and season the patties with salt and pepper before grilling. Remember to let the burgers rest for a few minutes after cooking to allow the juices to redistribute. With these tips in mind, grill masters can confidently create mouthwatering 1/3 pound burgers that will impress friends and family at any cookout.
Selecting the Perfect Ground Beef
The key to a delicious burger lies in choosing high-quality ground beef. The right blend of fat and lean meat ensures juicy, flavorful patties that will satisfy even the most discerning burger enthusiasts.
Understanding Beef Grades
Ground beef comes in different grades, reflecting its quality and fat content. USDA Prime is the highest grade, known for its superior marbling and tenderness. Choice grade offers excellent flavor with slightly less marbling. Select grade is leaner but may be less juicy.
For burgers, Choice grade often provides the best balance of flavor and value. Prime can be too rich, while Select may result in drier patties. Some specialty butchers offer custom blends, combining different cuts for optimal taste and texture.
Fat Content for Juiciness
Fat content plays a crucial role in burger juiciness and flavor. The ideal fat percentage for most burgers is 20%. This 80/20 lean-to-fat ratio provides enough fat to keep the meat moist during cooking without being overly greasy.
For a leaner option, 85/15 can work, but may result in slightly drier burgers. Avoid ultra-lean options like 93/7, as these often produce dry, less flavorful patties. Remember, some fat is necessary for a juicy burger.
Visible marbling in the meat is a good indicator of fat content. Look for ground beef with small, evenly distributed white flecks throughout.
The Best Ground Beef for Burgers
For the best burgers, choose freshly ground beef from a trusted butcher. Ask for a custom grind of chuck roast, which offers an ideal balance of fat and flavor. Some butchers create special burger blends, often incorporating brisket or short rib for added richness.
When possible, opt for grass-fed beef. It typically has a more complex flavor profile and contains higher levels of beneficial omega-3 fatty acids. However, it can be leaner, so you may need to adjust cooking times.
Avoid pre-formed patties, as these often contain additives and may be overworked, resulting in tough burgers. Instead, buy loose ground beef and form your own patties, handling the meat gently to maintain tenderness.
Preparing the Burger Patties
Crafting the perfect burger patty is crucial for achieving a delicious grilled burger. Proper shaping, seasoning, and preparation ensure even cooking and maximum flavor.
Forming the Perfect Patty
Start with cold ground beef, ideally 80/20 lean-to-fat ratio. Divide the meat into 1/3 pound portions. Gently form each portion into a patty about 3/4 inch thick and slightly wider than your bun.
Avoid overworking the meat, as this can lead to tough burgers. Use your hands to shape the patties, pressing just enough to hold them together.
For uniform cooking, make the edges slightly thicker than the center. This helps prevent the patties from puffing up during grilling.
Seasoning for Flavor
Season the patties generously just before grilling. Salt and freshly ground black pepper are essential. Use about 1/2 teaspoon of salt and 1/4 teaspoon of pepper per patty.
For added flavor, consider incorporating garlic powder, onion powder, or smoked paprika. Mix 1/4 teaspoon of each into your seasoning blend.
Apply the seasoning evenly on both sides of the patty. Gently press it into the meat to ensure it adheres well.
Making a Dimple for Even Cooking
Create a small indentation in the center of each patty using your thumb. This dimple should be about 1/4 inch deep and 1 inch wide.
The dimple prevents the burger from puffing up during cooking. As the meat expands, it will fill the indentation, resulting in a flat, evenly cooked patty.
This technique is especially important for thicker patties. It helps maintain their shape and ensures consistent doneness throughout the burger.
Grill Setup and Temperature Control
Proper grill setup and temperature control are crucial for achieving perfectly cooked 1/3 pound burgers. The choice of grill type, preheating process, and heat management techniques all play key roles in the outcome.
Gas Vs. Charcoal Grills
Gas grills offer precise temperature control and convenience. They heat up quickly and maintain a steady temperature throughout cooking. Most gas grills have multiple burners, allowing for easy creation of direct and indirect heat zones.
Charcoal grills provide a distinct smoky flavor that many burger enthusiasts prefer. They require more skill to manage temperature but offer higher maximum heat. To control heat on a charcoal grill, adjust the vents and arrange the coals strategically.
Both types can produce excellent burgers when used correctly. The choice often comes down to personal preference and available equipment.
Preheating Your Grill
Preheating is essential for proper burger cooking. For gas grills, turn all burners to high and close the lid. Allow 10-15 minutes for the grill to reach 400-450°F (204-232°C).
On charcoal grills, light the coals and let them burn until they're covered with white ash. This typically takes 20-30 minutes. Spread the coals evenly for direct heat cooking.
A properly preheated grill ensures a good sear on the burger patties and helps prevent sticking.
Managing Direct and Indirect Heat
Direct heat is ideal for cooking 1/3 pound burgers. Place patties directly over the heat source for a quick sear and even cooking.
For gas grills, set all burners to medium-high. On charcoal grills, spread hot coals evenly across the bottom grate.
If flare-ups occur, move burgers to a cooler part of the grill temporarily. Some grills have a warming rack that can serve as an indirect heat zone.
For thicker patties or well-done burgers, consider using a combination of direct and indirect heat. Sear over direct heat, then finish cooking in a cooler zone to avoid burning.
Cooking the Burgers
Grilling a perfect 1/3 pound burger requires attention to cooking time, flipping technique, and proper temperature monitoring. These factors ensure juicy, flavorful results while maintaining food safety.
Determining Cooking Time
For a 1/3 pound burger, cook for 4-5 minutes per side on medium-high heat. This typically yields a medium doneness. Adjust time for desired doneness:
Rare: 3-4 minutes per side
Medium-rare: 4 minutes per side
Medium-well: 5-6 minutes per side
Well-done: 6-7 minutes per side
Thickness affects cooking time. Thicker patties may need an extra minute per side. Keep the grill lid closed to maintain consistent heat.
Flipping Techniques
Flip burgers only once for optimal results. This method allows for better crust formation and even cooking. Use a wide, flat spatula to avoid breaking the patty.
Before grilling, create a small dimple in the center of each patty. This prevents the burger from puffing up during cooking.
Resist the urge to press down on burgers while cooking. This squeezes out juices, resulting in a drier patty.
Using a Meat Thermometer for Doneness
A meat thermometer is crucial for achieving desired doneness and ensuring food safety. Insert it horizontally into the thickest part of the patty.
USDA recommends the following internal temperatures:
Medium-rare: 145°F (63°C)
Medium: 160°F (71°C)
Well-done: 170°F (77°C)
Remove burgers from heat when they're 5°F below target temperature. They'll continue cooking during rest time.
For food safety, the USDA advises cooking ground beef to a minimum of 160°F (71°C). This eliminates harmful bacteria that may be present in ground meat.
Mastering Burger Doneness
Achieving the perfect burger doneness requires attention to detail and understanding of temperature and timing. Different levels of doneness result in varying textures and flavors, catering to individual preferences.
Rare to Well-Done: A Spectrum
Burger doneness ranges from rare to well-done. Rare burgers (125°F) have a cool red center and are cooked for about 2-3 minutes per side. Medium-rare (135°F) features a warm red center, requiring 3-4 minutes per side. Medium (145°F) burgers have a pink center and take 4-5 minutes per side. Medium-well (150°F) burgers have a slightly pink center, needing 5-6 minutes per side. Well-done (160°F) burgers have no pink and require 6-7 minutes per side.
Use a meat thermometer to check internal temperature. Remember, personal preference plays a significant role in choosing doneness. Some diners prefer juicier medium burgers, while others opt for well-done patties.
The Importance of Resting the Burger
Resting is crucial for a juicy burger. After cooking, let the burger rest for 3-5 minutes. This allows juices to redistribute throughout the patty. Cutting into a burger immediately after cooking causes juices to escape, resulting in a drier texture.
During resting, the internal temperature continues to rise slightly. This carryover cooking can increase doneness by about 5°F. Consider this when aiming for your desired level of doneness.
Place rested burgers on a clean plate or cutting board. Cover loosely with foil to retain heat without trapping moisture.
Avoiding Common Mistakes
Several mistakes can impact burger doneness. Pressing down on burgers with a spatula forces out juices, leading to dry patties. Flipping too frequently can result in uneven cooking and affect doneness.
Ensure the grill is preheated to the correct temperature before cooking. For 1/3 pound burgers, medium-high heat (375-400°F) is ideal. Consistency in grill temperature helps achieve desired doneness.
Avoid using frozen patties, as they cook unevenly. Thaw burgers in the refrigerator before grilling. Lastly, don't rely solely on cooking time. Factors like patty thickness and grill temperature can affect doneness. Always use a meat thermometer for accuracy.
Assembling the Perfect Burger
Creating a mouthwatering burger involves more than just cooking the patty. The right combination of buns, toppings, and presentation can elevate your burger from good to unforgettable.
Choosing the Right Buns and Toppings
Select fresh, high-quality burger buns that complement your patty. Brioche buns offer a rich, buttery flavor, while sesame seed buns provide a classic touch. For a healthier option, whole wheat buns work well.
For toppings, opt for crisp lettuce, ripe tomato slices, and thinly sliced onions. Pickles add a tangy crunch. Cheese lovers can choose from cheddar, Swiss, blue cheese, or American slices.
Bacon strips bring a savory, smoky element. Remember to cook bacon separately before adding it to your burger.
Layering for Maximum Flavor
Start with a lightly toasted bun bottom. Add a small amount of sauce or mayo to prevent sogginess. Place the cooked patty next, followed by cheese if desired.
Add lettuce, tomato, and onion slices. Place pickles and bacon on top. Finish with condiments like ketchup or mustard on the top bun.
This layering method ensures each bite contains a balanced mix of flavors and textures.
The Art of the Burger Presentation
Serve your burger on a clean plate or stylish wooden board. Secure it with a long toothpick or skewer to keep layers intact.
Arrange any extra toppings or condiments neatly on the side. A small ramekin of extra sauce adds a nice touch.
For a professional look, wrap the bottom half of the burger in parchment paper. This makes it easier to hold and eat without messy drips.
Safety and Cleanup
Proper safety practices and thorough grill cleanup are essential when cooking burgers. These steps help prevent foodborne illnesses and maintain your grill's performance.
Food Safety Guidelines
Always handle raw meat carefully to avoid cross-contamination. Wash hands thoroughly before and after touching raw burgers. Use separate cutting boards and utensils for raw and cooked foods.
Keep burgers refrigerated until ready to grill. Avoid leaving raw meat at room temperature for more than 2 hours. Cook burgers to an internal temperature of 160°F (71°C) to kill harmful bacteria.
Use a clean meat thermometer to check doneness. Insert it into the thickest part of the patty. Avoid placing cooked burgers on plates that held raw meat.
Cleaning Your Grill Afterwards
Clean your grill grates while they're still warm. Use a stiff wire brush to remove food particles and grease. For stubborn residue, soak grates in warm, soapy water.
Empty the grease trap after each use. Wipe down the exterior with a damp cloth. Clean the burners and check for clogs.
For deep cleaning, remove grates and burners. Scrub with a degreaser and rinse thoroughly. Reassemble and heat the grill to burn off any cleaning residue.
Regularly inspect your grill for wear and damage. Replace parts as needed to ensure safe operation.
Burger Grilling Tips and Tricks
Mastering the art of grilling burgers requires attention to detail and a few key techniques. These tips will help you achieve juicy, flavorful burgers with the perfect char and texture.
Preventing Burgers from Sticking
Clean and oil the grill grates before cooking to prevent sticking. Preheat the grill to high heat, around 375-400°F. Use a wire brush to remove any debris, then oil the grates with a paper towel dipped in vegetable oil. Hold the oiled towel with tongs and rub it across the grates.
Form patties with cold ground chuck for better handling. Make a slight indentation in the center of each patty to prevent puffing during cooking. Avoid pressing down on burgers while grilling, as this can squeeze out juices and cause flare-ups.
Only flip burgers once during cooking. Wait until the bottom develops a nice crust before turning. Use a wide, thin spatula to gently lift and flip the patties.
Controlling Flare-Ups
Keep a spray bottle of water handy to quickly douse any flames. Trim excess fat from the meat before grilling to reduce flare-ups. If using fatty ground beef, consider creating a two-zone fire with direct and indirect heat areas.
Move burgers to the cooler side of the grill if flames become excessive. This allows cooking to continue without burning. Avoid closing the grill lid during flare-ups, as this can trap smoke and create an unpleasant flavor.
Clean the grill regularly to prevent grease buildup, which can fuel fires. Empty the grease trap after each use and deep clean grates periodically.
Enhancing Flavor with Smoke and Marinades
Add wood chips to charcoal or use a smoker box on gas grills for a smoky flavor. Soak chips in water for 30 minutes before use. Hickory, mesquite, or applewood complement beef well.
Create a simple marinade with Worcestershire sauce, olive oil, garlic, and black pepper. Marinate burgers for 30 minutes to 2 hours before grilling. Don't over-marinate, as acids can break down meat fibers and affect texture.
Season patties generously with kosher salt and freshly ground black pepper just before grilling. For added depth, mix in minced onions, herbs, or spices to the ground beef before forming patties.
Toast burger buns on the grill for extra flavor and texture. Brush with butter and place cut-side down on the grates for 30-60 seconds until lightly browned.
