
Growing Microgreens at Home
A Step-by-Step Guide
Growing microgreens at home offers garden enthusiasts and health-conscious individuals an accessible way to cultivate a variety of edible plants, regardless of their level of gardening experience or the amount of space they have available. Microgreens are young vegetable greens harvested just after the first true leaves emerge. They are not only packed with nutrients but also add a fresh, flavorful boost to a myriad of dishes, from salads to sandwiches.
One can grow microgreens in a small space with minimal equipment from the comfort of their home. Essential requirements include a shallow seed tray, a suitable growing medium—which can range from soil to soilless mixes like coconut coir or peat moss—and a selection of seeds, which may include popular varieties such as radishes, kale, arugula, and basil. With their quick turnaround from seeding to harvest, typically ranging from one to three weeks, microgreens are an ideal choice for those looking to enjoy homegrown produce with a short growth time and minimal maintenance.
By controlling the growing environment indoors, cultivators can ensure optimal conditions to grow microgreens all year round. Adequate light, sufficient moisture, and proper ventilation are key components for successful growth. Homegrown microgreens not only promise a fresh supply of greens but also provide the satisfaction of growing one’s own food, embodying sustainability and self-sufficiency within the practice of modern gardening.
Getting Started with Microgreens
Embarking on the journey of growing microgreens at home begins with understanding these miniature plants, selecting the right microgreen seeds, and gathering essential supplies and equipment. This section provides specific insights to ensure growing microgreens at home with a successful cultivation process.
Understanding Microgreens
Microgreens are the young seedlings of edible vegetables and herbs harvested just after the first true leaves have emerged. They never get to grow into mature vegetables but they contain all the nutrients for producing mature plants, harvesting microgreens at this early stage of life has nutritional benefits.
They are coveted for their nutrient density and are grown indoors, typically reaching a height of 1-3 inches before harvest. Germination times vary, but most microgreens are ready to harvest within 2 weeks, providing a quick turnaround from seed to table.
They are a popular choice among urban gardeners as they can be cultivated in a tiny space, and many different plants can be grown and eaten as microgreens that provide health benefits.
Choosing the Right Microgreens Seeds
For a successful crop, start with high-quality microgreen seeds. Opt for seeds like radish, kale, or sunflower seeds, which are known for their ease of growth and minimal care requirements.
Radish microgreens, for example, germinate quickly and reliably, making them an excellent choice for beginners for micro-salad mixes.
When you source seeds to grow microgreens indoors you should consider heirloom varieties. When selecting new seeds for a micro-setup choose veggies with small seeds to maximize the available space.
Preferred Beginner Microgreens Seeds:
Radish
Kale
Sunflower
Herb seeds
Essential Supplies and Equipment
Lastly, the necessities for cultivating microgreens include:
Clean container: Small cups or trays to hold the growing medium.
Soil: A sterile, nutrient-rich growing medium such as a peat and perlite mix provides an ideal environment.
Trays: Shallow growth trays without holes for soil or hydroponic setups.
Lighting: If sunlight is insufficient, employing artificial light can help maintain optimal growth conditions.
For indoor growing, ensure you have a well-ventilated space with adequate light. It is crucial to maintain a consistent watering routine, avoiding over-saturation, to foster proper germination and growth.
The Perfect Micro-Greens Environment
In growing microgreens, the environment is instrumental in ensuring healthy, vigorous plants. One must carefully consider the location, the type of growing medium, and the balance of light and water for optimal growth.
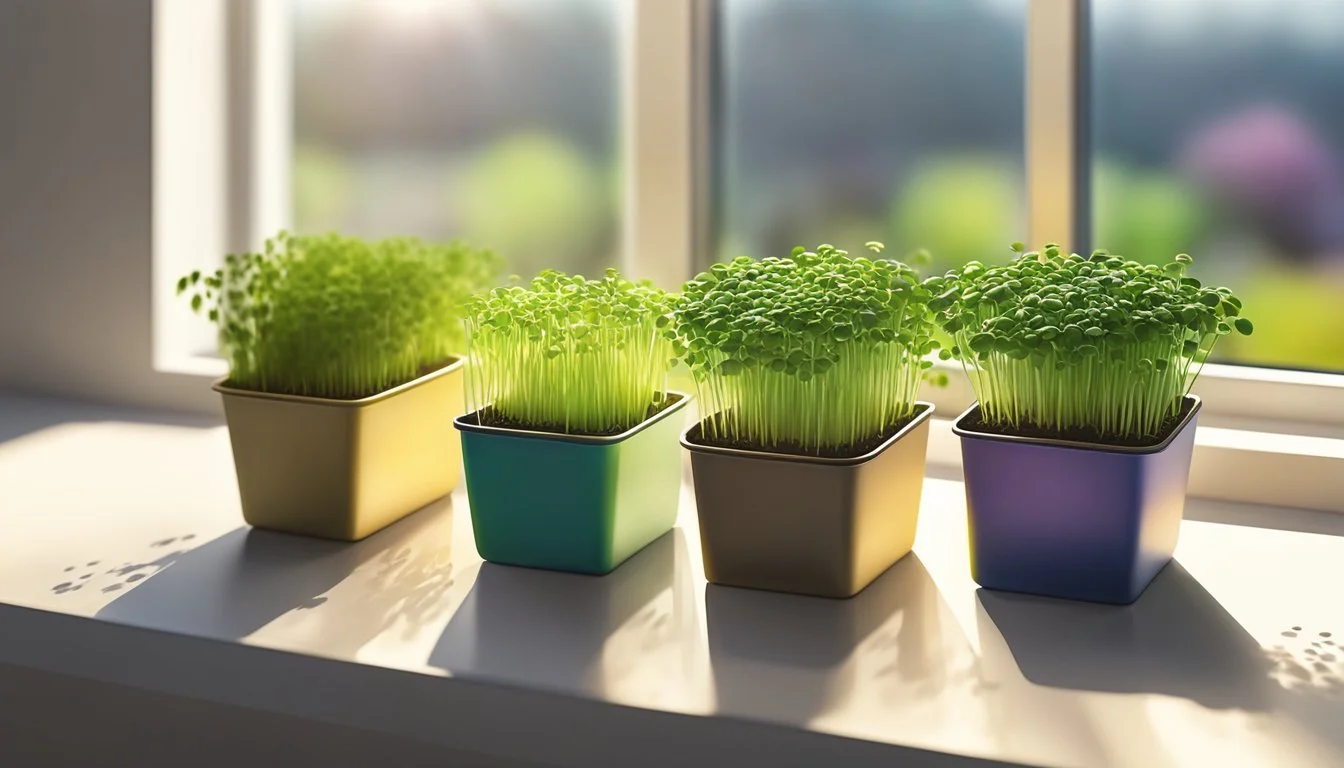
The Ideal Location to Grow Microgreens Indoors
Microgreens thrive in an area with ample daylight. A sunny windowsill is often the perfect spot, exposing the plants to sufficient indirect sunlight. The location should also maintain a consistent temperature, avoiding places subject to drafts, extreme heat, or high variability in temperature. Trays for growing microgreens should have drainage holes to prevent waterlogging.
Soil vs. Soilless Growing Mediums
The choice between soil and soilless mediums affects water retention, nutrient availability, and the potential for disease. Potting soil is a common choice due to its nutrient content and ease of use.
Alternatively, a soilless mix, often peat or a peat-perlite combination, can provide excellent drainage and reduce the risk of soil-borne diseases. Other growing mediums include hemp mats and coco coir, either way, you don't need a huge soil level a seedling tray of peat blocks will suffice for many sprouts.
Lights and Watering
Microgreens require consistent moisture, but overwatering can be detrimental. Water regularly from below by filling a tray and allowing the growing medium to absorb it can ensure that the microgreens are neither too wet nor too dry.
In cases where natural sunlight is not sufficient, one may use grow lights to mimic natural light cycles, generally keeping them on for 12-16 hours per day to avoid legginess in plants.
Planting and Growing Microgreens at Home
This section provides a comprehensive guide to the initial stages of planting microgreens and establishing the optimal conditions for their growth.
Preparing the Seeds to Grow Indoors
Before planting, seeds should be properly prepared. It is often recommended to soak larger seeds in water for several hours to expedite germination. However, smaller seeds may not require soaking. After soaking, the small seeds must be drained using a fine mesh colander, and then spread evenly across the growth tray.
Microgreen Planting Techniques
Planting microgreens requires a precise approach. A shallow tray, typically no more than 2 inches deep, should be filled with a thin layer of pre-moistened growing medium such as seed starting mix, potting mix, or a soilless option like coconut coir.
Evenly spreading the seeds over the surface is crucial, as overcrowding can impede the growth of root hairs. A light mist using a spray bottle helps settle the seeds into the medium and ensures the seeds germinate.
Optimal Conditions to Grow Microgreens at Home
Sprouting seeds requires close care, you need to keep the soil moist for the germinated seeds to grow. After sowing, one should manage the environmental conditions diligently.
Microgreen seeds sprout quickly but need consistent moisture; therefore, frequent misting with a spray bottle might be necessary to keep the growing medium damp but not waterlogged.
These tiny plants should be placed in an area with substantial indirect sunlight or under grow lights as they germinate and begin to grow. Soil moisture and temperature should remain steady, as significant fluctuations can affect the health of microgreens.
A store-bought microgreens kit with a seed starting mix medium might be a good investment for a beginner looking to grow microgreens.
How to Harvest Microgreens
Harvesting microgreens efficiently maximizes their taste and nutritional value. It requires an understanding of the right harvest time, the appropriate techniques, and effective post-harvest handling.
Recognizing When To Harvest Microgreens
Microgreens grow fast and are typically ready to harvest between 7 to 14 days after sowing, once they display their true leaves—the set that appears after the initial seed leaves. These greens should generally be about 1 to 4 inches tall. The best time for harvesting is during the early morning or evening to ensure freshness. For optimal taste, you should eat microgreens that are freshly harvested.
Harvesting Techniques
To harvest microgreens, gardeners should use a pair of scissors or a sharp knife to snip the microgreens just above the soil line. It is essential to handle the seedlings gently to avoid bruising. If the microgreens are cut cleanly and are not torn, the quality of the harvest remains high and the microgreens regrow in no time.
Post-Harvest Handling
Once harvested, microgreens should be carefully washed to remove soil and then laid to dry on a paper towel. They must be kept chilled in the fridge if not used immediately. To maintain freshness, it is recommended to store microgreens in a container lined with a paper towel to absorb any excess moisture.
Varieties of Microgreens
Microgreens come in an array of varieties, each offering unique flavors and nutritional benefits. Gardeners can choose from traditional vegetable greens, aromatic herbs, and exotic plants to grow at home.
Vegetables: Traditional greens like kale, cabbage, and beet leaves are popular for their robust flavors, adding a peppery or sweet note to dishes. Radish microgreens give a spicy kick and are favored for their quick growing time.
Herbs: Basil microgreens carry a concentrated version of the herb's signature taste, making them a favorite for garnishing and incorporating into culinary creations.
Broccoli: Renowned for its high levels of sulforaphane, broccoli microgreens are a top choice for those looking to boost their diet with anticarcinogenic properties and essential vitamins A, B, C, and E.
Sunflower: These greens are not only delicious with a nutty flavor but also packed with nutrients, including healthy fats and protein, making sunflower microgreens a nutritious addition to salads and sandwiches.
Amaranth: Known for their vibrant color and delicate texture, amaranth (how long does amaranth last?) microgreens are less common but offer a visually striking option with a mild, slightly sweet taste.
Chia: Chia offers microgreens with a refreshing crispiness. Although they require a bit more care to grow due to their gelatinous seed coating, they are worthwhile for their nutritional profile and versatility in use.
Health Benefits of Your Own Microgreens
Microgreens are highly nutritious and offer health benefits that can be easily included in a variety of dietary habits. They serve as a versatile ingredient that can enhance both the nutrition and flavor profiles of various dishes.
Nutritional Value and Benefits of Fresh Microgreens
Microgreens are known for their high nutritional value and offer a rich source of vitamins, minerals, and antioxidants.
These small greens can contain higher nutrient levels than their mature plant counterparts. For example, red cabbage microgreens are an excellent source of vitamin C.
These leafy greens also provide a substantial amount of vitamin K, essential for blood clotting and bone health, while being low in calories, making them a healthful addition to any diet.
Key Nutrients in Microgreens:
Vitamins: A, C, E, and K
Minerals: Iron, Potassium, Zinc, and Magnesium
Antioxidants: Betacarotene and Polyphenols
The dense nutritional profile supports the strengthening of the immune system and can contribute to reducing the risk of certain chronic diseases. Microgreens are often referred to as a superfood because of their potent concentrations of beneficial nutrients.
Incorporating Microgreens into Your Diet
Microgreens can be easily incorporated into one's diet in a variety of ways. They make an excellent addition to salads, providing a burst of flavor and a tender, crunchy texture. These greens can also be used to enhance sandwiches, wraps, and other dishes with fresh greens. When used in place of mature greens like spinach, microgreens can offer a different visual appeal and a more intense flavor profile.
Ways to Include Microgreens in Meals:
As a topping for pizzas, soups, and omelets
Mixed into smoothies or juices for added nutrients
Blended into dips or spreads for a nutritional boost
Due to their small size and delicate nature, it is best to eat microgreens added to dishes immediately harvested to preserve their nutritional content and flavor. Whether grown at home or purchased, microgreens can serve as a nutritious and flavorful element of a healthy eating plan.
Troubleshooting Common Issues
Within the satisfying endeavor of growing microgreens, growers may encounter certain challenges. This section provides targeted strategies for confronting pests and diseases, enhancing growth, and perfecting watering and lighting for optimal microgreen health.
Pests and diseases are common problems encountered when you grow microgreens indoors, they can hinder microgreen growth. Aphids and fungus gnats are common pests that can be managed by introducing beneficial insects like ladybugs or applying insecticidal soaps.
Fungal diseases often manifest as mold or mildew on the plants. These issues are typically due to excessive moisture. The grower can reduce humidity around the plants and increase air circulation to mitigate fungal growth when they grow microgreens.
Regular inspection of the microgreens for pests and signs of disease is crucial. Affected areas should be removed promptly to prevent spreading.
Slow or stunted growth in microgreens is often a symptom of a suboptimal growing environment. They must assess factors such as soil quality, seed density, and even temperature.
Fertile soil with peat moss and adequate but not excessive organic fertilizer will support robust growth. Thinly spreading seeds can prevent overcrowding which contributes to poor root development. Consistent temperatures between 18-24°C (65-75°F) are best for growing microgreens.
Microgreens showing yellowing leaves might signify a deficiency in nutrients. Growers should consider mild fertilizers suitable for the sensitive nature of microgreens or organic compost to boost nutrient content and help grow microgreens.
Precise watering is essential for growing microgreens– too much can lead to mold, and too little can inhibit growth. Microgreens require a consistent moisture level, which can be achieved by a light, daily misting with a spray bottle, or using a bottom-watering technique to keep roots moist but not waterlogged.
Optimal lighting is equally pivotal, microgreens flourish under a full-spectrum light source for approximately 12-16 hours a day.
Introducing grow lights or placing the microgreens in a well-lit area away from direct sunlight helps the grower avoid etiolation (leggy growth caused by insufficient light) and ensures a robust harvest.
Tips and Tricks for Growing Microgreens Indoors
When growing microgreens at home, enthusiasts often seek ways to both intensify flavors and increase yield, in addition to exploring sustainable practices like seed reusing and hydroponics. This section guides on taking your home microgreen cultivation to the next level, employing specific strategies to achieve the best results.
Maximizing Flavor and Yield
Flavor and yield are influenced by light and the growing medium. A blend of peat and perlite offers a balance of aeration and moisture retention, conducive to robust growth. To intensify flavor, consistent light exposure is crucial. Position grow lights 2-4 inches above the plants, and adjust the duration based on the variety:
Mild-flavored microgreens: 12-14 hours of light
Intense flavor varieties: up to 16 hours of light
Rotating your trays daily ensures even light exposure, resulting in uniform growth and potent flavors.
Regrowing and Reusing Seeds
While regrowing microgreens from used seeds is generally not recommended, due to diminished nutrients and flavor, growers can maximize their seed stock by:
Ensuring optimal seed density on trays to prevent overcrowding and to foster full growth development.
Staggering planting dates can provide continuous harvests and efficient use of microgreen seeds.
Cleanliness and proper storage of seeds can also help maintain their quality for future use.
Exploring Hydroponic Options
Hydroponics can enhance how you grow microgreens by optimizing nutrient delivery and minimizing soil-borne pathogens. For those embarking on this method:
Utilize a basic hydroponic setup with a nutrient-rich water solution to ensure the microgreens receive all necessary nutrients.
The absence of soil can lead to cleaner growth conditions and sometimes a higher yield of microgreens.
By implementing these advanced tips and embracing precise techniques, growers can significantly enhance both the flavor and yield of their homegrown microgreens while exploring more sustainable and efficient growing methods.
The Future of Microgreens
In advancing from the foundational aspects of growing microgreens at home, enthusiasts and educators are recognizing the potential for both academic exploration and commercial production.
Educational institutions have identified microgreens as valuable tools for teaching. The University of Maryland, for example, uses microgreens as a subject to teach students about plant biology in a hands-on manner.
Students learn about the growth cycle from seed to salad greens in a controlled environment. This can be especially engaging for younger students, who can see rapid results in a garden setting without having to wait an entire season.
Biology: Students observe seed germination and development.
Sustainability: Through growing microgreens, pupils learn about sustainable agricultural practices.
Nutrition: Lessons often include discussions on the nutritional benefits of consuming raw greens.
Commercially, microgreens have become a lucrative component for urban farmers and those operating home gardens who wish to enter the market and sell at their local farmers' market.
Typically, a commercial setup includes an array of microgreen seed mixes, often featuring species of sprouts like peas, lettuce, cauliflower, and other salad greens. These varieties are selected for their market demand and ease of growth in both indoor and outdoor setups.
Commercial gardens that produce microgreens often require a systematic approach including proper shelving, lighting, and irrigation to grow microgreens on a larger scale with larger crop volumes.
High standards of cleanliness are essential to prevent pathogens, especially when the product is intended to be eaten raw.
Harvesting microgreens at the right time ensures peak flavor and nutritional value, usually when cotyledons are fully developed and true leaves are just starting to emerge.
Conclusion
Microgreens grow incredibly quickly, the seeds germinate and are ready for harvesting in less than 2 weeks. With multiple health benefits on offer and their modest space requirements, urban dwellers should consider growing microgreens at home a no-brainer.
Little equipment is required to grow microgreens at home and these nutrient-dense baby sprouts add interest to a variety of recipes. Eating microgreens is healthy, they can be harvested and eaten raw or you can look at cooking microgreens.
Microgreens regrow, by staggering the planting of microgreens and effectively managing their environment, watering regularly with spray bottles one can grow microgreens indoors maintaining a steady supply year of highly nutritious baby greens year-round.
