
The Ultimate Guide to Using Chisels for Wood Carving and Shaping in Homesteading
Mastering Traditional Craftsmanship Techniques
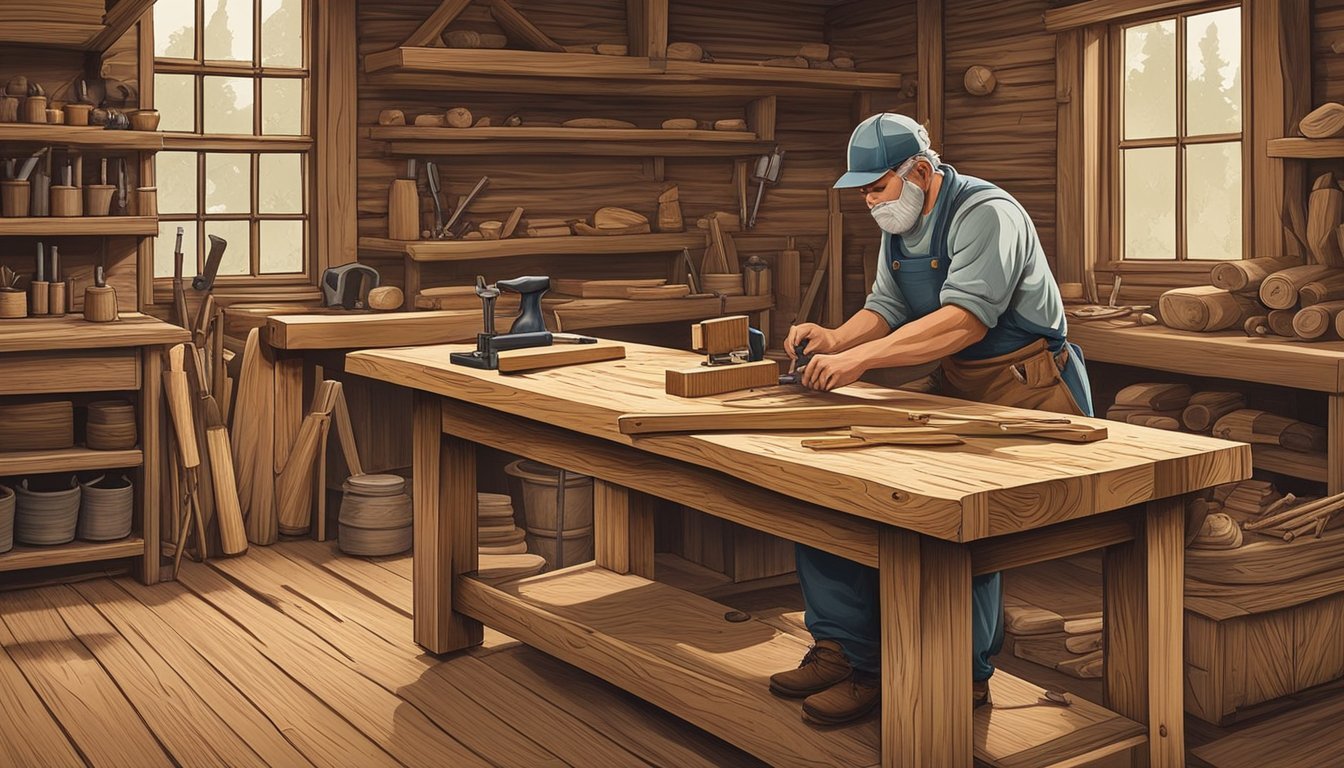
Chisels are indispensable tools in the world of homesteading, where wood carving and shaping are not just crafts, but also essential skills for creating functional and decorative items. Whether it's carving intricate designs into furniture or shaping handles for farm tools, chisels offer a level of precision and control unmatched by other woodworking implements. With proper technique and an understanding of the different types of chisels available, one can transform a simple piece of wood into a work of art or a practical object.
The successful use of chisels hinges on two critical factors: selecting the right type for the job and ensuring they are kept razor-sharp. Gouges, with their curved cutting edges, are particularly adept at creating contoured designs and hollowing out wood. Paring chisels, on the other hand, are more suited for delicate, precise cuts, often used in joinery. It is the sharpness of these tools, achieved through careful honing on stones and maintenance with strops, that dictates their effectiveness in cutting cleanly through wood without causing splintering or tearing.
Understanding the nuances of these tools extends beyond their selection and care. Mastery comes with knowing how to manipulate the chisel's angle and pressure applied, the efficiency of strokes, and the finesse needed to avoid mistakes that could compromise the integrity of the wood. With practice and patience, the use of chisels in homesteading can greatly enhance the quality and craftsmanship of woodworking projects, contributing to a self-sufficient lifestyle where both utility and beauty are crafted by hand.
Understanding Chisels
When undertaking wood carving and shaping in homesteading, one needs a firm understanding of chisels, the essential tools for the job. Chisels come in various types and sizes, each designed for specific tasks. Bench chisels are versatile and commonly used, while carving chisels are more specialized for detailed work. Paring chisels have a thinner blade and are finely sharpened for precise shaving or cleaning of wood joints.
Shapes and sizes is a crucial aspect of chisels. The blade's shape determines the kind of cut it can produce. For instance, straight chisels have a flat edge and are ideal for making straight cuts. Skew chisels feature an angled edge that allows for clean, acute cuts and access to tight corners. Gouges are chisels with a curved cutting edge used for scooping or carving out wood.
Bevel: The angle of the cutting edge, typically ranging from 20 to 30 degrees for wood carving.
Blade: The metal part that does the cutting; it comes in varying lengths and thicknesses.
Handle: The part the user holds, it can be made of wood or composite materials.
Tang: The metal part that extends into the handle for stability.
The table below summarizes key characteristics of different chisel types:
Bench Chisel:
Blade Shape: Straight
Use Case: General purpose cutting
Carving Chisel:
Blade Shape: Various
Use Case: Detailed and intricate work
Skew Chisel:
Blade Shape: Angled edge
Use Case: Precision corner work
Paring Chisel:
Blade Shape: Thin, flat
Use Case: Fine shaving of wood surfaces
Gouge Chisel:
Blade Shape: Curved
Use Case: Scooping, hollowing wood
The appropriate selection and use of a chisel greatly affect the quality of the finished work. It is imperative for homesteaders to familiarize themselves with these tools to achieve the best results in their woodcraft projects.
Selecting the Right Chisel
Choosing the right chisel is pivotal for any wood carving project, as it influences the ease of carving, the level of detail achievable, and the longevity of your tools.
Types of Wood: Softwoods and Hardwoods
Softwoods, such as pine or cedar, are less dense and typically easier to carve. They require chisels that are sharp but do not necessarily need to be as robust as those used for hardwoods. Hardwoods like oak or maple demand chisels that can withstand the wood's toughness while maintaining precision.
Softwoods: Opt for chisels with a slight bevel that can easily slice through the material without excess force.
Hardwoods: Choose chisels with a stronger build and durable edge retention to manage the demands of denser wood.
Chisel Types and Their Uses
Different chisels serve various purposes in the art of wood carving.
Straight Chisels: Ideal for creating flat surfaces and precise, straight edges.
Gouges: Their curved cutting edges are perfect for scooping out wood, allowing for both shallow grooves and deep recesses.
V-tools: Essential for carving fine lines and intricate designs, V-tools are excellent for detailing work.
Skew Chisels: Used to make angled cuts and clean corners for joinery.
Choosing the appropriate type of chisel directly influences the quality of the carving technique and the level of detail you can achieve.
Size and Shape for Your Project
Small, Narrow Chisels: Suitable for detailed work, such as ⅛ to ¼ inch widths.
Wider Chisels: Ideal for larger, rough-out processes, such as ¾ to 1-inch widths.
Medium-sized Chisels: Versatile for both detail and the overall shaping of wood.
Select the size and shape according to the scale and intricacy of your project. The right chisel size adds precision and control to your carving process.
The Importance of Chisel Materials
The material of a chisel determines its sharpness, durability, and longevity.
Carbon Steel: Known for its sharpness and ease of sharpening.
High-Speed Steel: Offers a balance between toughness and edge retention.
Chromium-Vanadium Steel: Provides great strength and resistance to wear and is suitable for hardwoods.
Materials are critical to the chisel's performance, especially when working with different types of wood.
Chisel Handling and Techniques
The art of wood carving and shaping with chisels requires a blend of strength and finesse. Mastery in chisel handling and techniques lies in the control of each stroke, precise angles, and depth of cuts, which ensures detailed artistry and minimizes fatigue.
Holding and Controlling the Chisel
The proper grip on a chisel provides the control needed for precision work. Carvers should hold the chisel in one hand near the blade, with the thumb on the back to steer the cutting edge, and clutch the handle with the other hand. A firm grip stabilizes the chisel, vital for control over the force and direction of carving strokes.
Correct Chisel Angles and Positions:
For Shaping: Hold at a low angle to the wood for slicing cuts.
For Paring: Use higher angles to slice parallel to the wood surface.
Effective Carving Strokes
Carving strokes demand an understanding of wood grain and the technique to avoid unwanted chips. One initiates strokes with a push or pull movement, applying even force to glide the chisel's blade through the wood. Gouges require a sweeping motion to excavate curves and textures, while skew chisels achieve clean, angular cuts.
Techniques for Minimizing Fatigue:
Use body weight to drive the chisel, not just arm strength.
Take breaks to prevent strain and maintain consistency in strokes.
Shaping and Paring Techniques
Shaping with chisels involves the removal of wood to form contours and textures. Hold the chisel at a consistent angle to maintain uniformity in depth across the surface. Paring is a subtler technique, often used for fine-tuning a shape or smoothing a surface, where precision and patience take precedence over force.
Key Points for Effective Shaping and Paring:
Precision: Maintain steady pressure for clean, precise cuts.
Texture: Use a variety of chisel shapes to create the desired surface texture.
Safety Considerations

In wood carving and shaping, prioritizing safety is essential to prevent injuries and ensure a smooth workflow. Proper protective gear, workspace arrangements, and handling of sharp tools are fundamental components of a carver's routine.
Protective Gear for Carvers
Gloves: Wood carvers should wear gloves to protect their hands from splinters and cuts. A pair of cut-resistant gloves can provide a better grip on tools while safeguarding against accidental slips of the chisel.
Safety Glasses: Woodworking often produces chips and debris. Safety glasses are crucial to shield the eyes from such flying particles and prevent any damage to vision.
Workspace Safety
Workbench: Carvers must secure their workpieces on a sturdy workbench. A stable, flat surface ensures accuracy and minimizes risk; it is also valuable for maintaining control over the tools.
Debris Management: Keeping the work area clean of debris reduces the chances of accidental slips or trips. Regularly sweeping away wood shavings can also prevent fire hazards.
Handling Sharp Tools Safely
Chisel Sharpening: A sharp blade is safer as it requires less force to cut, reducing slippage risks. Carvers should periodically sharpen their chisels to maintain their effectiveness and safety.
Mallet Technique: When using a mallet to strike a chisel, the carver should ensure their hands are behind the cutting edge. Accurate striking minimizes the chance of the chisel slipping, thus preventing injury.
Chisel Maintenance
Proper maintenance ensures chisels remain sharp and durable, becoming reliable tools in any woodworking project. This guide outlines sharpening techniques, rust prevention, and storage practices to extend the life of your wood carving chisels.
Sharpening Your Chisels
To maintain the sharpness of your chisels, regular sharpening on a sharpening stone is essential. Begin with a coarser grit stone and progress to finer grits for a polished edge. Apply a few drops of honing oil on the stone to lubricate the surface and remove metal filings. Use a honing guide to hold the chisel at the correct angle, ensuring uniformity and precision in sharpening. After sharpening, remove any burr formed on the edge with a leather strop, which refines the edge to optimal sharpness.
Sharpening Steps:
Start with a coarse sharpening stone (e.g., 400 grit).
Progress to medium (e.g., 800 grit) and fine stones (e.g., 1500 grit).
Lubricate the stone with honing oil to ensure a smooth glide.
Use a honing guide for consistent angles.
Finish with a leather strop to polish and straighten the edge.
Dealing with Rust and Wear
Chisels are prone to rust and wear, which affects their cutting performance. To prevent rust, regularly clean the blades with a brush and wipe them down with a protective oil after each use. If rust does occur, remove it with a fine-grit sandpaper or a specialized rust remover. Keeping the tools dry and applying a thin coat of oil will prevent rust and reduce wear.
Rust Prevention:
Clean regularly with a brush to remove debris.
Apply a light layer of protective oil after each use.
Remove existing rust using fine-grit sandpaper or rust remover.
Storing Chisels to Prevent Damage
Chisels should be stored properly to avoid damage. Implement a storage solution that keeps the chisel blades separated to prevent them from knocking against each other and dulling. Tools can be stored in a rack, a roll-up tool pouch, or magnetic strips. Ensure the storage area is dry to prevent rust formation.
Storage Solutions:
Rack: Secures each chisel individually and keeps them easily accessible.
Tool Pouch: Offers mobility and protects the chisels during transportation.
Magnetic Strip: Provides quick access and visibly organizes tools.
Maintain your chisels with careful sharpening, diligent cleaning to counteract rust and wear, and thoughtful storage to avert any form of damage.
Advanced Carving Techniques
Advanced wood carving techniques allow craftsmen to elevate their artistry and showcase their technical prowess. These methods require a blend of precision, creativity, and an understanding of traditional and innovative practices.
Mastering Relief Carving
Relief carving is a form of art where the woodworker carves figures and objects from a flat wood panel, creating a three-dimensional appearance. Key to mastering this technique is the control of depth and shadows, which bring the piece to life. Experienced carvers often use a range of chisels and gouges to achieve the desired effect, with each tool providing a different texture and level of detail.
Flat Chisels: Ideal for creating sharp outlines and crisp edges.
Veiners: Small gouges suited for delicate lines and fine detailing.
U-Gouges: Perfect for removing larger areas of wood and shaping contours.
Creating Intricate Designs and Sculptures
Moving beyond the basics, advanced wood carvers tackle intricate designs and full sculptures, which demand a high level of detail and versatility in technique. The use of specialized chisels is essential in achieving the precise facial expressions and complex patterns often found in such pieces.
V-Tools: Essential for creating fine lines and decorative cuts.
Fishtail Gouges: Allow access to tight corners.
Back Bent Gouges: Assist in undercuts and concave areas not reachable with straight gouges.
Techniques for Experienced Woodworkers
Experienced woodworkers often employ techniques that require a strong understanding of the wood grain and how it interacts with the carving tools. Craftsmen may also experiment with different finishes to enhance the visual appeal of the wood.
Stippling: Used to create texture by tapping the surface with a series of punctures.
Chip Carving: Involves removing small chips of wood in a single piece, resulting in geometric patterns.
Egg-And-Dart: A classic design pattern where an egg shape alternates with a V-shaped dart.
Finishing Your Work
When it comes to homesteading, finishing wood carving and shaping projects is paramount for both aesthetics and functionality. This final stage refines the surface, adds intricate details, and transforms a simple carving into a piece of art.
Smoothing and Texturing Surfaces
To achieve a smooth finish on furniture or other wood projects, one must begin with coarser grits and progress to finer grits for a polished surface. Essential tools for this task include sandpapers and fine grit stones, which help remove any tool marks and prepare the wood for sealing or staining.
Start with a medium-grit sandpaper and work in the direction of the grain.
Gradually switch to finer grits until the desired smoothness is attained.
Utilize a leather strop to hone edges and remove the wire edge after sharpening your tools.
Providing the Final Touches
Appearance is crucial in woodcraft, and the final touches can truly elevate the detail and texture of a piece. After smoothing, apply finishes such as oils, waxes, or varnishes, which enhance the wood's natural beauty and provide protection.
Select a finish that complements the wood type and intended use of the piece.
Apply the finish evenly with a clean cloth or brush, following the manufacturer's instructions.
Allow ample drying time between coats, as rushed work can lead to a less durable finish.
From Carving to Sculpting
Shifting from the broader strokes of carving to the finesse of sculpting allows for capturing the subtle expressions and finer details of artistic pieces. Fine chisels, gouges, and veiners become indispensable as they enable the carver to add texture and depth, transitioning a project from a simple shape to a detailed sculpture.
Use skew chisels for precision cuts that define intricate patterns.
Gouges and veiners are ideal for adding texture, creating concave shapes, and etching fine lines.
Employ a mallet to delicately drive the chisels, allowing for controlled and deliberate sculpting.
