
Building a Cob Oven for Outdoor Cooking
The Ultimate DIY Guide
Building an outdoor cob oven offers a unique combination of rustic charm and functionality to any backyard setting. Known for their efficient use of materials and natural aesthetic, cob ovens provide an environmentally friendly alternative to conventional outdoor cookers and are capable of delivering mouth-watering flavors from pizzas to bread, all with the distinct taste that only wood-fired cooking can offer. They also serve as a focal point for social gatherings, encouraging people to participate in the joy of creating and sharing food in a traditional, communal way.
The construction of a cob oven involves simple, readily available materials such as clay, sand, straw, and water. This mix creates a thermally resistant compound known as cob, which can be easily shaped and sculpted by hand. One key aspect of the build is forming the oven's dome, an essential structure that retains heat and reflects it evenly within the oven space. Whether employing techniques involving wet sand to shape the dome or weaving a frame from flexible materials, attention to detail in this process is paramount for achieving optimal cooking conditions and ensuring a long-lasting oven.
Once the cob has been prepared and the dome shaped, builders must allow proper drying time to solidify the structure and avoid cracking. The end result is an energy-efficient cooking space that can reach high temperatures while contributing minimal environmental impact. With patience and a bit of creativity, anyone can craft a cob oven that will produce delicious results for years to come.
Understanding Cob Ovens
In exploring the world of outdoor cooking, cob ovens emerge as a sustainable solution harnessing age-old techniques. They utilize natural materials and provide a distinct way of baking and cooking food.
History and Principles of Cob
Cob building is a traditional method that dates back centuries, found in various cultures around the world. A cob oven is constructed using clay, sand, and straw – materials that are often locally sourced and renewable. This combination creates a durable and heat-retentive structure ideal for even cooking.
Advantages of a Cob Oven
A cob oven stands out for its sustainability and efficiency in outdoor cooking scenarios. The materials used are not only natural but also renewable, contributing to a lower environmental impact. The thermal mass of cob allows for a slow release of heat, making it excellent for bread baking and pizza making.
Sustainability: Utilizes abundant, natural materials
Cost-effectiveness: Affordable to make with minimal resources
Heat retention: Delivers consistent cooking temperatures
Comparing Cob to Other Materials
Cob's unique attributes are evidenced when placed against other building materials. For instance, unlike metal, cob is not prone to rapid temperature fluctuations, providing a stable cooking environment. It's also inherently more sustainable than brick ovens, which often require manufactured materials and can be more resource-intensive to construct.
Metal Ovens: Prone to quick heating and cooling
Brick Ovens: More resource-intensive and less eco-friendly compared to cob
Cob Ovens: Boasts natural insulation and heat distribution for superior cooking
By integrating these elements of history, advantages, and comparisons, one can appreciate how a cob oven is crafted and why it presents a valuable addition to outdoor cooking practices.
Design and Planning
Designing and planning are crucial steps in the creation of an outdoor cob oven. This phase sets the foundation of your project, incorporating key elements such as the oven's size, location, and the materials needed. Thorough preparation in this stage ensures a streamlined building process.
Determining Size and Location
One must carefully consider the size and location of the cob oven. The oven should be positioned in the backyard where it can be easily accessed and used. The size depends on the individual's cooking needs; a common diameter for the oven interior is around 60 inches. Use a tape measure to define the space, ensuring it is clear of overhanging branches and a safe distance from other structures.
Gathering Your Materials List
A detailed materials list is vital for efficiency and cost management. Natural materials such as clay, sand, and straw are the primary components of cob. One will also need building tools like a shovel, wheelbarrow, and jigsaw for cutting door shapes. Acquire a pencil and measuring tape for precise measurements, and consider using cardboard as a template for the base.
Creating a Blueprint
With the location and materials sorted, creating a blueprint is the next step. A blueprint acts as a visual guide throughout the construction. Draw the design, including the dome, foundation, and chimney positions, to scale. It’s important to plan the door height to be 63% of the dome's interior height for optimal airflow. Use a pencil for initial sketches and refine them into a detailed plan that will direct the build process.
Foundation and Base
The foundation and base of a cob oven are essential for durability and functionality, as they support the weight and facilitate even heat distribution. It's crucial to use the right materials and construction techniques to ensure a stable and effective base for your oven.
Building a Solid Foundation
A solid foundation is paramount for the structural integrity of a cob oven. One should initiate the process by digging a pit where the oven will be located, ensuring it is slightly larger than the base of the oven will be. This pit is typically filled with a layer of gravel, facilitating proper drainage and preventing water accumulation that could compromise the foundation. A foundation can be constructed using concrete or a framework of cinder blocks. The depth and composition of the foundation must support the considerable weight of the cob oven without any settling or cracking over time.
Choosing Base Materials
For the base, options include cinder blocks or bricks laid down to create a sturdy platform. This base supports the oven's floor and must be level and strong. One may consider utilizing recycled materials, such as beer bottles, embedded in a sand and clay mixture for an eco-friendly and insulative layer. The chosen materials should be non-combustible and capable of withstanding high temperatures without degrading.
Insulation for the Base
Insulating the base is critical to prevent heat loss and improve the oven's efficiency. A layer of dry perlite or vermiculite can be placed between the structural base and the oven floor to create an insulating layer. These lightweight materials are effective insulators and can withstand the high temperatures generated by the oven. Alternatively, a mixture of sand and fireclay can also provide insulation. Depending on the design, layers of rocks or tiles may be used to create an airspace that further enhances insulation.
Constructing the Oven
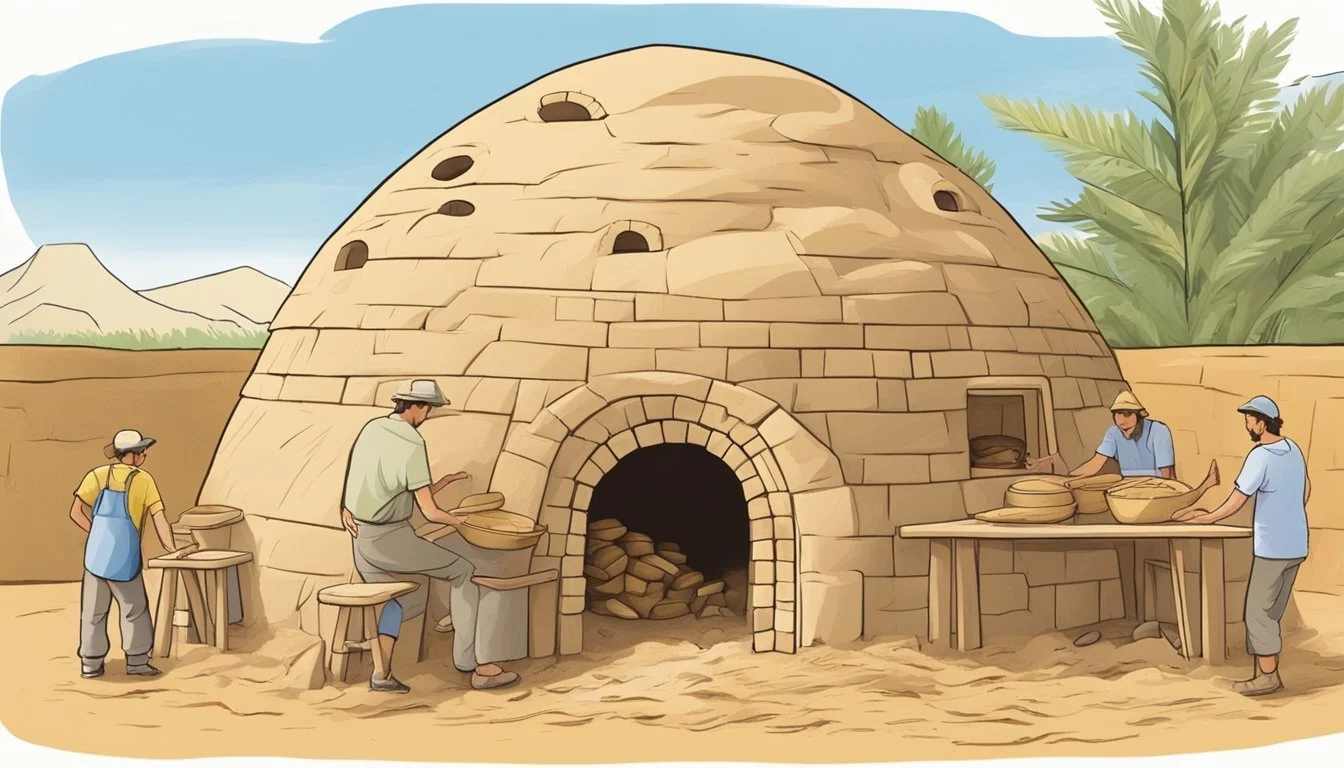
Constructing a cob oven for outdoor cooking involves a careful process of material selection and building techniques. The process capitalizes on natural materials such as cob, a mixture of mud, straw, and sand, to create an efficient and sustainable outdoor oven. Key steps involve mixing and layering these materials to form the oven's walls, creating a sand form to shape the dome, and installing a door and chimney for proper heat management and airflow.
Mixing Cob and Building Walls
Creating a durable cob mixture is the foundation of building solid oven walls. The standard ratio broadly adopted involves combining:
1 part clay
2 parts sand
1 part straw
Water, as needed for consistency
The cob should have a pliable but firm consistency, allowing it to hold its shape without slumping. One should mix the cob thoroughly until all ingredients are well integrated. To test its readiness, a well-mixed cob can be formed into a ball that holds together without cracking when dropped from waist height. After the mixture reaches the desired consistency, one can begin building the walls:
Lay a foundation of bricks or stones for stability.
Apply a base layer of cob to the foundation to insulate the oven floor.
Incrementally add layers of cob, molding and compressing them to create thick, sturdy walls.
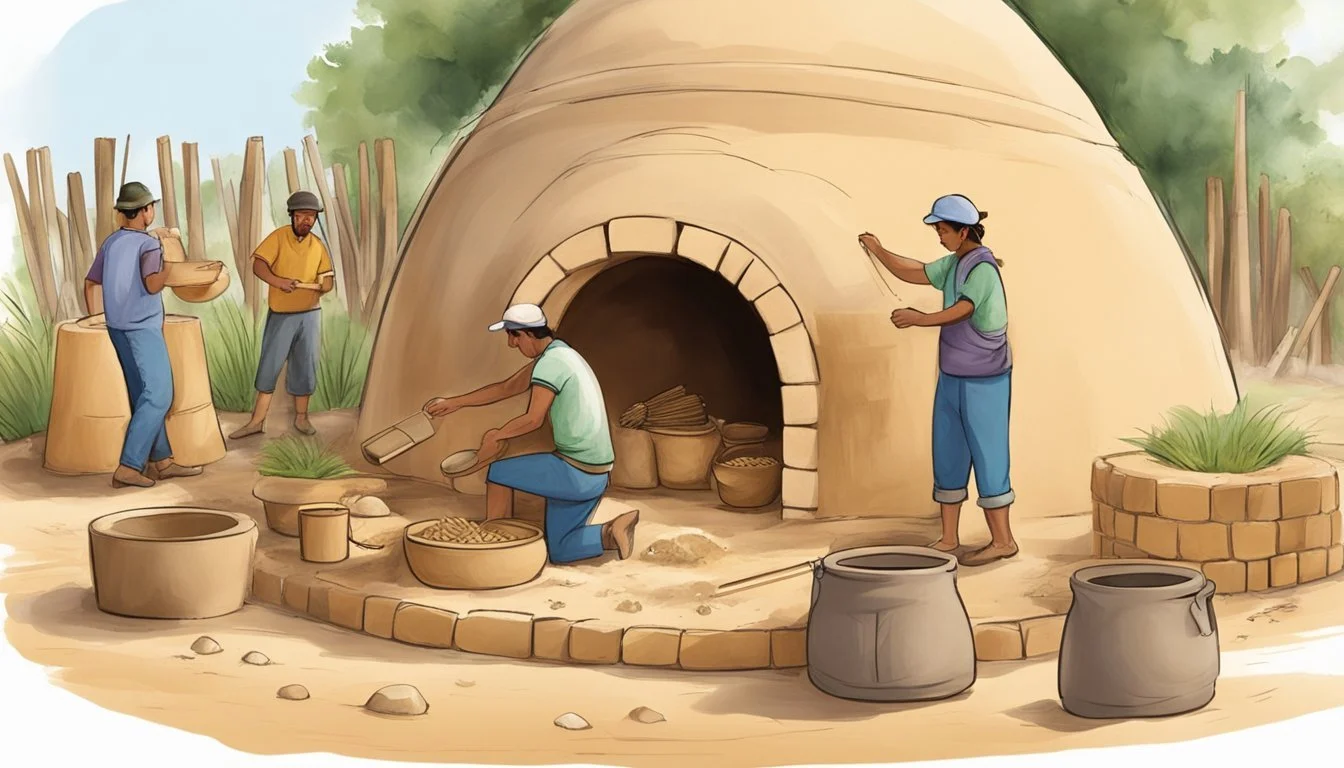
Shaping the Dome
The dome is a critical component of a cob oven, dictating the airflow and heat distribution. The dome's shape is often crafted using a sand form which acts as a temporary mold. The sand should be damp enough to hold together yet dry enough to remove easily after construction. Here's how to shape the dome:
Pile sand over the oven floor, forming a dome shape that correlates to the desired interior space of the oven.
Check for uniformity and smooth the surface.
Carefully layer wet cob over the sand form, establishing the thickness of the cob dome between 4 to 8 inches.
Door and Chimney Installation
A well-designed door and chimney are essential for controlling airflow and retaining heat within the cob oven. For an effective door:
Measure the width of the oven's interior and fashion a door that is roughly 63% of that width for efficient heat retention.
It's advantageous to build the door from a material that can withstand high temperatures, such as hardwood or metal.
Installing a chimney offers proper smoke venting and enhances temperature control, usually situated at the front of the oven, above the door. It involves:
Building a cylindrical structure from cob or clay, with dimensions that suit the oven's size.
Ensuring the chimney is high enough to draw smoke upwards and away from the cooking area.
With these stages of construction complete, the cob oven will need to dry and be cured before it is ready for use, typically achieved through small, initial fires to gradually set the structure.
Finishing Touches
Once the basic structure of a cob oven is complete, there are important finishing touches necessary to ensure durability and visual appeal. The final stages focus on protecting the cob oven while allowing the artisan's creativity to shine through.
Applying Finishing Layers
The initial layer of cob should be allowed to dry completely before a lime plaster is applied. This plaster, typically a mixture of lime, sand, and water, acts as a weather-resistant coating that shields the cob from the elements. It's essential to apply this layer smoothly to cover any cracks that might have formed during the drying process.
Decorative and Artistic Elements
After the functional layers are applied, one can add decorative and artistic elements to the oven. Using a blend of clay and straw, individuals may sculpt relief patterns or embed objects into the wet plaster to personalize the oven's exterior. This stage is not merely for aesthetics; one must ensure that decorations adhere well and do not compromise the structure's integrity.
Curing and Drying the Cob Oven
Curing the oven is a gradual process that involves small, controlled fires to remove all residual moisture from the cob. This is vital to avoid cracks and structural damage. The process can take several days, and each fire should be progressively larger to allow the cob to adjust and harden properly. After curing, periodic maintenance such as patching cracks with clay paste will help extend the oven's lifespan.
Cooking and Maintenance
Proper heating techniques and regular maintenance are crucial for the longevity and efficiency of an outdoor cob oven. Knowing how to manage heat retention and conducting timely repairs ensures a safe and enjoyable cooking experience.
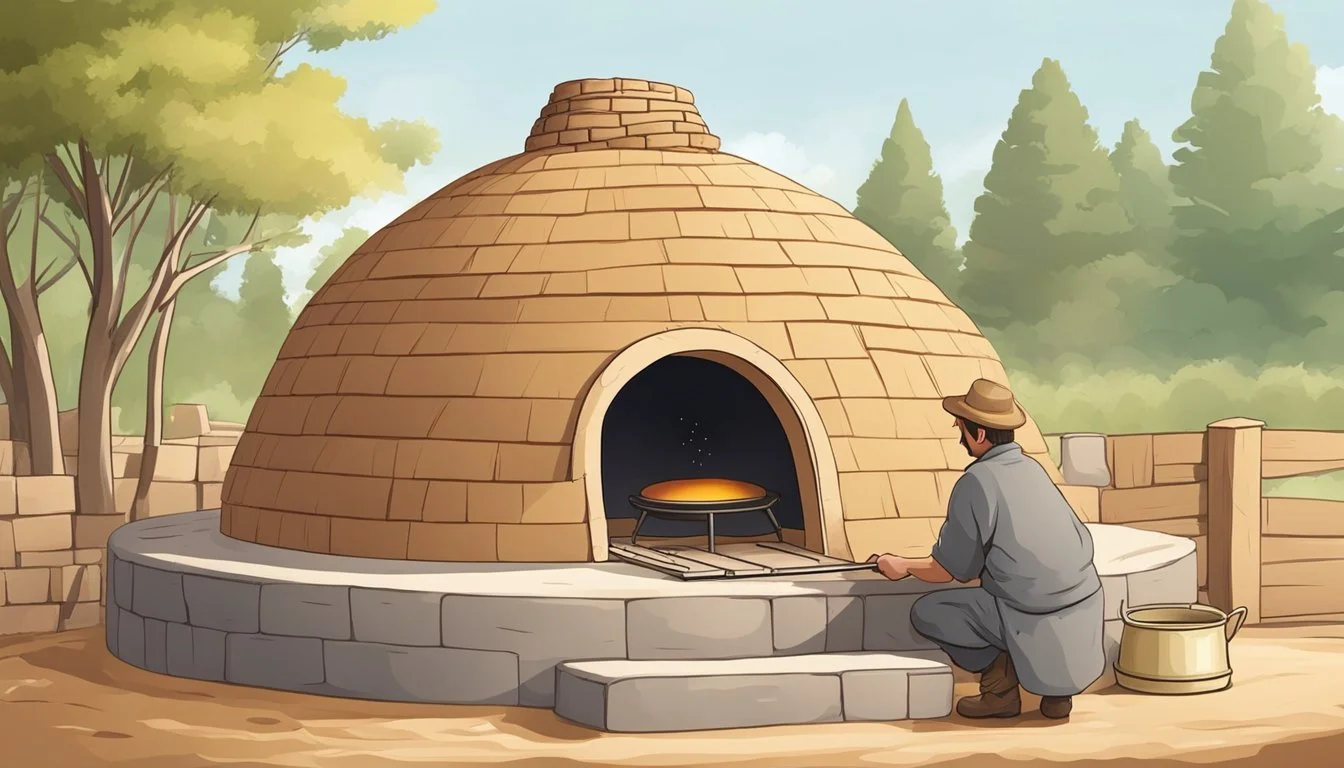
Heating and Cooking Techniques
When using a cob oven, it's essential to understand the role of fire bricks and wood in the cooking process. Fire bricks, known for their excellent heat retention, are often used in the oven floor, offering a stable and even cooking surface. Start by building a fire with firewood in the center of the brick surface, allowing it to burn and radiate heat throughout the oven. This stored heat is then gradually released, which is ideal for baking items like pizza and bread. The radiative heat from the bricks provides a consistent temperature, essential for perfect crusts and thorough cooking.
To Heat the Oven:
Place the firewood centrally on the fire brick surface.
Ignite the wood and let it burn to create a bed of embers.
Spread the embers evenly across the brick floor to saturate it with heat.
For Cooking:
For pizza: The oven should be very hot, around 750°F, to achieve a quick bake, typically less than 3 minutes.
For bread: After the initial high-heat phase, allow the temperature to fall to around 500°F for a slower bake, which could take up to 30 minutes or more, depending on loaf size.
Maintaining and Repairing Your Oven
Maintaining the cob oven involves regularly checking for cracks and wear. Repairing your oven is typically straightforward; minor cracks in the cob can be filled in with fresh cob mixture. For more extensive damage, remove loose material and patch with new cob. It's best to perform maintenance after the oven has cooled down completely to avoid shock to the construction materials.
Routine Maintenance Tasks:
Inspect the oven for cracks.
Clean out ash and remains of wood after each use.
Repair with fresh cob mixture as needed.
Safety and Precautions
A cob oven must be used with care. Always ensure there's no risk of fire beyond the intended area, especially during the burn phase when flames can be quite vigorous. Keep flammable materials away from the oven, and never leave the fire unattended. Additionally, due to high temperatures during use, it is crucial to wear proper protection to prevent burns when adding wood or handling food.
Key Safety Tips:
Clear the area of flammable materials.
Supervise the oven while it is lit.
Use heat-resistant gloves and tools when handling hot items.
Enhancements and Accessories
Creating the perfect outdoor cob oven setup involves more than just construction; it includes thoughtful additions that enhance its functionality and enjoyment. Whether you're aiming to protect your wood-fired oven with a roof or seeking custom tools for efficient cooking, these are important considerations that elevate your outdoor pizza oven experience.
Building a Roof or Shelter
A roof or shelter not only protects the earth oven from the elements but also extends its lifespan and utility under varied weather conditions. For a durable and sustainable option, opt for materials like clay tiles or reclaimed wood to harmonize with the natural aesthetic of a cob oven. The design should allow for smoke escape and ventilation, ensuring that functionality is not compromised.
Customized Tools for Your Oven
To manage the fire and food with precision, customized tools are a must. A long-handled shovel or peel is essential for placing and removing dishes safely, while a brass-bristled brush aids in maintaining a clean cooking surface. For those passionate about artisanal bread or pizza, a baking door can help regulate temperature for perfect, crusty loaves and crispy pizzas.
Essential Tools:
Long-handled peel (for placement of food)
Brass-bristled oven brush (for cleaning)
Baking door (for temperature control)
Seating and Workspace
An adjacent seating and workspace area maximizes comfort and efficiency during food preparation and cooking. Consider a built-in workbench with storage for utensils and a seating area that invites guests to watch the magic happen. To align with the outdoor cob oven's rustic charm, use materials like stone or reclaimed wood for these structures.
Seating and Workspace Enhancements:
Workbench: Provides prep space and storage for tools.
Seating Area: Offers comfort and promotes a social atmosphere.
Each addition, from a protective shelter to customized sticks and shovels, should be chosen with the intention to foster an inviting and functional outdoor cooking haven.
Recipes and Culinary Inspiration
Building a cob oven unleashes a world of flavorful possibilities. This ancient cooking method brings a distinctive wood-fired taste to various dishes. The thermal mass of the cob allows it to reach high temperatures ideal for pizza and bread, yet it also provides a gentle heat perfect for slow-cooked meals. Here are some recipes and techniques to inspire your outdoor cooking adventures.
Cob Oven Pizza Recipes
A cob oven quickly reaches the optimal temperatures necessary for cooking pizza. For the perfect crust:
Preheat your oven to around 800°F (425°C).
Stretch out your dough on a flour-dusted peel.
Top with a simple combination of crushed tomatoes, fresh mozzarella, basil, and a drizzle of olive oil.
Slide into the oven and bake for about 2 minutes until the crust is puffed and golden.
Explore recipes that take advantage of the high heat, such as a classic Margherita or a pepperoni pizza.
Bread Baking Tips and Techniques
Baking bread in a wood-fired cob oven gives it a rustic crust and soft interior. Tips for success include:
Prepare a sourdough or yeast-based dough and let it rise sufficiently before baking.
Heat your oven to approximately 500°F (260°C) and allow the temperature to even out.
Place the dough on a cornmeal-dusted peel and transfer it inside the oven.
Use steam by adding a pan of water to create a crispy crust.
Experiment with various grains and techniques, like kneading and folding, to produce artisanal loaves.
Other Foods to Cook in a Cob Oven
Cob ovens are versatile, not just for pizza and bread. They can also be used for:
Pies and Cakes: Benefits from the even heat, creating delectable, evenly-browned baked goods.
Roasted Vegetables: Slow-roasting in a cob oven enhances their natural sweetness.
Meats: Try slow-cooked, smoked, or roasted meats (What wine goes well with roasted meats?) which absorb the wood-fired flavor.
Experience how dishes traditionally cooked in a modern oven can acquire a new dimension of taste when prepared in a cob oven.
Building a Sustainable Future
Building a cob oven is more than just about creating an efficient outdoor kitchen appliance; it symbolizes a commitment to eco-friendly practices and a sustainable future. This section explains how cob ovens serve as a practical application of sustainable principles in everyday life.
Promoting Natural Building Techniques
Cob construction is an ancient method that utilizes simple materials – clay, sand, straw, and water – which are usually locally sourced and have minimal impact on the environment. The tactile process of mixing and shaping by hand showcases the practicality of natural building techniques. These methods reduce the ecological footprint by limiting transport and processing of materials, thereby cutting down emission of greenhouse gases.
Reducing Reliance on Fossil Fuels
Outdoor cob ovens are built primarily for cooking and baking, utilizing renewable resources such as wood rather than fossil fuels. This reliance on renewable energy sources helps diminish the burning of coal, natural gas, or oil, which are finite and contribute significantly to global warming. The heat retention properties of cob also ensure maximum efficiency as they slowly release acquired thermal energy over time, reducing the need for constant fuel input.
Using Recycled and Renewable Resources
Cob ovens exemplify sustainability not only in their operation but also in their construction. Builders can incorporate recycled materials such as wine bottles or old bricks for the foundation or decoration. This repurposing extends the lifecycle of materials that might otherwise end up in landfills. By also using renewable resources like straw, a byproduct of agriculture, cob ovens steer clear of depleting material resources, further cementing their role in a sustainable future.
DIY Project Guidance
Building a cob oven as a DIY project can offer immense satisfaction and a touch of rustic charm to outdoor cooking spaces. The process demands attention to detail and adherence to proven building techniques.
Step-by-Step Building Guide
To construct a cob oven, one begins by selecting a suitable location and then laying a strong foundation, which may include stone or bricks. A central aspect involves creating a sand dome to shape the oven or utilizing a woven frame—these act as temporary forms that define the oven's cavity. The cob mixture, primarily made of clay, sand, water, and straw, is then applied around the dome to form the oven's thermal mass. After the cob dries, the sand is removed, leaving the hollowed space where food will be cooked. Chimney construction is a critical step for vent regulation and smoke escape. How to Build a Cob Oven: The Ultimate Guide In 13 Easy Steps provides insights into the dome creation using sand.
Tips from Experts
Experts like Kiko Denzer, author of Build Your Own Earth Oven, emphasize the importance of using natural and locally sourced materials for sustainability and efficiency. When selecting timber for the oven's base or tools, one should choose untreated and seasoned wood to ensure longevity and safety. Measurement precision is key—incorrect proportions in the cob mixture or foundation can compromise the oven's structure. For desired cooking results, consider the oven's internal dimensions carefully, particularly the height of the dome and the size of the doorway. How to Build Your Own Cob Oven - Step-by-Step - Rural Sprout offers practical advice on dome-building techniques.
Resources and Further Reading
Those embarking on a DIY cob oven project should seek comprehensive guides and tutorials that break down the process into manageable steps. A variety of online resources and books offer in-depth information, diagrams, and tips. For detailed instructions, visit resources like Better Outdoor Pizza Oven: Cob Oven Building Plans, which provides information on materials such as the foundation stone and the ratios for the cob mixture. Access to a community of builders through forums and workshops can also be invaluable in troubleshooting and gaining inspiration.
