
How to Build a Brick BBQ at Home
Easy Steps for Backyard Grilling
Discover > Texas Outdoorsman > How to Build a Brick BBQ at Home

Building a brickwork barbecue (What wine goes well with barbecue?) at home is an excellent way to enhance your outdoor cooking experience and create a gathering space for friends and family. When you build a BBQ it is not only functional but also adds a touch of elegance to your backyard. This article will guide you through the necessary steps to create your own brick barbecue, ensuring that you have an ideal outdoor space for grilling and entertaining.
Before constructing your brickwork barbecue, it is essential to plan the design carefully. Considering factors such as the overall size, location in your yard or patio, and the type of grill insert you wish to use will help to ensure that your project is a success. Additionally, it is crucial to check local regulations and building codes to guarantee that your brick BBQ adheres to safety guidelines and requirements.
Once you have a clear vision for your brick BBQ, it's time to gather materials and begin construction. By following this step-by-step guide, you will soon have a beautiful and functional brickwork barbecue that will enhance your outdoor living space for years to come.
Choosing the Right Location

When building a brickwork barbecue in your backyard, finding the perfect location is vital. Carefully consider factors such as convenience, safety, and aesthetics before making your choice. Here are some suggestions to help you determine the ideal spot for your new outdoor cooking area:
Safety first: Keep the barbecue at least 10 feet away from any flammable materials, such as wooden fences, bushes, and trees, to reduce the risk of a fire. Be mindful of children and pets running around the area. Make sure the barbecue is not positioned too close to high-traffic areas where people congregate or move around.
Flat surface: A level and stable surface is crucial to ensure your barbecue’s sturdiness. Your patio or a slab of cast concrete is an ideal choice. If you don’t have a solid surface yet, you might consider adding one to accommodate your grill and ensure its stability.
Table 1: Pros and Cons of Different Surfaces
Accessibility: Choose a location that is easily accessible from your kitchen, allowing you to transport food and utensils with minimal effort. The convenience of the location might encourage more frequent use of the barbecue while entertaining guests.
Weather considerations: Consider the prevalent wind direction and the angle of the sun throughout the day. Position your barbecue so that smoke doesn't blow into your entertaining areas or your neighbors' properties. Choosing a partially shaded location can provide respite during hot summer days, but avoid placing your grill directly under trees.
Space and layout: Ensure there is enough space around the barbecue for cooking, food preparation, and storage of cooking equipment. The spot you select should accommodate not only the grill itself but also comfortable seating and dining areas.
In conclusion, analyze your backyard's unique characteristics and determine the spot that best accommodates your needs. With the proper planning and execution, your well-placed brickwork barbecue will become an inviting centerpiece for countless meals and gatherings.
Planning and Safety Considerations

Before starting to build a brick BBQ at home, one needs to ensure proper planning and safety considerations are in place. Failing to plan is planning to fail, and when it comes to constructing a brick BBQ, it's crucial to be well-prepared and knowledgeable about the necessary requirements.
First and foremost, check local building codes. This step is absolutely essential as different regions have different rules and regulations regarding outdoor structures. Compliance with these codes will ensure that the brick BBQ meets the safety standards established by the local authority. It's advisable to obtain any necessary permits before construction begins.
Safety should always be a priority, and consulting a professional is highly recommended. While DIY enthusiasts may have the necessary skills to build a brick BBQ, having an expert opinion on the construction, layout, and cook and design can greatly improve safety precautions.
When deciding on the location for the brick BBQ, consider the following factors:
Distance from combustible materials: Ensure that the BBQ is placed at a safe distance from any flammable items such as wooden structures, fences, or overhanging tree branches.
Accessibility: Ensure that the location is easily accessible and has ample space around the BBQ for food preparation and comfortable seating.
Ventilation: Choose a spot with proper ventilation to facilitate dissipation of smoke and to avoid any personal safety hazards.
It's crucial to use the correct and appropriate materials for the construction. To build a safe and sturdy brick BBQ, ensure the following materials are used:
Firebricks: These bricks are specifically designed to withstand high temperatures and are ideal for constructing the firebox.
Heat-resistant mortar: Using heat-resistant mortar is crucial for joining the firebricks as it can handle high temperatures without breaking down.
Metal grill grate: Invest in a quality grill grate that is rust-resistant and easy to clean.
In conclusion, thorough planning and adherence to safety guidelines are vital for the successful construction of a brick BBQ at home. Following the above precautions and consulting professionals where needed will help ensure that the BBQ is safe, sturdy, and enjoyable for years to come.
Tools and Materials Required
Before starting your brickwork barbecue project, it is essential to gather the necessary tools and materials. This section provides a list of fundamental items you should have on hand before embarking on this project.
Tools:
Shovel: Used for mixing concrete or mortar and handling sand and gravel.
Trowel: Essential for applying and smoothing mortar between bricks.
Spirit Level: Ensures that your brickwork barbecue is leveled properly.
Hammer: Useful for breaking bricks and tapping them into place.
Bucket: To hold water or mixing mortar and concrete.
String and Chalk: Adequate for marking lines on the ground to guide bricklaying.
Grill Tray and Barbecue Grill Set: Needed for the functional aspect of your barbecue.
Materials:
After acquiring these tools and materials, you can begin the brickwork barbecue construction process with confidence and clarity. Remember to plan your barbecue's size and layout, as well as its desired location in your outdoor space. With proper preparation and attention to detail, you are well on your way to a beautiful and functional brickwork barbecue for your home.
Preparing the Building Area

Before starting the construction of a brickwork barbecue, it is essential to find and work to a barbecue design and choose the best site in the garden. Then prepare the building area to ensure a stable and long-lasting structure. Select a level surface that will provide adequate space and ventilation. This section will guide you through the process of preparing the building area.
First, determine the required dimensions for the barbecue, taking into account the size of the cooking grill, the height of the structure, and the amount of space needed for preparing food and preparation is a great idea. It's important to have a clear plan so that the barbecue can be adequately constructed, so use a tape measure.
Creating a foundation is crucial for any brick structure, especially for a brick barbecue. Start by digging a hole that is deeper than the frost line, with dimensions slightly larger than the area of the barbecue itself. This will prevent the foundation from cracking due to ground movement caused by seasonal frost. Fill the hole with a 4-inch layer of crushed natural stone and sand, then tamp and level it until the natural stone is flat.
After preparing the base, lay a concrete foundation for maximum stability. To do this, construct a wooden frame around the perimeter of your hole and mix the concrete according to the manufacturer's instructions. Pour the concrete into the framed area and level it with a trowel. Allow the concrete to cure for at least 48 hours.
Once the foundation has set, it is essential to provide a solid base for the structure. For this purpose, use concrete blocks or bricks to cover the foundation. To lay the first brick, spread enough mortar on the foundation and position the blocks with even spacing. Make sure to align the concrete blocks properly and check the level frequently.
For the construction of the barbecue, it is recommended to use a stretcher bond pattern. A stretcher bond is a simple, linear pattern where blocks are laid end to end, with each row offset by half a brick. This bond is both strong and visually appealing for a brick barbecue. Additionally, make sure to use fire-resistant blocks and mortar specifically designed for high-temperature applications.
Laying the First Course of Bricks
To begin building your own brick barbecue or BBQ, it's essential to start with a strong and stable foundation. In this section, we will guide you through laying the first course of bricks to ensure a well-structured and reliable BBQ. Always work safely and wear safety glasses.
1. Preparing the cement mix: First, prepare a proper cement mix for securing the cinder blocks, in place. A standard mix consists of:
1 part cement
4 parts sand
Water
Combine the cement and sand, then gradually add water and mix until you achieve a thick, toothpaste-like consistency.
2. Laying the first layer: Pour a layer of cement approximately 1-inch thick onto the designated area for your brick BBQ. This will act as a base for the first course of bricks, ensuring proper leveling and stability as you proceed.
Tip: Make sure this area is both a flat surface and level for optimal results.
3. Placing the solid bricks: Begin laying the bricks along the outer edge of the cement base, keeping a ⅜-inch gap between each brick for the mortar joints. Apply cement to the side of each brick as you lay them down, ensuring strong bonds between adjacent bricks.
Note: Solid bricks are ideal for BBQ construction due to their ability to withstand high temperatures.
4. Leveling: Consistently check that your first course of bricks is level, making any necessary adjustments as you go. Use a carpenter's level to confirm that the bricks are aligned both horizontally and vertically. Correct leveling is crucial for maintaining the structural stability of your brick BBQ.
By following these clear instructions and ensuring proper leveling, you will create a strong and stable first course of bricks. This will serve as the foundation for your brick BBQ, paving the way for the subsequent courses and the ultimate enjoyment of your outdoor cooking.
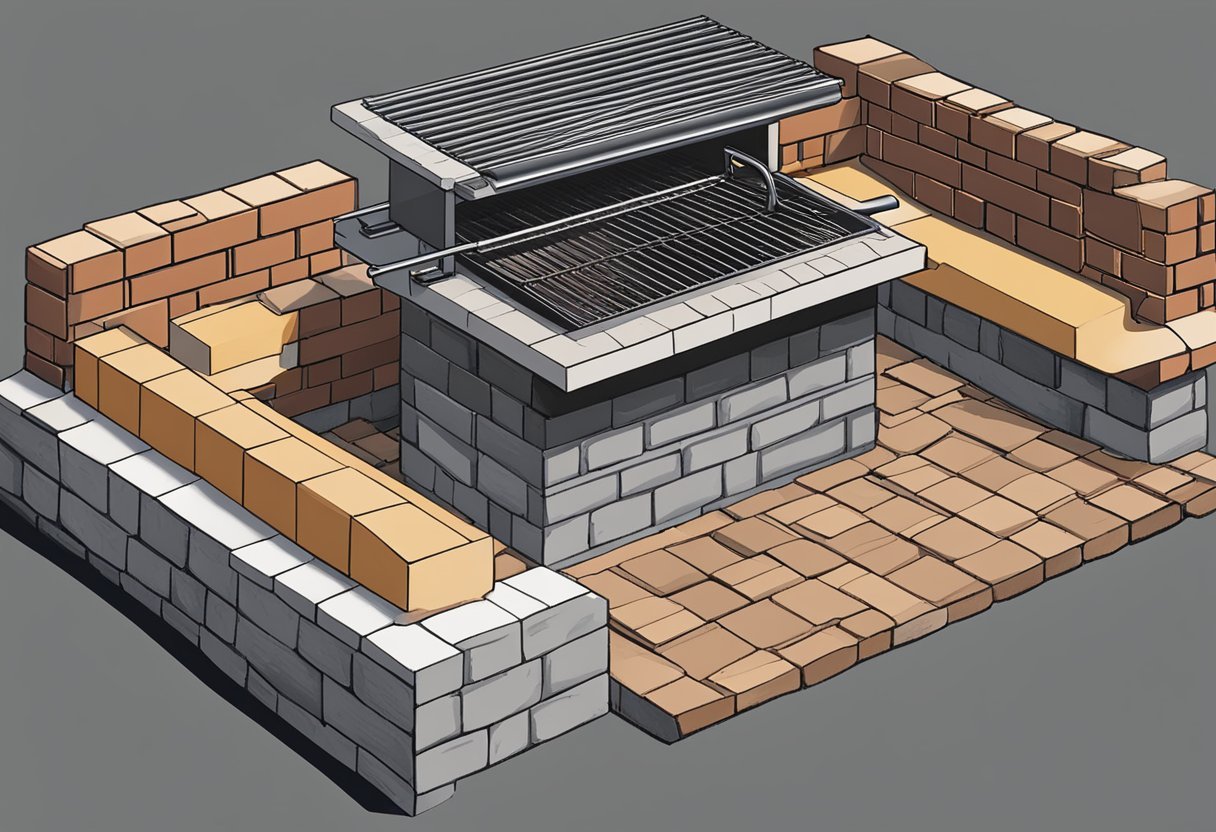
Building the Brick BBQ
To build a sturdy and functional brick BBQ, follow these steps methodically. Begin by preparing a stable and level surface, preferably a cast slab of concrete, which will support the weight of the BBQ. The foundation should measure at least 4 feet by 2 feet.
Next, plan the layout, making sure to account for the firebox and gas grill area. Ensure there is enough space between the firebox, the fire pit, gas grill area, and the surrounding structure to avoid potential fire hazards. Lay the bricks in a dry run (no mortar) to gain a visual understanding of the final product.
Laying the initial course of bricks: Start at one corner and arrange the bricks in a 90-degree angle. Apply a layer of mortar evenly to the bottom of each brick. Press the bricks gently into the mortar, aligning them carefully in a straight line and ensuring all joints are about 3/8-inch thick.
Stagger the joints: As you continue building up courses of bricks, stagger the joints for added stability. This means that the vertical joints of one course should meet the center of the bricks stacked directly above or below. A common technique used by bricklayers is the running bond pattern.
Check for plumb and level: Periodically use a spirit level to ensure each course and corner are leveled and aligned properly. Adjust the bricks as needed to maintain a straight and even layout.
Overlap the corners: Build each corner to overlap the adjoining wall, creating a strong interlocking structure.
Adding the grill supports: After completing three or four courses of bricks, position metal grill supports before laying the next course. This will allow you to build the supports right into the structure.
Allow the brick BBQ to cure for at least 48 hours before using it, as the mortar needs to set and strengthen. Once cured, your new BBQ is ready for plenty of grilling and delicious, outdoor meals.
Cementing and Construction Details
When building a brickwork barbecue at home, it is crucial to pay attention to cementing and construction details. This section will provide essential information on materials and techniques that ensure your brick barbecue remains structurally sound with a safe fire pit.
Materials required:
Mortar: A pre-packaged dry mix or a homemade blend of cement, sand, and water. 1 part cement to 4 parts sand is a common ratio.
Concrete: For the base and footings, it's recommended to use a pre-packaged mix that includes aggregate, cement, and sand.
Rebar: Reinforce the concrete slab with steel bars for added strength.
Brick: Select high-quality, heat-resistant bricks or cinder blocks for the barbecue itself.
Slabs: A flat, sturdy surface such as a concrete slab or patio stones is required for building the barbecue on.
Step 1: Prepare the Base and Footings
Before beginning construction, create a solid base for the brick barbecue. This process involves:
Excavating the area to a depth of at least 6 inches.
Framing the area with wooden planks to hold the concrete.
Inserting rebar or wire mesh into the bottom of the excavation to reinforce the concrete.
Pouring concrete into the excavation, ensuring it is level.
Tip: The concrete should cure for at least 48 hours before proceeding.
Step 2: Build the Walls and Supports
Now, with a sturdy base in place, construct the barbecue pit's walls and supports following these steps:
Lay a layer of mortar (approximately ½ inch thick) along the base's edge where the first bricks will be placed.
Position each brick and gently press it down onto the mortar to create a strong bond.
Apply additional mortar to the end of each brick before adding the next one, creating a staggered pattern for added strength.
Use a spirit level to ensure the bricks are even and properly aligned.
Tip: Keep the barbecue's interior cavity in mind while constructing the walls, including an area for the grill grates and a cutout for the ash tray.
Step 3: Apply Finishing Touches
After the walls and supports have been built, finalize the construction with these steps:
Once the walls have set, smooth out any excess mortar with a jointing tool.
Place the grills on top of the supports.
Set your ash tray in the designated cutout.
Following this process diligently and using appropriate materials will ensure a well-constructed brick barbecue that's ready for cooking.
Establishing the Heat and Smoke Management
To build a successful brick barbecue at home, it's crucial to establish effective heat and smoke management. This ensures the ideal cooking environment and optimal flavor of your grilled dishes. Here, we discuss the key aspects that must be considered.
Selecting the right heat source: Choose charcoal as the primary heat source for your barbecue. Charcoal allows for high temperatures, which is essential for effectively searing the outer layer of your food and keeping the inside juicy. Moreover, charcoal imparts a smoky flavor that is difficult to replicate with other heat sources like gas or electric.
The ideal charcoal tray: When constructing your brick barbecue, it's important to allocate a dedicated space for the tray. Ensure that it's made from a durable material to withstand high temperatures and resist warping. An adjustable charcoal tray is a bonus, as it facilitates heat control during cooking.
Optimal ratio for heat and smoke: Strike a balance between open flame and a smoker. An open flame provides intense, direct heat, whereas a smoker circulates the heat and smoke, resulting in a lower, more even temperature. A decent ratio can be accomplished by leaving enough ventilation for smoke to exit, while closing the lid to minimize heat loss.
Barbecue grill set: Invest in a quality barbecue grill set, including a cooking grill and a smoker, to effectively manage both heat and smoke for your brick barbecue. The cooking grill should be made of high-quality materials and equipped with easy-to-clean features, making it a long-lasting and convenient addition to your setup.
Consider these factors to create the perfect brick barbecue at home. Effective heat and smoke management is a crucial aspect in ensuring delicious and perfectly cooked meals. With thoughtful planning and execution, you will undoubtedly become a master of outdoor cooking.
Finishing Touches

Once the main structure of your brick BBQ is complete, it's time to add the finishing touches to inner wall to ensure a sturdy, secure and functional cooking space. This process includes preparing the cement mix, leveling the work surface, and using a trowel to even out the cement.
Start by preparing the cement mix using a combination of one part cement and four part sand. An ideal proportion would be:
1 part cement
4 part sand
Mix the cement and sand thoroughly with water until a smooth, thick consistency is achieved, perfect for holding the bricks together.
Using a trowel, evenly apply a layer of mortar onto the top layer of bricks, ensuring a stable and secure base for your grill to rest on. Remember to maintain a horizontal orientation, giving attention to leveling the work surface throughout this process.
Consider adding a border around the work surface to improve its overall appearance. You can do this by:
Selecting a few extra bricks for the border.
Applying a layer of mortar mix along the outer edge of the work surface.
Securely placing the border bricks in the mortar, laid ensuring they are level and properly aligned.
The key to a successful and long-lasting brick BBQ in the garden is ensuring it is sturdy and secure. Take your time in checking the structure's stability, and make any necessary adjustments with your trowel and level.
With these finishing touches complete, allow the mortar to dry and set according to the manufacturer's recommendations before using your new brick BBQ. The end result will be a functional and visually appealing addition to your outdoor space or garden.
Maintenance and Care

Regular Cleaning: To keep your brick BBQ in top shape, perform routine cleaning after every use. Start by removing the ashes from the charcoal and ensuring that the fire is completely extinguished. Use a wire brush to clean the grill grates and get rid of any food residues.
Hosepipe Cleaning: Occasionally, clean the brick exterior using a garden hosepipe. Make sure to focus on the areas with grease and smoke stains. Allow the structure to dry completely before using it again to prevent heat damage.
Mortar Inspection: Periodically inspect the mortar joints for any cracks or damage, as heat and moisture may weaken the structure. If repairs are needed, consult a professional to prevent further damage.
Avoid Chemical Cleaners: Stick to natural cleaning solutions, like water and mild detergent, to avoid the risk of chemical residue affecting the taste of your food. Refrain from using harsh cleaning products on the grill grates as well.
Charcoal Storage: Store your charcoal in a cool, dry place to prevent moisture absorption, which can affect its performance. Ensure that the storage area is well-ventilated to minimize the risk of fire.
Safety Measures: Here are some important safety guidelines to follow:
Never leave food to cook with the fire unattended, especially when young children and pets are around.
Always use heat-resistant gloves when you cook or handle the grill grates or any hot objects.
Keep a fire extinguisher nearby in case of emergencies and periodically check the gas bottle when preparing food
Avoid using accelerants like lighter fluid to start or maintain the fire, as it may result in uncontrollable flames and smoke.
By following these maintenance and care tips, you can ensure that your brick BBQ remains a reliable and enjoyable addition to your outdoor area for life. Regular care will not only preserve the structure but also enhance the overall cooking experience, delivering delicious, smoky flavors to your food.
Tips and Tricks for a Successful DIY Project
When embarking on a DIY project like building a brick barbecue, it's essential to be well-prepared and armed with the right skills. Here are some tips and tricks to ensure your project's success:
1. Plan in advance: Before you begin, sketch out your design and establish a clear plan. This will allow you to determine the correct measurements, materials, and tools needed for the project. A trip to your local hardware or DIY store will get you started on gathering everything required.
Example: A simple table for your supplies list:
| Supplies | Quantity |
|---|---|
| Bricks | 100 |
| Mortar mix | 3 bags |
| Metal grates | 2 |
2. Practice your skills: If you're new to bricklaying or haven't worked with mortar before, practice on a small scale before starting your BBQ project. Familiarize yourself with the tools of the trade, such as a trowel, jointer, and level. The key to a successful DIY project is patience and a willingness to refine your skills as you go.
3. Choose the right location: Find a spot in your yard that meets the criteria for your DIY brick BBQ. Ensure that it's away from flammable materials, on level ground, and close enough to your kitchen for ease of use. Be cautious not to infringe on any property lines or local regulations or to build to close to your house.
Note: Consider factors such as wind direction, sunlight, and accessibility. Avoid placing your BBQ close to trees or wooden structures.
4. Invest in quality materials: Purchase quality bricks, mortar, and grates from a reputable DIY or hardware store. This will ensure the longevity and performance of your brick barbecue. It's worth investing in solid, fire-resistant bricks and high-quality mortar suitable for outdoor use.
Tip: Consult with the store's staff and ask for recommendations specific to building outdoor barbecue setups.
5. Stay organized: As you progress through the project, maintain an organized workspace. Keep tools and materials in designated areas for easy access, safety, and efficiency.
6. Take your time: Be patient and thorough throughout your DIY project. Take the time to ensure your bricklaying is neat and level. Remember that making a quality brick BBQ is a labor of love, and rushing the process can lead to mistakes and shoddy construction. If necessary, split the project into smaller tasks and tackle them one at a time.
By following these tips and tricks, you'll be well on your way to a successful DIY brick barbecue project.
