
How to Build and Use a Cold Frame
A Step-by-Step Guide
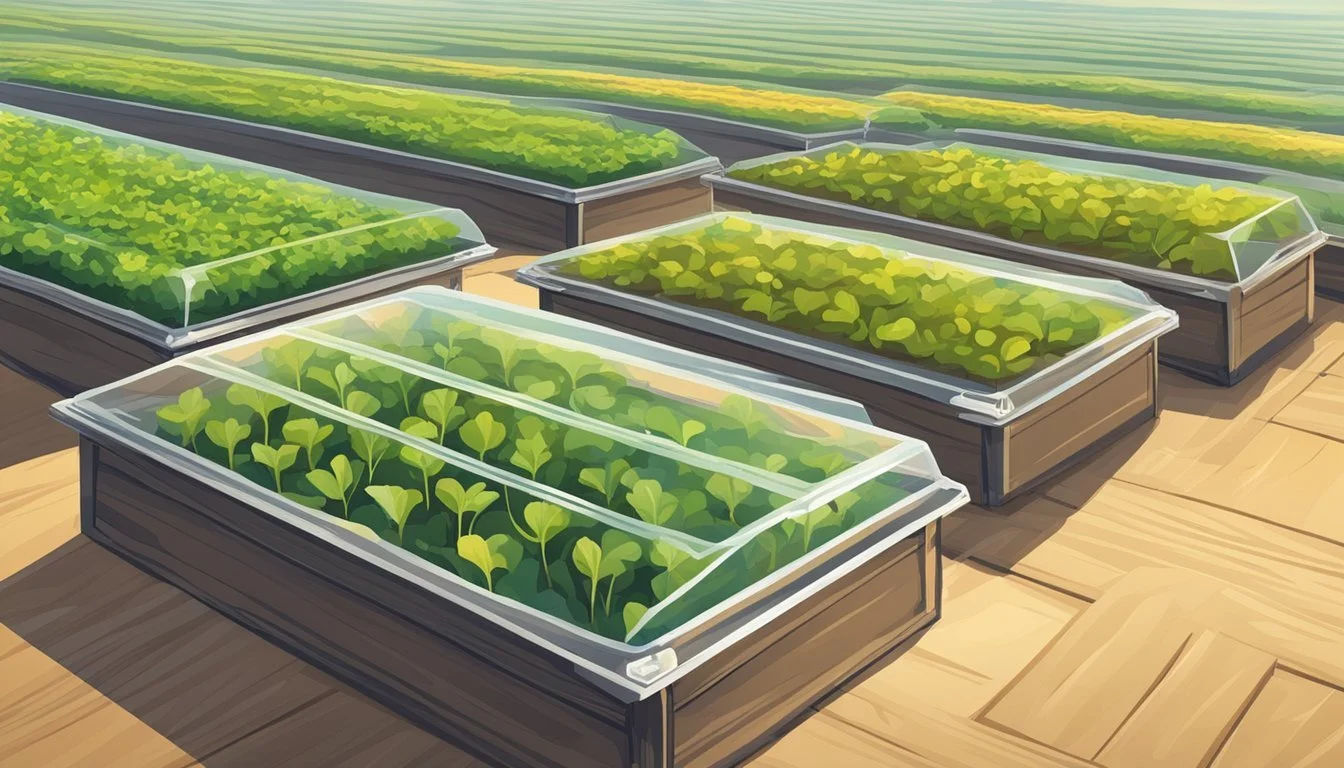
A cold frame is a simple and effective structure that extends the growing season for gardeners. It operates like a miniature greenhouse, trapping heat and protecting plants from frost and harsh weather. Typically made of a wooden frame with a transparent lid, a cold frame nurtures seedlings and allows for early planting of crops.
Building a cold frame is a straightforward DIY project beneficial for garden enthusiasts. This structure creates a microclimate that can provide several degrees of extra warmth and shelter, even in cold weather. By leveraging a cold frame, gardeners can cultivate a wide variety of plants year-round, which would otherwise struggle to survive in a standard outdoor environment.
Using a cold frame does more than just shield plants; it can also be used to harden off seedlings, preparing them for transplanting. With a controlled environment, adjusting the temperature and exposure to elements gradually strengthens young plants. This ensures a seamless transition from the cold frame to the open garden beds.
Understanding Cold Frames
A cold frame is a transparent-roofed enclosure, built low to the ground, used to protect plants from adverse weather. Essentially, it creates a microclimate that provides several degrees of air and soil temperature insulation, extending the growing season in both spring and fall.
Benefits of Using Cold Frames
Cold frames offer multiple advantages for garden enthusiasts. They create a controlled environment, which can be crucial for seedling development, allowing gardeners to harden off seedlings gradually by adjusting the lid to temper exposure to the elements. This can lead to earlier planting dates and extended harvest into the cooler months. Additionally, cold frames can improve the survival and growth rates of plants in regions with challenging climates, aligning with varying USDA hardiness zones.
Ideal Locations for Cold Frames
Selecting the right location for a cold frame is pivotal. It should receive ample sunlight, ideally facing south for maximum exposure. A location with natural insulation, such as the north side of a structure or by a hedge, can provide additional protection against cold winds. Gardeners should ensure the site has good drainage and consider the proximity to the garden to facilitate easy monitoring and maintenance of the plants sheltered inside the cold frame.
Designing Your Cold Frame
Creating an effective cold frame begins with thoughtful design, ensuring durability and optimal growing conditions for plants. Selecting appropriate materials and sizing, along with considering the type of lid to use, are crucial steps. Additionally, adequate ventilation and insulation are key factors that influence the microclimate within the cold frame.
Choosing Materials and Dimensions
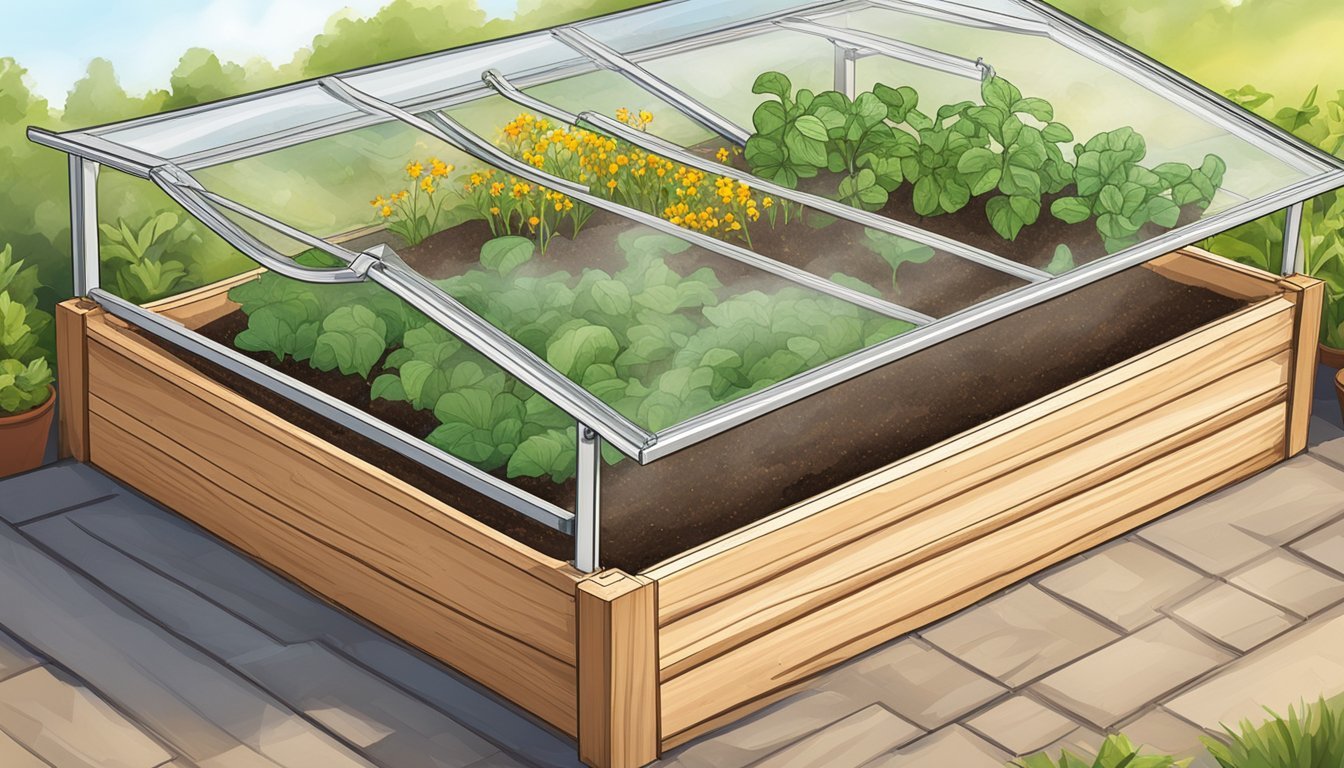
When selecting materials for a cold frame, durability and thermal properties are paramount. Wood is a popular choice for the frame due to its natural insulation properties and aesthetic appeal. Common dimensions for a home garden cold frame are around 3 feet wide by 6 feet long, although the size can vary based on available space and gardening needs. To optimize sunlight entry, transparent roofs made from glass or clear polycarbonate are often used.
Types of Lids and Their Benefits
The lid or cover of a cold frame is vital as it allows light in while protecting plants from the elements. A glass lid is a traditional option, offering excellent clarity and maximizing light penetration. Alternatively, polycarbonate lids are lighter and less prone to breaking. Hinged lids provide ease of access and can be propped open to adjust ventilation as required.
Considering Ventilation and Insulation
Proper ventilation is essential to manage temperature and humidity within a cold frame. Features such as sliding or hinged lids enable gardeners to control airflow, which can prevent overheating and ensure healthy plant growth. For insulation, materials like polystyrene can be used to line the inner walls, especially if the cold frame will be used in colder climates to enhance heat retention.
Building Your Cold Frame
Constructing a cold frame is an excellent way for gardeners to extend their growing season. It requires basic tools and materials and involves straightforward steps from framing to installing a functional lid.
Tools and Materials Needed
Lumber: Choose a weather-resistant wood like cedar or hardwood. Avoid wood treated with creosote as it can harm plants.
Plywood or Old Windows: For the top of the cold frame; reclaimed windows can be a sustainable option.
Hinges: To attach the lid to the frame for easy access and ventilation.
Screws and Nails: Wood screws for assembling the frame and nails for additional support.
Drill and Screwdriver: For making pilot holes and driving screws.
Step-by-Step Construction Guide
Measure and cut the lumber to the desired size of the cold frame, typically 2-3 feet deep and as long as needed.
Assemble the frame using wood screws, ensuring each corner is at a right angle. A power drill makes this task much more efficient.
Construct the base and attach it to the sides of the frame, using both screws and nails for additional durability.
If opting for plywood rather than old windows, ensure it is measured and cut to snugly cover the frame top.
Installing the Lid with Hinges
Align the hinges evenly on the selected cover, whether it's plywood or a reclaimed window.
Secure the hinges to the cover with wood screws, using a screwdriver for precision.
Position the lid on the frame and attach the hinges to the frame, allowing it to open and close easily.
Ensure the lid sits flush on the frame when closed to maintain internal warmth.
Using Your Cold Frame
A cold frame provides a microclimate for your plants, offering controlled heat and moisture levels to effectively start seeds early and extend the growing season. Proper soil preparation, seed management, and climate control within the cold frame are critical for success.
Preparing the Soil and Base
The base of a cold frame should be sturdy and level, chosen for its ability to drain well and support the structure. The soil inside requires enrichment with compost to provide a nutrient-rich environment for plant growth. If the cold frame is situated directly on the ground, layering the base with straw can help insulate against cold temperatures, ensuring the roots stay warm during winter.
Sowing Seeds and Transplanting Seedlings
Sow seeds directly into the prepared soil of your cold frame or carefully transplant seedlings. Choose species suited for the season – cool-season crops for fall and winter, warm-season ones for early spring. The cold frame creates an ideal environment for hardening off seedlings, gradually introducing them to outdoor conditions without the shock of sudden changes.
Managing Temperature and Moisture
Regulating the internal climate is key; too much heat can damage plants, while too little can inhibit growth. On sunny days, it's important to vent the cold frame to avoid overheating. On the flip side, during cold snaps, the frame should be securely closed to protect against frost. Managing moisture levels is equally important to prevent rot and fungal diseases – the lid should be opened to reduce condensation and allow for air circulation when necessary.
Extending the Growing Season
A cold frame can significantly extend the growing season. By protecting plants from extreme temperatures, both in early spring and late fall, the cold frame allows for earlier seed starts and can keep hardier plants alive well into winter. Precise control over the internal environment means a longer period of harvest, increasing yield and the diversity of crops that can be grown in your garden.
Cold Frame Maintenance and Care

Maintaining a cold frame is essential for its longevity and effectiveness. A regimented schedule for cleaning, inspection, repair, and upgrade procedures ensures the structure remains functional and efficient against frost and snow.
Regular Cleaning and Inspection
They should clean the cold frame's interior and exterior surfaces regularly to prevent disease and pests. Inspections for cracks and warping are equally important; these compromises can be detrimental during snow or heavy rain events. One should remove any debris or dead plants to mitigate mold and mildew growth.
Weekly tasks:
Wipe down surfaces
Check for signs of wear or damage
Cold Frame Repairs and Upgrades
Timely repairs prevent minor issues from escalating. They might need to replace damaged panels or reinforce the frame's structure. Upgrades such as adding automatic vent openers can significantly improve the cold frame's usability and efficiency.
Repair checklist:
Seal gaps
Fix or replace hinges
Winterising Your Cold Frame
To combat colder temperatures and frost, one should add insulating materials or consider a layer of straw or fleece around the cold frame for enhanced protection. They should always ensure the cold frame can withstand the weight of snow, potentially adding a sloped roof to prevent accumulation.
Pre-winter upgrades:
Strengthen structural supports
Install thermal insulation
Crops Suited for Cold Frames
Cold frames provide a microclimate for extending the growing season, making them ideal for cultivating a variety of cool-season crops. These structures create a nurturing environment for hardy vegetables and salad greens, allowing for an earlier start in spring and a prolonged harvest into the colder months.
Hardy Vegetables to Grow
Spinach: Thrives in cold frames, with sowing possible in early spring or late summer for a fall harvest.
Lettuce: A staple for cold frames, best planted in succession to maintain a continuous crop.
Radish: Fast-growing and robust, radishes are perfect for interplanting with slower-growing greens.
Kale: Cold-tolerant and nutrient-rich, kale produces well in cold frames throughout the cooler seasons.
Endive: A bitter green that can be blanched by closing the cold frame to reduce light exposure before harvest.
These vegetables are not only frost-resistant but can also become sweeter with a touch of frost. Their hardiness makes them superb choices for the limited space of a cold frame.
Timing for Planting and Harvesting
Spinach & Kale: Plant as soon as the soil is workable in early spring. Harvest young leaves regularly to promote continued growth.
Lettuce & Endive: Begin planting lettuce 4-6 weeks before the last frost date; endive slightly later. Harvest lettuce when leaves reach the desired size, and endive typically after 85-100 days.
Radish: Sow seeds every two weeks for a consistent supply. Harvest radishes as soon as they mature in about four weeks.
By using a cold frame, growers can effectively manage planting times and harvesting schedules to optimize yield and enjoy fresh produce outside of the traditional growing season.
Advanced Cold Frame Techniques
Exploring advanced techniques can significantly enhance a cold frame's utility, providing a tailored environment for specialty plants and extending the growing season for tender perennials. Incorporating technology such as automatic openers can also add precision and convenience to cold frame gardening.
Creating a Microclimate for Specialty Plants
Cold frames can create optimal microclimates for growing specialty plants that require specific temperature and humidity levels. Gardeners can manipulate the interior climate by adjusting the cold frame's orientation and by selectively painting its interior. For instance, a black interior absorbs heat during the day to keep plants warm, while a white or reflective interior can help maintain cooler temperatures.
Orientation: Aim to tilt the cold frame towards the south at a 10 to 15-degree angle to maximize sunlight exposure.
Paint: Choose your paint based on whether you need to absorb heat (black) or reflect sunlight (white).
Overwintering Tender Perennials
Tender perennials that are not frost-resistant can benefit from the protective environment a cold frame offers during the cold months. To successfully overwinter plants, it is essential to ensure proper insulation and ventilation to prevent moisture buildup and to regulate temperature.
Insulation: Use materials like straw or bubble wrap for added insulation during extreme cold.
Ventilation: Introduce openings or ensure existing ones can be adjusted on warm days to prevent overheating.
Overwintering not only keeps the plants alive but can also enable them to get a headstart on growth for the coming season.
Using Automatic Openers and Almanacs
The integration of automatic openers can optimize temperature control within cold frames, reducing the need for daily manual adjustments. These devices respond to temperature changes, automatically opening the lid to vent excess heat and closing it to retain warmth as needed.
Automatic Opener: Install an automatic opener that uses a wax cylinder; it expands with heat to open the lid, and contracts as it cools to close it.
The use of garden planning tools such as an almanac garden planner can assist in determining the best planting schedules and cold frame maintenance routines based on local climate data. By tracking the lunar cycle and weather patterns, gardeners can make informed decisions on when to plant or harvest crops within their cold frames.
Almanac Garden Planner: Consult it for the local frost dates and the optimal planting times for various crops.
DIY Tips and Tricks
Building and using a cold frame can be an efficient way to extend the growing season. Key tactics include repurposing materials, adapting to your climate, and solving typical problems that may arise.
Repurposing Old Windows and Materials
One can easily repurpose old windows into the top of a cold frame, allowing for an economical and environmentally friendly option. These windows act as the perfect transparent cover, permitting sunlight while providing insulation. For instance, The Spruce offers a guide on using old windows for a cold frame, explaining how to secure them onto a wooden base.
When selecting materials for the sides, sturdier options like 2x6 boards provide better insulation compared to thinner plywood. A design from Epic Gardening uses thick boards effectively, helping to retain warmth - crucial for seedlings during cooler months.
Optimizing Your Cold Frame for Your Climate
Adaptation to local climate conditions is paramount for a cold frame's success. In areas with mild winters, ventilation can be as simple as propping open the cold frame with a stick on sunny days. Conversely, a harsher climate might necessitate the installation of insulating materials and strategic placement to harness maximum sunlight. Sources like The Old Farmer's Almanac recommend techniques like adjustable lids for easy temperature control.
Additionally, positioning the frame to face south ensures that plants receive ample sunshine throughout the day, essential for growth and warmth during the cold season.
Troubleshooting Common Issues
Even the well-constructed cold frames can encounter problems. An example is condensation, which can lead to mold growth if not managed. To address this, ensure proper ventilation and check regularly for excess moisture. If plants begin to wilt or show signs of distress, adjusting the amount of sunlight or warmth they receive can often rectify the issue.
Additionally, Bob Vila's website notes that maintaining a constant temperature is critical. They highlight the fact that cold frames can keep the garden warmer by 5 to 10 degrees compared to outside temperatures. It's important to monitor and adjust the internal temperature accordingly to avoid cooking the plants on unseasonably warm days or freezing them on cold nights.
