
The Cooler Corn Method
Efficient Cooking for Corn on the Cob at Big Events

Cooking corn on the cob for a large gathering presents a unique set of challenges. The demand for both quantity and quality has often led cooks to search for innovative ways to prepare and serve this classic side dish efficiently. The concept of cooler corn, a method where corn on the cob is cooked inside a cooler, emerges as a practical solution. With the use of a standard cooler, an item commonly found in many households, one can easily cater to a large crowd without the need for multiple pots or extensive grill space.
The process of cooking corn in a cooler is straightforward and effective. A cooler's insulated environment makes it an ideal cooking vessel for corn on the cob. The method involves boiling a large volume of water, which is then poured over shucked ears of corn arranged in the cooler. Once the hot water submerges the corn and the cooler is sealed, the heat is trapped inside, perfectly cooking the corn in a matter of minutes.
This technique not only simplifies the cooking process but also enhances the serving experience. It allows for the corn to stay warm and fresh for an extended period, making it perfect for picnics, barbecues, and other outdoor events where food is served over the course of several hours. The adaptability of cooler corn cooking has made it a favorite for those hosting larger events, ensuring that each guest can enjoy hot and tender corn on the cob with minimal effort from the host.
Understanding Cooler Corn
Cooler Corn is a novel cooking method that marries the simplicity of boiling with the portability of a cooler. This technique caters particularly well to large events, offering an efficient way to prepare corn on the cob en masse.
Defining Cooler Corn
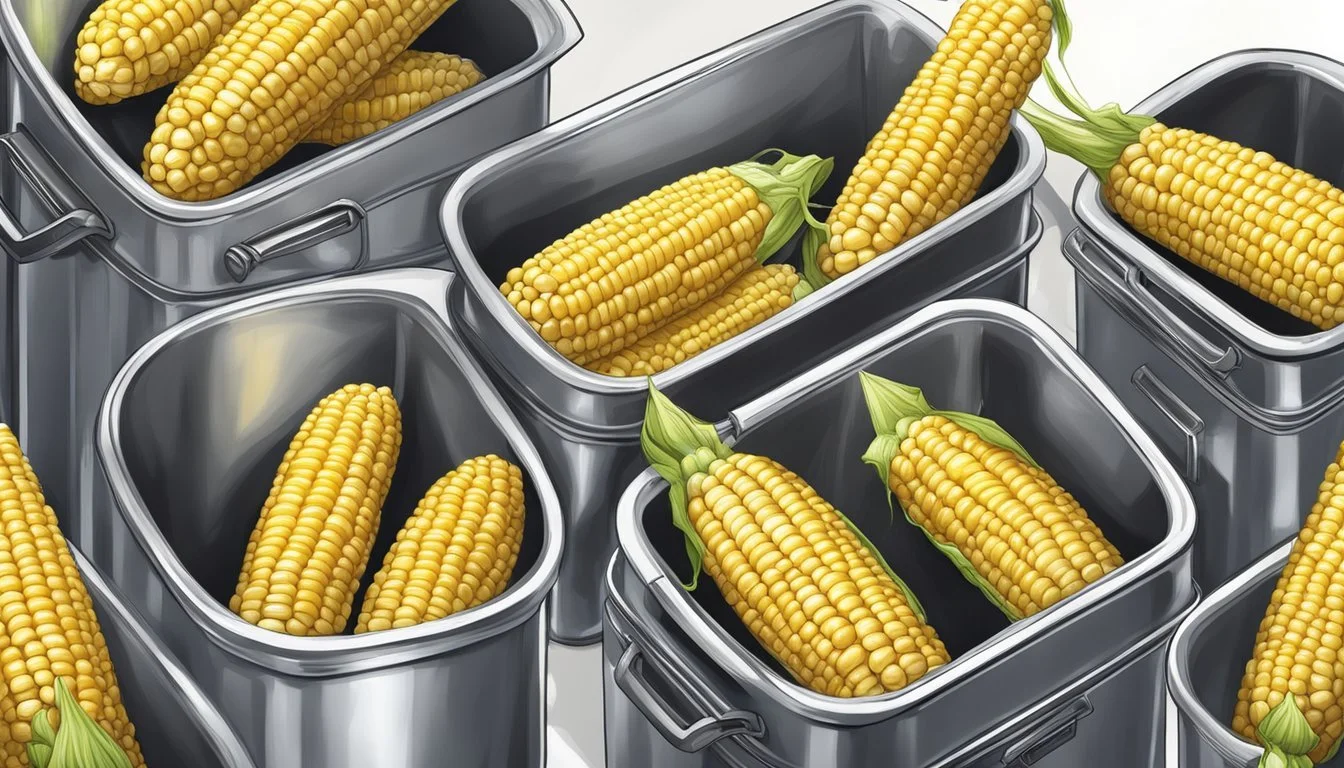
"Cooler Corn" refers to the process of cooking corn on the cob inside a large cooler. The method involves placing shucked ears of corn in a clean cooler and then pouring boiling water over them to cook. The cooler's insulation keeps the heat in, allowing the corn to cook through evenly.
Benefits for Large Gatherings
For large gatherings, Cooler Corn serves as a practical solution:
Saves Space: Frees up stove-top space by using a cooler rather than multiple large pots.
Portability: Offers the convenience of being able to set up the cooking station anywhere, making it ideal for outdoor events.
Efficiency: Can cook large quantities at once, catering to many guests with less effort.
The Popularity on Pinterest
The concept of Cooler Corn has gained considerable attention on Pinterest, a platform known for its treasure trove of creative DIY ideas. Users share and save recipes and techniques, showcasing:
Visual step-by-step guides.
Images of Coolers filled with perfectly cooked corn.
Tables consisting of user testimonials and photos on Pinterest attest to the effectiveness of this method and its suitability for feeding a crowd. As a result, Cooler Corn has become a favorite among those in charge of hosting larger events.
Preparation of the Corn
The success of cooking corn in a cooler starts long before the corn hits the water. Selecting high-quality corn, careful shucking, and thorough cleaning set the foundation for perfectly cooked ears of corn.
Selecting the Corn
One must inspect ears of corn with a discerning eye; fresh, plump kernels are a marker of quality. They should opt for ears with bright green, snugly wrapped husks and golden brown, sticky tassels that indicate freshness.
Shucking the Corn
Shucking involves removing the husks—the green outer layer—and as much of the silk—the thin, stringy fibers beneath the husk—as possible. To shuck:
Grip the top of an ear of corn firmly.
Peel back the husks and snap or cut them off at the base.
Dispose of husks appropriately, keeping the work area clean.
Cleaning the Silk
The silk can be stubborn to remove, but a thorough cleaning is crucial for a pleasant eating experience. They should:
Rub each ear with a dry towel to catch loose silks.
Use a vegetable brush to gently remove remaining silks.
Rinse the corn under cool running water to wash away any lingering debris.
Selecting a Suitable Cooler

When preparing to make cooler corn, choosing the right type of cooler is pivotal to the success of this cooking method. The cooler chosen should be large enough to accommodate the quantity of corn, made of a material that retains heat well, and be able to be thoroughly cleaned.
Size Requirements
Small Gatherings: For fewer than 10 ears of corn, a standard 28-quart cooler should suffice.
Large Gatherings: If serving more than 10 ears, opt for an ice chest of 48 quarts or larger to ensure there is enough space for both the corn and the boiling water needed to cook it.
Cooler Material
Plastic Coolers: These are preferred because they are easy to clean, and their insulating properties are suitable for keeping the hot water temperature constant, playing a critical role in cooking the corn evenly.
Metal Coolers: Metal coolers can also be used but are less common, as they may not retain heat as uniformly as plastic coolers.
Ensuring Cleanliness
Before using an ice chest or cooler for cooking, it should be cleaned with hot soapy water and rinsed thoroughly to ensure no contaminants affect the food.
For health and safety, it is essential to use either a designated food-safe cooler or ensure the cooler has not been used to store chemicals or raw meat.
Cooking Process
Cooking corn on the cob in a cooler for large gatherings is a straightforward process that requires a large enough cooler, sufficient boiling water to cover the corn, and some patience to let the corn cook through. This section outlines the essential steps to complete this method effectively.
Filling Cooler with Hot Water
First, one should ensure the cooler is clean and can safely handle hot liquids. Then, they need to boil a significant amount of water—roughly 2 quarts per 12 ears of corn. Once boiled, the hot water is carefully poured into the cooler, preparing it for the corn.
Adding Corn and Sealing with Lid
After the water has been taken off the boil, the shucked ears of corn are placed in the water-filled cooler. The corn should be arranged in a single or double layer, depending on the cooler's capacity. It is critical that the corn is completely submerged. Once in place, the lid of the cooler is closed firmly, creating an insulated environment for the corn to cook.
Cooking Time and Temperature Control
With the lid on, the cooler acts as a makeshift oven, with the trapped steam and hot water cooking the corn. The corn should be left to cook for about 30 minutes. During this time, the cooler's insulation maintains the water's temperature, ensuring that the corn cooks evenly. After 30 minutes, one can expect perfectly tender and hot ears of corn, ready to be served.
Enhancing the Flavor
Preparing corn in a cooler not only simplifies cooking for large gatherings but also provides a canvas for flavor enhancements. Strategic use of seasonings and the classic duo of butter and salt can elevate the humble corn on the cob into a savory delight.
Seasonings and Herbs
Incorporating a mix of seasonings and herbs can infuse the corn with aromatic and complex flavors. The following list outlines suggested pairings that work well with corn:
Chili Powder: Adds a kick of heat and color.
Garlic Powder: Introduces a subtle, savory nuance.
Cumin: Brings a warm, earthy note that pairs well with chili.
Paprika: Offers both sweetness and a smoky aroma.
Thyme: Provides a subtle, earthy greenness.
Basil: Contributes a fresh and slightly sweet flavor.
Cilantro: Imparts a citrus-like taste with a sharp finish.
For the best results, one can mix these seasonings with melted butter before brushing them onto the corn.
Adding Butter and Salt
It is essential to understand the role of butter and salt in enhancing the taste of corn on the cob:
Butter: Provides a creamy texture that complements the natural sweet flavor of the corn.
Salt: Amplifies the inherent sweetness and helps balance the overall taste profile.
For optimal flavor, one should evenly coat the cooked ears of corn with melted butter using a pastry brush or similar tool, then sprinkle with salt to taste. This simple yet effective combination serves to highlight the freshness of the corn and can satisfy a variety of palates.
Serving the Corn

When cooking corn on the cob in a cooler for large gatherings, the end-goal is to serve the corn efficiently while maintaining its warmth and safety. Proper serving tools and techniques are crucial to ensure the corn can be enjoyed at its best.
Using Tongs for Safety
One should always provide tongs for serving corn on the cob. This allows guests to safely pick up the hot corn without direct hand contact. It is recommended to have several pairs of tongs available to prevent waiting lines and to encourage guests to serve themselves quickly and efficiently.
Why Use Tongs?
Safety: Prevents direct hand contact with hot corn.
Hygiene: Minimizes multiple hand touches on food.
Keeping Corn Warm
To keep the corn on the cob warm throughout the event, one should close the cooler lid between servings. This will trap the heat inside and utilize the cooler's insulation properties. Ensure that the water used initially to cook the corn is drained if it has cooled significantly, as it can lower the overall temperature of the corn.
Tips for Keeping Corn Warm:
Close the cooler lid between servings.
Drain any significantly cooled water.
Periodically check the temperature inside the cooler and add more hot water if needed (be cautious to avoid overcooking).
Alternative Cooking Methods
When cooking corn on the cob for large gatherings, cooler corn provides a practical, large-scale solution. However, alternative methods offer varied flavors and textures for those who prefer more traditional techniques.
Grilling for a Smoky Flavor
Grilling corn on the cob imparts a distinct, smoky flavor that can't be replicated in a cooler. The cook needs to preheat the grill to medium-high and prepare the corn by removing the silk and husks or by soaking the corn in their husks prior to grilling. The corn should be placed directly on the grill grates, turning occasionally. Each ear typically takes about 10 to 15 minutes to develop a rich, charred exterior and a tender interior.
Stovetop Boiling Method
The stovetop boiling method is a tried-and-true technique for achieving classic, sweet corn on the cob. Shucked corn is placed in a large pot of boiling salted water. It's essential to use enough water to cover the corn completely. The cook should bring the water back to a boil and let the corn cook for approximately 7 to 10 minutes, or until it reaches the desired tenderness. This straightforward method requires minimal equipment and delivers corn with a pure, unadulterated flavor.
Ideal Occasions
Cooking corn on the cob in a cooler is particularly suited for gatherings that demand serving a large number of guests efficiently without sacrificing the quality and taste of the food.
Outdoor Cookouts
At outdoor cookouts, where the crowd is eager for convenient yet delicious fare, cooler corn becomes a practical solution. Its simplicity allows for a stress-free cooking experience, ensuring that everyone, from children to adults, can enjoy freshly cooked corn with minimal wait time.
Summer Barbecues
Summer barbecues often feature corn as a staple side dish. Utilizing a cooler to cook corn on the cob not only complements the smoky flavors (What wine goes well with smoky flavors?) of grilled meats but also becomes a conversation starter. With the ability to serve large numbers, no guest is left waiting, making it an excellent option for those long, lazy summer afternoons.
Camping Trips
For camping trips, the convenience of cooler corn can't be overstated. It's an ingenious way to feed a hungry group without the need for constant attention or specialized cooking gear. As campers enjoy the great outdoors, the corn is being perfectly cooked, ready to be enjoyed alongside the campfire.
Recipes and Variations
Cooking corn on the cob in a cooler is a convenient method for serving large groups. This technique ensures that everyone enjoys hot, delicious corn on the cob without the hassle of constant monitoring.
Basic Cooler Corn Recipe
Ingredients: Fresh corn on the cob, boiling water
Instructions:
Clean the cooler thoroughly to remove any debris.
Shuck the corn, removing all husks and silk.
Place the corn in the cooler, ensuring they do not stack too tightly.
Pour boiling water over the corn until all are covered.
Close the cooler lid and let the corn cook for about 30 minutes.
Lemon-Parsley Variation
For those who appreciate a zesty twist, adding lemon and parsley can provide a fresh flavor profile to the corn.
Additional Ingredients: 2 Lemons (halved), 1 bunch of parsley (chopped)
Instructions: Squeeze the lemon juice over the corn and add lemon halves in the cooler before pouring the boiling water. Sprinkle chopped parsley on top before closing the lid.
Buttery Spiced Corn
For a richer taste, incorporating butter and spices can elevate the corn to a new level of deliciousness.
Additional Ingredients Instructions Butter (to taste) Dot the corn with butter after placing it in the cooler. Your choice of spices Season the corn with preferred spices such as paprika, garlic powder, or chili flakes before adding the boiling water.
It is important to remember that while the cooler method is quite forgiving, it does not lend itself to overcooking. Corn should remain crisp and tender, not mushy. Experimenting with different seasonings and toppings allows for personalization for any palate, making cooler corn a versatile option for gatherings.
Safety and Precautions

When cooking corn on the cob in a cooler, it's paramount to prioritize safety to prevent foodborne illnesses. The method involves soaking ears of corn in hot water inside a cooler for a period of time which, if not done correctly, can create a breeding ground for bacteria.
Temperature Maintenance
Keep It Hot: The water temperature must remain above 135°F to prevent the "danger zone" (41-135°F) where bacteria can multiply.
Check It Twice: Use a food thermometer to verify that the corn reaches a safe temperature of 165°F.
Cooler Cleanliness
Sanitize: Ensure the cooler is thoroughly cleaned and sanitized before use to remove any residue or contaminants.
Avoid Cross-Contamination: Never use the same cooler for raw meats and cooked foods without proper cleaning.
Timely Consumption
Watch the Clock: Corn should not be left in the cooler for more than two hours to avoid bacteria growth.
Serve Soon: Aim to serve the corn shortly after cooking to ensure it's enjoyed at a safe and favorable temperature.
Handling Precautions
Careful Handling: Use clean utensils and gloves when handling the hot corn to avoid burns and maintain hygiene.
Proper Storage: If there are leftovers, refrigerate within two hours in airtight containers.
Following these precautions helps ensure the corn is not just perfectly cooked but also safe for consumption at large gatherings.
Cleaning and Storage
Before and after preparing cooler corn, maintaining cleanliness is crucial to ensure safe food handling and extend the lifespan of the cooler itself. They should start by thoroughly cleaning the cooler to remove any residue, dirt, or bacteria. Regular dish soap and water typically suffice for this purpose. For a deeper clean, they may consider using a solution of bleach and water (1 tablespoon of bleach per gallon of water) to sanitize the ice chest.
After cleaning the cooler, it should be dried completely to prevent the growth of mold or mildew. It is important they leave the lid open for several hours in a well-ventilated area to ensure all moisture has evaporated. Storing the cooler with the lid closed while damp can lead to a musty odor and potential contamination.
When it comes to storage, they should find a cool, dry location. An ideal place would be a clean, dry garage or an indoor storage area. They should avoid places with high humidity or extreme temperature fluctuations that could damage the cooler's material. They might want to consider elevating the cooler from the ground to protect it from pests and rodents.
For the lid, it is important to check the seal and clean it as part of the maintenance routine. A good seal ensures that no external elements enter the cooler, keeping it ready for its next use. Should the lid have a gasket, they should wipe it down, check for wear, and replace it if necessary to maintain a proper seal.
A well-maintained cooler will ensure they can always host a large gathering and serve perfectly cooked corn on the cob without worry.
