
How to Eat a Pavlova:
A Step-by-Step Guide
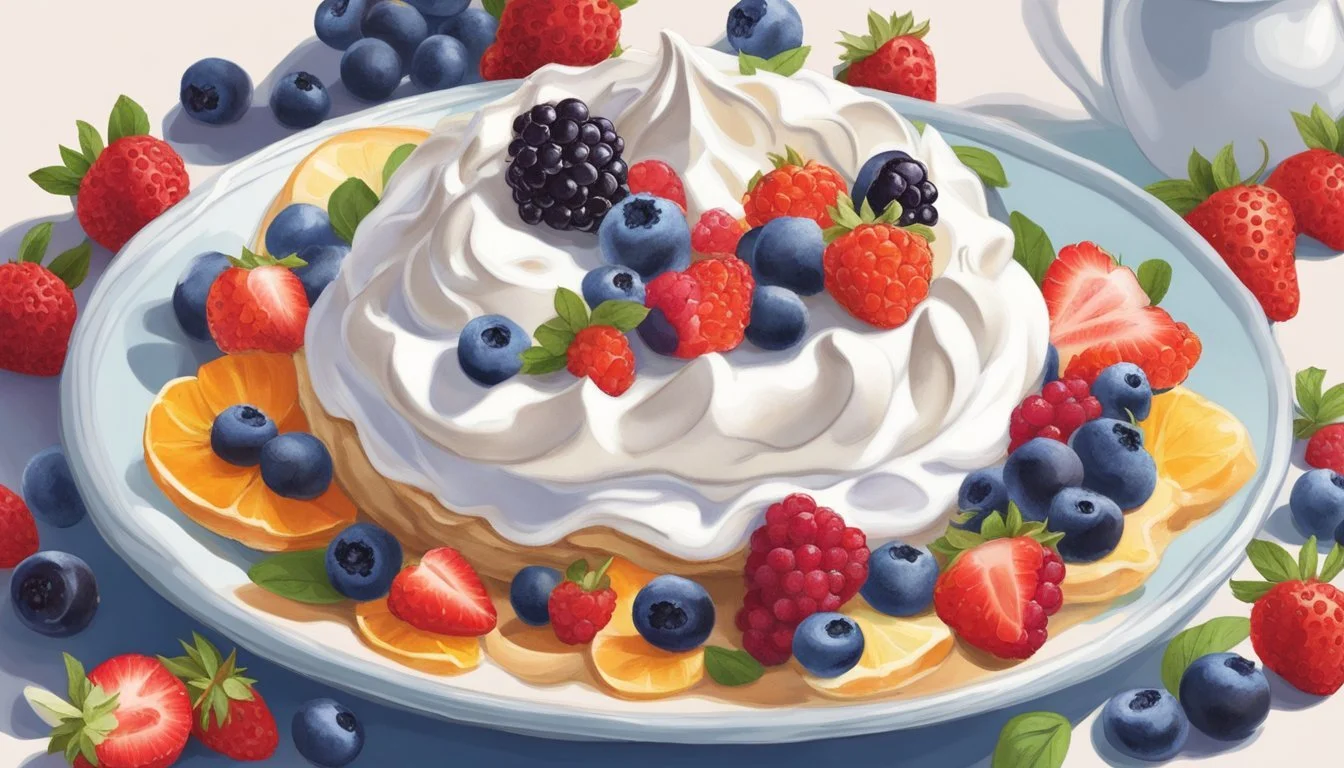
Eating a pavlova is both an art and a simple pleasure. This meringue-based dessert, often associated with festive occasions, is a sweet symphony of textures and flavors. A pavlova features a crisp crust surrounding a soft, marshmallow-like center, which is typically adorned with an array of fresh fruit and sometimes topped with whipped cream (how long does cream last?). Originating from either Australia or New Zealand, pavlova is named after the Russian ballerina Anna Pavlova and has become a beloved treat in many parts of the world.
When presented with a pavlova, diners might wonder about the proper way to enjoy this delicate dessert. It's traditionally served as a celebratory dish, cut into wedges like a cake, allowing each portion to maintain a piece of the crunchy outer layer along with the softer inside. The choice of fruit topping can vary, with options like kiwifruit, berries, and passionfruit being popular choices that provide a refreshing contrast to the sweetness of the meringue.
The experience of eating a pavlova is one of contrasts—the brittle meringue exterior gives way to the fluffy interior, and the tartness of the fruit complements the sugary base. Although typically eaten with a fork and spoon to savor each bite mindfully, enjoying a pavlova can be a personal affair where each individual can appreciate the dessert in a way that delights their own palate. Consequently, there is no strict etiquette when it comes to indulging in a pavlova, apart from enjoying the balance of flavors and textures that it offers.
Origins and Cultural Significance
Pavlova carries a rich cultural significance, often associated with national pride in both Australia and New Zealand. The dessert not only pays homage to a revered Russian ballerina but also reflects a longstanding culinary debate.
Origin of Pavlova
Pavlova is named after Anna Pavlova, the famous Russian ballerina who toured Australia and New Zealand in the 1920s. The dessert is believed to have been created in honor of her visit. While the exact timing and place of its creation are subject to a trans-Tasman rivalry, it's clear that the pavlova was inspired by her lightness and grace, characteristics mirrored in the dessert's delicate meringue.
Pavlova in Australia and New Zealand
In Australia, the pavlova is a staple at Christmas celebrations and is deeply embedded in the nation's culinary traditions. Australians claim the dessert as their own, citing its frequent appearance at holiday feasts and gatherings.
Conversely, New Zealanders argue that the pavlova is intrinsically linked to their culture, with historical recipes and accounts suggesting that it was created on their shores. The dessert stands as an icon of New Zealand's rich culture and traditions, with its composition often compared to the light and airy nature of an Eton Mess, another meringue-based dessert.
Both countries cherish the pavlova, adding seasonal fruits to its whipped cream topping to celebrate the joy and festivity of the Christmas season. The pavlova's origin story remains a friendly point of contention, ultimately highlighting the strong cultural connections each nation holds to this beloved dessert.
Preparing the Meringue Base
Creating a meringue base is a delicate process that requires precision and care. The pavlova's signature light and airy texture begin with a stable meringue, formed by combining the right ingredients and incorporating them properly.
Selecting the Right Ingredients
The purity and quality of ingredients are pivotal in making a meringue base. Fresh egg whites are essential; they should be at room temperature to ensure a greater volume when whipped. Any trace of yolk can inhibit the formation of a stable foam. Granulated sugar is preferred for its fine crystals that dissolve easily, and it provides structure to the meringue base. Optional stabilizers include cornstarch or cream of tartar.
Achieving Perfect Egg Whites
A stand mixer fitted with a whisk attachment is ideal for beating the egg whites to perfection. They need to be whipped until fluffy and able to hold peaks but not so much that they become dry. Starting at a lower speed and gradually increasing it allows the protein networks to form a stable, glossy foam.
Adding Sugar for Stability
While continuing to whip the egg whites, granulated sugar is added slowly, one tablespoon at a time. This gradual approach prevents the egg whites from being weighed down and allows the sugar to dissolve properly, achieving a sleek and stable foam. The meringue should not feel gritty when rubbed between fingers—this indicates that the sugar has been well incorporated.
Incorporating Acid for Texture
A touch of acid is critical for the pavlova's texture. White vinegar or a pinch of cream of tartar can be used. Acid helps to stabilize the meringue and contribute to a marshmallow-soft interior. Additionally, cornstarch is sometimes folded into the mix, which helps absorb any excess moisture, ensuring a crisp outside. The addition should be done delicately to not deflate the meringue.
Following these steps with attention to detail will yield a meringue base that is ready for the next stage of pavlova preparation, promising a dessert with the perfect balance of crispness and soft, fluffy interior that pavlova is known for.
Baking the Pavlova
When baking a pavlova, it is crucial to manage oven temperature precisely and prepare the baking surface properly to ensure a crisp exterior and a soft center without cracks.
Oven Preparation and Temperature Control
Before beginning the pavlova recipe, one must ensure the oven is correctly preheated. Preheating the oven to the necessary temperature is a critical step. Pavlovas typically require a low temperature to bake properly, often around 200-250°F (93-121°C). It is essential to start with a high temperature to stabilize the pavlova's structure quickly, and then reduce it to avoid burning. An oven thermometer can be used to confirm the accuracy of the oven's temperature setting.
Special attention must be paid to humidity levels, as high humidity can affect the baking process and cause a pavlova to become soft or sticky. Therefore, it is advisable to attempt baking a pavlova on days with low humidity.
Using Parchment Paper
A baking tray lined with parchment paper or baking paper is a non-negotiable tool for baking a pavlova. It prevents sticking and ensures the pavlova can be removed easily once baked. Cornflour (or cornstarch) can be lightly sifted on the parchment paper before adding the pavlova mixture to further prevent sticking. The pavlova should be formed into the desired shape on the prepared parchment paper, allowing enough space for the mixture to expand slightly without touching the sides of the oven or any baking accessories.
Once placed in the oven, the pavlova should be baked until it achieves a crisp, pale exterior. It's essential not to open the oven frequently as fluctuations in temperature and humidity can cause the pavlova to crack. After baking, the pavlova should be left in the oven to cool down to room temperature gradually, as sudden temperature changes can also lead to cracking. The residual heat within the oven aids in drying the pavlova and achieving the desired texture.
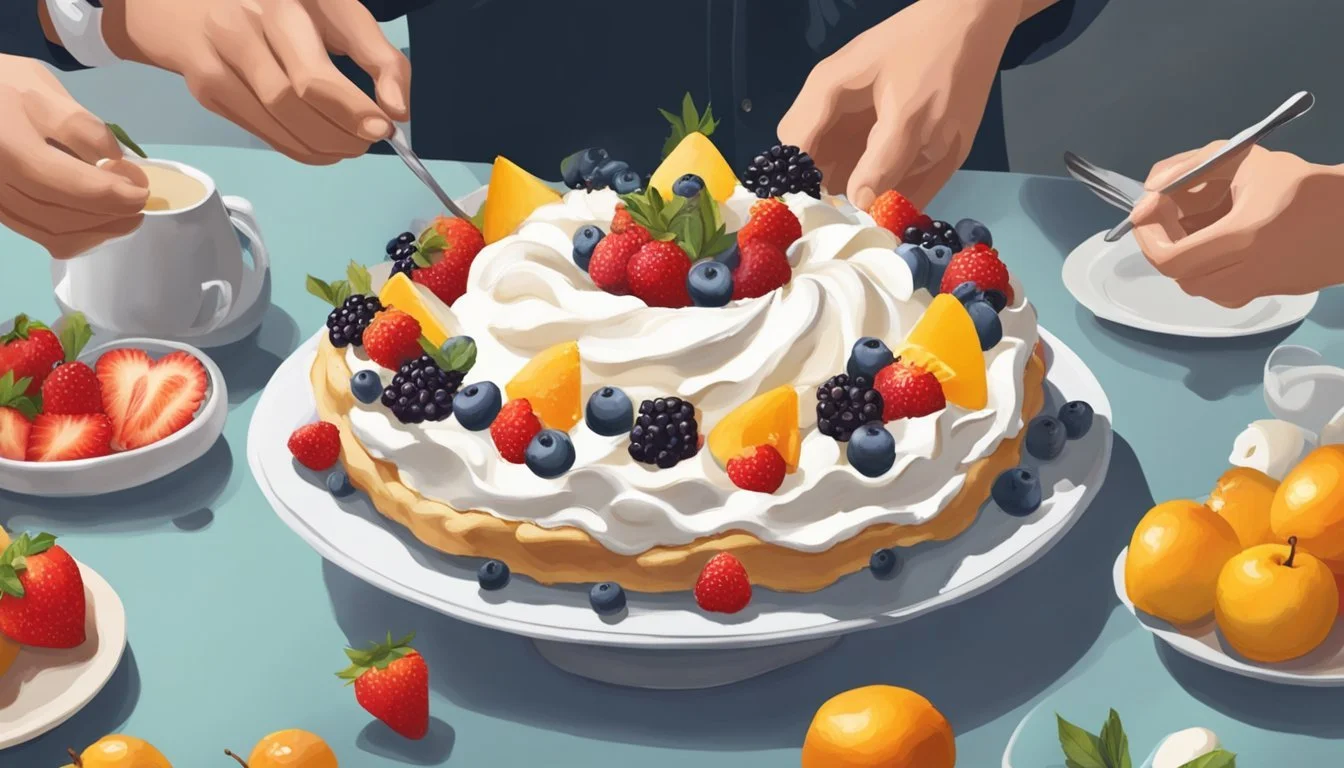
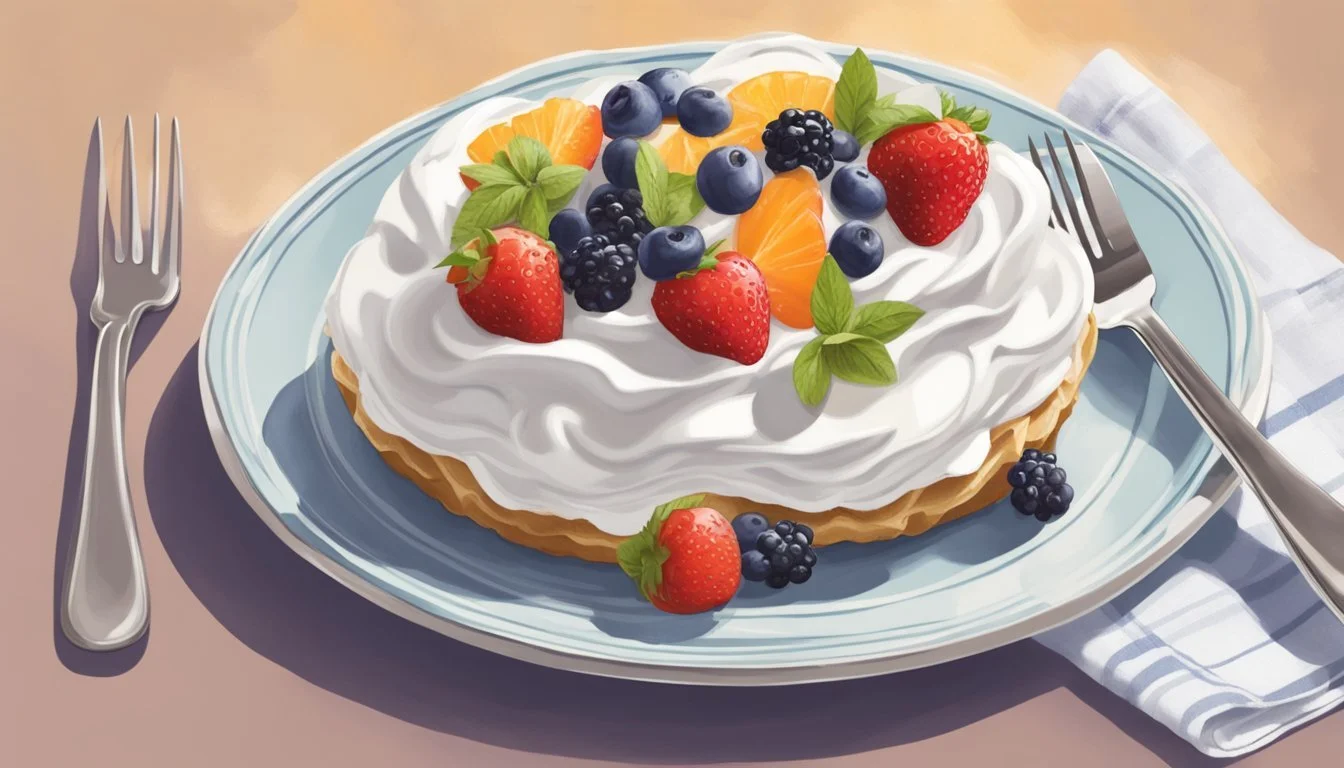
Assembling the Pavlova

Assembling a pavlova involves carefully topping the meringue base with whipped cream and artistically arranging the fruit toppings. Proper application ensures a balance of flavors and textures in each bite.
Applying the Whipped Cream
After the meringue base has cooled, one applies a generous layer of whipped cream. The cream should be freshly whipped to soft peaks, possibly flavored with a hint of vanilla to enhance the taste. They should use a spatula to spread the cream evenly over the meringue, leaving a slight border to contain the cream when the fruit is added.
Arranging Fruits and Toppings
The next step is to carefully place the fresh fruit on top of the whipped cream. Key choices include berries like strawberries, raspberries, blueberries, and other fruits such as kiwi, mango, and passionfruit. One should arrange the fruits in a pattern that is visually appealing, ensuring there is a good variety of color and flavor with every slice. The fruit should be fresh, and, if necessary, it should be patted dry to prevent any excess juice from seeping into the whipped cream.
Finishing Touches and Presentation
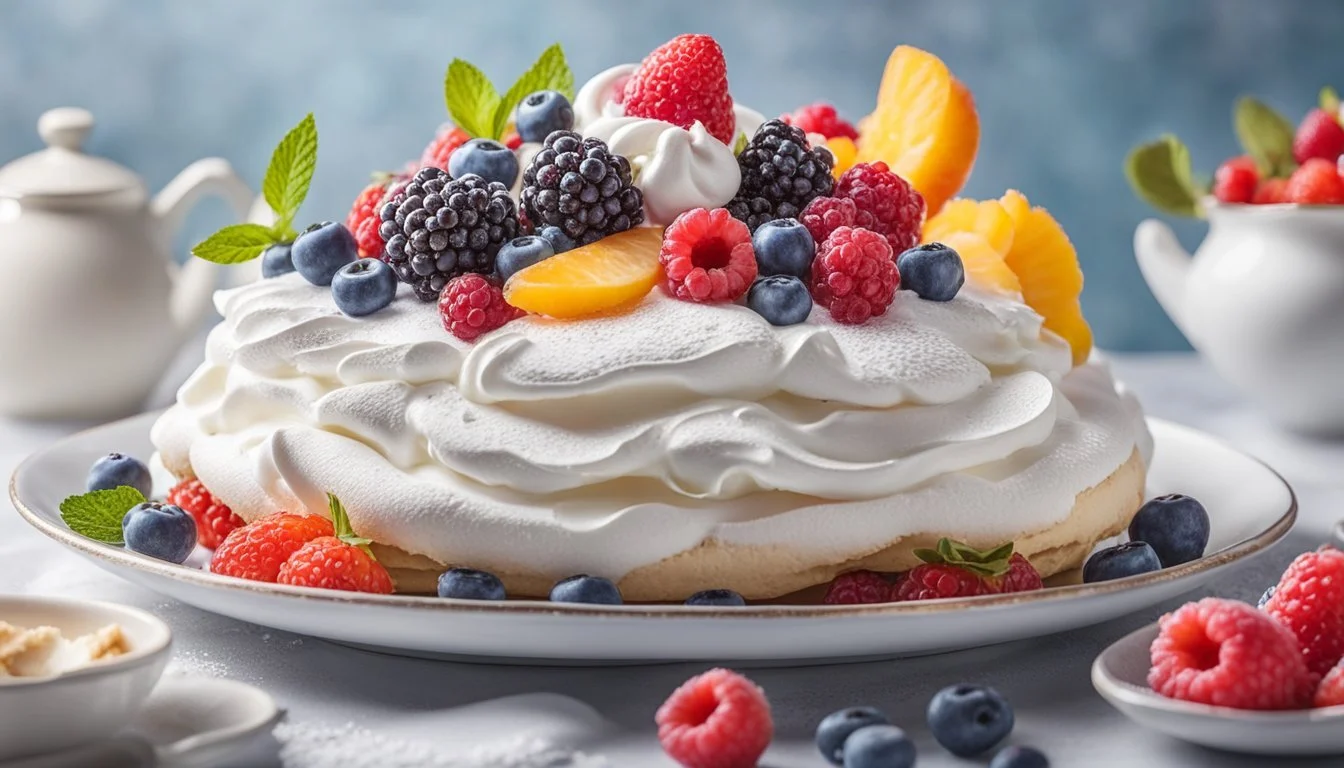
Mastering the final steps in pavlova preparation ensures that the dessert retains its desired textures while showcasing its visual appeal. Meticulous application of toppings and careful handling can prevent common issues such as weeping and cracks.
Avoiding Weeping and Cracks
To prevent the occurrence of weeping — the leakage of syrup from the meringue — one should ensure that the sugar is fully dissolved during the whisking process. Adding an acid, such as vinegar or lemon juice, stabilizes the egg whites and helps maintain structure. Incorporating these acids and baking the meringue until it's crispy on the exterior while allowing it to cool completely in the oven with the door slightly ajar can minimize the risk of weeping and cracking.
Decorating with Additional Toppings
Once the pavlova is prepared and stable, one can decorate it with a variety of toppings. Topping the meringue with a layer of custard, mascarpone, or softly whipped cream creates a rich base for additional garnishes. Fresh fruits like strawberries or kiwi add brightness, while a sprinkling of chopped pistachios, mint leaves, or even a hint of cinnamon can introduce contrasting flavors and textures. For a touch of luxury, one may drizzle melted chocolate over the dessert just before serving.
Serving and Storing the Pavlova
A Pavlova is a showstopper dessert that offers versatility and freshness in each bite. The key to making the perfect Pav lies in how it is served and stored.
Best Practices for Serving
When serving Pavlova, one should aim to maintain its delicate crispness and light texture. To serve, it is ideal to add toppings just before presentation to avoid sogginess. Common toppings include:
Fresh fruit, such as berries
Whipped cream
Sauces, such as raspberry coulis or lemon curd
Keep the Pavlova base at room temperature before adding the toppings. For visual appeal, arrange the toppings elegantly on the meringue base; this not only makes the Pavlova more appetizing but also highlights the dessert's fresh ingredients.
Tips for Storage and Freshness
To ensure that Pavlova retains its desirable qualities, proper storage is crucial. Follow these guidelines:
Storage Conditions:
Store the Pavlova base in a dry, airtight container
Keep the container at room temperature, away from moisture
Duration:
Base can be stored for up to two days without losing quality
Remember, the Pavlova base should not be refrigerated as this can cause it to become soft and lose its crispness. If you have leftover assembled Pavlova, store it in the refrigerator and consume within 24 hours for optimal taste.
Variations of the Classic Pavlova
The classic Pavlova is a meringue-based dessert known for its crisp crust and soft, light interior, traditionally topped with whipped cream and fruit. While the traditional version is a beloved dessert in many parts of the world, there are numerous variations that play with size, flavor, and presentation.
Mini Pavlovas and Individual Portions
Mini Pavlovas offer a personalized dessert experience, perfect for gatherings where individual servings make a delightful presentation. They follow the same fundamental pavlova recipe using fresh eggs to create the meringue base but are sized down for single servings. These mini versions are a popular choice because they are not only easier to serve, but also allow for a variety of toppings to cater to different tastes.
Ingredients: Fresh eggs, sugar, cream, desired toppings
Method: Whip eggs to stiff peaks, bake until crispy on the outside
Serve: Topped with cream and a selection of fruits or sauces
Mixing Up Flavors and Textures
The versatility of Pavlova extends to the incorporation of different flavors and textures. Here are some popular twists:
Eton Mess: A deconstructed Pavlova with layers of meringue, fruit, and cream, often using berries like blackberries.
Chocolate Pavlova: Incorporating cocoa powder or melted chocolate into the meringue mixture offers a rich twist to the classic.
Tropical Pavlova: Topping the base with passion fruit, mango, and kiwi can transport the taste to the tropics.
Lemon Curd Pavlova: For a tangy alternative, lemon curd complemented by fresh berries adds a zestful punch.
Custard Pavlova: Swapping out traditional whipped cream for luxurious custard can add a creamy texture and depth of flavor.
Pavlova for Special Occasions

Pavlova serves as an exquisite centerpiece for special events, embodying elegance with its meringue base topped with fresh whipped cream and vibrant seasonal fruits. It not only pleases the eye but becomes a topic of conversation for its delightful taste and texture.
Christmas and Holiday Pavlovas
During the festive season, Christmas pavlovas take a traditional dessert and elevate it with thematic decorations. As a staple dessert for an Aussie Christmas, pavlova is often adorned with red and green fruits such as strawberries and kiwi, or with pomegranate seeds to mirror holiday colors. For those hosting a holiday BBQ, pavlova provides a refreshing and light option that can easily be prepped in advance and assembled quickly, making it an easy-to-make dessert for a joyful gathering.
Suggested Fruits for Christmas Pavlova:
Strawberries (halved)
Kiwifruit (sliced)
Pomegranate seeds
Raspberries
Blueberries
Cherries
Note: Preparation should account for the use of fruits that hold well without releasing too much juice onto the pavlova, which can soften the meringue.
Pavlova as a Showstopper Dessert
For occasions that call for an impressive dessert, a pavlova can be the showstopper. Its towering layers of crisp yet chewy meringue, paired with a luxurious whipped cream topping, make it visually stunning and irresistibly tempting. Chefs often innovate the classic pavlova into modern forms, such as Eton mess, for a twist on the traditional while still delivering the well-loved flavors. Toppings can range from tropical fruits to artisanal chocolate shavings, tailored to the event's theme.
Examples of Showstopper Pavlova Toppings:
Tropical fruits (mango, passionfruit)
Edible flowers
Dark chocolate shavings
Whipped mascarpone cream
Drizzles of fruit coulis
Note: To ensure that the pavlova retains its showstopping quality, be meticulous with the layering and use fruits that complement the aesthetic as much as the flavor.
Common Questions and Troubleshooting

In this section, we address typical problems encountered when making pavlova and provide advanced tips for creating the perfect dessert. Knowing how to solve common pavlova issues ensures a delightful treat, while advanced techniques fine-tune the process for even better results.
Tackling Common Pavlova Issues
Cracks and Weeping: The two most frequent troubles are cracks in the meringue and weeping (syrup seeping out). Cracks often occur due to a rapid temperature change, so it's essential to cool the pavlova slowly in the oven after it’s turned off. Weeping happens due to undissolved sugar or over-beaten egg whites. Ensure sugar is fully dissolved by rubbing a bit of meringue between your fingers; it should feel smooth.
Humidity: Pavlova can absorb moisture from the air, leading to a sticky texture. Make pavlova on a dry day and store in an airtight container.
Fresh Eggs: Use the freshest eggs possible, as they whip up better and create a stable meringue.
Clean Bowl and Whisking: Any traces of fat or oil can prevent egg whites from properly whipping. Clean the mixing bowl and beaters with vinegar to ensure they're free of fats, and avoid using plastic bowls as they can retain oils.
Stiff Peaks: Whisk egg whites until stiff peaks form, which should take about 25-35 minutes. The egg whites should stand up straight when the whisk is lifted.
Advanced Tips for Perfect Pavlovas
Temperature Control: After whisking the egg whites with sugar to stiff peaks, a low and consistent oven temperature, around 250°F (120°C), is key to a crisp crust and marshmallowy center. It helps to have an oven thermometer to ensure accuracy.
Acidic Ingredients: Ingredients like vinegar or cream of tartar stabilize the egg white foam. A common ratio is about 1/2 teaspoon of vinegar per egg white.
Starch: Adding a stabilizer, such as cornstarch, prevents the pavlova from collapsing. Fold the starch in gently after the sugar has been incorporated.
Hand Mixer vs. Stand Mixer: A stand mixer is typically easier to use, as it provides a consistent speed, but a hand mixer can work just as well if used carefully.
Temperature and Humidity: Consider your environment when making a pavlova. High humidity can affect the meringue's structure. It's ideal to prepare pavlova in a low-humidity setting.
By closely controlling temperature, humidity, and ingredient quality, while explicitly following the steps for incorporating air and stabilizers into the egg whites, one can create a pavlova that presents with a crisp crust and soft interior, with minimized cracking and weeping.
Nutritional Information
When examining the nutritional aspects of pavlova, it is important to focus on its caloric content and consider its compatibility with gluten-free diets, as its primary components are egg whites and sugar, which form the meringue base of this light dessert.
Caloric Content of Pavlova
Pavlova is a meringue-based dessert that typically consists of a light, airy mixture of whipped egg whites and sugar. The caloric content of pavlova can vary depending on the recipe and serving size, but on average:
Per 55 grams serving (approximately 0.17 of a slice):
Calories: 167
Calories from Fat: 73.8 (44.2%)
This indicates that pavlova can be a moderately high-calorie dessert, mainly due to the sugar content.
Gluten-Free and Dietary Considerations
Considering the primary ingredients of pavlova, egg whites and sugar, this dessert is naturally gluten-free. However, individuals should remain vigilant about cross-contamination or additional toppings that might contain gluten. Given its ingredients, pavlova can fit into a gluten-free diet, but those mindful of sugar intake may need to consume it more sparingly.
