
How to Organize Your Kitchen for a Dinner Party with a Chocolate Fountain
Efficient Space Management and Presentation Tips

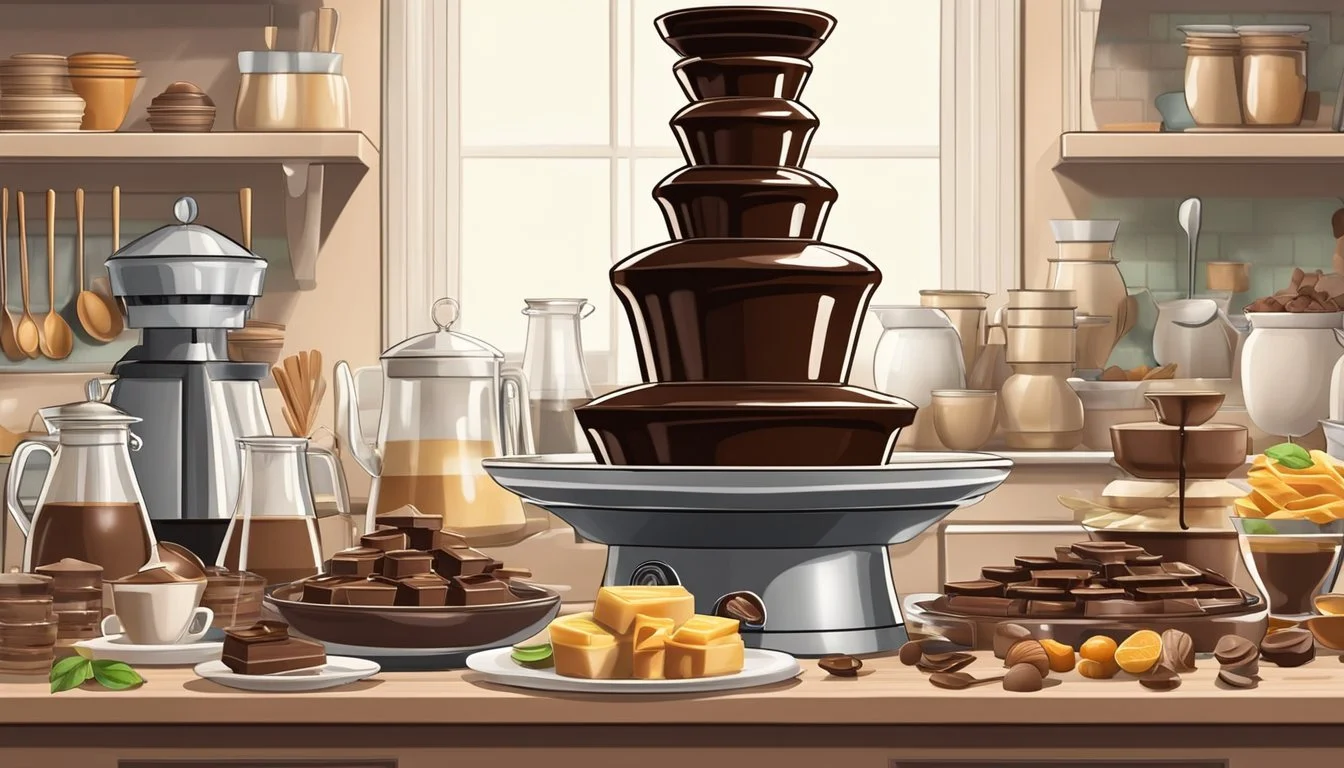
Organizing a kitchen for a dinner (What wine goes well with dinner?) party centered around a chocolate fountain requires careful planning and strategic arrangement. One must ensure that guests have easy access to the chocolate fountain while maintaining a functional space for other dining elements. The placement of the chocolate fountain should be such that it becomes a focal point in the kitchen without hindering movement. It is paramount that the surface is stable and near enough to an outlet to power the device, and that space is allocated for a variety of dippable items and napkins to manage any potential mess.
In preparing the chocolate fountain, the chocolate needs to be melted smoothly and maintained at a proper temperature to ensure a continuous flow. This involves preheating the fountain before adding the chocolate, which should be combined with oil for a silken cascade. The selection of chocolate—dark, milk, or white—will influence the overall aesthetic and taste experience of the party. Offering a range of dippable foods—from fruits to marshmallows to pretzels—allows guests to personalize their treats and engage with the chocolate fountain throughout the event.
Lastly, when orchestrating a kitchen for a party with a chocolate fountain, attention should be paid to hygiene and functionality. Protective barriers or placements might be necessary to prevent splatter, and setting up stations around the kitchen can help disperse the crowd, making the experience enjoyable and fluid for all involved. With thoughtful organization, the chocolate fountain can be a seamless and indulgent centerpiece to a memorable evening.
Planning Your Kitchen Layout

To ensure a successful event, one must consider space requirements, electrical needs, and environmental factors when organizing a kitchen layout for a dinner party featuring a chocolate fountain.
Maximizing Space For The Chocolate Fountain
The chocolate fountain should be the centerpiece of the party, so allocating ample room for it is crucial. One should choose a spacious area of the kitchen or dining area where guests can freely gather without congestion. It's essential to clear away any unnecessary items and rearrange furniture to create an open space that allows for a smooth flow of traffic.
Clear countertops: Ensure nearby surfaces are free of clutter.
Rearrange furniture: Adjust tables and chairs to enhance accessibility.
Ensuring Electrical Access for Heating Elements
A critical aspect of chocolate fountains is maintaining the chocolate's fluidity which relies on continuous heat. Therefore, one must position the fountain near a reliable power outlet. Ensure that the cord reaches without stretching or posing a trip hazard, and consider using a heavy-duty extension cord if necessary.
Power requirements:
Voltage: Verify that the fountain's voltage matches the outlet.
Amperage: Ensure the outlet can handle the fountain's amperage.
Preventing Wind and Cold Interference
Chocolate fountains are sensitive to wind and cold, as these elements can cause the chocolate to harden or become unevenly tempered. If the event involves outdoor access, situate the chocolate fountain in a sheltered area away from drafts. Indoors, keep away from air conditioning vents or open windows that could introduce cold air or gusts.
Environmental considerations:
Avoid placements near windows or doors to minimize wind exposure.
Adjust room temperature to maintain a consistent warmth.
By addressing these elements, the host can ensure that the chocolate fountain operates smoothly and becomes a memorable feature of the dinner party.
Selecting the Chocolate

Selecting the proper chocolate is crucial for both the functionality of your chocolate fountain and the overall taste experience for your guests. The type, quality, and amount of chocolate will directly impact your dinner party's success.
Types of Chocolate: Pros and Cons
Milk Chocolate: Known for its smooth and creamy texture, milk chocolate is a favorite due to its sweet flavor. It melts easily, making it a reliable choice for a fountain.
Type Pros Cons Milk Chocolate Sweet, smooth, popular choice Less intense chocolate flavor Dark Chocolate Rich flavor, less sugar, can be more aromatic May be too bitter for some White Chocolate Creamy, sweet, a unique option Can be overly sweet; temperamental to melt
Dark Chocolate: Offers a richer, more intense flavor. It can add a sophisticated touch to your event, pairing well with various foods.
White Chocolate: Though not chocolate in the strictest sense as it contains no cocoa solids, it offers a sweet and creamy alternative. Care must be taken as white chocolate can be tricky to melt and maintain.
Amount of Chocolate Needed
The capacity of your chocolate fountain dictates the amount of chocolate you’ll need. A standard rule of thumb is approximately 1 to 1.5 pounds of chocolate per 10 guests. Keep in mind, it’s better to have a little extra than to run out during your party.
Choosing High-Quality Chocolate
High-quality chocolate, especially couverture chocolate with a higher percentage of cocoa butter, is optimal for creating a smooth and delicious flow. One should look for brands that specify they are formulated for fountains or fondue. This type of chocolate ensures a silky melt without the need for additional oils. For fountains, chocolate chips are not recommended as they may contain additives that hinder melting.
Couverture Chocolate: A superior choice for fountains due to its high cocoa butter content which requires tempering but provides a deluxe taste and texture.
Setting Up The Chocolate Fountain
A well-assembled chocolate fountain with perfectly viscous chocolate is a showstopper at any dinner party. Pay attention to the setup process for a smooth and indulgent flow of chocolate.
Assembling the Fountain
One must assemble the chocolate fountain correctly by stacking its tiers over the base and ensuring the auger, the internal mechanism that transports the chocolate upwards, is in place. The fountain should be positioned on a sturdy, level surface to prevent any tilting that might cause uneven chocolate flow.
Achieving the Right Chocolate Viscosity
The viscosity, or flow, of the chocolate is crucial. One can achieve a smooth consistency by melting the chocolate properly, using either a microwave or a double boiler. If using a microwave, heat the chocolate in intervals of 20 seconds, stirring between each, until completely melted. Should the chocolate be too thick, one may add a small amount of vegetable oil to thin it out, ensuring it has the right viscosity for a seamless cascade.
Preheating and Adding Chocolate
Before adding the chocolate, preheat the fountain for approximately 15 minutes. This ensures that the base is warm and ready, preventing the chocolate from solidifying upon contact. After preheating, one can fill the base with the melted chocolate. Once filled, turn on the auger so the chocolate begins to flow. Regular monitoring is necessary to prevent any clogging and maintain the chocolate's smooth stream.
Dipping Goodies Selection
A successful chocolate fountain experience relies on a diverse and appealing selection of dippables. Guests should be greeted with fresh, bite-sized offerings that pair well with the chocolate of choice.

Best Foods to Dip
When choosing dippables for a chocolate fountain, one should aim for variety and taste compatibility. Fresh fruits such as strawberries, pineapple pieces, and orange segments are perennial favorites for their fresh flavors that complement the richness of chocolate. Pretzel sticks offer a savory crunch with a delightful saltiness that pairs beautifully with the sweet chocolate. For those with a sweet tooth, cookies, donuts, brownie bites, and cheesecake bites are indulgent options. Here's a list to consider:
Fresh fruits: strawberries, bananas, apple slices
Bakery items: donuts, cookies, marshmallows
Confectionery: brownie bites, cheesecake bites
Savory: pretzels, pretzel sticks
Preparing and Presenting Dippables
Presentation is key; one should present dippables in an accessible and visually appealing manner. To maintain freshness and prevent browning, fruits like apples and bananas should be sliced and then briefly soaked in lemon juice before serving. Bakery items such as cookies and donuts should be bite-sized to allow for easy dipping. Keep in mind that dippers should be sturdy enough to withstand dipping without crumbling; for example, cake pieces should be dense, like brownie bites.
Organizing the dippables on multiple tiered platters around the fountain makes for a beautiful and functional display. Provide skewers or fondue forks for guests to use, ensuring a clean dipping experience. If one aims for convenience, serving dippers on lollipop sticks can be an elegant solution to keep guests' hands clean.
Operating the Chocolate Fountain
When hosting a dinner party, incorporating a chocolate fountain can elevate the experience significantly. One should start by selecting an ideal location for the fountain. The location must be sheltered from wind, rain, and direct sunlight, as these can affect the chocolate's consistency and flow.
Setting It Up:
Before the party begins, they need to assemble the chocolate fountain. After ensuring a stable base, one should follow these steps:
Lock in Tiers:
Slide the largest tier onto the auger first, making sure it’s secure.
Continue with smaller tiers, ensuring they face downwards for smooth chocolate flow.
Install the Auger:
Insert the auger into the central column, checking for stability.
Warm It Up:
Preheat the chocolate fountain for about 15 minutes.
Use the designated heat control to avoid hardening the chocolate.
Adding the Chocolate:
Melting:
One should melt the chocolate thoroughly using a microwave or a double boiler.
If required, integrate oil into the chocolate to achieve the right consistency.
Pouring:
Once melted, pour the chocolate into the base basin.
It should be evenly distributed to prevent blockages.
Tips for Use:
Avoid Touching:
Guests should use skewers to dip items without touching the fountain.
Chocolate Fountain Ideas:
Provide a variety of dippables such as strawberries, marshmallows, and pretzels.
Enhance the presentation with decorative elements around the fountain.
By focusing on these steps, one can ensure the chocolate fountain operates smoothly, adding a touch of elegance and delight to any dinner party.
Maintaining Optimal Functioning During the Party

During a dinner party, it's crucial to ensure the chocolate fountain operates smoothly to avoid disruptions. This involves regularly monitoring the chocolate's temperature and flow, and quickly addressing any clogs or drips that may occur.
Monitoring Temperature and Flow
One must constantly check the chocolate temperature. It should remain warm enough to maintain a flowing consistency without overheating, which typically means maintaining a temperature between 115-120°F. A consistent flow is essential for both presentation and functionality. They can use a thermometer to regularly check the temperature.
Temperature Range: Maintain 115-120°F
Flow Consistency: Keep an eye on the chocolate flow; it should be smooth and continuous.
Addressing Clogs and Drips
Immediate action is required if there is a reduction in flow or if clogs are present. One should turn off the fountain and use a rubber spatula to gently remove the clog. Regularly wiping away chocolate drips maintains cleanliness and prevents any build-up from affecting the fountain's operation.
Clog Removal:
Turn off the fountain
Remove the obstruction with a rubber spatula
Drips:
Wipe away promptly with a clean cloth
By vigilantly monitoring and quickly addressing these aspects, one can ensure that the chocolate fountain remains a delightful centerpiece throughout the dinner party.
Accommodating Your Guests

When planning a kitchen setup for a dinner party featuring a chocolate fountain, one should prioritize guests' comfort and engagement. Effective crowd management, ensuring accessibility, and customizing the party experience with thoughtful themes and extras will guarantee a memorable celebration.
Crowd Management
To ensure guests have room to mingle and enjoy the chocolate fountain without congestion, one should consider the flow of the space. For a celebration such as a wedding or birthday party, try to arrange furniture to create open areas for guests to move around comfortably. Use strategies such as:
Designating a chocolate fountain area: This should be away from heavy traffic zones to avoid bottlenecks.
Buffet-style setup: Push the dining table against a wall, where it can serve as a buffet, specifically for the chocolate fountain and related treats.
Ensuring Accessibility for All Guests
Accessibility is essential for guests to feel welcome and accommodated, especially during celebrations like Valentine’s Day or when children are attendees. Ensure:
Clear pathways: Keep walkways free of obstructions for guests with mobility concerns.
Labels: Clearly label chocolate fountain dips and treats, especially noting allergens for kids and other guests with specific dietary needs.
Customizing Experience with Themes and Extras
Theming can turn a simple get-together into a bespoke experience, whether it's a Valentine's Day gathering or a child's birthday party. Personalize the event with:
Themed decorations: Coordinate colors and decorations to match the occasion—a soft, romantic palette for Valentine's Day or vibrant, playful tones for kids' birthdays.
Added entertainment: Provide themed music or a simple game corner to enhance the party’s atmosphere and make it an enjoyable experience for the number of guests present.
Organizing tasks and areas thoughtfully will help guests enjoy the celebration to the fullest, engaging with the chocolate fountain and each other, all within a comfortable and accessible environment tailored to the theme of the occasion.
Safety Precautions

When hosting a dinner party with a chocolate fountain, one must prioritize safety to ensure a fun and accident-free event. Adequate precautions regarding burn and mess incidents can drastically increase the safety of the environment.
Preventing Burn and Mess Accidents
Positioning of the Chocolate Fountain: One should place the chocolate fountain on a stable, level surface away from high traffic areas to prevent it from tipping over. It should also be positioned far from the edges to avoid accidental contact with individuals passing by.
Quality of Chocolate: Using specially designed chocolate for fountains is crucial, as it often requires less oil for smooth flowing. This minimization of oil not only enhances the taste but also reduces the risk of a slippery mess in case of a spill.
Supervision and Instruction: Always provide supervision, especially when children are present, and offer clear instructions on how to use the skewers and the fountain safely to avoid direct contact with the hot elements.
Heat Resistance and Accessibility: Employ heat-resistant utensils and ensure that there is a designated area for these tools to prevent any burn accidents.
Electrical Safety: Inspect the chocolate fountain's electrical cords for any damage before use and ensure that it's plugged into a grounded outlet. Keep water or any liquids away from the electrical components to avoid electrocution risks.
Maintaining Cleanliness: Clean spills immediately with a damp cloth and have napkins or paper towels readily available for guests. Keeping surfaces free of chocolate ensures a safer, non-slip space.
Post-Event Cleanup

After a delightful evening with a chocolate fountain serving as the centerpiece of a dinner party, efficient cleanup is key. It ensures the kitchen is restored to order and the chocolate fountain is ready for future use.
Dismantling the Chocolate Fountain
To begin the cleanup process, dismantle the chocolate fountain. The fountain should be turned off and unplugged, then allowed to cool down before attempting to disassemble it. Any remaining liquid chocolate should be carefully removed. Parts that come into contact with the chocolate should be disassembled and prepared for cleaning, following the manufacturer's instructions.
Components: Separate the tiers, auger, and basin.
Wiping: Use a rubber spatula or a soft cloth to wipe off excess chocolate from each component.
Cleaning Best Practices
Cleaning a chocolate fountain must be done meticulously to ensure no residue is left that could affect its performance at the next event. Immediate cleaning is recommended to prevent the chocolate from hardening, making it more difficult to clean.
Hot Water Method: Rinse each part with hot water to melt and remove leftover chocolate.
Dishwasher-Safe Parts: If applicable, place dishwasher-safe components in the dishwasher for thorough cleaning.
Microwave Method for Smaller Parts: Smaller parts that are tough to clean can be soaked in soapy water, then microwaved for a short period to loosen the chocolate before scrubbing.
Remember to dry all parts thoroughly before reassembling or storing to prevent water spots or corrosion.
Dealing with Leftover Chocolate
She should consider the amount of leftover chocolate as a sweet surprise, as it can be repurposed:
Refrigeration: Store the excess chocolate in an airtight container and refrigerate. It can be reused as a dip or for baking.
Instant Pot Method: Chocolate can be melted again in an instant pot for future fondue or hot chocolate recipes.
Freezing: For longer preservation, chocolate can be frozen, labeled with the date, and kept for several months.
By following these straightforward steps, the host can efficiently manage post-event cleanup, ensuring that both the kitchen and the chocolate fountain are well-maintained and ready for the next gathering.
Troubleshooting and FAQs
In preparing for a dinner party with a chocolate fountain, attendees will be drawn to the allure of flowing chocolate. It's essential to ensure that the chocolate fountain operates smoothly to avoid disruptions.
Common Issues with Chocolate Fountains
Incorrect Chocolate Consistency: A frequent issue people encounter is chocolate that's either too thick or too thin. In a chocolate fountain, the chocolate must flow easily without dripping too quickly.
Too Thick: If the chocolate is too thick, it will not flow well. This often requires the addition of coconut oil to thin it out. A general rule is 1 tablespoon of oil for every pound of chocolate melted.
Too Thin: On the opposite end, chocolate that's too runny may contain too much oil or might have been overheated. Add more solid chocolate to achieve the desired consistency.
Temperature Challenges: Ensuring the chocolate melts evenly is crucial.
Use a double boiler or an Instant Pot with a metal bowl to melt the chocolate consistently. One should avoid direct heat as it can cause the chocolate to seize or burn.
Maintain the chocolate at a consistent temperature, usually between 105°F and 110°F, for optimal flow.
Expert Tips for the Perfect Fountain
Choosing the Right Chocolate: It's often recommended to use chocolate specifically formulated for fountains due to its flow properties. However, one can use any chocolate, considering its quality and the correct melting practices are applied.
High-quality chocolate yields a better taste and flow.
The price of specialized fountain chocolate may be more, but its availability is widespread, and it saves time on preparation.
Setup and Maintenance: Proper setup and ongoing maintenance are key for uninterrupted operation during the party.
Assemble the fountain on a stable, level surface to prevent uneven flow.
Regularly check for blockages and clear out any bits of solid chocolate or debris.
By adhering to these guidelines, the chocolate fountain should delight guests with its smooth cascade of chocolate, enhancing both the visual and taste experience of the dinner party.
