
Foraging and Harvesting Okra
A Practical Guide to Cultivating Your Crop

Okra, scientifically known as Abelmoschus esculentus, is a warm-season vegetable prized for its edible green pods. Originating from Africa, it has become a staple in many cuisines, especially in the Southern United States, where it is a key ingredient in dishes like gumbo. The plant flourishes in warm weather, making it suitable for growth in many regions, extending even to some northern areas with the right variety and care.
For those interested in foraging and harvesting okra, timing and technique are critical to ensure the best quality of the harvest. Okra pods are best picked when they are tender and immature, typically measuring 2 to 3 inches in length. Pods quickly grow after the plant flowers, and if left on the plant too long, they become tough and woody, losing their desirable texture.
Maintenance is straightforward but essential for a bountiful harvest. It involves checking the plants daily during the harvesting season, as okra pods can rapidly grow to the ideal size for picking. After harvest, okra can be stored in the refrigerator in plastic bags for short-term use, or it can be preserved through pickling or freezing for longer-term storage without significant loss of quality.
Understanding Okra

Okra is a warm-weather vegetable with a rich history and diverse culinary uses. It is known for its unique texture and flavor, which contribute to its popularity in dishes like gumbo.
Botanical Profile
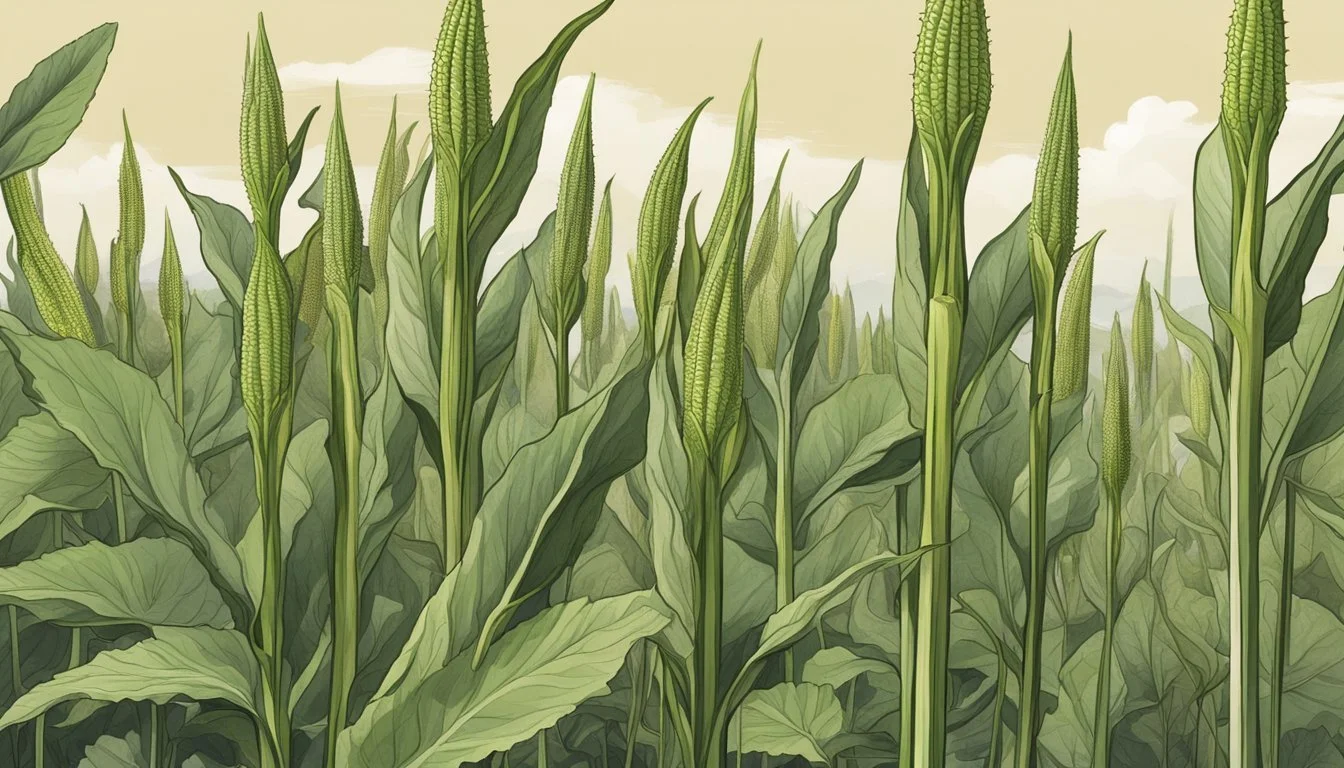
Okra, Abelmoschus esculentus, is a member of the hibiscus family and shares similarities with cotton and hollyhock plants. It originates from Africa and has been valued for its edible green pods. The plant thrives in hot climates and typically grows between four to six feet tall. Clemson Spineless and Burgundy are two popular cultivars, with the former known for its smooth pods and the latter for its reddish pods and ornamental qualities.
Nutritional Values and Uses
Okra pods are low in calories and a good source of vitamins A and C, fiber, and antioxidants. Their mucilaginous texture makes them ideal for thickening soups and stews, such as gumbo, a traditional Southern dish. The seeds (how long do seeds last?) can also be roasted and ground to serve as a coffee substitute. The vegetable's health benefits and versatility in cooking have contributed to its increasing popularity in various cuisines.
Culinary Varieties
While many varieties of okra are available, Clemson Spineless is renowned for its tenderness and is widely cultivated. Burgundy, on the other hand, not only stands out for its flavor but also for its decorative appeal in gardens. Both varieties are commonly used in culinary applications, and their pods are best harvested when they are 2 to 3 inches long to ensure tenderness.
Cultivation Requirements
Optimal okra cultivation requires attention to soil composition, climate conditions, and adequate sunlight and watering practices. These are essential for healthy growth and fruitful harvests.
Soil Conditions and pH Levels
For okra, soil should be fertile and well-drained, with organic matter such as aged compost or manure mixed in prior to planting to enrich the soil. The ideal pH level for okra is neutral, ranging between 6.5 to 7.0. Testing soil pH before planting and adjusting with lime or sulfur can be necessary to create the best growing environment.
Soil enrichment: Before planting, mix in aged manure or compost.
pH levels: Maintain a soil pH of 6.5 to 7.0 for optimal growth.
Climate and Temperature Needs
Okra thrives in a warm climate and is very much a heat-loving plant, requiring temperatures to be consistently above 20°C (68°F). It can be planted 3 to 4 weeks before the last spring frost date in temperate regions, though it is ideally a tropical crop. Frost can damage okra plants, so it should be ensured that they are only exposed to warm temperatures.
Minimum temperature: Above 20°C (68°F) is necessary.
Climate: Best grown in warm or tropical climates.
Sunlight and Watering
Okra plants need full sun exposure for at least six hours per day to develop properly. They are somewhat drought-tolerant but produce better with regular watering, especially during dry spells. Mulching with organic materials will help retain soil moisture and also add nutrients as it breaks down.
Sunlight: Require full sun, with at least six hours of direct sunlight daily.
Watering: Water regularly while being cautious to not overwater; use mulch to retain moisture.
Planting and Germination

Planting and germination form the foundation for a successful okra harvest. Selecting high-quality seeds, applying appropriate germination techniques, and timing the planting correctly are essential steps.
Seed Selection and Treatment
When selecting okra seeds, it's crucial to opt for those suited to the grower's regional climate. Heat-loving varieties often fare better in warmer climates. The seeds may require treatment to enhance germination rates, such as:
Soaking: Immerse okra seeds in water for 12-24 hours to soften the hard seed coating.
Scarification: Gently rub seeds with sandpaper to create small abrasions, facilitating water absorption.
Germination Techniques
Proper germination techniques can significantly improve the likelihood of successful planting okra. Consistent moisture and warmth are vital for okra seed germination, with soil temperatures ideally around 75-85°F (24-29°C). Methods include:
Direct sowing: Plant seeds 0.5 to 1 inch deep into the soil, ensuring consistent moisture without waterlogging.
Indoor starting: In cooler climates, start seeds indoors using biodegradable pots 3-4 weeks before the last frost.
Optimal Planting Times
Timing is critical for planting okra to ensure seedlings thrive. They should be planted when the danger of frost has passed and the soil has warmed adequately:
Frost-free regions: Plant seeds directly into the garden after the last frost date, when soil temperature reaches at least 65°F (18°C).
Cooler regions: Transplant indoor-started seedlings outdoors after hardening off when outdoor temperatures and soil consistently stay warm.
Growth and Maintenance

When growing okra, it's important to maintain a routine that fosters healthy plants and maximizes yield. This involves regular weeding and pruning, vigilant pest and disease management, and strategic companion planting and crop rotation.
Weeding and Pruning
Okra thrives in well-maintained beds. Weeds compete for nutrients and should be removed regularly. As for pruning, okra plants often do not require it, but selective removal of lower leaves can improve air flow and reduce disease risk. Additionally, topping the plant when it reaches about 3 feet can promote bushier growth.
Pest and Disease Management
Several pests and diseases can impact okra:
Aphids and stink bugs can be managed by introducing beneficial insects or using insecticidal soap.
For corn earworms, regular inspection and hand-picking can be effective.
To combat diseases like fusarium wilt and root-knot nematodes, using disease-resistant varieties and practicing crop rotation are vital.
Consistent monitoring and early intervention keep pest and disease issues in check.
Companion Planting and Crop Rotation
Companion planting can be beneficial for okra. Certain plants can deter pests naturally and enhance growth. Good companions for okra include:
Tomatoes
Peppers
Eggplants (how long does eggplant last?)
Melons
For crop rotation, avoid planting okra in soil that previously grew Solanaceae family members (tomatoes, potatoes, eggplants) to prevent disease buildup. Rotate with unrelated crops every year to maintain soil health.
Harvesting Techniques
Mastering the techniques for harvesting okra ensures a bountiful and quality yield. From recognizing the signs of ripeness to adopting the correct picking methods, adhering to these guidelines is crucial for any gardener.
Signs of Ripeness
Okra is ready to harvest when the pods are tender and measure between 1 to 4 inches long. They should have a bright color and yield slightly to pressure. Pods that are left too long become woody and tough, diminishing their quality for consumption.
Harvest Timing and Frequency
Okra should be picked frequently--every other day is ideal--as this encourages continued production. The peak time for harvesting okra is usually during the morning hours to reduce plant stress. Regular picking before pods exceed 4 inches can optimize both the quantity and quality of the harvest.
Proper Harvesting Methods
To pick okra, one should use a sharp knife or pruning shears to snip the stem directly above the pod, which avoids damaging the plant. It's important to handle okra delicately as the plants can be sensitive to rough treatment. When picking, wearing gloves can protect hands from the okra's spiny surface.
Post-Harvest Handling and Storage
Proper post-harvest handling and storage are crucial for maintaining the quality and flavor of okra. These steps also prevent spoilage and extend the usable life of the harvested pods.
Preventing Skin Irritation
When handling okra, one should wear gloves and a long-sleeved shirt to avoid skin irritation caused by the tiny spines on the okra surface. It is important for individuals who have sensitive skin or are prone to irritation.
Short-Term Storage Tips
For short-term storage, okra should be kept in plastic bags with some perforations and stored in the refrigerator's crisper drawer. This method maintains the pods' freshness for 2 to 3 days. It's vital to avoid washing the okra before refrigeration as excess moisture can accelerate spoilage.
Refrigeration: Place in perforated plastic bags
Duration: 2-3 days for optimal freshness
Condition: Do not wash until ready to use
Long-Term Preservation Methods
To preserve okra for extended periods, freezing, canning, or pickling are reliable methods. For freezing, blanch the pods first, then immerse them in ice water, dry, and pack them in airtight containers or freezer bags. Canning requires sterilized jars and following proper safety guidelines to prevent foodborne illnesses. Pickling is another method that not only preserves the okra but also adds a unique flavor profile. Pickled okra can be stored in sealed jars and enjoyed over several months.
Freezing:
Blanch and cool quickly in ice water
Dry completely and store in airtight containers or freezer bags
Canning:
Use sterilized jars and adhere to safety guidelines
Pickling:
Soak okra in vinegar and spices
Seal in jars for long-term storage
Seed Saving and Propagation
Seed saving is an essential practice for the sustainable cultivation of okra, involving the collection of viable seeds from mature pods and taking measures to prevent unintended cross-pollination.
Collecting and Storing Seeds
To successfully save seeds from okra, one must allow pods to ripen fully on the plant until they are dry and brittle. This usually occurs well after the pods are too tough for consumption. Gardeners should choose the healthiest and most robust pods for seed extraction. Once the pods are completely dry, they can be harvested and cracked open to remove the seeds.
Storage Tips:
Ensure seeds are dry to prevent mold.
Store seeds in a cool, dry place.
Label seeds with the date of harvest and variety name.
Cross-Pollination Considerations
Okra is predominantly a self-pollinating plant, meaning the flowers usually fertilize themselves. However, there is still a possibility of cross-pollination with other okra plants due to insect activity. To maintain seed purity:
Plant different okra varieties at least half a mile apart to minimize cross-pollination.
Alternatively, utilize physical barriers such as row covers to deter insects during the flowering period.
By understanding the pollination process and implementing these strategies, gardeners can preserve the genetic traits of their okra plants from year to year.
Okra in the Kitchen

When it comes to using okra in the kitchen, one can embrace its unique texture and flavor profile. This versatile vegetable can be prepared in a variety of ways to highlight its taste, ranging from raw to cooked methods such as frying and inclusion in stews.
Preparation Tips for Cooking
Before cooking, okra should be gently rinsed and dried. To mitigate its characteristic sliminess, soaking in vinegar or lemon juice for about 30 minutes is recommended. After soaking, a thorough rinse and pat dry is necessary. When it comes to cutting okra, the pods should be trimmed around the top, avoiding cutting into the seed capsule to prevent excess mucilage.
For those who prefer to cook okra, tender pods can be fried or baked. Frying in a batter made from okra flour (how long does flour last?) can give a crispy exterior that contrasts pleasantly with the soft interior. In baking, okra can be used to thicken dishes, benefiting from its mucilaginous properties.
Popular Okra Recipes
Okra's distinct taste and texture make it a staple in many dishes:
Gumbo: This classic stew from Louisiana uses okra as a thickening agent and flavor enhancer.
Fried Okra: Small pods or slices are coated in cornmeal and spices, then fried until crispy.
Additionally, okra can be sliced and added raw to salads, giving them a refreshing crunch, or it can be pickled for a tangy treat.
Alternative Okra Uses
Beyond traditional recipes, okra can also have unconventional uses:
Okra Water: Soaked overnight to create a drink believed to have health benefits.
Flour Replacement: Ground okra seeds can be turned into flour for gluten-free baking.
It should be noted that while okra, also known as lady's finger, offers a unique flavor when raw—mild and slightly grassy—its taste becomes more pronounced in cooked dishes, often described as resembling eggplant or green beans.
Okra in the Garden Ecosystem
The integration of okra (Abelmoschus esculentus) into the garden ecosystem not only enhances the garden's vibrancy but also contributes to soil health and ecological balance. They play a critical role within the interconnectivity of flora and fauna, offering benefits that extend beyond their value as a food source.

Soil Enrichment and Sustainability
Okra plants can contribute to soil enrichment by adding organic matter when their leaves and stalks are left to decompose in the garden or turned into compost. The use of compost and especially aged manure as a soil amendment promotes a robust and fertile growing environment. Furthermore, okra’s deep taproot structure helps break up hard soils, allowing for better water infiltration and root penetration for subsequent crops.
Sustainable Practices Description Cover Cropping with Okra Okra leaves and stalks return nutrients to the soil as they decompose. Application of Aged Manure Manure improves soil structure and adds essential nutrients. Crop Rotation Including okra in rotation can enhance soil health and reduce pest cycles.
Biodiversity and Plant Synergy
In a garden ecosystem, okra contributes to biodiversity by serving as a companion plant. They can enhance the overall health and productivity of the garden by being planted alongside vegetables such as beans, peppers, tomatoes, tomatillo, cucumbers, eggplant, and lettuce. Okra has been found to be compatible with beans, helping deter some pests that afflict beans, while tomatoes thrive when shaded by okra’s taller varieties during parts of the day.
Moreover, okra can benefit from natural pest deterrents such as garlic and onions when planted in proximity, reducing the dependency on chemical controls like insecticidal soap. The presence of diverse plant species aids in attracting beneficial insects and promoting a dynamic vegetable garden.
Companion Plants Benefits Beans Complementary in pest management Tomatoes, Eggplant Mutual improvement of growth conditions Garlic, Onions Natural pest deterrents
In a vegetable garden, okra also serves as an example of functional beauty. With its hibiscus-like flowers and striking pods, it adds an aesthetic appeal while supporting the garden's ecological function.
