
Advanced Sourdough Techniques
Lamination and Layering Explained
Sourdough baking is an art that marries the simplicity of flour, water, and salt with the complex biochemistry of fermentation. As hobbyists and professionals continue to push the boundaries of this age-old craft, advanced techniques have emerged to enhance the texture, flavor, and visual appeal of sourdough breads (What wine goes well with bread?). One such technique is lamination, typically associated with making pastries like croissants, which has been adapted for sourdough to produce distinct layers within the crumb structure.
In the process of laminating lean dough, which is characteristic of classic sourdough, bakers meticulously fold and roll the dough to incorporate air and develop thin, alternating layers of dough and gas pockets. This results in a finished loaf that features a light, airy crumb and a crispy crust—traits that are highly sought after in artisanal bread making. Lamination not only contributes to the bread's aesthetics but also to its eating quality, balancing tender softness with a satisfying chew.
The technique requires precision and timing; the baker must handle the dough gently to prevent degassing while stretching it to just the right thinness. It involves strategic rest intervals between folds to allow the gluten network to relax and maintain its strength throughout the process. While lamination is more time-consuming compared to other methods, such as the basic stretch and fold, it adds another level of sophistication to the sourdough craft, offering bakers a means to refine their skillset and produce exquisite loaves that are as much a visual piece of art as they are a culinary delight.
Understanding Sourdough Fundamentals
Before one ventures into advanced techniques like lamination, it is imperative to grasp the essentials of sourdough bread-making. These foundations are rooted in the science of fermentation and the roles of key ingredients.
The Science of Fermentation
Sourdough fermentation is a bio-chemical process where natural yeasts and bacteria in the sourdough starter convert sugars in the flour into carbon dioxide and alcohol. This process not only causes the bread to rise but also contributes to its unique flavor and texture. The fermentation rate is influenced by multiple factors, including the hydration of the dough, the environment's temperature, and the ratio of flour to water.
Hydration affects gluten development; a higher hydration level usually results in a more open crumb structure.
Gluten development is crucial as it gives the dough strength and elasticity, enabling it to trap the gases produced during fermentation.
While experimenting with sourdough, bakers often adjust fermentation times and temperatures to manipulate the bread's sourness and texture.
Key Ingredients and Their Roles
Each ingredient in sourdough has a specific function that contributes to the final quality of the bread.
Ingredient Role in Sourdough Bread Flour Provides the structure; gluten networks trap air bubbles. Water Hydrates flour for gluten formation; affects dough consistency. Salt Enhances flavor, regulates yeast activity, strengthens gluten structure. Sourdough Starter Contains wild yeast and bacteria for leavening and flavor.
Flour, typically bread flour, is chosen for its higher protein content, which is ideal for gluten formation.
Water is integral not just in hydration but in dissolving salts, sugars, and enzymes, which aids in fermentation.
Salt, besides adding flavor, is paramount for controlling yeast activity and strengthening the gluten network.
The sourdough starter, a mixture of flour and water left to ferment, introduces natural yeast and lactobacilli into the dough, kickstarting the fermentation process.
Dough Preparation and Autolyse Technique
Effective sourdough techniques heavily rely on meticulous dough preparation. The inclusion of autolyse and proper integration of levain are crucial for enhanced gluten development and dough texture.
Mixing and Autolyse Explained
The term 'autolyse' refers to a critical phase in dough preparation where one mixes flour and water before adding levain and salt. This process allows for the hydration of the flour, giving gluten networks time to form naturally, which can lead to better dough strength and extensibility. Typically, bakers let this mixture rest for about 20 to 60 minutes, although the duration might vary based on the flour type; finer flours require less time than coarser ones.
Key steps for autolyse include:
Hand mixing: Combine flour and water in a bowl, gently mixing until there are no dry spots.
Rest: Cover the mixture and leave it to rest at room temperature. This rest period lets the gluten form without the interference of salt or levain.
Incorporating Levain
After the autolyse phase, it's time to incorporate the levain – the fermented mixture of flour and water that contains wild yeasts and bacteria. Introducing levain starts the bulk ferment process, where the dough rises and develops flavor.
Tips for incorporating levain:
Gentle handling: Gradually mix the levain into the autolysed dough to avoid tearing.
Even distribution: Ensure the levain is evenly distributed throughout the dough for a consistent texture.
Lamination and Layering Techniques
This section delves into the sophistication of lamination and layering, underscoring their importance in achieving the distinct qualities of sourdough bread and pastries.
The Role of Gluten in Lamination
Gluten, a protein matrix in dough, is pivotal for lamination. It provides elasticity and strength, which allows the dough to hold its shape and trap air, resulting in the desired flaky texture. During lamination, the gluten must be sufficiently developed to endure the extensive folding and rolling without tearing.
Creating Layers with Butter for Pastries
Incorporating butter into pastry dough is essential in creating layers. For example, when making croissants, butter is evenly distributed between layers of dough. As it melts during baking, steam lifts the layers apart. This process, applied to puff pastry and Danish dough, results in a light, airy structure with a rich, buttery flavor.
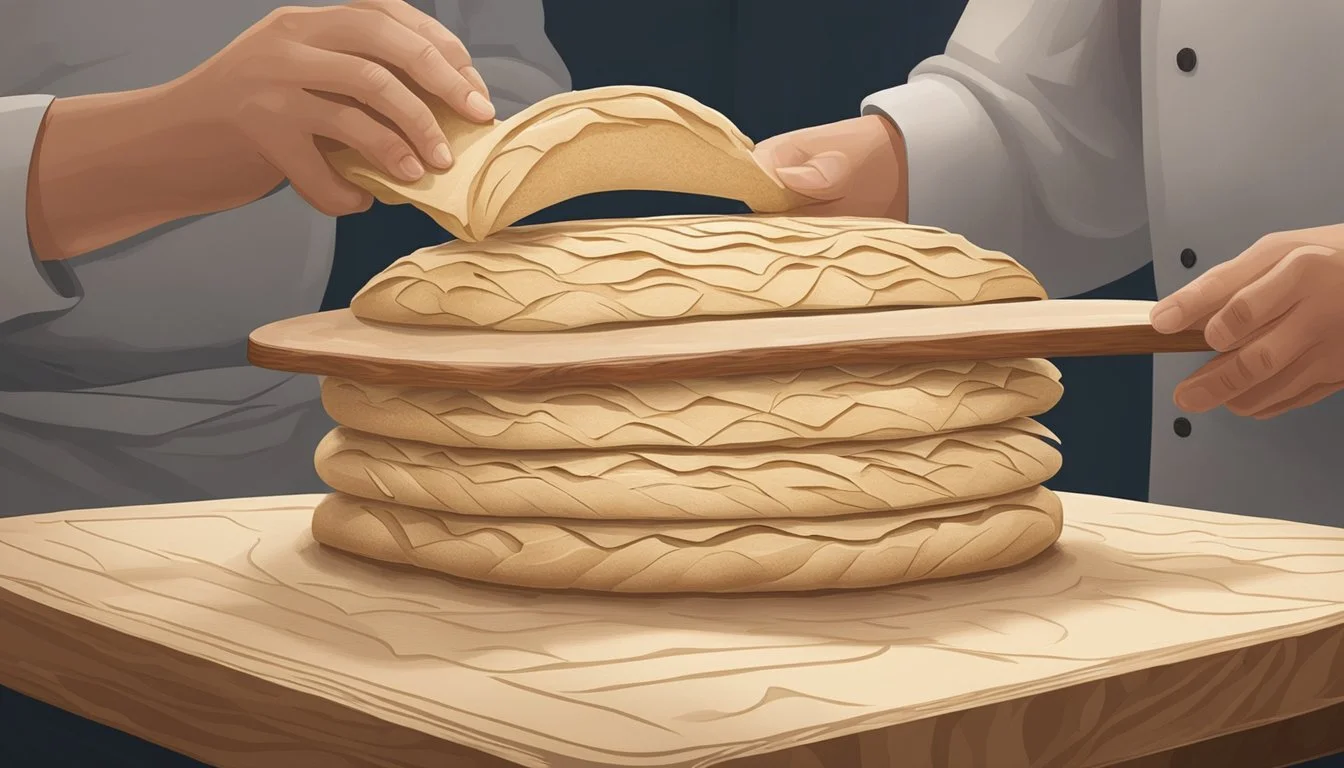
Detailed Lamination Process for Sourdough
Laminating lean dough for sourdough involves careful manipulation to induce layering while preserving gas bubbles. The dough is gently stretched into a rectangle and folded onto itself, creating multiple layers. Each layer contributes to the final bread's quality by influencing the crumb structure and crust crispness. This structured approach heightens dough strength and contributes to a more complex texture.
Bulk Fermentation and Its Importance
Bulk fermentation is the crucial phase in sourdough bread making where the dough's flavor and structure are developed. This process is responsible for the dough's rise and ultimately determines the bread's texture and surface characteristics.
Timing the Bulk Ferment for Optimal Flavor
Timing is critical during bulk fermentation as it influences the sourdough's final flavor. Bakers should adjust the duration of the bulk ferment according to the temperature and the dough's specific needs. An adequately timed bulk ferment leads to a well-developed flavor profile that is tangy, yet not overpowering.
Shorter Ferments: They may result in a milder flavor and less complex texture.
Longer Ferments: These contribute to a more pronounced sour flavor and a bubblier, more intricate crumb structure.
Recognizing Proper Fermentation Stages
Determining when sourdough has properly fermented involves both visual and tactile cues. The dough should exhibit a noticeable increase in volume and a surface that is taut but not tight. It should feel pillowy with a network of small bubbles palpable beneath the surface.
Under-fermentation: The dough lacks volume and has a dense, heavy texture.
Over-fermentation: Dough may collapse, indicate by a very loose surface and an excessive increase in volume that is not sustainable.
Successful bulk fermentation is geared towards striking the right balance. Baker's experiment with variables such as ambient temperature, starter strength, and the dough's hydration level to achieve a consistent, desirable outcome in their sourdough's texture and flavor.
Folding Techniques to Enhance Dough Structure
Folding is a crucial process during the bulk fermentation of sourdough, significantly affecting dough structure by aligning and strengthening gluten strands.
Stretch and Fold Method Explained
The stretch and fold technique is a gentle method used to enhance gluten structure in sourdough. A baker will typically perform this process several times during bulk fermentation. They start by stretching the dough upwards and then folding it over itself, effectively aligning the gluten networks. This is often done in different directions to ensure an even structure.
Steps for Stretch and Fold:
Stretch the dough gently upwards from one side.
Fold it over towards the opposite side.
Rotate the container 90 degrees and repeat.
Cover the dough before the next set.
By spacing out the series of stretch and folds throughout the fermentation process, the dough's elasticity and gas retention improve, leading to a well-structured sourdough with an airy crumb.
Coil Folds for Strengthening the Dough
Coil folding, another technique applied during bulk fermentation, involves lifting the dough from the center and allowing it to fall under its own weight, twisting slightly as it is folded back onto itself, resembling a coil. This method serves to strengthen the dough without applying too much force, which is beneficial for maintaining the gases trapped inside the dough.
How to Perform Coil Folds:
Lift the center of the dough upwards.
Let it fall under its own weight.
Fold the dough back onto itself, creating a coil.
Coil folds are especially effective for wetter doughs, as they add tension and strength without overly degassing the dough. The baker may repeat these folds every 30 minutes to an hour, depending on the dough's development, until sufficient dough strength and structure are achieved.
Pre-shaping and Final Shaping of Dough
Pre-shaping and final shaping are pivotal steps in sourdough bread making that influence the dough structure and the final crumb of the loaf.
Techniques for Effective Pre-shaping
Pre-shaping is the process of gently forming the dough into a rough shape before it undergoes final shaping. In sourdough preparation, this step builds internal structure and surface tension, which are crucial for maintaining the dough's shape during proofing. Bakers typically start by folding the dough onto itself and then forming it into a round or oblong shape. These are some of the techniques used:
Boule (Round): Folding the dough underneath itself, rotating, and cupping to form a tight ball.
Bâtard (Oblong): Folding the edges into the center, then rolling and sealing to create an elongated loaf shape.
During preshaping, the dough should not be overworked. It will often rest, or 'bench rest', on the countertop for about 20-30 minutes. This resting period allows the gluten to relax, making the dough more pliable for the final shaping.
Final Shaping and Its Impact on Crumb
Final shaping is a more defined and delicate process where the shaping technique directly affects the crumb – the internal structure of the bread, including its holes and softness. Creating an open crumb with a complex network of holes often coveted in artisan sourdough requires precise final shaping methods where the dough is handled with care to avoid de-gassing.
Common steps in final shaping involve folding the rested dough to increase tension on the surface while still preserving the gas and volume within. The technique varies depending on the desired loaf type but maintaining surface tension is key in all:
For round loaves: The boule technique is refined, using the dough's stickiness and friction to pull and tighten the outer surface.
For oblong loaves: The shaping involves rolling or enveloping edges towards each other beneath the dough to elongate and develop a taut skin.
The shaped dough must then be properly supported in a banneton or similar tool to help it retain its shape during the final proofing phase before baking. The skillful application of these shaping techniques contributes significantly to the quality and artisanal characteristics of the final sourdough bread.
Proofing and Scoring the Dough
Mastering the final stages of sourdough making, particularly proofing and scoring, ensures that the bread has the ideal texture and aesthetic appeal when baked. Proper tension in shaping, coupled with full proof baking, are critical for the fermentation process that gives sourdough bread its signature flavor and crumb.
Final Proof and Ensuring Full Proof Baking
The final proof is the last rise after shaping sourdough and before it's baked. This stage is crucial for developing the right amount of fermentation and tension. Observing the dough's expansion and surface for signs of readiness is essential. A fully proofed dough is slightly puffy but still retains its shape when poked gently. When sourdough is under-proofed, it lacks volume and has a dense crumb, whereas over-proofed sourdough collapses, resulting in a weak structure.
Key indicators of full proof baking:
Dough should spring back slowly when poked, and the indentation should mostly fill back in.
The surface tension should be noticeable but not tight enough to tear the surface.
During fermentation, the sourdough should increase in volume by approximately 30% to 50%.
Scoring Techniques Using a Lame
Scoring sourdough, just before baking, is a key step for controlled oven spring and enhancing the bread's aesthetic. Using a bread lame, a specialized blade, to score the dough allows for expansion and prevents bursting at weak spots. Depth and pattern of scoring affect how steam releases from the dough, influencing the final bake's crust and overall shape.
Scoring with a bread lame:
Use a lame to make confident, quick slashes, about 1/4 to 1/2 inch deep.
For even expansion, score at a 30-degree angle to the surface of the dough.
Classic patterns include a single slash, cross hatch, or decorative designs for a personal touch.
It is important to maintain a steady hand and decisiveness during scoring to help ensure optimal expansion and shape during the oven spring. Proper scoring paired with steam in the initial phase of baking promotes a crisp crust and a beautifully presented sourdough bread.
Baking and Oven Techniques

In the domain of sourdough bread baking, the control of oven temperatures and steam plays a crucial role in achieving the desired crust and crumb quality. The baker must exercise precision and attention to detail to elicit the best texture and flavor from the bread.
Mastering Oven Temperatures and Steam
Ideal oven temperatures and the introduction of steam during baking are significant factors that impact the quality and texture of sourdough bread. An oven preheated to the correct temperature ensures a robust oven spring, which is critical for a well-risen loaf. Most sourdough breads require baking at high temperatures, often between 450°F (232°C) to 500°F (260°C), to create a crisp crust and fully develop the loaf's interior structure.
Steam during the initial phase of baking is essential for sourdough bread. It prevents the crust from forming too early, which otherwise would limit the loaf's rise or oven spring. Here is a method to introduce steam:
Preheat the oven with a cast iron pan placed on the bottom rack.
When placing the sourdough in the oven, pour a cup of hot water into the preheated pan to generate steam.
Note: Use oven mitts and exercise caution to avoid burns when handling hot water and pans.
Evaluating Baking Results
When evaluating sourdough bread post-baking, several indicators signify proper baking technique. A well-baked loaf features a crust that is deeply colored and crisp, with a crumb that is light, airy, and open. The presence of a glossy section under the crust, known as the gelatinized layer, points to the right balance of temperature and steam.
Here are signs of a successful bake:
Crust: Deep golden brown, crisp, but not burnt.
Crumb: Evenly distributed holes, soft and chewy texture.
A loaf lacking proper oven spring often has dense crumb and inadequate volume, while overproofing might result in a loaf that collapses or spreads out. Assess the tension in the dough before baking; it should be taut but not tight to facilitate even expansion and rise during baking.
Achieving the perfect combination of crust, crumb, and flavor is a testament to the baker's mastery of advanced sourdough techniques, particularly when it comes to baking and oven methods.
