
Sourdough Skillet Breads
Elevating Home Baking with Timeless Techniques
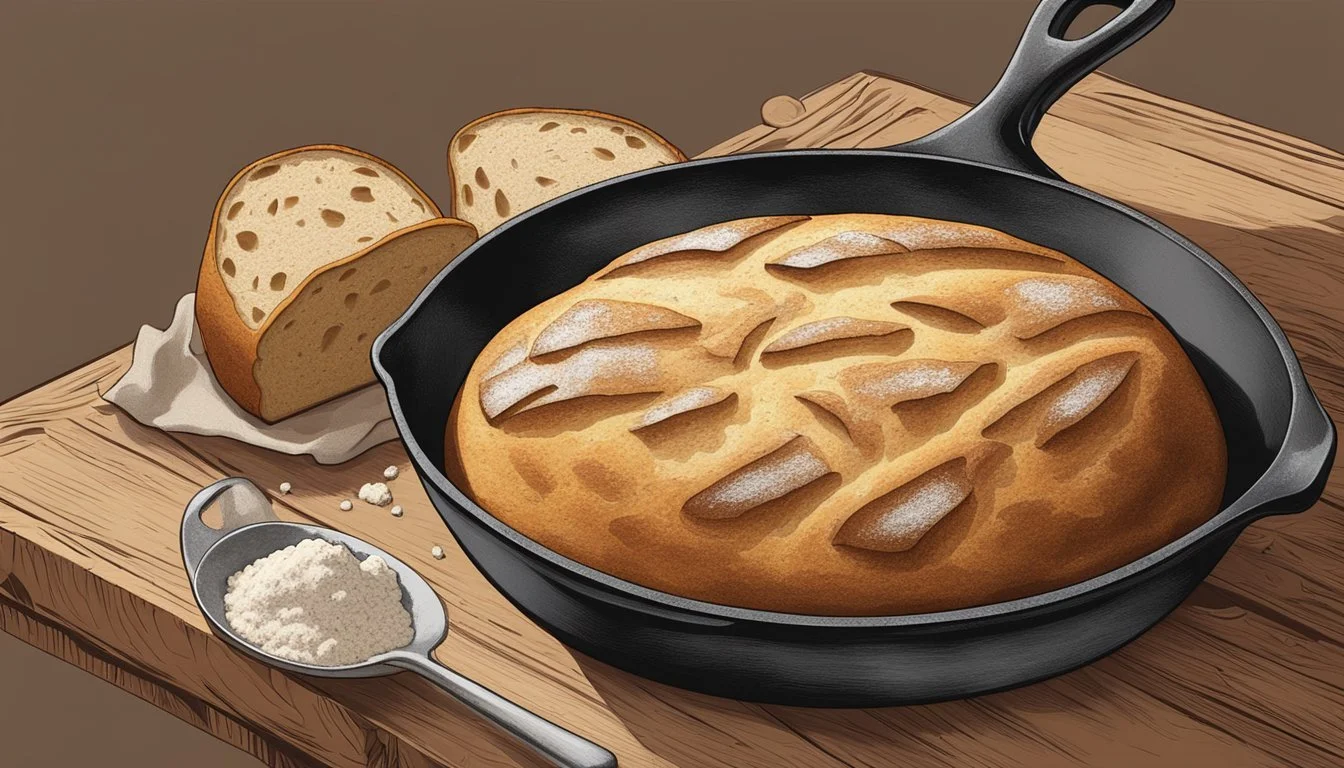
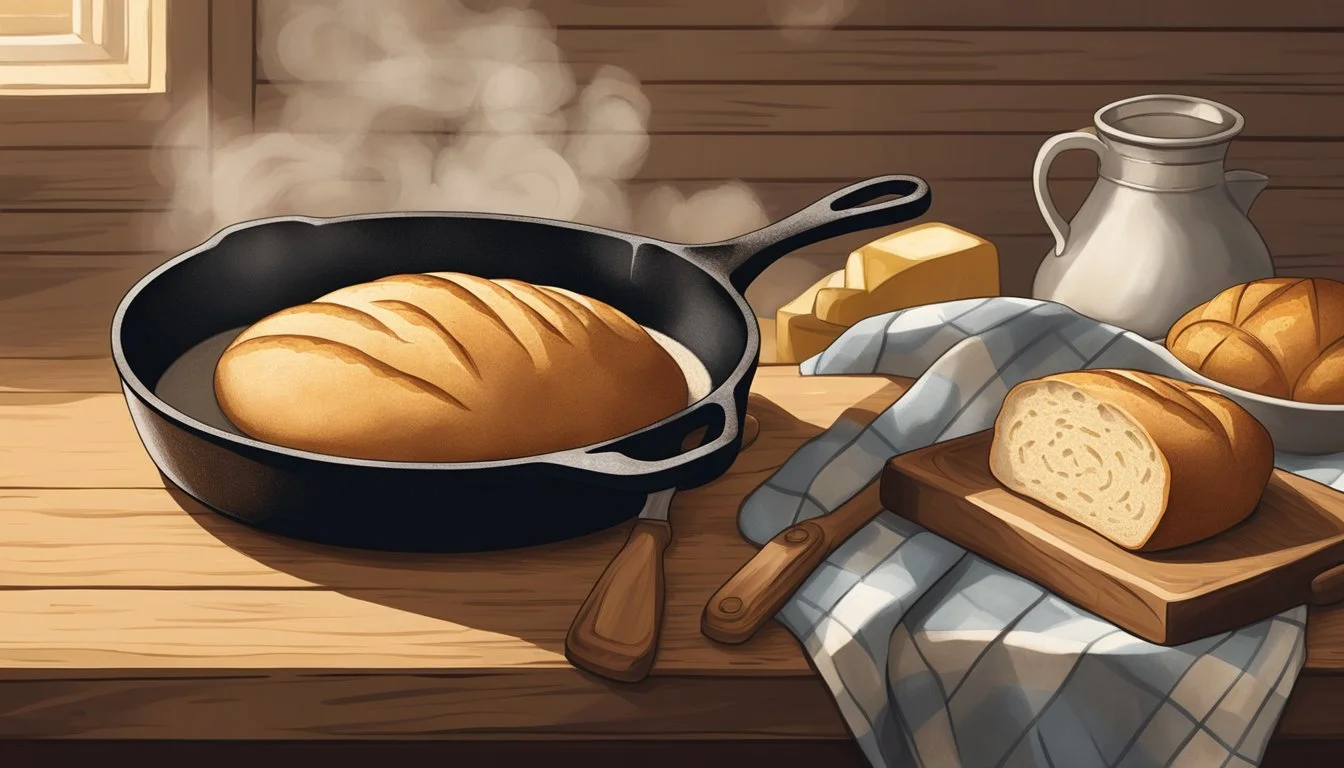
Sourdough skillet bread (What wine goes well with bread?) embodies the essence of artisan baking by combining the age-old tradition of sourdough fermentation with the rustic charm of cooking in a skillet. This method creates a distinct bread with a crisp crust and a rich, tangy flavor that is a hallmark of sourdough. The method leverages the consistent heat distribution of a cast-iron skillet, which is key to achieving a well-baked crust and a soft, airy interior. A nod to simpler times, sourdough skillet bread is a celebration of minimalism in baking, focusing on the quality of ingredients and the time-honored techniques of bread making.
Perfecting rustic sourdough in a skillet involves a process that is both an art and a science. The sourdough starter, a mixture of flour and water left to capture wild yeasts, is the backbone of the bread's flavor and texture. Careful attention to the starter's health and the dough's hydration level results in a bread that is both robust and versatile. Sourdough enthusiasts cherish the skillet bread for its characteristic tang and chewy texture, which are the products of natural fermentation.
Skillet bread, beyond the satisfying taste, is also a practical choice for home bakers looking to achieve professional-quality crusts in typical kitchen ovens. The cast iron provides an ideal baking vessel that mimics the baking qualities of a steam-injected oven, essential for developing the crispy crust associated with artisan sourdough loaves. The skillet's ability to retain and distribute heat evenly gives these loaves an exemplary lift and color. The minimal need for specialized equipment and the straightforward technique make sourdough skillet bread an accessible endeavor for bakers of all skill levels.
The Basics of Sourdough Bread
Sourdough skillet bread is an example of the delicious and traditional techniques of bread-making. Understanding the role of sourdough starter, the right choice of flour, and the importance of hydration can guide one through crafting a perfect loaf.
Understanding Sourdough Starter
The sourdough starter is a fermented mixture of flour and water, housing beneficial bacteria and wild yeasts. One begins by mixing equal parts of flour and water to create a viable starter. Over time, it requires regular feedings with fresh flour and water to remain active and leaven bread effectively. The starter's readiness is evident when it is bubbly and doubles in volume after feeding.
Flour Selection for Sour Skillet Bread
Choosing the right flour is critical for sour skillet bread. Bread flour is typically preferred due to its high protein content, which contributes to a well-structured crumb. For a rustic loaf, one might opt for whole wheat or rye flour, introducing different flavors and textures. The flour composition directly affects gluten development and the bread's final structure.
Hydration and Dough Consistency
Hydration refers to the ratio of water to flour in the dough. Higher hydration can result in a more open crumb and lighter bread, while lower hydration tends to yield a denser loaf. For sour skillet bread, a recipe may call for a hydration level around 60%-70%. Consistency is crucial, as the dough should be tacky but not overly sticky, allowing for easier handling during shaping and scoring. One adjusts water quantities to achieve the desired consistency, considering factors such as flour type and ambient humidity.
Preparing Your Dough

Successful sourdough bread begins with expert preparation of the dough. The process involves mixing ingredients to start the autolyse, applying proper kneading techniques, and understanding the role of bulk fermentation to develop the bread's structure and flavor.
Mixing and Autolyse
Someone working on sourdough bread starts by combining all-purpose flour or bread flour with water in a mixing bowl, initiating what's known as the autolyse process. This stage typically requires the baker to mix until just incorporated and then let the mixture rest. This rest can vary from 20 minutes to an hour which allows for better gluten development and hydration of the flour.
Kneading Techniques
Once autolysing is complete, the baker must knead the dough to build strength and elasticity. While one can knead dough by hand, using a stand mixer with a dough hook attachment for approximately 12 minutes at medium speed can yield a smooth, elastic dough that pulls away cleanly from the side of the bowl. The goal here is to develop gluten, which provides the bread its structure.
Bulk Fermentation Explained
Bulk fermentation occurs after kneading and involves leaving the dough to rise. During this phase, the baker may employ a technique called stretch and fold—a gentle way of organizing the dough's gluten network without deflating it. Typically, the dough should be left to ferment until it has doubled in size, which can take anywhere from 3 to 5 hours, depending on the temperature and the vigor of the starter. This bulk ferment stage is crucial as it impacts the bread's final taste, texture, and quality.
Shaping and Proofing

Before turning leavened dough into an edible art form, bakers must give it shape and allow it to rise. The processes of shaping and proofing are integral to achieving the sourdough skillet bread's final texture and flavor.
Creating Tension on the Work Surface
The shaping process begins on a work surface, where the dough is gently stretched to create tension without tearing. The baker's skillful hands maneuver the dough, pulling it across a lightly floured surface to form a tight, smooth skin. This exterior tension is crucial for supporting the bread as it rises and ensures the finished loaf has a superb crust and uniform shape.
Method:
Stretch the dough outward from the center
Fold it back over itself
Rotate 90 degrees and repeat until tension is created
Proofing for Optimal Rise
After shaping, the dough must rise, or proof, to develop its unique sourdough characteristics. This step is sensitive to temperature and time; proofing in a warm place aids in yeast activity, contributing to both the flavor and structure of the bread. Skillet bread requires a vigilant eye to ensure that it is removed from the proofing environment at the perfect moment—over-proofed dough will not maintain its shape while under-proofed lacks volume.
Ideal Proofing Conditions:
Keep the dough in a warm location
Maintain consistent environmental temperature
Proof until the dough has visibly expanded and is slightly puffy, but retains a dimple when gently poked
Using a Banneton Basket
Banneton baskets are tools often used during proofing to help the dough maintain its shape and to impart a pleasing pattern on its surface. When the shaped dough is placed into the banneton, it benefits from its supportive structure and the basket's cloth liner, which wicks away moisture, contributing to the formation of a crisp crust. The baker must ensure the banneton is well-floured to avoid the dough sticking to it.
Banneton Use:
Generously flour the banneton's surface
Gently place the shaped dough inside for the final rise
Once well-risen, invert it onto the heated skillet for baking
Scoring and Baking
As the final steps in creating a rustic sourdough skillet bread, scoring and baking are critical for texture and aesthetic appeal. Proper scoring techniques facilitate oven spring, while skilled baking in a skillet allows for the development of an impressive crust.
Techniques for Scoring Dough
Scoring sourdough dough requires precision and an understanding of how deep cuts influence the bread's expansion in the oven. A sharp lame—a tool with a razor blade—should be used for this task. The dough should be scored right before baking, and the depth of the scores will control the direction in which the bread expands. For intricate designs, bakers may use a stencil as a guide. It's essential to score using quick, decisive motions to avoid deflating the bread.
Ideal angle for scoring: 30°
Optimal score depth: 1/4 to 1/2 inch
Baking in a Skillet
For even heat distribution and to emulate the environment of a professional oven, it's recommended to bake sourdough bread in a preheated cast iron skillet or a Dutch oven. These vessels retain high heat and deliver it evenly to the bread. Place the skillet into an oven preheated to a temperature typically ranging from 450°F to 500°F (consult your specific recipe). The bread should be carefully transferred to the skillet using parchment paper to avoid burns.
Oven temperature: 450°F to 500°F
Bake time: 20 to 30 minutes
Note: Cover the skillet with a lid or a stainless-steel bowl for the first portion of the baking process to trap steam, which is critical for crust development.
Achieving the Perfect Crust
The perfect crust on sourdough bread is achieved through a combination of factors, including oven temperature, steam, and baking time. High heat helps the crust to form quickly, while steam created in a covered skillet makes it crisp and shiny. After the initial steaming period, uncovering the bread allows the crust to harden and brown beautifully. Some bakers opt to place the skillet on a lower oven rack to maximize bottom crust formation.
Initial baking (with skillet covered): 20 minutes
Final baking (uncovered): 10 to 15 minutes
Ensure the bread is baked until the crust is a deep golden brown and the internal temperature registers at least 200°F, indicating that the bread is fully baked and the crust is well-developed.
Flavor Variations and Add-Ins

Sourdough skillet breads allow for a versatile intertwining of flavors, ranging from the savory punch of cheese to the subtle complexity of herbs and seeds. The transformative potential of these add-ins makes each loaf a distinctive creation, perfect for table bread or an elevated sandwich bread option.
Utilizing Herbs and Seeds
Herbs infuse sourdough with nuanced flavors and are easily incorporated during the dough mixing process. Common selections include:
Sage: lends a robust aroma,
Thyme: introduces a subtle earthiness,
Oregano: offers a warm, balsamic quality, and
Rosemary: imparts a distinctive piney flavor.
For those who prefer a textured bite, seeds provide not only a flavorful crunch but additional nutritional benefits. Popular seed additions include:
Sesame Seeds: for a nutty taste;
Sunflower Seeds: bringing a rich, toasty dimension; and
Flaxseeds: known for their healthful omega-3 fatty acids.
Incorporating either olive oil-infused herbs or a dry seed blend enhances the sourdough's taste profile without overpowering its inherent tanginess.
Cheese and Other Flavorful Ingredients
Cheese transforms sourdough into a rich and decadent experience. Cheddar, with its sharpness, and Gruyère, known for its creamy melt, are both excellent cheese choices. Bacon, when cooked to a crisp and crumbled, can be added to the dough alongside cheese for a savory twist. The key is to incorporate these ingredients during the stretch and fold phase of dough preparation to ensure even distribution.
To avoid excess moisture, which can impact the dough's texture, it is advisable to pat dry ingredients like cooked bacon or cheese before adding them. Additionally, cheese should be cut into small cubes or shredded, allowing for seamless integration into the dough without disrupting the bread's structure.
Long-Term Care for Sourdough Starter
The longevity and vigor of a sourdough starter depend on regular feeding and proper storage. These practices ensure a stable environment for the yeast and bacteria to thrive, leading to reliably delicious sourdough bread.
Feeding and Maintenance
A sourdough starter should be fed equal parts of flour and water. The typical routine involves adding a scant cup of flour (113g) and 1/2 cup (113g) of lukewarm water to the existing starter. It's imperative to maintain a regular feeding schedule, approximately every 12 to 24 hours if kept at room temperature. Temperature fluctuations can dictate the frequency of feedings; warmer conditions necessitate more frequent feedings, while cooler conditions may require less.
The process is as follows:
Remove and discard all but 1/2 cup (113g) of your starter.
To the remaining starter, add 113g of lukewarm water and 113g of flour.
Mix until smooth and cover lightly, allowing the mixture to rest at room temperature for at least 2 hours before storing or using.
Starter Storage Tips
Refrigeration is key for long-term storage of sourdough starter. One can refrigerate their starter to slow down the fermentation process, making it more manageable. The refrigerated starter will require less frequent feedings, typically once every week. Before using the refrigerated starter, it should be allowed to reach room temperature and fed to reinvigorate it.
Here are guidelines for refrigerating a sourdough starter:
Before refrigerating: Ensure your starter is freshly fed and has reached peak activity.
In the fridge: Store your covered sourdough starter in a jar with a loose lid or covered with a cloth to prevent drying out.
Reviving a refrigerated starter: Remove the starter from the refrigerator, discard all but a small amount, and feed it with equal parts of flour and water. Depending on the starter's vigor, this might need to be done multiple times until the starter is active and bubbly again.
Advanced Techniques

To elevate the artisanal quality of sourdough skillet breads, bakers can integrate specific techniques focused on flavor development and texture refinement. Mastering these methods allows for better control over tang and crumb structure.
Cold Retardation for Enhanced Flavor
Cold retardation is the process of slowing down the fermentation by placing the dough in a colder environment, typically a refrigerator. The lower temperature extends the dough's fermentation, allowing a more complex flavor profile to develop as the acids contribute to the sourdough's characteristic tang. To perform cold retardation:
After the initial bulk fermentation, shape the dough.
Place it in a suitable container or a floured banneton.
Cover and refrigerate for 12-72 hours; this enhances both flavor and texture.
Remove it from the cold environment when ready to bake.
High Hydration Dough Handling
High hydration doughs typically result in bread with an open crumb and more pronounced bubbles, imparting a desirable airy texture. Handling such dough requires a delicate touch and skill to maintain its structure. Here are key steps for managing high hydration dough:
Mixing: Combine ingredients until just incorporated to avoid overworking the gluten.
Stretch and Fold: Perform a series of stretch and folds at 30-minute intervals to build strength without compromising hydration.
Gentle Shaping: When shaping, handle the dough with care to preserve the gas bubbles formed during fermentation.
Proofing: Ensure a final proofing stage that allows the dough to reach its final volume while preserving the delicate structure.
Troubleshooting Common Issues
When creating sourdough skillet breads, bakers may encounter a few common hurdles. Identifying and resolving these issues is key to achieving the perfect rustic loaf.
Gummy or Dense Bread: A frequent obstacle is a loaf that hasn't doubled in size, resulting in a dense texture.
Cause: Lack of fermentation due to an inactive starter or insufficient time.
Solution: Use an active, bubbly starter and allow adequate time for the dough to rise until it's visibly puffy.
Sticky Dough: Sometimes, the dough may be too sticky to shape properly.
Cause: High hydration or inadequate flour.
Solution: Gradually add small amounts of flour during kneading but be cautious not to overdo it, as too much flour can make the dough dense.
To ensure the bread doubles in size and achieves the desired lightness:
Temperature: Maintain a warm environment (around 75-80°F) during the rising process.
Consistency: Keep the dough's temperature consistent, which may involve using a bread proofing box.
Timing: Be patient and give the dough enough time to ferment fully before baking.
By systematically addressing these issues, bakers can enhance their sourdough skillet breads, producing a satisfying texture and beautiful rise indicative of expertly crafted sourdough.
Serving and Storage
Serving and storage are crucial steps to ensure the integrity and longevity of sourdough skillet bread. Proper slicing enhances the bread's texture and taste, while appropriate storage methods maintain its freshness.
Best Practices for Slicing
When it comes to slicing a loaf of sourdough skillet bread, a sharp bread knife is key. It should be done when the bread is completely cooled to avoid crushing the delicate crumb. The thickness of the slices depends on one's preference, but a thickness of about half an inch is common for balancing the bread's rustic crust with its soft interior.
Cooling Time: Wait until the bread is at room temperature.
Tool: Use a serrated bread knife for a clean cut.
Preserving Freshness
To keep the loaf healthy and flavorful, it is best stored at room temperature and wrapped loosely in plastic for a few days. For longer storage, freezing is ideal. Sourdough bread can be frozen whole, or pre-sliced for convenience. When freezing, it's recommended to wrap the bread tightly to prevent freezer burn.
Short-Term Storage:
Wrap in plastic
Keep at room temperature
Long-Term Storage:
Wrap tightly in plastic and then aluminum foil
Store in the freezer
Thaw at room temperature when ready to serve
Lastly, to serve sourdough skillet bread at its best, it can be briefly reheated in a cast iron skillet to revive the crust, giving it a delightful crunch.
Recipes and Variations
Exploring the world of sourdough skillet breads reveals a delightful variety of recipes, ranging from the classic version to ingenious sweet and savory twists. These variations maintain the rustic charm of traditional sourdough while adding unique flavors and textures that cater to different palates.
Classic Sourdough Skillet Bread
The Classic Sourdough Skillet Bread calls for a simple blend of sourdough starter, flour, water, and salt. Here is a streamlined approach to creating this rustic delight:
Combine sourdough starter with water in a large bowl.
Gradually add flour and salt, mixing until a cohesive dough forms.
Allow the dough to undergo an initial rise, typically overnight, in a warm, draft-free area.
The next day, shape the dough and place it in a preheated, oiled cast-iron skillet.
Bake in a hot oven, often at 450°F (230°C) for 30 minutes with the lid on, then reduce to 410°F (210°C) for an additional 10-15 minutes with the lid removed. This process gives the bread a crunchy crust and a soft, chewy interior.
Sweet and Savory Options
For those seeking a twist on the classic, sourdough skillet bread can be tailored with sweet and savory options:
Sweet Variations: Incorporate ingredients like maple syrup or honey into the dough for a subtle sweetness. One can also add dried fruits (What wine goes well with dried fruits?), such as cranberries or raisins, for additional flavor and texture.
Savory Variations: Infuse the dough with finely chopped herbs like rosemary or thyme. Cheeses, such as grated Parmesan or crumbled feta, blend seamlessly into the dough, creating a rich, savory loaf. For an Italian flair, one might opt for a sourdough focaccia, embedding toppings like cherry tomatoes, olives, and a drizzle of olive oil before baking.
Both variations follow the same basic sourdough recipe, with the added ingredients mixed in after combining the starter, flour, water, and salt.
Sourdough skillet bread offers a flexible canvas for culinary experimentation. Whether it's a classic loaf or one imbued with sweet or savory elements, each recipe presents an opportunity to indulge in the satisfying crunch and complex flavors of rustic sourdough bread.
Health Benefits of Sourdough
Sourdough bread has been acclaimed for its health benefits, distinguishing itself from breads made with commercial yeast. The traditional baking process of sourdough involves natural fermentation, which not only contributes to a distinct tangy flavor but also enhances nutritional value.
Nutrient Accessibility: The lactic acid bacteria present in sourdough improve the bioavailability of minerals. This fermentation process reduces phytic acid levels, which can inhibit the absorption of nutrients.
Digestive Health: Sourdough fermentation breaks down gluten, making it easier to digest, particularly for those with mild sensitivities. The prebiotic content and probiotics generated during the fermentation may promote gut health.
Glycemic Index: Notably, sourdough bread exhibits a lower glycemic index compared to bread made from commercial yeast. This results in a more moderate blood sugar response post-consumption.
Antioxidative Properties: Additionally, antioxidants found in sourdough can contribute to the reduction of risk for certain chronic diseases. Studies suggest that these antioxidants might be beneficial in reducing inflammation and combating oxidative stress.
Enhancements from fermentation:
Mineral absorption
Gluten breakdown
Nutritionally, sourdough may offer:
Lower glycemic index
Presence of antioxidants
By harnessing the unique qualities of the sourdough baking process, consumers can enjoy not just a robust flavor profile but also several health benefits. While it is important to acknowledge that individual dietary needs can vary, sourdough bread can be a healthy choice that complements a balanced diet.
Getting Started for Beginners

Embarking on the journey of making sourdough skillet bread can be an enriching experience for beginners. This section will provide novices with essential guidance and dispel common sourdough misconceptions.
First-Time Bakers' Guide
For those new to the art of bread-making, the first step is creating a homemade sourdough starter. It's crucial to begin with a balance of flour and water, typically combining 4 ounces of all-purpose flour with an equal part of water. To ensure a successful fermentation process, the starter should rest at a consistent room temperature, ideally between 70°F and 75°F.
One should be patient, as it may take several days for the starter to show signs of activity, like bubbling and rising. During this period, the aspiring baker must regularly discard a portion of the starter and refresh it with more flour and water. This process, crucial for developing a strong and active starter, aids in cultivating the beneficial bacteria and yeast necessary for a flavorful sourdough loaf.
Fresh sourdough starter is a living entity; its care and feeding will become part of one's daily routine. Here's a simple process beginners can follow over a few days to establish their starter:
Day 1: Mix equal parts flour and water in a clean jar or container. Let it sit loosely covered in a warm place.
Days 2-5: Continue to discard half the starter and feed it with new flour and water each day.
Common Sourdough Myths Debunked
There are myths surrounding sourdough baking that often intimidate or mislead beginners.
Myth: A sourdough starter is too complex for a novice to create successfully.
Reality: With the right instructions and patience, anyone can cultivate a healthy starter.
Myth: You need specialized equipment to make sourdough bread.
Reality: A simple skillet and basic kitchen tools are sufficient to begin your sourdough baking journey.
Moreover, while some recipes or guidance may suggest specific branded tools or pans through affiliate links, these are not necessary for a beginner to start making sourdough skillet bread. One can achieve marvelous results with basic, non-branded kitchenware.
Beginners should focus on understanding the process, learning from each attempt, and not being discouraged by initial failures. With practice, the process becomes straightforward, and the results are often well worth the patience and effort.
Tools and Equipment
In the art of sourdough skillet bread baking, the tools and equipment one uses are integral to the outcome of the bread. Precision and appropriate tool choice lead to a gorgeous, rustic final product.
Essential Baking Tools
For sourdough skillet bread, bakers need a few essential tools. A stand mixer, though not mandatory, is helpful for thoroughly combining the sourdough starter with flour and water. Tea towels, preferably made out of cotton or linen, are necessary to cover the dough during rest times to maintain temperature and prevent contamination. A bench scraper is invaluable for manipulating and transferring the dough without sticking, while a bread lame is necessary for scoring the dough, which controls the expansion and rise of the bread during baking.
Choosing the Right Oven Accessories
Choosing the right accessories for the oven is crucial for achieving the perfect sourdough skillet bread. A dutch oven acts as a mini steam oven inside a regular oven, providing the perfect environment for a crisp crust and good oven spring. The use of a baking sheet might also be necessary if one opts for free-form loaves over skillet bread. The even heat distribution and retention of the chosen oven accessories are what give sourdough its desirable crust and crumb.
Beyond Bread: Other Sourdough Delights
When exploring the versatility of sourdough, enthusiasts will find a world of baked goods beyond the traditional loaf. Sourdough starter's unique properties can enhance flavor and texture in a variety of recipes.
One may dive into the Italian cuisine with sourdough focaccia. It imbues this airy, olive oil-rich flatbread with a tangy depth. The spongy interior and crisp exterior make it a perfect carrier for fresh herbs and sea salt.
Sourdough pancakes offer a delightful weekend breakfast option. They can be made light and fluffy, and incorporating sourdough discard adds a pleasant tang that complements sweet syrups and toppings.
Sourdough Delight Key Feature Sourdough Focaccia Tangy flavor, olive oil richness Sourdough Pancakes Light, fluffy, with a sour tang
While creating these dishes, bakers may experiment with various additives to enhance flavor and nutrition. Common choices include herbs, cheeses, seeds, or dried fruits, all of which can be incorporated directly into the dough before baking.
It's clear that sourdough's range extends far beyond bread, demonstrating its place as a cornerstone in both sweet and savory realms of baking. Its adaptability ensures that one's sourdough starter remains a valuable and versatile ingredient in the kitchen.
