
Canning Salsa: A Comprehensive Guide for Preservation
Discover > Texas Home Cooking > Canning Salsa: A Comprehensive Guide for Preservation

Canning salsa offers a wonderful means of preserving the harvest of garden-fresh tomatoes (What wine goes well with tomatoes?) and bell peppers (What wine goes well with bell peppers?), providing a versatile condiment that delights taste buds year-round. As an ideal project for beginners, crafting homemade canned salsa not only saves money but also grants us the joy of savoring our preferred flavors at our convenience.
Our exploration takes us through the canning salsa process, emphasizing essential steps like selecting the perfect recipe, grasping the significance of acidity for secure preservation, and ensuring the jars are impeccably sterilized. By journey's end, we will possess the knowledge and confidence to assemble a stockpile of irresistibly fresh and flavorful canned salsa, ready to be shared with friends and family.
Let's immerse ourselves in the exhilarating realm of canning salsa, delving into the finest practices and techniques required to craft a successful and delectable batch. Equipped with this valuable information, the art of canning salsa will swiftly become a cherished skill in our food preservation repertoire.
Decoding Canning Salsa
Canning salsa is a culinary journey that fuses science and flavor, and at its heart lies the understanding of acidity in preserving this beloved condiment. As you venture into the world of canning salsa, comprehending the role of acidity becomes paramount.
The canning process hinges on creating a high-acid environment, a potent shield against harmful bacteria and microorganisms. With tomatoes as salsa's primary ingredient, their innate acidity offers a head start, but achieving the ideal pH level requires the harmonious addition of ingredients like vinegar or lemon juice.
Canning Tomatoes: A Comprehensive Guide for Preservation: Learn the art of canning tomatoes to savor their freshness all year round with our comprehensive guide, providing insights into the preservation process.
The synergy of these elements not only ensures safety but also elevates the salsa's taste profile, especially when employing canning salt. Dive into the art of preserving salsa as we unravel the science and techniques that make it both safe and irresistibly flavorful.
Understanding Acidity in Canning
Understanding the role of acidity in canning is a fundamental aspect of the food preservation process. This knowledge is particularly crucial when it comes to canning salsa, where acidity plays a pivotal role in safeguarding the quality and safety of the final product.
At its core, the canning process relies on the creation of a high-acid environment. This high acidity serves as a formidable defense against the growth and proliferation of harmful bacteria and microorganisms that can lead to spoilage and, even worse, foodborne illnesses. In the realm of salsa, where the star ingredient is tomatoes, we have a natural advantage. Tomatoes, as the primary component, possess an inherent acidity that makes them well-suited for canning.
However, it's not just about relying solely on the tomatoes' natural acidity. To ensure that our salsa reaches the desired level of acidity for safe preservation, we often need to introduce additional acidic elements. This is where ingredients like vinegar or lemon juice come into play. These additives serve a dual purpose: first, they help lower the pH level of the salsa, creating a more acidic environment, and second, they enhance the overall flavor profile of the salsa.
The importance of this step becomes even more apparent when we consider the use of canning salt. While salt itself does not significantly impact the pH level of the salsa, it does play a crucial role in enhancing the flavor and texture of the final product. However, the acidity level still needs to be carefully controlled to ensure safety, and that's where the addition of vinegar or lemon juice becomes particularly critical.
Easy Restaurant-Style Homemade Salsa: Elevate your salsa game with our easy recipe for restaurant-style homemade salsa, bringing the vibrant flavors of Texas to your table with minimal effort.
Decoding Safe for Canning
Ensuring that your salsa recipe is safe for canning involves a multifaceted evaluation process that encompasses several critical factors. Canning is not merely a method of food preservation but also a science that requires strict adherence to guidelines to prevent potential health risks associated with improperly preserved foods.
Tested Recipes
One of the foremost considerations in determining the safety of your salsa for canning is the use of tested recipes. These recipes, like the one provided in this canning salsa guide, have undergone rigorous testing to ascertain the correct acid balance and ingredient proportions. Such recipes have been developed and validated by experts in food preservation to ensure the highest level of safety. Deviating from these tried-and-true recipes can introduce variables that may compromise the acidity levels needed to prevent bacterial growth.
Acid Balance
The acid balance in your salsa is a crucial aspect of safety. Acidic ingredients, such as tomatoes, are integral to the canning process because they create an environment hostile to harmful microorganisms. It's essential to maintain the prescribed acidity levels in your recipe, as even slight deviations can lead to an unsafe product. This is why using reputable recipes is essential; they provide the assurance that the acid balance is appropriate for safe canning.
Low-Acid Ingredients
Paying close attention to the ratio of low-acid ingredients, such as onions and peppers, is vital. While these components contribute to the flavor and texture of your salsa, they are lower in acidity compared to tomatoes. The proportion of these low-acid ingredients should align with the tested recipe to ensure the overall acidity of the salsa remains within the safe range. Deviating from these ratios may affect the pH balance and jeopardize the safety of your canned product.
Stick to the Recipe
The mantra of safe canning is to stick faithfully to the recipe. The temptation to customize your salsa with additional ingredients or to adjust ingredient quantities might be strong, but it's a risk that can result in an unsafe product. The tested recipe is designed to strike the perfect balance between flavor and safety. Straying from it can disrupt this balance and potentially expose your salsa to the risk of spoilage and foodborne illness.
The Role of Blanching and Roasting
Blanching and roasting, two optional yet influential techniques in the salsa-making process, contribute significantly to the transformation of your salsa's flavor, texture, and overall character. By understanding their roles, you can better appreciate the culinary science behind these methods and make well-informed choices about whether to incorporate them into your salsa preparation.
Prepping for Preserves: Get ready to embark on your preserving journey with our guide to prepping for preserves, ensuring you have the right tools and knowledge to capture the flavors of the season.
Blanching: Enhancing Texture and Purity
Peel Tomatoes: A primary objective of blanching is to facilitate the removal of tomato skins. This process entails briefly immersing tomatoes in boiling water, causing the skins to loosen and making them effortlessly peelable. The importance of this step cannot be overstated, as it ensures your salsa boasts a velvety, smooth consistency, devoid of the slightly chewy or papery texture that tomato skins can impart.
Texture Enhancement: Beyond skin removal, blanching has the added benefit of slightly softening the tomatoes. This softening not only aids in skin removal but also plays a pivotal role in shaping the overall texture of the salsa. Softened tomatoes are easier to manage when blending or chopping, allowing you to achieve your desired salsa consistency with greater precision and ease.
Roasting: Elevating Flavor Complexity
Enhanced Sweetness: Roasting peppers and onions, although optional, can profoundly influence your salsa's flavor profile. Roasting caramelizes the natural sugars in these ingredients, intensifying their inherent sweetness. This heightened sweetness introduces a delightful contrast to the inherent acidity of tomatoes and other components, resulting in a more multifaceted and balanced flavor.
Subtle Smokiness: Roasting introduces a subtle smoky dimension to your salsa. The exposure to high heat imparts a nuanced smokiness that can be exceptionally appealing. This subtle smokiness adds depth and sophistication to your salsa, elevating it beyond a mere condiment and transforming it into a complex culinary delight.
Personalization and Time Considerations
Ultimately, the decision to include these optional steps hinges on your personal preferences and time constraints. While blanching and roasting undoubtedly enhance the quality of your salsa, not everyone may favor the smoother texture and nuanced flavors they impart. Additionally, it's important to acknowledge that these steps do demand additional time and effort in the preparation process.
Understanding the Canning Process
The final phases of the canning process are paramount, particularly when it comes to sealing, lids, and rings, ensuring the safety and durability of your preserved hot salsa.
Water Bath Canning
Jars in the Canner: Once you've diligently filled your jars with the delectable hot salsa you've prepared, the next step involves placing them inside a specialized water bath canner. This generously sized pot is purpose-built for canning and should be filled with sufficient water to immerse the jars entirely. This pivotal step establishes the ideal conditions for heat penetration and the subsequent secure sealing of your jars.
Bringing to a Boil: Subsequently, as the jars sit submerged within the canner, you'll bring the water to a vigorous, rolling boil. The boiling process is pivotal to canning. It serves the dual purpose of heating the jar contents to a temperature that eradicates any potential harmful bacteria, while also creating a vacuum that aids in hermetically sealing the jars.
Timer and Processing Time: Adhering to the processing time specified in your recipe is of utmost importance. This specified duration is meticulously calculated to guarantee that the hot salsa reaches a temperature that renders it safe for extended storage. Deviating from this prescribed processing time could compromise the efficacy of sterilization, potentially leading to spoilage and unsafe salsa.
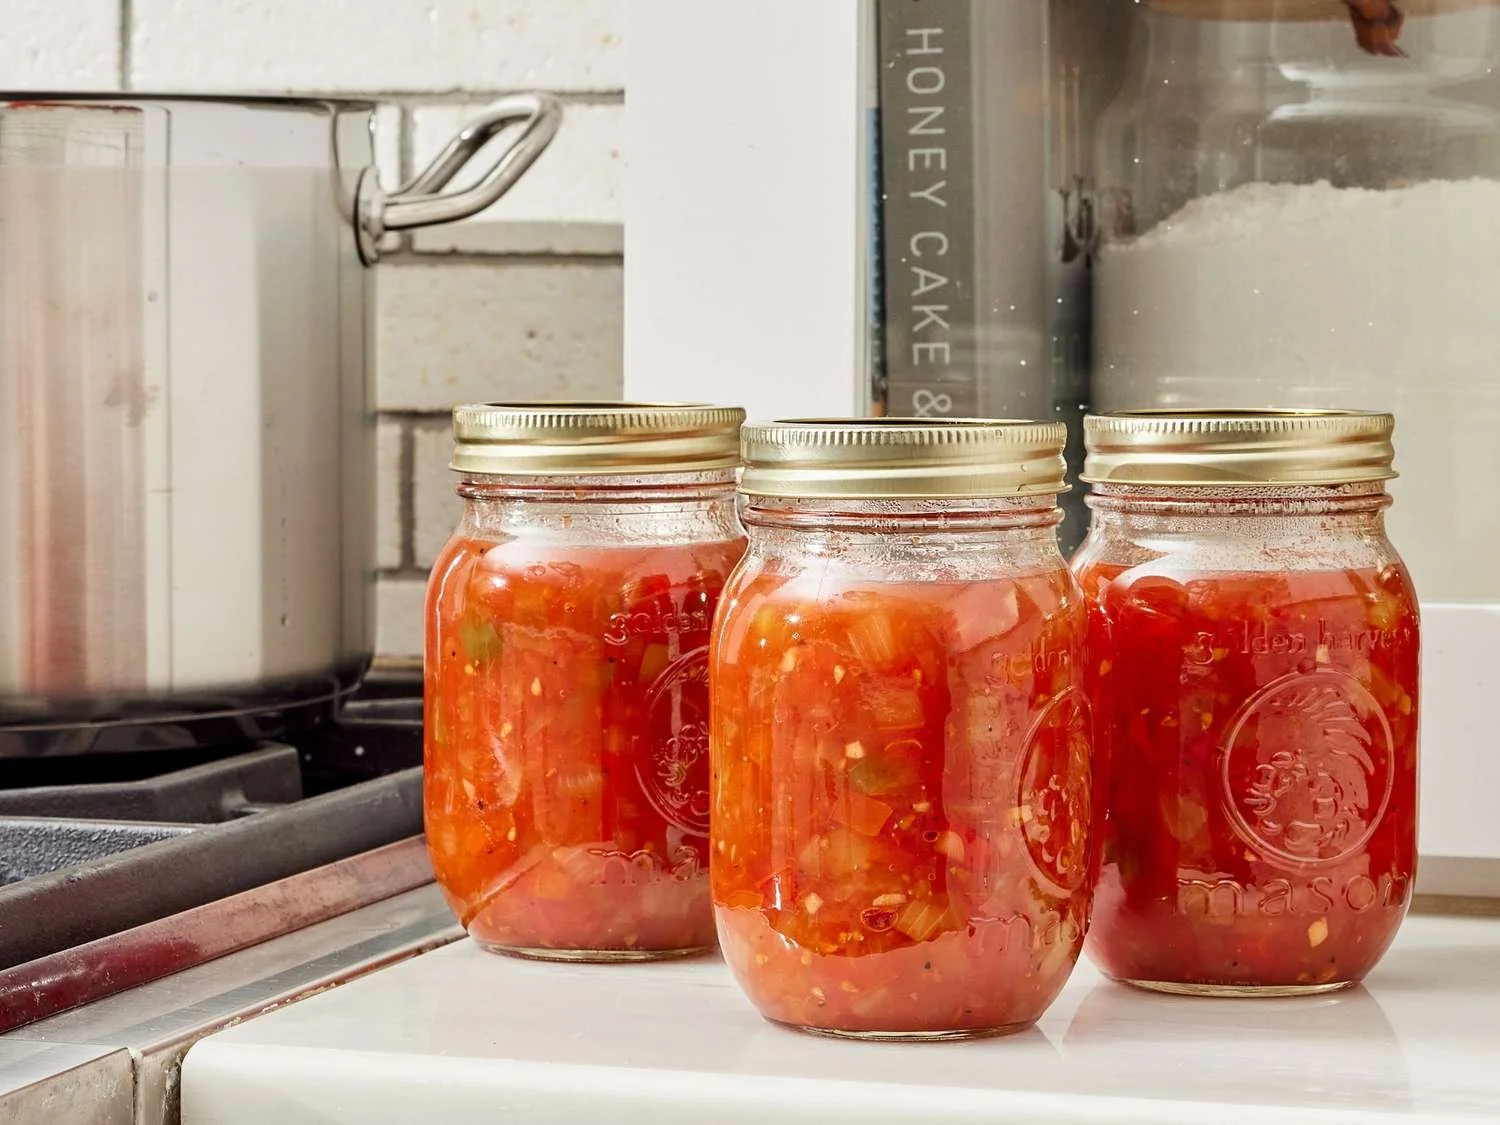
Seal Inspection and Storage
Jar Retrieval: Once the designated processing time has elapsed, employ a jar lifter to cautiously extract the jars from the canner. These jars will be exceptionally hot, necessitating careful handling.
Cooling and Seals: Place the hot jars onto a clean towel, allowing them to cool gradually. During this cooling phase, a crucial aspect of the canning process unfolds—the formation of a vacuum seal. As the contents within the jars contract during cooling, the lids are pulled downward, creating an airtight seal. Scrutinizing these seals is imperative to ensure the long-term safety of your hot salsa.
Validating Seals: Following the complete cooling of the jars, meticulously examine the lids. A securely sealed lid will appear concave, exhibiting no flex when pressed at its center. In cases where jars have not sealed appropriately, you have several options at your disposal. You can opt to reprocess them, repeating the same steps, or choose to refrigerate these jars for immediate consumption. Conversely, jars featuring a dependable vacuum seal can be stored in a cool, dark location, such as a pantry or cellar, allowing you to relish your hot salsa throughout the year.
Seals, Lids and Rings: Ensuring Safe Canning
To bring the canning process to its conclusion, the following steps are pivotal, ensuring the safety and longevity of your canned salsa:
Water Bath Canning: Carefully position your filled jars inside a water bath canner, ensuring they are fully submerged. Adding enough water to envelop the jars completely is essential. This phase creates the optimal environment for heat penetration and the eventual hermetic sealing of your jars.
Boiling the Water: Gradually heat the water within the canner to a vigorous, rolling boil. This boiling process is the cornerstone of effective canning. Its dual purpose is to elevate the temperature of the jar contents to levels that eradicate any lurking harmful bacteria, while concurrently triggering the formation of a vacuum seal that fortifies jar closure.
Timer and Processing Time: Complying meticulously with the processing time specified in your recipe is of paramount significance. This duration is thoughtfully calculated to guarantee that the hot salsa reaches temperatures conducive to its long-term preservation. Straying from this specified processing time could jeopardize the efficacy of the sterilization process, potentially leading to salsa spoilage and safety concerns.
Jar Removal: After the designated processing time has transpired, employ a jar lifter to gingerly retrieve the jars from the canner. Given that the jars will be exceptionally hot, meticulous care in handling is imperative.
Cooling and Seal Inspection: Position the hot jars onto a clean towel, allowing them to cool methodically. During this cooling phase, a critical aspect of the canning process unfolds—the formation of a vacuum seal. As the contents within the jars cool and contract, the lids are drawn down, creating an airtight seal. A thorough examination of these seals is necessary to ensure the long-term safety of your canned salsa.
Validating Seals: Once the jars have completely cooled, conduct a detailed inspection of the lids. A securely sealed lid will exhibit a concave appearance and will remain firmly fixed when pressed at its center. In cases where jars have not sealed appropriately, you have several options at your disposal. You can opt to reprocess them, repeating the same steps to ensure proper sealing, or decide to refrigerate these jars for immediate consumption.
Storage: For jars featuring dependable vacuum seals, storage in a cool, dark environment, such as a pantry or cellar, is advised. This will enable you to relish your meticulously canned hot salsa at your leisure throughout the year.
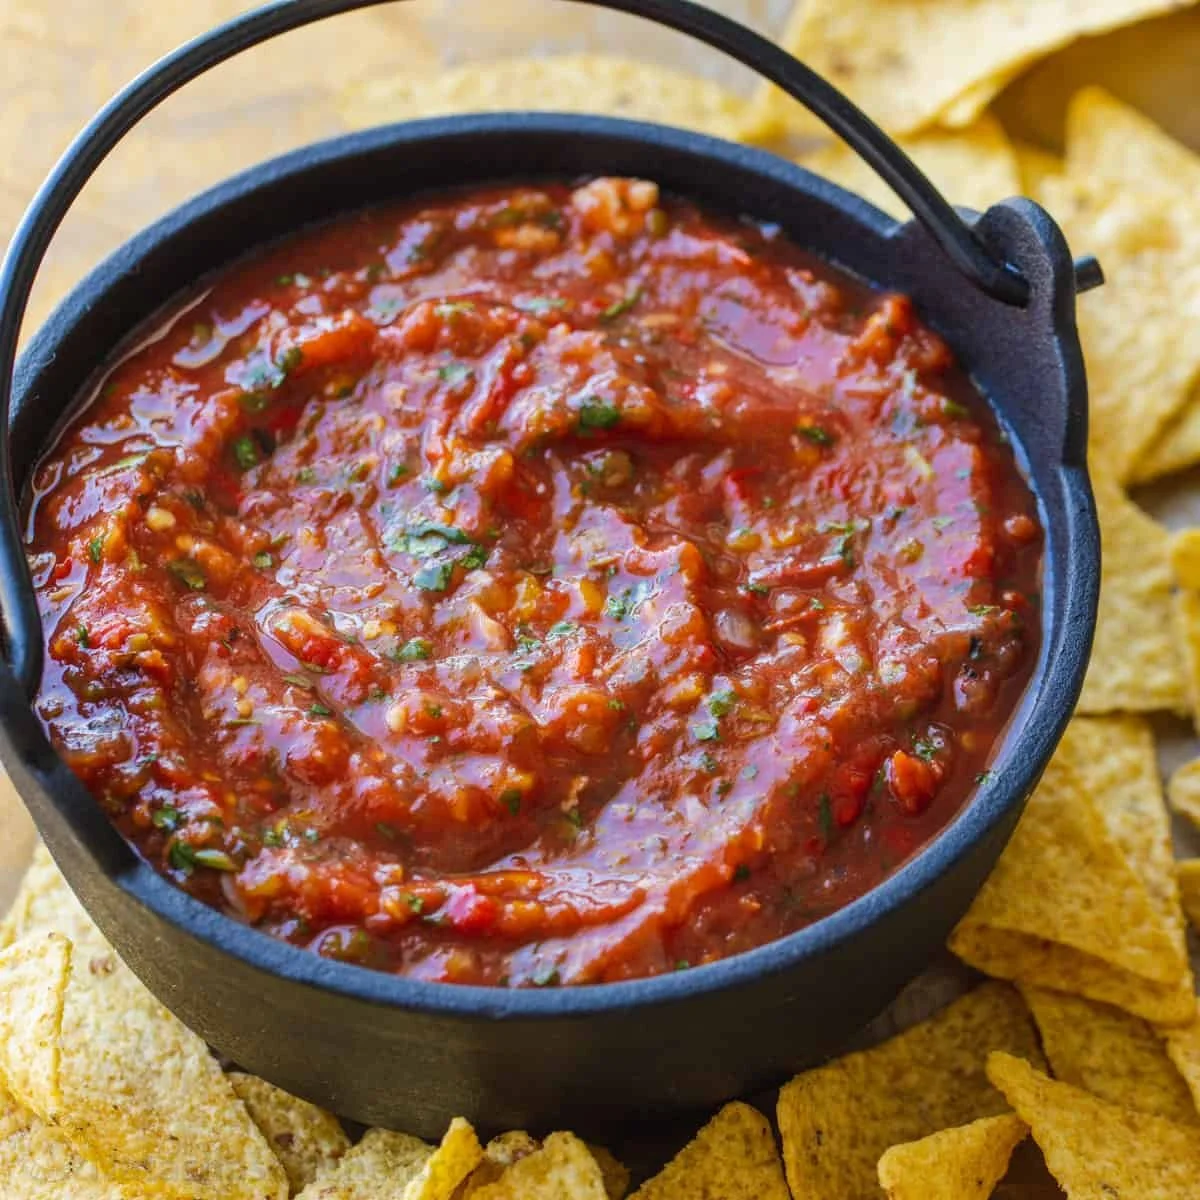
The Art of Making Salsa
Crafting the perfect salsa is a culinary art, and it begins with the careful selection of fresh, top-notch produce. Ripe, juicy tomatoes, such as Roma tomatoes, strike an ideal balance of sweetness and acidity. Pair them with red onions for a bold flavor base, and include a mix of peppers, from jalapeños to bell peppers, to cater to your preferred level of spice.

Canning Tomato Sauce: A Comprehensive Guide for Beginners: Explore the basics of canning tomato sauce with our beginner-friendly guide, offering step-by-step instructions to help you preserve the rich flavors of ripe tomatoes.
For a zestful profile, introduce fresh cilantro and a hint of lime juice. The spice cabinet also holds secrets to exceptional homemade salsa, with cumin and chili powder lending warmth and smokiness.
When it comes to chopping, finding the right balance between coarseness and finesse is key, ensuring the perfect salsa texture. So, sharpen your knives and join us in the art of making salsa, where flavor, spice, and texture harmonize to create a year-round delight.
Choosing the Right Produce
When creating a perfect canning salsa, selecting fresh and high-quality produce is essential. Start with ripe, juicy tomatoes like Roma tomatoes, as they have a great balance of acidity and sweetness. Be sure the tomatoes are not overripe, as they may result in mushy salsa. Onions also play a vital role in building the flavor base of the salsa; red onions are preferred for their bold taste and crunchy texture. Don't forget to include a variety of peppers such as jalapeno peppers, green bell peppers, and other hot peppers to suit your spice preferences. To achieve a fresh, zesty profile, add some fresh cilantro and a bit of fresh lime juice.
Understanding Spices for Salsa
To make outstanding homemade salsa, it's crucial to understand which spices work best. Cumin is the classic choice for salsa, enhancing the flavor and giving it a touch of warmth. Also consider adding chili powder to give your salsa a smoky and spicy note. When seasoning your salsa, remember that less is sometimes more, as too many spices can overpower the natural flavors of your ingredients. Start with small amounts and adjust according to taste.
The Art of Chopping for Salsa
When making salsa, the chopping process greatly influences the texture and consistency of the final product. It's essential to find a balance between coarsely chopping vegetables and mincing them. For tomatoes, a gentle dice will retain their natural juiciness. Meanwhile, onions and garlic should be finely chopped to evenly disperse their flavors throughout the salsa.
Tips for chopping
Use a sharp knife for precise cuts and to make the process easier.
De-seed jalapeno peppers to control the heat level in your salsa; leaving some seeds in will increase spiciness.
When preparing fresh cilantro, remove the thick stems and only chop the leaves for a more pleasant texture.
Once your produce is selected and prepared, combine the ingredients in a large bowl, adjusting the spices to achieve your desired taste. Then, get ready to preserve and enjoy your homemade canning salsa all year round!
Salsa Types
There are several types of salsa, including smooth, chunky, and spicy varieties. The type of tomato you choose can also significantly influence the outcome of your recipe.
The Perfect Smooth Homemade Salsa Recipe
To create the perfect smooth salsa, we recommend using a blend of tomato sauce, tomato paste (how long does tomato paste last?) and paste tomatoes. For a delicious and creamy texture, use a food processor or blender to thoroughly mix the ingredients until smooth. Combining these elements provides a consistent base that is perfect for dipping or topping your favorite dishes. Using ripe roma tomatoes is an excellent choice, as they are firm and have rich flavors.
Making Chunky Salsa
Chunky salsa is a popular choice among salsa lovers, as it offers more texture and substance to your dish. To make chunky salsa, start with fresh, ripe tomatoes and dice them into small, uniform pieces. Then, combine the chopped tomatoes with other ingredients, such as onions, peppers, and spices. Make sure to mix gently, so the ingredients retain their firmness and shape, resulting in a satisfying, chunky texture.
Spicy Salsa and Adjusting Heat
Adjusting the heat level in your salsa is essential for customizing it to your taste. To create a spicy salsa, include hot peppers like jalapeños or habaneros in your recipe. For a milder option, stick to bell peppers, which add a pleasant crunch without the heat. To increase or decrease the level of heat, simply adjust the number of peppers you use, and remember to taste as you go to ensure your salsa hits the perfect level of spiciness.
Tomato Type's Influence on Salsa
The type of tomato you choose can significantly impact the flavor and consistency of your salsa. For example, roma tomatoes offer a robust, meaty texture that works well in both smooth and chunky salsas. On the other hand, using paste tomatoes provides a thicker, more concentrated taste that is ideal for creating a smooth salsa with depth. Be sure to experiment with a variety of tomatoes to find the perfect balance for your salsa recipe.
Preserving Produce in the Fall: Make the most of fall harvests with our guide to preserving produce, offering tips and techniques to capture the autumn bounty and enjoy it throughout the year.
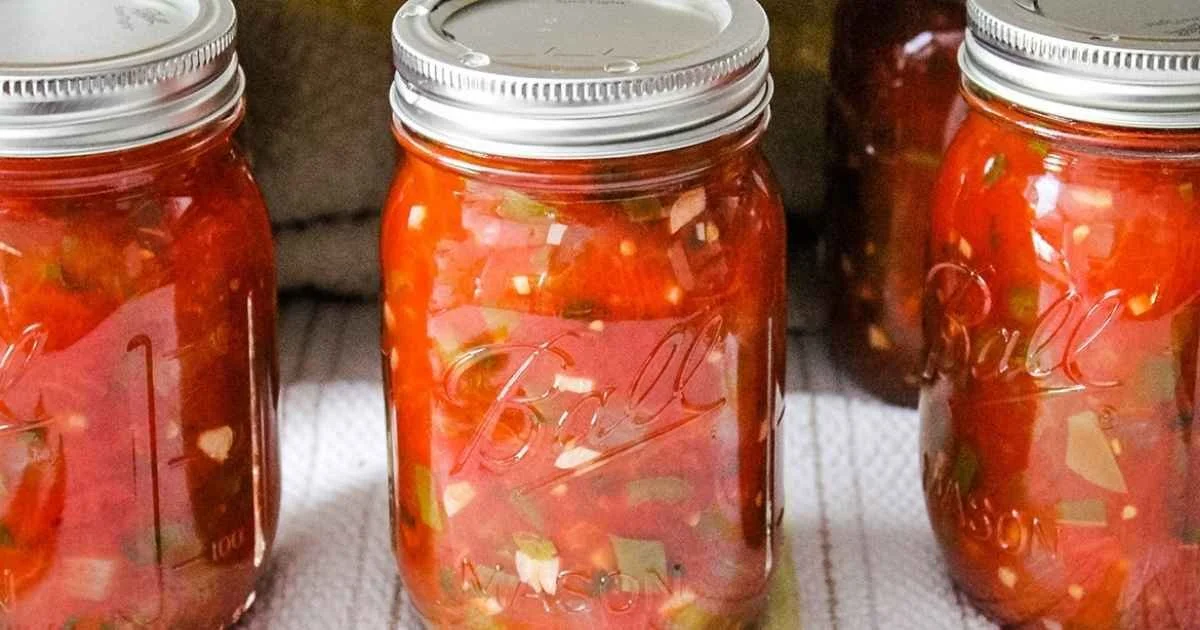
Importance of Proper Storage
When it comes to canning salsa, proper storage is essential to ensure the safety and quality of the final product. In this section, we will discuss the necessary steps for storing canned salsa and the importance of understanding its shelf life.
Sterilize the Jars
Before beginning the canning process, it is crucial to sterilize the jars and lids. This can be done by boiling them for 10 minutes, then allowing them to dry on a clean towel to ensure they are free from bacteria and other contaminants.
Fill Jars with Salsa
After the jars are sterilized, fill them with the salsa mixture, leaving a 1/2-inch headspace to allow for expansion during processing.
Seal the Jars
Wipe the rims of the jars with a damp cloth to remove any food residue, ensuring a tight seal. Place the lids on the jars, and secure the bands until they are fingertip tight.
Process the Jars
Place the jars in a boiling water bath for the recommended processing time, based on your specific salsa recipe and jar size. This will vary, so follow what your canning homemade salsa recipe calls for to ensure safe processing times and methods.
Cool and Store
Once the jars are processed, remove them from the water bath and let them cool on a towel for 12 to 24 hours. Check the lids for a proper seal by pressing on the center. If the lid does not move, it is sealed correctly. Store the jars in a cool, dark pantry or other suitable storage space, with the bands removed to prevent corrosion.
Understanding Shelf Life
Properly canned salsa can last up to one year in ideal storage conditions. However, it is essential to check for signs of spoilage, such as bulging lids or off-odors, before consuming the salsa. Remember that any changes in texture, color, or flavor can indicate that the salsa may not be safe to eat.
Following these steps carefully will help ensure that your canned salsa is stored safely and effectively, and it will be ready to enjoy at any time throughout the year.
Frequently Asked Questions
What is the best way to water bath can salsa?
To water bath can salsa, first prepare your salsa recipe, gather all necessary equipment, and clean your jars. Fill a large pot with water, and bring it to a boil. Put the jars in the pot, ensuring that they are completely submerged. Boil the jars for the time indicated in your recipe, then carefully remove them from the pot using a jar lifter. Allow the jars to cool on a towel or a cooling rack. Once completely cooled, check the seals and then store them in a cool, dark place.
How long does canned salsa last?
Canned salsa can last for up to a year when stored in a cool, dark place. After opening, it's best to store it in the refrigerator and consume within a week or two for the best flavor and freshness.
Can I use canned tomatoes for making salsa?
Yes, you can use canned tomatoes (how long does canned tomatoes last?) for making salsa. In fact, using canned tomatoes provides a consistent flavor and is convenient when fresh tomatoes are not in season. Just be sure to drain the excess liquid from the canned tomatoes so that your salsa doesn't become too watery.
Is it necessary to cook salsa before canning?
Cooking salsa before canning helps ensure that the final product is safe to consume and that the flavors are well combined. It also softens the ingredients, making the salsa easier to pack into the jars. You can find a detailed cooking and canning process in this tested salsa canning recipe.
What is a unique salsa recipe for canning?
A unique salsa recipe for canning could include nontraditional ingredients such as fruits or a variety of peppers for added spice. Experiment with different types of tomatoes or even tomatillos for a twist on traditional salsa. Get inspired by this delicious Roasted Tomatillo and Pineapple Salsa recipe to create your own unique variation.
Do I need to add citric acid or vinegar for canning salsa?
Yes, the addition of citric acid (how long does citric acid last?) or vinegar is necessary for canning salsa, as it ensures the salsa has a safe acidity level for preservation. You can refer to the National Center for Home Food Preservation and follow a tested recipe for the proper amount of acid that needs to be added.
Canning Meat: A Comprehensive Guide for Preservation: Dive into the art of preserving meat with our comprehensive guide to canning, providing essential tips and techniques to ensure your meats stay fresh and flavorful.
