
How to Can Milk at Home

The popularity of how to can milk is an increasingly widespread method for preserving this essential staple, both for its convenience and the long-term storage capabilities. With the proper technique, one can preserve raw or store-bought milk, be it cow's milk or goat's milk, and safely preserve it for future use without the need for refrigeration. This process extends the shelf life of milk, and also ensures a steady supply when fresh milk is not readily available.
So, how to can milk? A pressure canner is required to successfully demonstrate how to can milk at home. When milk is pressure canned it is sterilized and properly sealed, eliminating any potential for spoilage. Participation in how to can milk at home originates from a desire for self-sufficiency and sustainability, but it is also an opportunity to explore a traditional food preservation method in a modern context.
This article provides guidance on the steps and precautions to take when canning fresh milk at home, focusing on cleanliness, proper storage, and ensuring safety throughout the process. By the end, readers will be equipped with the knowledge to embark on their own how to can milk journey, promoting a healthier and more sustainable lifestyle.
Understanding Milk Canning at Home
Milk canning at home is a method of preserving raw milk for extended periods without refrigeration. But how to can milk in the home environment? By using a pressure canner fresh milk is processed and sealed in a sterile environment. The technique can be applied to various types of milk, including raw milk or store-bought cow's milk or goat's milk.
To ensure the safety of canned milk, it's essential to follow proper canning procedures and guidelines. Using a pressure canner is the recommended method for canning milk since it can effectively process the low-acid content found in milk. This helps in reducing the risk of harmful bacteria, such as botulism, which can't be detected by smell or taste.
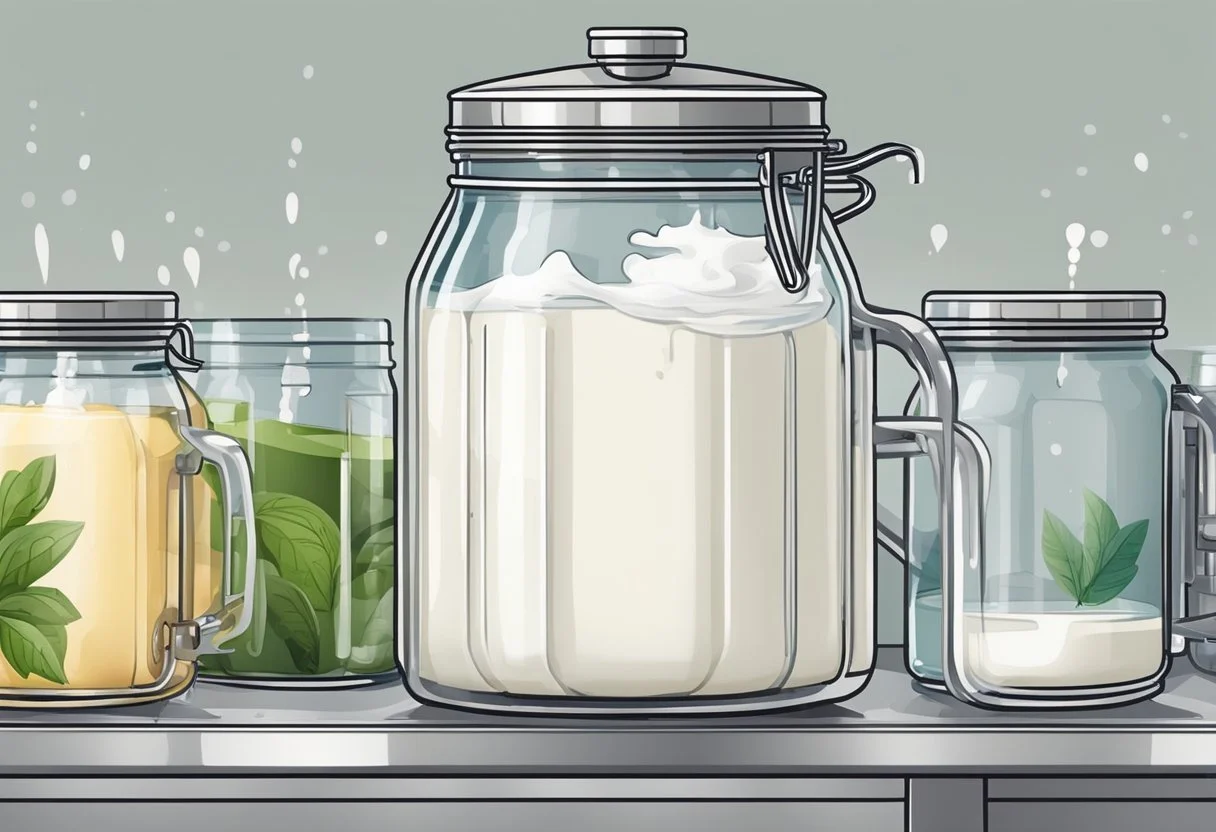
Before getting started, gather necessary supplies and equipment, such as:
Pressure canner
Jars with lids and bands
Jar lifter
Clean cloth or paper towels
Milk
Here are some key steps in the milk canning process:
Preparation: Sterilize the jars, lids, and bands in a pot of boiling water for 10 minutes. Remove them carefully using a jar lifter and place them on a clean surface to air dry. Simultaneously, heat the milk in a saucepan over medium-low heat until it reaches 185°F (85°C).
Filling the jars: Pour the heated milk into the sterilized jars, leaving 1-inch headspace, which is the space between the milk and the rim of the jar. Wipe the rim of the jar with a clean cloth or paper towel to remove any spills or milk residue.
Sealing: Place the lids and bands on the jars, ensuring they are tight but not overly tightened. This allows for proper sealing during the canning process.
Pressure canned milk: Place the filled jars in the pressure canner, following the manufacturer's instructions for water level and canning process. Process the jars for the recommended time, typically 10-15 minutes. Allow the pressure canner cool completely and release the pressure before removing the jars.
Cooling and storing: Let the jars cool on a towel or wire rack for 12-24 hours. Once cooled, check the lids for a proper seal by pressing the center of the lid. If it doesn't move, the jar is sealed correctly. Store canned milk in a dark and cool place for up to a year.
It's worth noting that although many recommend canning milk but it is still considered a "rebel canning" approach and might not be endorsed by all food safety experts. Therefore, it's crucial to stay informed and use your judgment when deciding whether or not to can milk at home. Following good hygiene and canning practices can reduce the associated risks and help you enjoy a long-lasting, tasty milk supply for various applications in your recipes.
Preparation and Precautions

Before learning and applying a technique to can milk at home, it's essential to understand the necessary preparations and precautions to ensure the process is done safely and correctly.
Choosing a Canning Method
There are two main methods for canning low-acid foods like milk: water bath canning and canning under pressure. Water bath canning is typically used for preserving high-acid foods like fruits, while pressure canning is preferable for low-acid foods. Milk, being a low-acid food, should be canned using a pressure canner for safety reasons and to prevent bacterial growth, including botulism.
The Importance of Sterilization
Sterilizing the canning jars, lids, and bands is an essential step in the canning process. You can sterilize the jars and bands in boiling water, while keeping the lids in hot, but not boiling water to prevent the seal from melting. Alternatively, you can also wash the hot jars, lids, and bands in a dishwasher if your dishwasher has a sanitize cycle.
Choosing Your Milk
When pressure canning milk, you can use raw or store-bought milk, cow milk, or goat milk. The key is to use fresh dairy products to ensure the best taste and quality. Make sure to always check the milk for any signs of spoilage or contamination before canning.
Preventing Contamination
To minimize the risk of contamination and bacterial growth, follow these precautions:
Always use clean, sterilized jars and lids.
Make sure the rims of the jars are clean and free of any debris before placing the lids and bands.
After filling the jars, wipe the rims with a damp, clean kitchen towel to remove any milk residue.
Do not tighten the bands too tightly, as air needs to escape during the canning process.
Once the jars are processed in the pressure canner, let them cool for 12 to 24 hours on a cloth towel before checking the seals. Properly sealed lids should not flex if pressed in the center.
By carefully selecting canning methods, maintaining clean conditions, and taking necessary precautions, you can safely and successfully can milk at home.
The Canning Process
The Canning Recipes
There are several canning recipes but for home canned milk but pressure canning is a popular one, as it ensures both safety and quality. To can milk using this method, follow these instructions:
Preparation: Start by sterilizing the quart jars and lids that you will use for canning. Heat them in boiling water for 10 minutes, then carefully remove them using tongs and place them on a clean towel to dry.
Filling the jars: Pour the milk into the jars, leaving about 1 inch of headspace at the top. This will allow for expansion during the canning process.
Sealing the jars: Wipe the rims of the jars with a clean cloth to remove any milk residue, then place the lids on top and screw the bands until they are fingertip tight.
Processing: Place the jars on the rack inside the pressure canner, ensuring that they are not touching each other or the sides of the canner. Add water to the canner, following the manufacturer's instructions for the recommended amount of water. Close the canner and bring it to 10 pounds of pressure. Process the jars for 10 minutes if using pint-sized jars or 15 minutes if using quart-sized jars.
Cooling: After the processing time is complete, turn off the heat and allow the pressure canner to cool and depressurize naturally. Once the pressure has dropped to zero, remove the jars using a jar lifter and place them on a towel to cool for 24 hours.
The Water Bath Canning Method
The water bath canning method is another option for conserving milk, though it is less commonly used due to concerns about safety and the potential if the milk spoils. Instructions for water bath canning milk are as follows:
Preparation: Sterilize the jars and lids as noted in the pressure canning method above.
Filling the jars: Fill the jars with milk, leaving 1 inch of headspace at the top.
Sealing the jars: Wipe the rims, place the lids, and screw the bands as mentioned in the pressure canning method.
Processing: Place the jars on a rack inside a water bath canner. Fill the canner with hot water until the jars are covered by at least 1 inch. Heat the water to a rolling boil, then process the jars for 10 minutes if using pint-sized jars or 15 minutes if using quart-sized jars.
Cooling: After the processing time is complete, remove the jars using a jar lifter and allow them to cool completely for 24 hours on a towel.
Sealing and Storing
Once the jars have cooled completely, check the seals by pressing down on the center of each lid. If the lid does not move, the jar is properly sealed. Any glass jars that have not sealed properly should be refrigerated and used within a few days.
Store sealed jars of stable milk in a cool, dry, and dark place, such as a pantry or cupboard. Ideally, the temperature should be between 50-70°F for optimal storage. Although canned milk can last for several months, it is generally recommended to consume it within one year for the best quality and taste.
Emergency Preparedness and Milk Canning
In a world where emergencies and natural disasters can strike at any time, being a prepper means ensuring self-sufficiency in terms of food and other essential resources. Milk, a highly nutritious and versatile product, is often overlooked in emergency food supplies. Conserving milk by canning makes it shelf-stable without the need for electricity to power refrigerators.
The process of canning milk involves sterilizing containers, heating the milk, and sealing it in jars to create an airtight environment, thus preventing spoilage caused by bacteria and other microbes. This section focuses on what you need to know to can milk effectively and safely for emergency food supplies.
Tools and supplies: Prepare the necessary tools and equipment for canning milk. This comprises of a pressure canner, jars, lids, bands, canning funnel, ladle, and clean paper towels. Strictly adhere to the manufacturer's instructions regarding the use and maintenance of these tools.
Temperature management: When canning milk, temperature management is crucial to prevent jar breakage and ensure safe canning. Pour milk warmed into hot jars can cause cracks due to thermal expansion. First, heat the milk gently and allow the jars to cool. Then, pour the milk into the jars, leaving about a 1-inch headspace.
Sealing and processing: After filling the jars with milk, clean the rims using a paper towel. Place a lid on each jar, followed by a band, and tighten them finger-tight. Load the jars into the pressure canner, vent steam for 10 minutes according to the canner's instructions, and begin the pressurized canning process.
Storage: Allow the jars rest and when cooled completely store the canned milk away from direct sunlight, at a cool and dry place. Properly canned milk can last up to several months, if not years, without refrigeration. Check for signs of spoilage before consumption, such as foul smell, mold, or the lid bulging.
Home canning milk is a practical skill for preppers and those seeking to build an emergency food stash. By mastering this process, you can ensure a reliable source of nutrition even when electricity is scarce, and refrigeration is not an option.
Benefits of Canning Milk
Canning milk at home offers several advantages for both homesteaders and individuals who enjoy preserving dairy products. One primary benefit is extended shelf life. By canning milk, its longevity is significantly increased, allowing for long-term storage without refrigeration. This can be particularly useful in situations where power outages or limited access to refrigeration are common concerns.
Moreover, preserving milk through canning helps to reduce food waste. Often, store-bought milk and other dairy products tend to spoil before they can be consumed entirely. Canning provides an effective solution to this problem by allowing users to enjoy dairy products at their leisure without the risk of spoilage.
Another advantage lies in maintaining the nutritional value of canned milk. Canned milk retains most of its vital nutrients, including protein, fat, and milk solids. This ensures that even after an extended period, consumers can still benefit from the nutritional content of milk-based products.
Canning milk is also a versatile method of preserving various types of dairy products, enabling people to store different kinds of milk, such as cow milk and goat milk. In addition, canned milk can serve as a valuable addition to various recipes, simplifying meal planning and preparation.
In summary, canning milk at home provides an array of benefits, such as:
Extending the shelf life of dairy products
Reducing food waste
Retaining nutritional value
Versatility in preserving various types of milk
These advantages make canning milk a valuable practice for those who seek long-term storage solutions for dairy products while maintaining their nutritional content and usability in recipes.
Other Ways of Preserving Milk
There are several ways to preserve milk at home beyond just canning. This section will explore methods such as making cheese and yogurt, creating evaporated and powdered milk, (how long does powdered milk last?) and freezing milk. These methods are helpful alternatives when looking to extend the shelf-life of milk and its derivatives.
Making Cheese and Yogurt
Cheese and yogurt are popular dairy products made by fermenting milk. They not only provide a tasty way to conserve milk but also offer various nutritional benefits. Cheese-making typically involves adding a starter culture and rennet to milk to create the desired textures and flavors. Once the milk has curdled, it is strained, molded, and aged according to the specific type of cheese being made.
Yogurt, on the other hand, is created by heating and cooling milk before adding a yogurt starter culture. The milk is then incubated at a consistent temperature for several hours to achieve a thick and creamy consistency. Both cheese and yogurt can be stored in the refrigerator for an extended period, making them excellent options for preserving milk.
Making Evaporated and Powdered Milk
Evaporated milk (how long does evaporated milk last?) is a concentrated form of milk that has had about 60% of its water content removed through a heat process. To make evaporated milk at home:
Pour the milk into a saucepan.
Turn the heat to medium-low and simmer without boiling.
Stir frequently for about 25 minutes.
Let the evaporated milk cool, then strain it into a container and refrigerate.
Powdered milk, also known as dried milk, is created by further dehydrating evaporated milk through a drying process. This method provides a shelf-stable milk product, requiring only water to reconstitute it. You can use a food dehydrator or an oven to dry pre-made evaporated milk. Spread the evaporated milk thinly on a parchment-lined baking sheet and dry at a low temperature until completely dry. Powder the dried milk using a blender or food processor, and store it in an airtight container.
Freezing Milk
Freezing is a simple and effective method for preserving milk without altering its taste or nutritional value. To freeze milk, follow these steps:
Pour the milk into a freezer-safe container, leaving some space for expansion.
Seal the container, label it with the date, and place it in the freezer.
When needed, thaw the frozen milk in the refrigerator.
Keep in mind that the texture of the milk may change slightly after freezing, but it remains suitable for cooking and baking purposes. Frozen milk can last up to three months if stored properly.
