
Preserving Meat: A Carnivore’s Guide to Jerky & Curing Techniques and Tips

Preserving meat without refrigeration is a skill that has been essential for centuries and remains valuable for anyone following a carnivore diet or living off-grid. Traditional methods like curing and making jerky allow meat to be stored safely for long periods by removing moisture and preventing spoilage. Salting, drying, and smoking techniques also concentrate flavor and maintain nutritional value, making them trusted tools for both survivalists and home cooks.
Understanding these preservation techniques ensures a steady supply of nutrient-rich food, even when modern conveniences aren’t available. With the right approach, anyone can prepare and store high-quality meat that can last for months without a freezer or refrigerator.
The Fundamentals of Meat Preservation
Preserving meat plays a crucial role in maintaining food quality and safety, especially for those following a protein-rich, carnivore diet. Effective preservation prevents spoilage, extends shelf life, and ensures a ready supply of nutrient-dense food without relying on constant refrigeration.
Why Preserve Meat?
Meat preservation allows for safer long-term storage by slowing or stopping bacterial growth, which is essential for food security. This is particularly important in environments where fresh protein sources may not be readily available or when refrigeration is limited.
Proper preservation methods help maintain the nutrition of meat, especially its protein content, vitamins, and minerals. Techniques such as curing or dehydrating minimize nutrient losses compared to some modern storage practices.
For those on a carnivore diet, keeping meat safe for longer means access to high-quality food with minimal risk of illness. It also helps reduce waste from spoilage and allows for efficient use of bulk purchases or harvests.
Overview of Preservation Methods
Several traditional and modern methods are used to preserve meat. The most common include:
Salting and Curing: Removes moisture and creates an environment hostile to bacteria.
Smoking: Adds flavor and further dehydrates the meat.
Drying/Jerky-Making: Eliminates most water, stopping spoilage organisms.
Canning: Seals meat in sterile jars, preventing exposure to air and microbes.
Preserving in Fat or Ash: Traditional methods that limit oxygen exposure.
Each method impacts flavor, texture, and shelf life differently. Choosing the right approach depends on storage needs, personal preference, and available resources. These practices make it possible to enjoy protein-rich foods safely outside of refrigeration.
Jerky: The Art of Drying Meat
Drying meat for jerky is both a preservation method and a way to concentrate flavor. The choice of meat, the way it’s dried, and how it’s stored all play crucial roles in its safety, texture, and taste.
Types of Meat for Jerky
Jerky can be made from a range of meats. Beef remains the most popular due to its flavor, protein content, and consistency when dried.
Cuts like eye of round, flank, or sirloin are preferred for their leanness and minimal connective tissue. Poultry meats, mainly turkey and chicken breast, offer a milder alternative but require extra care due to lower fat content and the need for thorough cooking to eliminate pathogens.
Pork is another option but is less common. It should be trimmed of all visible fat and dried until completely firm for safety. Fish such as salmon, trout, or tuna can be used, especially for those seeking a different texture and taste. Choosing wild-caught or fresh fish ensures quality and reduces the risk of spoilage.
Meat Type Recommended Cut Notes Beef Eye of round, Sirloin Most common, lean cuts best Poultry Turkey/Chicken breast Cook fully for safety Pork Loin, Tenderloin Trim all fat, dry until firm Fish Salmon, Trout, Tuna Use fresh/wild-caught fish
Traditional and Modern Drying Techniques
Classic jerky involves sun drying or smoking. Native Americans and early settlers often used fires and open air, sometimes mixing dried meat with fat for sustained nutrition.
Modern techniques favor dehydrators and ovens. Dehydrators maintain precise temperatures (usually around 140°F or 60°C), yielding consistent results and better food safety. Ovens can dry jerky but require careful monitoring to avoid overcooking or uneven drying. Smokers are also popular for adding flavor while slowly removing moisture.
Before drying, meat should be sliced thinly and marinated if flavoring is desired. Always heat poultry and pork to at least 165°F (74°C) before drying to reduce the risk of bacteria.
Method Temperature Pros Dehydrator 140°F Even drying, safer process Oven 140-170°F Readily available Smoker 140-160°F Adds flavor Sun/air drying Variable Traditional, less control
Safe Storage and Shelf Life
Once dried, jerky must be handled properly to prevent spoilage. Store jerky in airtight containers or vacuum-sealed bags to limit moisture and oxygen exposure.
For added safety, refrigerate or freeze jerky, especially with homemade versions or if using poultry, pork, or fish. Commercial beef jerky can last several months at room temperature, but homemade jerky is best consumed within 1-2 weeks if kept unrefrigerated, or up to several months when frozen.
Signs of unsafe jerky include mold, off-odors, or a sticky texture. Label batches with the date made and inspect for any changes before eating. Always discard any product if there is uncertainty about its safety.
Curing Meat: Wet and Dry Methods
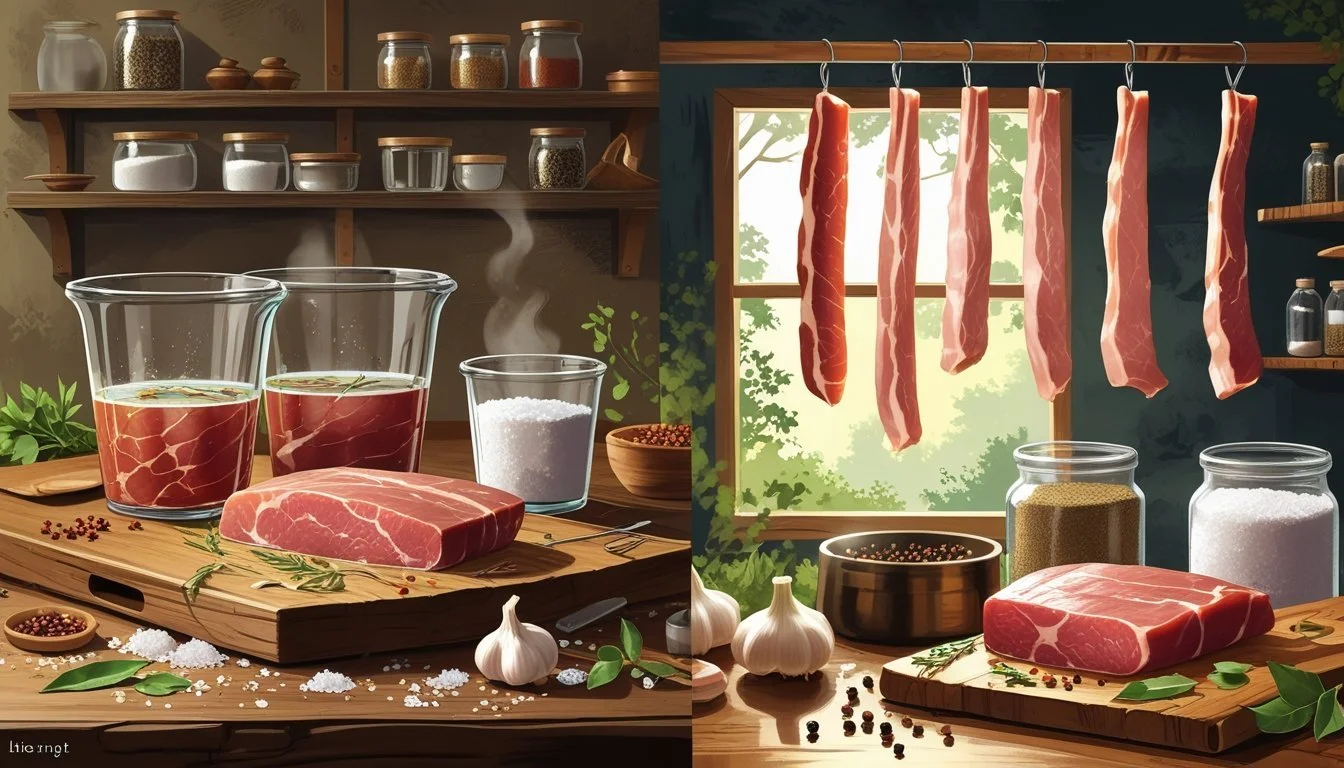
Curing meat helps extend its shelf life, enhance flavor, and ensure safety. The two most common methods—wet curing and dry curing—differ in their processes, ingredients, and ideal uses.
Wet Curing Techniques
Wet curing, also known as brining, involves submerging meat in a solution of salt and water. Common curing agents like nitrites, sugar, and spices can be added to the brine. The brine evenly penetrates the meat, helping it retain moisture and flavor.
This technique is frequently used for ham, bacon, and corned beef. The meat should be fully submerged and refrigerated throughout the process to prevent spoilage. Typical curing times range from a few days to several weeks, depending on thickness and desired saltiness.
Advantages of Wet Curing:
More uniform seasoning
Increased moisture in finished product
Can infuse a variety of flavors with added herbs or spices
After curing, meats often require cooking or smoking for further preservation and improved taste.
Dry Curing Approaches
Dry curing meat means rubbing salt directly onto its surface. Salt draws moisture out, creating conditions that inhibit bacterial growth. Sugar, spices, and sometimes curing salts may be added as part of the rub.
This method is traditional for products like prosciutto, pancetta, and some types of jerky. The meat is placed in a cool, controlled environment to dry over days or weeks. Thin cuts cure and dry faster, while larger cuts need more time to ensure safety.
Benefits of Dry Curing:
Intensified, concentrated flavors
Longer shelf-life without refrigeration if fully dried
Well-suited for firmer, sliceable cured meats
Careful monitoring of temperature and humidity is essential. Proper dry curing ensures products are safe and shelf-stable.
Smoking Meat for Preservation and Flavor
Smoking meat is a time-tested way to both preserve and enhance the taste of pork, beef, and fish. Different methods, such as cold smoking and hot smoking, play crucial roles in shelf life, texture, and flavor intensity.
Cold Smoking vs. Hot Smoking
Cold smoking involves exposing meat to smoke at lower temperatures, typically between 68–86°F (20–30°C). This method infuses rich smoky flavors without fully cooking the meat. It’s commonly used for products like smoked salmon, bacon, and some traditional hams.
Cold smoking requires meat to be properly cured with salt beforehand. This lowers moisture and helps protect against bacteria. However, because the meat is not cooked, strict attention to hygiene and curing steps is critical for safety.
Hot smoking uses higher temperatures, usually between 165–250°F (74–121°C). This process both cooks and smokes the meat at the same time. Hot smoked items, such as smoked brisket or pork shoulder, are ready to eat immediately after preparation.
Compared to cold smoking, hot smoking offers a safer preservation method and is less sensitive to environmental contamination. The flavor tends to be deeper and more robust.
Smoking Method Temp Range Pros Suitable Meats Cold Smoking 68–86°F Unique flavor, preserves Fish, bacon, ham Hot Smoking 165–250°F Cooks & flavors, safer Pork, beef, poultry, fish
Choosing the Right Meats for Smoking
Pork, beef, and fish all respond well to smoking, but selecting the best cuts and species matters for texture and taste.
Pork such as belly (for bacon), shoulder, and ribs are well suited for both hot and cold smoking. Balanced fat content helps these cuts absorb smoke flavor evenly.
Beef options like brisket, short ribs, and round are preferred for their muscle structure, which stays tender when cooked low and slow. Lean cuts can become dry during smoking, so marinating or curing first helps.
Fish, especially salmon, trout, and mackerel, are ideal for cold smoking due to their natural oils and texture. Freshness is crucial for safety and quality. Salt-curing before smoking is essential to prevent spoilage and maintain food safety.
Cutting meat to uniform thickness and removing excess surface fat leads to more even smoking and better texture in the final product.
Salting and Brining: Ancient Methods Revived
Salting and brining have roots that extend back thousands of years, developed out of necessity before refrigeration. These traditional techniques remain effective for preventing spoilage while also adding distinctive flavors and textures to preserved meats.
Basic Principles of Salt Preservation
Salt both draws out moisture and prevents the growth of bacteria, making it one of the most reliable forms of meat preservation throughout history. When salt is applied directly to meat, it creates a hostile environment for microbes by dehydrating the tissue and raising osmotic pressure.
The two primary methods include dry salting, where coarse salt is packed directly onto cuts, and salt curing, where salt is combined with nitrates or nitrites for added protection. Early civilizations, from Egyptians to Romans, regularly used these approaches to store meat for longer periods, especially through harsh winters or during travel.
Key benefits of salt preservation include increased shelf life, a firm texture, and a concentrated, robust flavor. Salt also preserves the natural red color of some cuts and assists in forming the unique rind seen in aged meats. The fundamental process remains largely unchanged today, serving as the foundation for cured classics like prosciutto and pancetta.
Brining for Safety and Taste
Brining combines water, salt, and sometimes sugar, spices, or curing salts to immerse cuts of meat in a flavorful solution. The process starts with dissolving salt—often 1 cup per gallon of water—sometimes with additions like brown sugar or pink curing salt for improved taste and safety.
A basic brine for curing typically includes:
Ingredient Amount per Gallon of Water Pickling Salt 1 cup Brown Sugar 1/2 cup Sodium Nitrate 1 tbsp (Prague Powder #1) Baking Soda 1 tsp Optional Spices To taste
Proper brining ensures the salt and flavorings reach every part of the meat, reducing the risk of spoilage and enhancing the eating experience. Submersion time varies by thickness and type of meat—from a few hours to several days. Brining not only makes meat safer but also infuses it with subtle flavors, offering both preservation and culinary appeal.
Making and Preserving Bacon at Home
Homemade bacon delivers richer taste control and allows for specific ingredient choices. Producing bacon safely involves choosing the correct pork cut followed by proper curing and smoking steps that preserve both texture and flavor.
Selecting the Right Cut
The ideal cut for bacon is pork belly due to its balance of fat and meat. Pork belly offers an even layer of fat that results in traditional streaky bacon with tender texture. For those desiring leaner bacon, pork loin can also be used, though it produces what is known as back bacon.
A quality pork belly should be firm with a good ratio of fat to muscle. Aim for slabs that are at least 1 inch thick. Freshness is important—inspect for a clean, mild scent and a pinkish color. Avoid cuts with excessive gristle or signs of spoilage.
Curing and Smoking Homemade Bacon
Curing bacon requires salt, sometimes sugar, and often a curing salt containing nitrite to inhibit bacteria and preserve color. A dry cure involves rubbing the pork belly with these ingredients and refrigerating it for about 5–7 days, turning daily to ensure even curing. For a wet cure, the pork is submerged in a seasoned brine for a similar time.
After curing, rinsing and drying the pork belly is essential. Smoking is optional but enhances flavor. Traditional cold smoking at lower temperatures imparts smokiness while keeping texture firm. The bacon is then sliced and can be stored in the refrigerator for up to a week or frozen for several months. Proper sealing prevents freezer burn and maintains quality.
Freezing Meat: Preserving Freshness and Nutrients
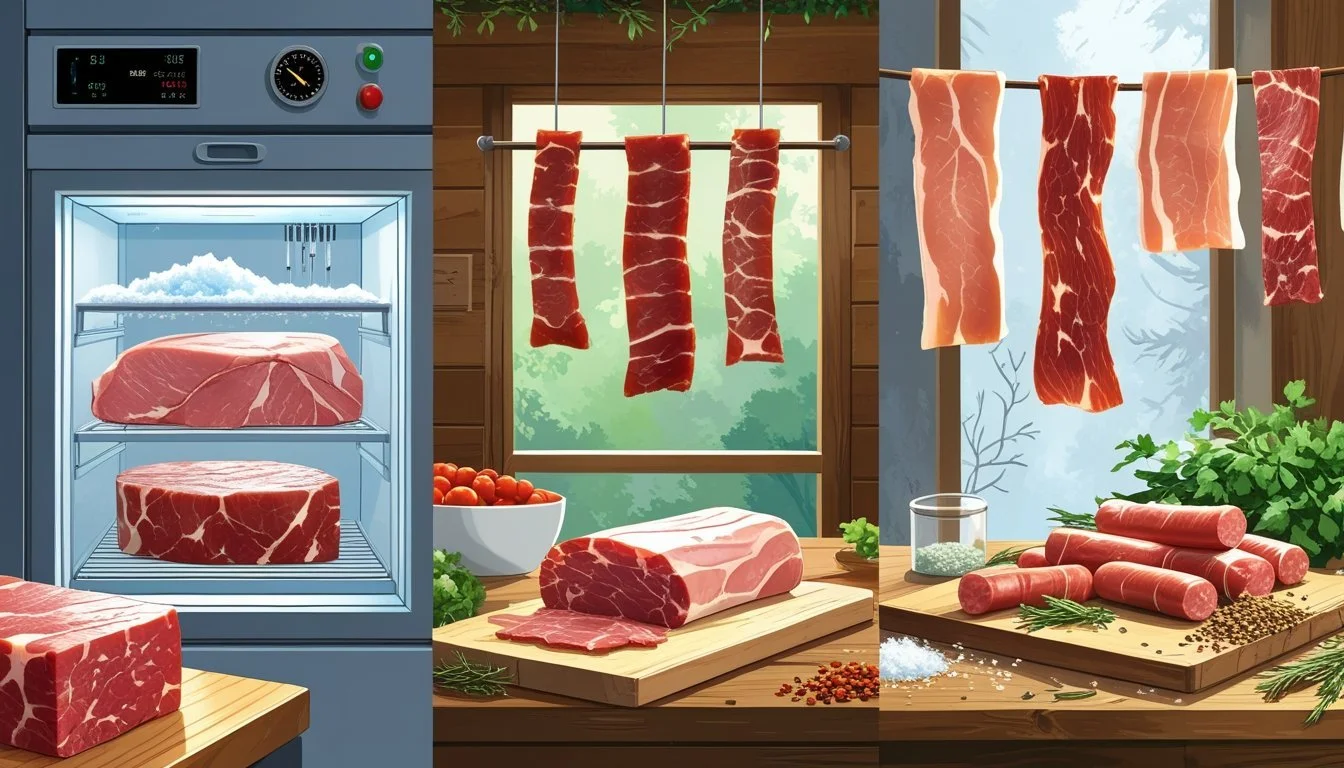
Freezing is a reliable way to maintain the quality of beef, poultry, and fish for extended periods. When done properly, frozen meat retains both its freshness and most of its nutritional value.
Proper Freezing Techniques
To avoid freezer burn and preserve both flavor and nutrients, meat should be frozen at 0°F (-18°C) or lower. Vacuum sealing or tightly wrapping meat in plastic wrap and heavy-duty aluminum foil reduces exposure to air, which helps prevent drying and oxidation.
Label each package with the type of meat and the date it was frozen. This practice makes it easy to manage rotation and avoid keeping items too long. For best texture, freeze meat while it is still fresh and avoid refreezing after thawing.
Below is a table for maximum recommended freezer storage times:
Meat Type Recommended Max Storage Time Beef 6–12 months Poultry 6–12 months (whole); 3–9 months (parts) Fish 3–6 months (lean); 2–3 months (fatty)
Freezing does not significantly affect protein content, vitamins, or minerals, as long as the temperature is kept steady and the meat is well wrapped.
Thawing Safely
Thawing meat correctly is essential to prevent bacterial growth and maintain quality. The safest method is to thaw meat in the refrigerator at 40°F (4°C) or below, which may take several hours or overnight depending on size.
For faster thawing, sealed meat can be placed in cold water, changing the water every 30 minutes. Small pieces thaw in about an hour, while larger cuts take longer.
Avoid thawing beef, poultry, or fish at room temperature, as this increases the risk of harmful bacteria multiplying. Never refreeze meat that has been thawed at room temperature or in warm environments. If thawed safely in the refrigerator, it can be refrozen without major loss of quality.
Storing and Consuming Preserved Meats

Proper storage is essential to maintain the safety, texture, and flavor of jerky and cured meats. Enjoying these preserved products with complementary foods, such as fried eggs, can enhance their taste and provide nutritional balance.
Ideal Storage Conditions
Preserved meats like jerky and cured cuts last longest when stored in cool, dry, dark places. Airtight containers, such as vacuum-sealed bags or glass jars with tight lids, reduce moisture and air exposure. This slows the growth of bacteria and mold.
For best results, keep temperatures below 70°F (21°C) and avoid direct sunlight. If humidity is high, consider using silica gel packs or oxygen absorbers in storage containers. Refrigeration extends shelf life, especially for homemade or nitrate-free products.
Label jars or bags with the date of preservation. Rotate your stock by placing the oldest meats in front for quick access. Check for signs of spoilage before eating, such as sour smells, discoloration, or unusual textures.
Pairing with Fried Eggs and More
Preserved meats pair well with fried eggs due to the balance of protein and fat. Thin-sliced jerky or crispy cured ham served alongside eggs makes a high-protein breakfast or snack. The saltiness from the meat complements the mild, rich flavor of eggs.
To create simple meals, consider these combinations:
Preserved Meat Preparation Egg Style Serving Idea Beef Jerky Sliced, warmed Sunny-side up Over the top, garnished with herbs Cured Ham Pan-fried Scrambled Mixed in or served on the side Smoked Sausage Sliced, sautéed Poached Served together on toast
Other foods that pair well include sautéed greens, roasted potatoes, and pickled vegetables. Preserved meats add umami and depth to many dishes without requiring extra seasoning.
