
Revolutionize Your Seed Starting with a Soil Block Maker
Enhance Germination and Growth
Starting seeds can be an exercise in patience and precision, but with the revolution brought about by soil block makers, the process becomes markedly streamlined and efficient. A soil block maker compresses a moistened mixture of soil and water into dense cubes that are ready to receive seeds. This method not only eliminates the need for traditional plastic seed trays but also fosters stronger seedling growth. By using soil blocks, gardeners can provide a more aeration-rich and natural environment for seedlings right from the start.
Soil blocks create minimal transplant shock since there's no disruption of the roots when you move them to your garden or a larger pot. The blocks are formed with a depression on top to accept the seed, which then germinates within its own compact environment. The exposed sides of the block encourage air pruning of the roots, which naturally stops the roots from circling and creates a robust root system.
Employing a soil blocker can introduce beneficial practices in any gardening routine. It encourages the use of a fine-textured, nutrient-rich soil mix specific to the needs of young seedlings, offering optimal conditions for their development. Gardeners, furthermore, can avoid the waste associated with disposable plastic containers, making soil blocking not just an innovative approach to starting seeds, but an environmentally conscious choice as well.
Understanding Soil Blocks
Soil blocks are a game-changer in the world of seed-starting. They provide a distinctive method that fosters strong root systems while being eco-friendly.
What Are Soil Blocks
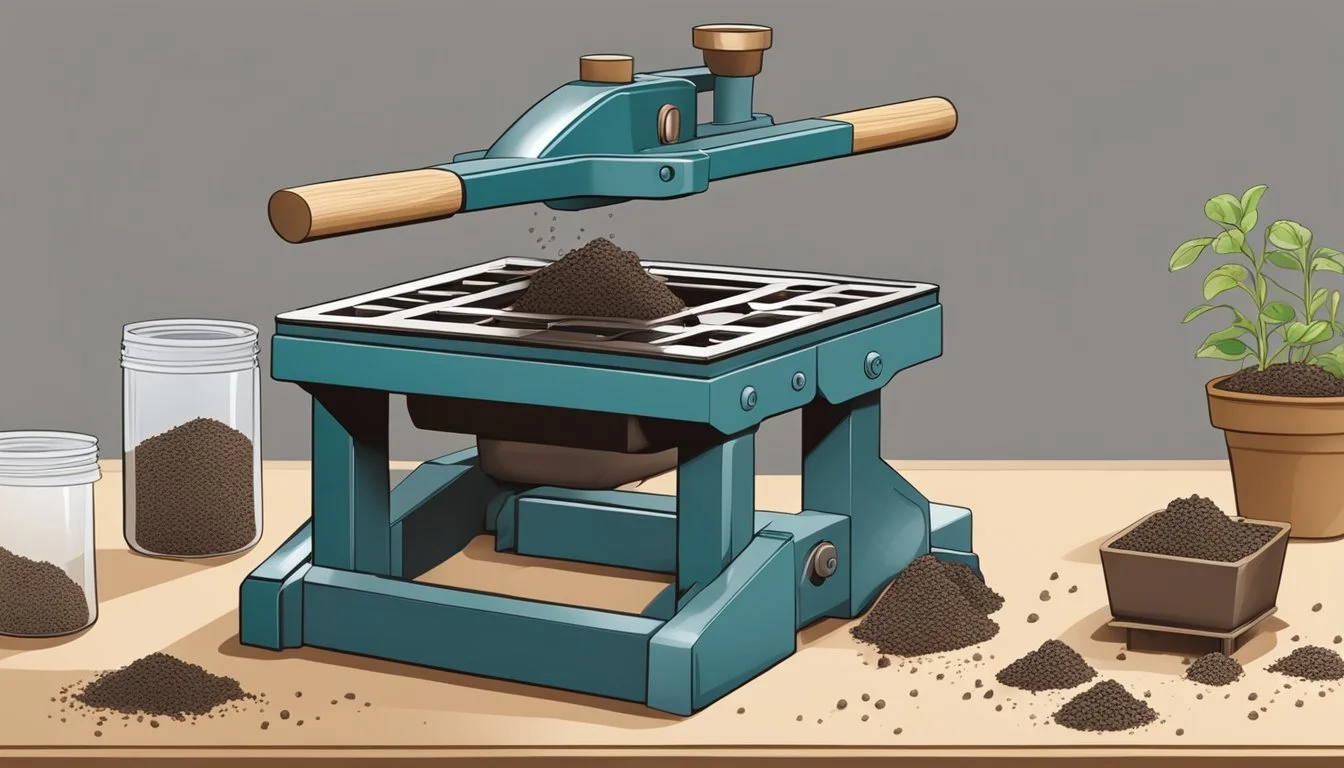
Soil blocks are small, compressed cubes of soil mixture used for starting seeds. Gardeners create them using a soil block maker, which compresses a blend of soil, peat, perlite, and water into a dense cube that can maintain its shape. These blocks often have a small indentation on top for the seed, eliminating the need for separate seed containers.
Benefits of Soil Blocking
Reduced Transplant Shock: Soil blocks allow plants to develop healthier root systems. When roots reach the edges of a soil block, they experience "air pruning," which encourages the growth of new roots within the block, rather than circling as they would in a pot. This leads to a more robust root system and reduces transplant shock when seedlings are moved to the garden.
Eco-Friendly and Sustainable: Using soil blocks is a more sustainable practice as it reduces the reliance on plastic seed trays and pots. This not only cuts down on waste but also helps in creating an eco-friendly gardening environment.
Efficient Use of Space: Seedlings in soil blocks can be nestled closely together, maximizing greenhouse or indoor growing space. This arrangement allows gardeners to start more plants in a smaller area.
By adhering to the principles of soil blocking, gardeners can start their seeds in a manner that is not only effective for the plants but also responsible towards the environment.
Getting Started with Soil Blocks
Soil blocks provide a high-density planting medium without the need for traditional containers. This method is both space-efficient and promotes strong root growth. Beginning your gardening journey with soil blocks requires careful selection of the right soil block maker and understanding the essential ingredients for your soil mix.
Choosing the Right Soil Block Maker
When selecting a soil block maker, gardeners should consider the size and scale of their seed starting endeavors. For small-scale gardeners, a hand-held soil blocker is typically sufficient, such as those offered by Ladbrooke, which are known for their durability and ease of use. These often come in various block sizes to accommodate different seed sizes.
Here is a comparative list of the most commonly sought features in a soil block maker:
Feature: Multiple Sizes, Benefit: Allows for various seed sizes and transplant stages
Feature: Durable Material, Benefit: Ensures longevity and consistent performance
Feature: Ease of Use, Benefit: Less effort and time to produce blocks
One should ensure that the soil blocker provides a firm and consistent compression to create well-formed blocks that can stand alone and hold moisture effectively.
Essential Soil Block Ingredients
The perfect soil mixture for soil blocks isn’t merely about soil; it’s a blend of various components that result in a firm yet breathable block. The ingredients typically include:
Compost: A source of organic matter that provides nutrients to seedlings.
Peat or Coconut Coir: These substances help retain moisture and create a light structure.
Sand or Perlite: They are used for aeration and to ensure a loose structure that allows roots to grow freely.
Organic Matter: Additional ingredients like worm castings or green compost can be added for extra nutrients.
For a standard soil block mixture, follow this blend:
1 part peat or coconut coir for moisture retention.
1 part garden compost for nutrients.
1 part perlite or fine sand for aeration.
All components should be mixed thoroughly to achieve an even consistency. Water is then added until the mixture reaches a moist, clump-forming consistency, essential for the soil blocker to form cohesive blocks.
Creating the Perfect Soil Block Mix
Creating the perfect soil block mix is essential for successful seed starting. A well-crafted mix ensures that the blocks maintain their shape, provide the necessary moisture, and deliver nutrients to the seedlings as they grow.
Soil Block Recipes
The foundation of a good soil block recipe includes a balance of peat moss, lime, and vermiculite, along with a nutritional component like fertilizer. One might consider the following proportions for a basic mix:
3 parts peat moss: Sustainably sourced peat moss is preferred to retain moisture.
2 parts vermiculite: This mineral helps aerate the mix and improve water retention.
1 part compost: For added nutrients beneficial to young plants.
1/2 part lime: To neutralize the acidity of the peat moss.
Additionally, one may choose to incorporate other materials such as coarse sand or perlite to increase drainage and base fertilizer for nutrition.
Mixing Techniques
The process of mixing ingredients for soil blocks should be thorough to ensure even distribution of moisture and nutrients. Achieving the right moisture level is crucial – the mix should be damp enough to form a cohesive block but not so wet that it cannot hold its shape. A simple test involves squeezing a handful of the mix; if a few drops of water come out and the mix holds together, it has the correct level of moisture.
Here's a suggested step-by-step approach to mixing:
Blend dry ingredients: Combine peat moss, lime, and vermiculite.
Add compost: Mix in the compost thoroughly to ensure even distribution of organic matter.
Moisten the mix: Slowly add water while stirring until the desired moisture level is achieved.
Incorporate fertilizer: Fold in the chosen base fertilizer evenly throughout the mix.
Seeding and Maintenance of Soil Blocks
To ensure the healthy growth of seedlings, proper seeding and subsequent maintenance of soil blocks are essential. This entails careful planting and consistent watering and fertilizing routines tailored to the needs of the plants.
Planting Seeds in Soil Blocks
One begins with placing a single seed into the divot of each soil block, except for larger seeds like those of pumpkins or watermelons which may require a larger block. For instance, when planting seedlings for tomatoes, peppers, or eggplants, one should ensure the soil blocks are of adequate size to allow for optimal root development before transplanting. Carrots and zinnias, with their differing seed sizes, will also thrive in blocks made to suit their growing requirements.
Example Seed Planting Table:
Seedling Type: Tomatoes, Block Size: 2-inch cubes
Seedling Type: Peppers, Block Size: 2-inch cubes
Seedling Type: Eggplants, Block Size: 2-inch cubes
Seedling Type: Carrots, Block Size: 3/4-inch cubes
Seedling Type: Zinnias, Block Size: 3/4-inch cubes
Watering and Fertilizing
Soil blocks need consistent moisture; thus, bottom watering is recommended to encourage roots to grow downward and prevent mold. One should place the blocks in a shallow tray of water allowing the blocks to absorb water from the bottom up. Watering should be monitored closely—the soil should remain moist but not waterlogged.
When it comes to fertilizing, seedlings benefit from a balanced organic fertilizer mixed into the watering routine once they have developed their second set of true leaves. A small handful of 4-4-4 organic fertilizer can be used per gallon of water, depending on the specific needs of the plants. Regular fertilizing helps in providing the essential nutrients crucial for the growth of seedlings like tomatoes and eggplants, which are heavy feeders.
Growing and Transplanting
In the journey of seedling growth, consistent monitoring is critical to prepare for a successful transplant. A soil block maker significantly reduces root disturbance, fostering stronger seedlings ready for their move to a larger habitat.
Monitoring Seedling Growth
The grower should vigilantly observe seedlings for the appearance of true leaves, which are indicative of a seedling's readiness for transplanting. Temperature control is crucial, ideally between 65-75°F (18-24°C), and seedlings must be provided with adequate grow lights—14 to 16 hours per day—to promote healthy growth.
Preparing for Transplant
Seedlings in soil blocks require careful handling to maintain the integrity of the soil and roots. Before transplanting, seedlings need to harden off—a process of gradually exposing them to outdoor conditions over several days. Root disturbance is minimized as the entire block can be placed directly into the garden soil, easing the transition for the seedlings and promoting rapid acclimation to their new environment.
Advantages Over Traditional Pots
Transitioning to soil block makers from traditional plastic pots can significantly benefit seed starting. This approach addresses plastic waste concerns and promotes healthier root systems for young plants.
The Issue with Plastic Pots
Plastic pots have been the standard for gardeners for years, yet they come with an environmental cost. The production and disposal of these plastic containers contribute to plastic waste, an ever-growing environmental issue. Traditional pots can also lead to a phenomenon known as being "root-bound," where roots grow in circles confined by the pot walls, potentially hampering plant growth when transferred to the garden.
Air Pruning and Root Health
Unlike plastic pots, soil blocks encourage air pruning, a natural process where the exposed roots dehydrate and signal the plant to generate new root growth. This results in a more vigorous and fibrous root system, eliminating the risk of becoming root-bound. Air pruning ensures that when the time comes to transplant, the plants are better adapted and less shocked by the transition, leading to higher survival rates and stronger growth in the garden.
Additional Tips and Tricks
When venturing into the world of soil blocks for seed starting, one may find that employing the right techniques can be just as important as using the right tools. This section provides seasoned advice for utilizing a soil block maker effectively, as well as tips for crafting a do-it-yourself version that suits individual gardening needs.
DIY Soil Block Maker Methods
Creating a DIY soil block maker can be an economical option for gardeners. One popular method involves using a soda can to mold blocks, although caution is advised due to the sharp edges. A more hand-friendly option is to repurpose small plastic containers by drilling a soil release hole at the bottom. When using a DIY blocker, ensure that the soil is firmly compressed so that it holds together, but avoid over-packing as this may impede root growth.
Gardening with Soil Blocks
Gardening with soil blocks requires a balance between soil consistency and moisture content. The ideal mixture should resemble crumbly, moist chocolate cake. When using a blocking tool, a clear sign of correct moisture levels is water just barely seeping through the top of the pressed soil block. Watering these blocks can be achieved with a gentle watering can to sustain seedlings without disrupting their form. Managing garden space effectively includes organizing soil blocks in sturdy trays, designed to support their weight and maintain easy access for tending and observation, especially for beginner gardeners.
Cultivating a Sustainable Garden
Sustainable gardening practices are essential for eco-friendly horticulture. They emphasize the preservation of resources and the health of the ecosystem. One aspect of sustainability in the garden is using soil blocks for seed starting.
Soil blocks are small, compressed cubes of soil used to start seeds. They are created using a soil block maker, a tool that presses moistened seed starting mix into compact blocks. This method eliminates the need for plastic seedling trays, thus reducing waste and enhancing sustainable practices in gardening.
Advantages of Soil Blocks:
Reduces plastic waste.
Encourages stronger root systems due to "air pruning."
Transplants experience less shock when moved to the garden.
Allows dense planting, saving space and resources.
Gardeners make their own blocks using a mixture rich in organic matter, which can include compost, peat, or coconut coir, and other nutrient-dense components. The inclusion of organic material ensures that the seedlings receive a healthy start, without the reliance on chemical fertilizers.
Ingredients: Compost, Purpose: Provides nutrients and beneficial microorganisms.
Ingredients: Peat/Coir, Purpose: Offers structure and water retention.
Ingredients: Perlite/vermiculite, Purpose: Ensures good aeration and drainage.
Sustainable gardening practices, such as soil blocking, contribute to a healthier planet. They require an investment of time and effort, but the outcomes—strong, healthy plants and a reduced ecological footprint—speak volumes of their importance. Gardeners play a pivotal role in eco-friendly practices by choosing methods that support the earth while yielding plentiful harvests.
Resources and Further Reading
In this section, gardeners can find valuable resources, including high-quality products and insightful literature, to enhance their seed starting experience with soil blocks. The provided information is selected to ensure a comprehensive understanding and successful application of this technique.
Recommended Products and Supplies
Soil Block Makers:
Ladbrooke Mini 4 Soil Blocker: A widely recommended hand-held tool for creating soil blocks.
Mixing Trays: Essential for preparing and mixing the growing medium.
Growing Medium:
Organic Potting Mix: A suitable base for creating soil blocks.
Peat: Often included in soil block recipes to retain moisture.
Seed Starting Supplies:
Seeds: High-quality seeds suitable for soil block planting.
Watering Can: For gently watering the blocks without disrupting their structure.
Affiliate Links: To purchase these items, gardeners may click on provided affiliate links, which help support gardening resources.
Expert Insights and Literature
Books by Eliot Coleman:
The New Organic Grower: Coleman shares his expertise on organic gardening, including sections on soil blocks.
Articles on Gardening Websites:
For practical tutorials and step-by-step guides, gardeners should visit reputable gardening sites.
Research Studies:
Scholars and horticultural experts have documented studies on soil blocking which can be found in agricultural journals.
It is crucial for gardeners to refer to trusted sources when seeking guidance on seed starting with soil blocks to ensure the health of their seedlings and success in their gardening endeavors.
