
The Ultimate Guide to Using a Seed Spreader
Master Efficient Seed Planting on Your Homestead

Efficient seed planting on a homestead can vastly improve germination rates and lead to a more lush, even lawn or productive garden. A seed spreader is a crucial tool for this process, allowing homesteaders to distribute seeds uniformly across the soil. By ensuring seeds are sown at the correct rate and depth, a spreader helps to optimize the growing conditions, leading to healthier and more robust plants.
Understanding how to properly use a seed spreader is key for anyone looking to enhance their agricultural practices. The spreader's settings play a vital role in the distribution of seeds, ensuring that they are neither too sparse to occupy the land effectively nor too dense to inhibit growth. Additionally, the technique employed when pushing the spreader, such as walking in consistent, straight lines and slightly overlapping each pass, can significantly affect the evenness of seed distribution.
Choosing the right type of seed spreader is just as important, with options ranging from handheld models, suitable for smaller spaces, to larger push or tow-behind styles for expansive areas. Each type comes with specific features and capabilities, catering to different terrain, seed types, and user preferences. Homesteaders must consider their specific needs, such as plot size and the kind of seeds they intend to spread, to select the most appropriate equipment for their tasks.
Understanding the Basics of Seed Spreading
Seed spreading is a fundamental practice for homesteaders aiming for an efficient and precise sowing process. The right equipment can ensure even distribution of seeds, resulting in optimal growth conditions.
Types of Seed Spreaders
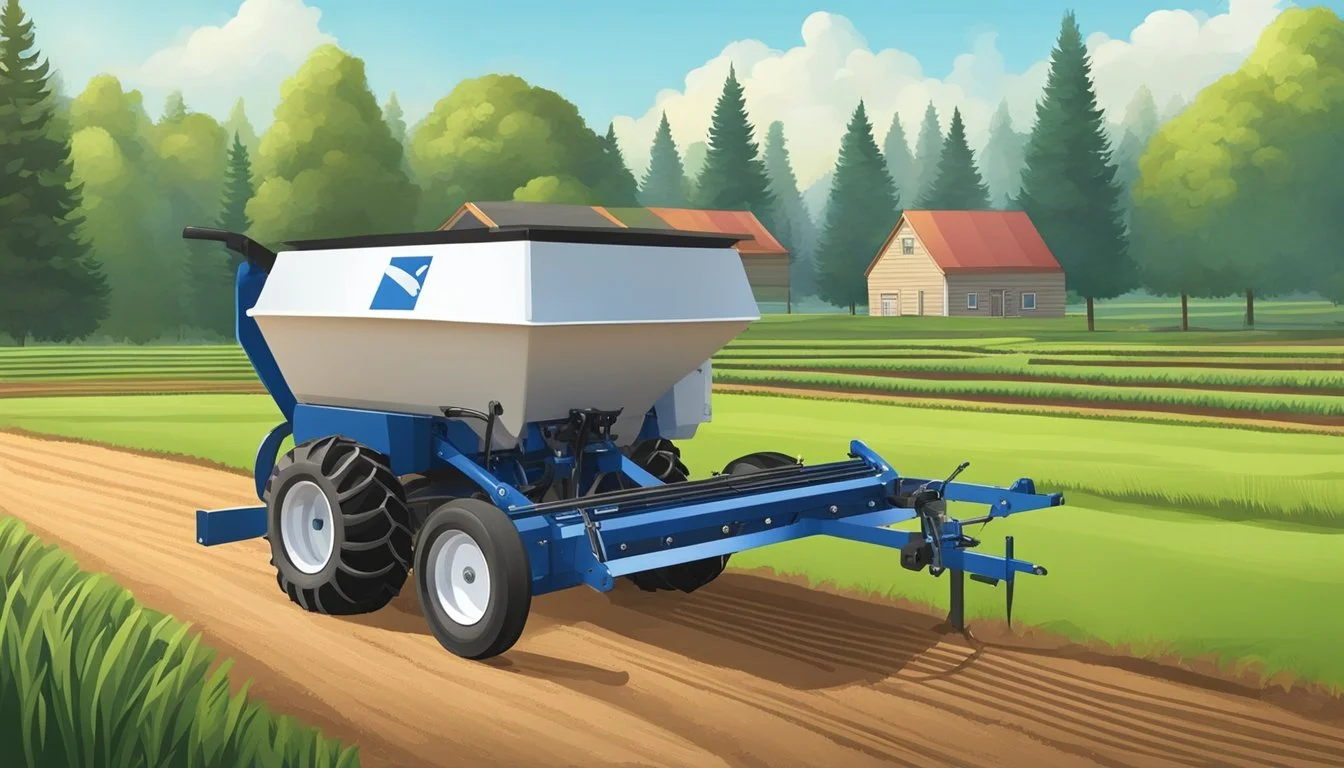
Broadcast Spreaders: These are designed to disperse seeds over a large area quickly. They come in various sizes, from walk-behind models to larger versions that can be attached to tractors. The key advantage of broadcast spreaders is their ability to cover wide expanses efficiently, making them ideal for larger homesteads.
Handheld Broadcast Spreaders: Compact and portable, suitable for smaller or hard-to-reach areas.
Push Broadcast Spreaders: Require manual operation and are perfect for medium-sized plots.
Tow-Behind Broadcast Spreaders: Attach to the back of a tractor for use on extensive land plots.
Drop Spreaders: These offer more precision by dropping seeds directly beneath the spreader along a defined path. Drop spreaders are often used for creating dense, uniform rows and are preferable when control over the seed placement is necessary.
Small Drop Spreaders: Ideal for residential gardens or smaller homesteads.
Large Drop Spreaders: Best suited for more expansive, open spaces.
Handheld Spreaders: These are the most basic and economical choice, which involve manually spreading seeds by cranking a handle. Their simplicity and cost-effectiveness make them accessible to all gardeners, although they require more labor and are less precise than other types.
Small, user-friendly, and perfect for tight spaces or minimal seed spreading requirements.
Benefits of Using Seed Spreaders
Efficiency: Seed spreaders save time and effort by covering more ground faster compared to manual sowing. They reduce the physical labor involved, especially on larger plots of land.
Precision: Especially with drop spreaders, seeds are placed with greater accuracy, promoting an even distribution that is less likely to require thinning or reseeding. This accuracy leads to better resource use and healthier plant populations.
Even Distribution of Seeds: Both broadcast and drop spreaders are designed to disperse seeds evenly, which helps promote uniform germination and growth, while minimizing waste and the likelihood of overcrowding.
In summary, the use of seed spreaders—be it broadcast, drop, or handheld types—is beneficial for homesteaders looking to plant seeds more efficiently and with greater precision. Each type offers unique advantages that can be matched to the specific needs of the land and the crop being sown.
Preparation for Seed Spreading
The success of planting seeds hinges on thorough preparation, focusing on optimal seed selection, soil condition, and timing.
Selecting Quality Seeds
A homesteader should choose high-quality seeds that are suited to the local climate and soil conditions. This ensures optimal growth and yield. They should look for seeds that are:
Certified disease-free
Proven to have high germination rates
Appropriate for the planting season
Soil Testing and Preparation
Soil testing is a critical step to determine soil fertility and pH levels, ensuring the provision of necessary nutrients for the seeds. Preparation should include:
Clearing the field of debris and weeds
Tilling the soil to the right depth to allow seed penetration
Adding fertilizer or organic matter based on soil test recommendations to optimize soil health
Choosing the Right Time for Planting
They must plant at a time when the climate and soil conditions are conducive to seed germination and growth. Key considerations include:
Planting after the last frost to avoid seed damage
Ensuring the soil is moist but not waterlogged
Avoiding seeding during windy conditions which can affect spread patterns
By addressing these specific areas of preparation, a homesteader can create the foundation for a successful seeding endeavor.
Operating a Seed Spreader
To achieve a lush and evenly seeded area, understanding how to operate a seed spreader with precision and care is crucial. From setting adjustments to regular maintenance, each step ensures accurate seed distribution and coverage.
Seed Spreader Settings
Each seed spreader comes with adjustable settings to control the rate at which seeds are dispensed. For precise coverage, it's essential to consult the product's manual to set the dial according to the type of seed being used. Usually, the settings are numbered or might have a corresponding letter code. The right setting ensures an even spread of seeds and prevents waste or under-seeding.
Calibration and Test Runs
Calibration ensures the spreader dispenses seeds accurately. Perform a dispersal pattern test by marking a predefined area, such as a 12-foot by 20-foot section, and conduct a test run; this helps to fine-tune walking speed and spreader settings. Adjust the flow lever, fill the hopper with a measurable amount of seeds, and walk at a normal walking speed for a few paces. Measure the distribution to ensure easy use and consistent coverage during actual seeding.
Proper Maintenance
Maintenance of the seed spreader is critical to sustain its ease of use and functionality. After each use, remove any residual seeds and clean the hopper to prevent clogging and corrosion. Check for any loose parts or damage, especially in moving components. Regularly lubricate necessary areas to maintain smooth operation. Storing the equipment in a dry environment will extend its lifespan and assure reliable performance with every use.
Best Practices in Seed Spreading
Achieving a lush, evenly grown area requires precise seed spreading techniques. These practices ensure proper seed dispersal pattern, improved germination rates, and protection against potential challenges such as inclement weather. In this section, readers will learn the correct loading techniques, spreading patterns, and weather considerations to optimize their seed spreading process.
Loading Techniques
Before starting, one must ensure that the hopper, typically part of a seed spreader, is clean and dry to prevent seeds from sticking. The user should:
Measure the correct amount of seeds needed for the area, often overestimating slightly to account for potential bare patches.
Fill the hopper evenly to assist in maintaining balance and prevent tipping, which might disrupt the spreading pattern.
Spreading Patterns
For an even spread, the operator of the seed spreader should follow a methodical approach:
Utilize overlapping paths by spreading half of the seeds in one direction and the remaining half perpendicular to the first pass.
Conduct a test run to ensure that the dispersal pattern is even, making adjustments to the spreader settings if necessary.
Weather Considerations
Weather plays a crucial role in the spreading process, particularly in seed germination and the application of additional products like weed killer:
Avoid seeding before rain as water can wash seeds away, leading to uneven coverage and poor germination.
Optimum conditions are when the weather is calm and dry; wind can disrupt seed distribution, and moisture can clump seeds, hindering their dispersal.
Lawn Care and Maintenance Post-Seed Spreading
After spreading grass seed efficiently, a homestead's lawn requires proper care to ensure successful seed germination and the growth of a healthy, dense turf. This care involves precise watering, timely mowing, and vigilant control of weeds and pests.
Watering and Nutrition
Watering should commence immediately after seeding. The top inch of soil must remain consistently moist but not waterlogged, as prolonged saturation can hinder seed germination. Initially, they may water lightly but frequently, typically twice a day, until germination occurs.
Morning (6-10 AM) and late afternoon (4-7 PM) are optimal watering times.
After germination, reduce frequency of watering to encourage deep root growth.
Fertilizing plays a vital role in providing nutrition to the newly seeded lawn. Use a starter fertilizer with an appropriate nitrogen-phosphate-potassium (N-P-K) ratio such as 10-20-10 during sowing. They should wait until the grass has been mowed a few times before applying any additional fertilizer.
Mowing and Thatching
Mowing should begin once the grass reaches a height of approximately 3 inches, cutting it down to about 2 inches. This practice encourages the grass to grow thicker and establish a robust root system. Ensure the mower blades are sharp to prevent damage to the tender grass shoots.
Mow frequently, making sure not to remove more than one-third of the grass height at a time.
Thatch is a layer of organic matter that can build up on the soil surface, and if not managed, can prevent water and nutrients from reaching grass roots. They can prevent thatch by:
Regularly aerating the lawn.
Ensuring a balanced pH level in the soil.
Dealing With Weeds and Pests
Weeds compete with grass seeds for space, sunlight, and nutrients. It is important to address weed issues early and regularly to avoid them overtaking the budding lawn. Pre-emergent herbicides can be used to prevent weed seeds from germinating, but should not be used if they recently sowed grass seed as it may inhibit its growth as well.
Post-emergent herbicides may be used after the lawn has been established for selective weed control.
Pest control is essential to protect young grass from insects and disease. They can use targeted pesticides carefully, following all label instructions to address any pest problems without harming the grass. It is important to identify the specific pests or diseases present before treatment to ensure effective control.
Specialized Seed Spreading Techniques
To achieve optimal growth and ground coverage, specialized seed spreading techniques can be employed to ensure uniform and efficient planting. Whether maintaining a lush lawn, starting a garden, or distributing non-seed materials, these methods are critical for homesteaders looking to maximize their efforts.
Overseeding for Lush Lawns
Overseeding is a method used to thicken a lawn by spreading grass seed over existing turf. To overseed effectively, a rotary spreader or grass seed spreader should be used to distribute the seed evenly. It is recommended to set the spreader to deliver half the seed in one pass and the rest in a pass perpendicular to the first, ensuring even coverage and full contact between seeds and soil.
Best Practices for Overseeding:
Use a rotary spreader for even distribution.
Apply grass seed over existing turf during the appropriate growing season.
Seed Starting for Gardens
For garden enthusiasts looking to cultivate vegetables or flowers, seed starting involves precise spreading techniques to ensure the correct planting depth and spacing. Sowing depth should typically be three times the diameter of the seed. Small seeds can be lightly scattered over the soil, while larger seeds may require more targeted spacing.
Create a moist, clump-free soil environment.
Sow seeds at a depth proportional to their size, as a rule of thumb, at a depth three times their diameter.
Using Spreaders for Non-Seed Materials
Spreaders are not limited to seeds alone. Homesteaders can also use them for spreading materials like ice melt, fertilizer, and more. For non-seed materials, a fertilizer spreader can ensure an accurate application rate. Calibration is key; performing a test run over a small area can help establish the correct settings.
Material Applications with Spreaders:
For ice melt: Set the spreader to achieve a consistent layer to prevent ice from forming.
For fertilizer: Adjust the spreader to the recommended rate for your specific garden or crop needs.
Troubleshooting Common Seed Spreader Issues

When using a seed spreader on a homestead for efficiently planting seeds, issues can arise that may affect its performance. Addressing these problems promptly can ensure continued precision and proper function of the equipment.
Spread Pattern Irregularities
The seed spreader should distribute seeds evenly across the lawn. Irregularities in the spread pattern often point to debris or buildup obstructing the seed flow. Users should inspect the spreader for any clogs and remove debris that may be causing the uneven distribution. Additionally, checking the impeller plate for damage and ensuring it's clean will help maintain a consistent spread pattern.
Feed and Flow Problems
Proper feed and flow are critical for the precision of seed spreading. If the spreader isn't releasing seeds at the desired rate, the user should first verify that the settings match the seed or fertilizer type per the manufacturer’s guidelines. Blockages in the hopper or issues with the feed mechanism can also lead to flow problems. Routine maintenance, such as regular cleaning and lubrication, can prevent these issues from occurring.
Breakdowns and Repairs
A seed spreader can experience mechanical failures, particularly in a tractor-driven spreader where the complexity increases. Components such as the gearbox or drive assembly may break down over time. Users should consult the spreader's manual for troubleshooting steps and replacement parts. For more complex repairs, seeking professional service is advisable to ensure the longevity and precision of the spreader. Regular inspections and replacing worn parts preemptively can help avoid unexpected breakdowns.
Advancements in Seed Spreading Technology
Recent advancements in seed spreading technology have significantly enhanced the efficiency and accuracy of planting seeds for homesteaders.
Equipment Enhancement: Modern seed spreaders exhibit sturdy construction with durable materials that withstand varied environmental conditions. Innovations in design have led to lightweight yet robust frameworks, allowing for ease of use and longevity.
Integration with Tractors: For larger fields, technology has advanced to improve the compatibility of seed spreaders with tractors. Today's seed spreaders easily attach to a tractor's Power Take-Off (PTO), harnessing the vehicle's power to evenly distribute seeds over extensive areas.
Advanced Spreading Mechanisms:
Precision Planting: Technology now allows for meticulous control over seed placement, fostering uniform growth.
Variable Rate Technology (VRT): Adjusts the amount of seeds dispensed based on pre-programmed field data.
GPS Guidance: Ensures accurate and consistent seed distribution patterns, reducing overlaps and gaps.
Smart Technology Integration:
Sensors: Monitor flow rates and adjust in real-time for optimal seed distribution.
Connectivity: Allow operators to control settings remotely and receive updates on equipment status.
The incorporation of such advancements enables homesteaders to plant seeds more effectively, maximizing yields and resource usage. They have positively impacted agricultural practices, making seed spreading an activity that blends traditional farming wisdom with cutting-edge technology.
Conclusion
Maximizing the efficiency of planting seeds on a homestead is paramount. Utilizing a seed spreader is a proven method to achieve uniform distribution and optimal growth conditions. With various lawn products available, it is crucial to select the right spreader—hand-held, broadcast, or drop—that best suits the specific needs of a homestead.
For beginners, the process may involve some trial and error, as operating speeds and dispersal patterns are adjusted for consistency. Reading seed packets thoroughly provides valuable information on application rates, ensuring adequate supplies are on hand. When users understand their tools and materials, they experience increased overall satisfaction with the planting process.
Pros of Using Seed Spreaders:
Even distribution of seeds
Time-saving compared to manual sowing
Adjustable settings for different products
Quick Tips for Success:
Sweep a test area to measure dispersal
Fill the spreader to 60-80% to prevent spillage
Overlap each row slightly for complete coverage
Optimal use of a seed spreader requires practice, yet even seasoned gardeners appreciate the consistent results. By combining knowledge with the correct tools, homesteaders can establish lush, fruitful gardens, season after season.
