
How to Measure the Perfect Amount of Liquid for Cake Batter
Precision Baking Tips

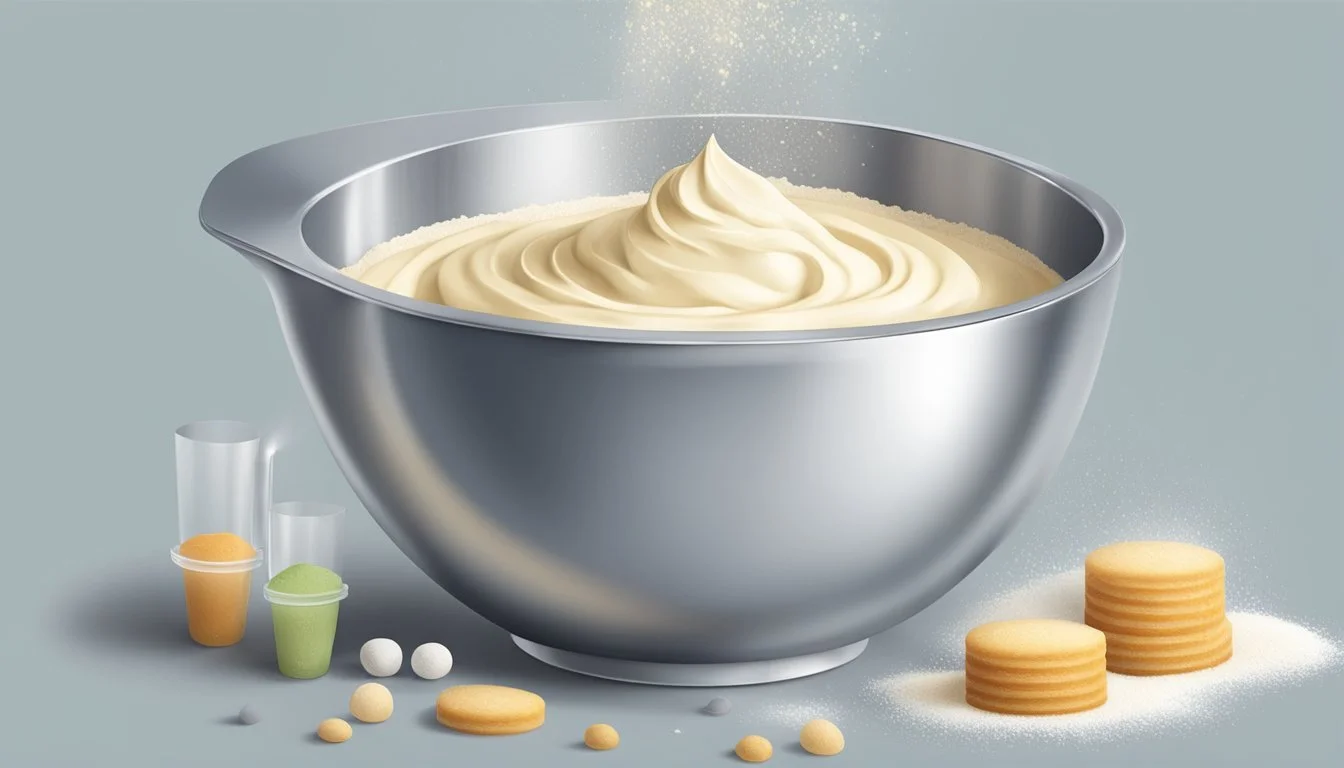
Accurately measuring the components for cake batter is pivotal to baking a successful dessert. It's not just about having the right ingredients; the precise quantity of each liquid plays an essential role in the texture and rise of the cake. Bakers should be aware that too much liquid can lead to a dense or soggy cake, while too little might yield a dry and crumbly texture. Understanding the balance is key, and it begins with mastering the measurement of liquids—from water and milk to more viscous substances like oils and syrups.
Measuring techniques vary depending on the specific recipe and its requirements. Bakers use tools such as cups and spoons for volume measurements, though these can be less accurate due to the potential for air pockets or differing pour levels. A more reliable method is using a kitchen scale which ensures precision. It is essential when working with a sensitive recipe where the balance between the structural and moistening agents needs to be exact.
The nature of cake batter requires attention to detail, and when measuring liquids, bakers must consider the recipe's desired consistency and how various components interact. For example, while one recipe might call for a generous amount of oil for moisture, another might rely on butter for both richness and structure. Bakers should also account for how the incorporation of liquids affects overall batter volume, using tools like rulers or the water displacement method to gauge the capacity of their pans to prevent overflow during baking.
Understanding Cake Batter Basics
In cake baking, the interplay between wet and dry ingredients, especially liquids, is pivotal for achieving the desired batter consistency. This balance ensures that cakes rise properly and have the right texture, ranging from moist to fluffy.
Role of Liquids in Cake Batters
Liquids in cake batter serve several crucial functions. They hydrate the dry ingredients, initiating the gluten formation necessary for structure. Liquids also dissolve sugar and salt, and in conjunction with leavening agents, such as baking powder or soda, they facilitate the necessary chemical reactions to produce a fluffy cake. The common liquids used are milk, water, oils, or butters, and the type chosen can affect the cake's flavor, tenderness, and moistness.
Hydration: Liquids bind dry ingredients such as flour and sugar, ensuring even batter.
Dissolution: Liquids help sugars and salts to dissolve, contributing to the overall flavor profile.
Leavening Activation: In combination with leavening agents, liquids enable the batter to rise.
Flavor and Texture: Choices of liquid can impart unique flavors and contribute to a moist texture.
Significance of Measuring Ingredients Precisely
Precise measurement of ingredients in cake batter is non-negotiable. It determines the outcome of the cake's texture and flavor. A cake with too much liquid may become dense or soggy, while too little can result in a dry, crumbly cake. Employing the correct measuring techniques for both wet and dry ingredients is thus essential.
Wet Ingredients: Use clear measuring cups designed for liquids to ensure accurate volume.
Dry Ingredients: Spoon and level method is preferred for dry ingredients to avoid compaction.
By adhering to accurate measurement practices, bakers can ensure the batter has the perfect balance between liquid and dry ingredients, fostering an ideal environment for leavening and resulting in the optimal cake structure.
Measuring Equipment and Techniques
To achieve the desired consistency and flavor in cake batter, accurate measurement of liquid ingredients is crucial. Below you will find specific details on the tools and methods needed to measure liquids precisely.
Types of Measuring Cups and Scales
Measuring Cups: There are two primary types used in baking:
Liquid measuring cups: Usually made of transparent material with a spout to pour liquids. They are marked with volume measurements, such as cups and milliliters.
Dry measuring cups: Typically designed without a spout and are meant to be filled to the top and then leveled off with a straight edge.
Scales: Bakers prefer using a kitchen scale for its precision.
Digital scales are the most accurate, displaying measurements in ounces, grams, or pounds.
A digital scale should have a 'tare' function that allows for the container's weight to be subtracted from the total measurement.
How to Measure Wet Ingredients
Using Liquid Measuring Cups:
Place the cup on a flat surface.
Pour the liquid until it reaches the desired measurement mark.
Check the measurement at eye level to ensure accuracy.
Using a Scale:
Turn on the scale and place your container on it.
Press the 'tare' button to zero out the container's weight.
Slowly add the liquid until the scale reads the weight that corresponds to the desired volume of liquid.
Volume Weight (Water) 1 cup 240 grams 1/2 cup 120 grams 1/4 cup 60 grams
Converting Volume to Weight
Measuring by weight can be more accurate than volume. A gram measurement on a scale ensures precision, which is important for achieving consistent results in baking. Most liquid ingredients can be converted from volume to weight using the following equivalences:
Water and Milk: 1 cup ≈ 240 grams
Oils: 1 cup ≈ 220 grams
To convert recipes that only provide volume measurements, one can use tables or conversion calculators that account for the specific density of the liquid being measured.
Preparing Ingredients for Measurement
Before diving into making a cake batter, it's important to prepare the ingredients correctly. Ensuring butter is at the right consistency and flour is measured accurately are crucial steps in achieving the desired baking results.
Softening Butter to Room Temperature
For butter to be properly incorporated into a cake batter, it should be at room temperature. This allows the butter to blend smoothly into a buttercream or other mixtures, avoiding clumps. To soften butter, it should be left out on the counter for about 30 to 60 minutes before baking.
Ensuring Accurate Flour Measurement
When measuring flour, it is essential to avoid packing it down. Spooning flour into a measuring cup and leveling it off with a straight edge ensures a precise measurement. For cake flour, which is lighter than all-purpose flour, this technique is particularly important to avoid a dry cake texture.
Recipe Specifics and Variations
The perfect amount of liquid in cake batter can vastly influence the texture and structure of the finished product. It's crucial for bakers to tailor liquid ratios to the cake type and adjust measurements when incorporating alternative ingredients.
Adjusting Liquid Ratios for Different Cake Types
In vanilla cake recipes, a standard liquid component may be simply water or milk, aimed at achieving a light, soft crumb. For denser cakes, such as pound cake, a heavier liquid like buttermilk may be employed not only for moisture but to give a slightly tangy flavor that complements the dense texture. Marble cake often calls for variations in liquid amount to balance the cocoa integration, ensuring both the chocolate and vanilla batters have a uniform consistency.
Italics are used for special terms or emphasis:
Buttermilk is ideal for recipes that benefit from its acidic properties for leavening.
Marble cake requires careful balance between the vanilla and cocoa-flavored batters, which might need varying amounts of liquid.
Adapting Measurements for Alternative Ingredients
When introducing alternative ingredients, which can include flax eggs, plant-based milk, or gluten-free flours, it's essential to understand how these substitutes interact with other components. A recipe may call for an increase or decrease in liquid based on the absorbency of the chosen flour substitute.
Flavor combinations greatly influence the recipe adjustments. Rich flavors like chocolate or coffee may need a different liquid ratio compared to a basic vanilla cake recipe. If fillings or buttercream are especially thick, one might reduce the liquid in the batter slightly to offset the overall moisture content of the finished cake.
Observations in a list for clarity:
Substitute absorptions: Almond flour absorbs more liquid than wheat flour, which means more liquid may be necessary.
Flavor impact: Strong flavors might necessitate different liquid amounts; chocolate or espresso powders can dry out batter, requiring extra moisture.
Cake Pan Selection and Preparation
Choosing the perfect pan size and preparing it correctly are crucial steps in baking that affect the outcome of the cake. The type of pan and its preparation can impact the batter's height, risk of overflow, and ultimately, the success of the cake layers.
Choosing the Right Pan Size and Shape
When selecting a baking pan, it is essential to consider the specific pan size and shape that the recipe calls for. Cake recipes are designed with particular pan volumes in mind, and using a different size can result in baking issues. Here is a list of common cake pan types and their typical uses:
Round Pan: Ideal for classic layer cakes; available in various diameters.
Square Pan: Used for sheet cakes; provides straight edges.
Loaf Pan: Best for bread-like cakes or pound cakes.
Bundt Pan: A fluted pan that gives decorative shapes to cakes.
Material matters as well. Aluminum pans heat quickly and cool quickly, making them popular for their even baking properties, while silicone pans are non-stick and flexible but may require longer baking times. Size is measured from the inside edge to the inside edge without including lips or handles.
Preventing Batter Overflow
To ensure a perfect bake, avoid filling the pan more than two-thirds full. This allows the cake to rise without causing batter to spill over. It's also helpful to understand the volume of your pan to calculate batter needs. A simple formula for a round pan:
Volume = π x (radius of pan)^2 x pan height
For example, a 9-inch round pan typically needs about 5 to 6 cups of batter, depending on its height.
Consider the following guidelines to reduce the risk of overflow:
Cake Layers: Use multiple pans for layered cakes to distribute batter evenly.
Sheet Cake: A larger pan area may require a thicker batter to prevent overflow.
Heavier Batters: In loaf and bundt pans, a heavier batter shouldn't fill more than half of the pan to accommodate rising.
Adhering to these specific guidelines should lead to successful cake baking, with perfectly baked layers and no messy oven spills.
Combining Wet and Dry Ingredients
When creating the perfect cake batter, it is crucial to combine wet and dry ingredients appropriately to ensure a consistent texture and prevent common issues such as a collapsed or curdled mixture.
Mixing Techniques for a Consistent Batter
A key step in preparing cake batter is mixing the wet and dry ingredients together. A chef should start by whisking all the dry ingredients—like flour, leavening agents, and spices—in a large mixing bowl. This is to create an even distribution which will help to achieve a soft and fluffy texture in the cake. After creating a well in the center, they need to carefully pour the wet ingredients, which include elements such as water, eggs, milk, and fat (like butter or oil), into the well.
Using either a mixer or a hand mixer, they should combine the mixture at a low speed until just combined. Overmixing can overdevelop the gluten in the flour, resulting in a tougher cake. The goal is to attain a smooth batter where no flour pockets remain but some small lumps may still be present; these will dissolve during the baking process and contribute to the cake's ability to rise properly.
Avoiding Common Mixing Mistakes
To avoid common issues like a batter that curdles or collapses, there are precise measures a chef should take:
Temperature of ingredients: Ingredients should be at room temperature to mix evenly. Cold ingredients can make fats like butter to curdle.
Addition of ingredients: Liquid ingredients should be added gradually to the dry mix to prevent forming a batter that is too wet or lumpy.
Mixing too vigorously: This can incorporate too much air and cause the cake to collapse after rising.
Striking the right balance when combining ingredients can be the difference between a cake that's a delight and one that's a disappointment. A chef's keen attention to these details will result in a cake that's as pleasing to the eye as it is to the palate.
Baking the Perfect Cake

Achieving the perfect cake requires careful attention to liquid amount in batter, but also extends to precise oven temperature control and accurate testing for doneness. Here's how to master these aspects for cakes that not only taste great but are also Instagram-worthy.
Optimizing Oven Temperature and Baking Time
A successful baker knows that the oven is the cornerstone of a moist cake with a tender texture. One should always preheat the oven to the specified temperature before adding the cake. This ensures an environment where the cake can rise appropriately. Here's an optimal temperature guide depending on the cake type:
Sponge Cakes: 325°F (165°C) – a lower temperature to avoid a crust forming too quickly
Dense Fruit Cakes: 300°F (150°C) – a gentle heat to cook slowly and thoroughly
The baking time varies based on the size and type of cake. For layer cakes, a common range is 25 to 35 minutes in the oven. It's crucial to rotate the cake halfway through the baking process for an even rise and color.
Testing for Doneness
To prevent a cake that looks done but remains uncooked in the middle, use the following tests:
Toothpick Test: Insert a toothpick in the center of the cake; it should come out clean or with a few crumbs attached.
Spring-Back Test: Gently press the top of the cake. If it springs back fully, it’s done.
Cake Thermometer: A specialized cake thermometer can read the internal temperature; look for 210°F (99°C) for fully baked cakes.
Perfecting the methods of testing for doneness eliminates guesswork and results in cakes that have the right texture to support layers and frosting—a clear mark of success for a self-taught baker using scratch recipes or box mixes alike, whether the cake is for a simple celebration or a grand event.
Decorating and Serving
Once the cake has been baked to perfection, its presentation is crucial for both visual appeal and taste. A well-decorated cake not only enhances the festive spirit of a celebration but also offers a tantalizing hint of the dessert's textures and flavors.
Applying Frosting and Layers Evenly
Applying frosting requires a steady hand and an eye for detail. The baker should begin with a crumb coat—an initial thin layer of frosting that seals in crumbs—ensuring a smooth canvas. Using an offset spatula, they evenly spread the frosting from the top down the sides of the cake. For layered cakes, it's essential that each layer is level and secured with an adequate amount of frosting to maintain the structure. They can use a turntable to rotate the cake while applying frosting, which aids in uniform application and crisp edges.
Creative Serving Suggestions
Cake serving goes beyond just slicing; it's a presentation opportunity. For instance, bold slices of layered cake can reveal the intricate textures and color contrasts within, making for an Instagram-worthy dessert. The baker may consider using diverse plating techniques that highlight the cake's design, such as offsetting slices on individual plates or pairing with complementary garnishes. Versatile serving options also enable guests to enjoy the cake as they prefer, whether that's a sizeable celebratory slice or a petite portion to savor the dessert's array of flavors.
