
Doughnut Dreams
Mastering the Art of Homemade Doughnut Frying
Frying doughnuts at home can seem like a daunting task, but with the right techniques and a bit of practice, anyone can create those delightful treats that awaken the senses and fulfill doughnut dreams. The key to achieving the perfect homemade doughnut is in understanding the process of frying – a crucial step that transforms a simple dough into a golden, airy, and delectable confectionery masterpiece. The journey to homemade doughnut success begins with meticulous preparation and the careful selection of ingredients.
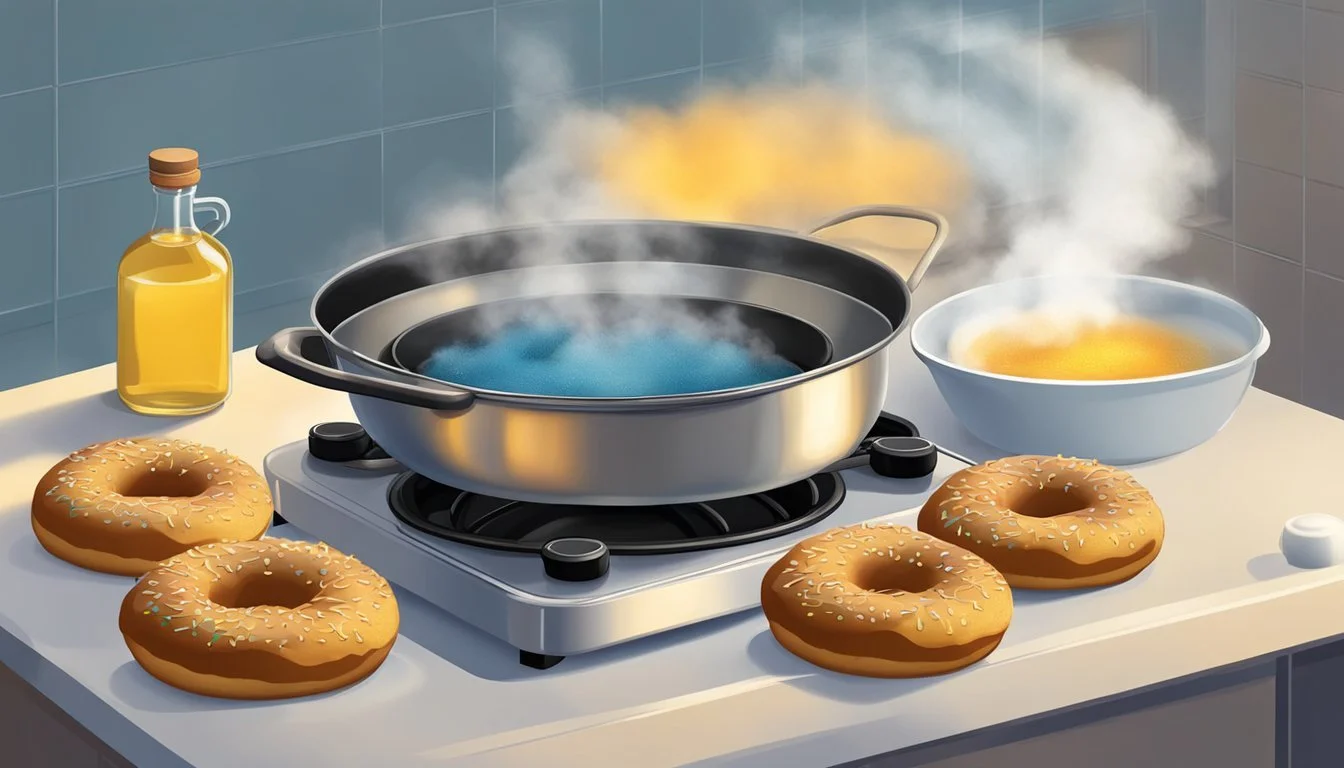
To make doughnuts at home, one must pay attention to the details that influence the frying process. The oil's temperature, the dough's consistency, and the timing are all pivotal elements that determine the outcome. Maintaining oil at the optimal temperature range, usually between 350°F and 360°F, ensures that doughnuts fry up light and crisp without absorbing too much oil. A well-prepared dough that rises properly is the foundation that, once introduced to the hot oil, puffs up to create the classic doughnut texture.
Achieving the dream of making the perfect doughnut at home is an attainable goal. It embraces the fusion of art and science, requiring a balance of precision and intuition. Once mastered, the act of making doughnuts can be a satisfying and delightful experience, allowing one to explore various flavors, fillings, and toppings right from the comfort of their kitchen. The aromas of freshly fried dough, coupled with the satisfaction of a successful batch, can turn an ordinary day at home into a memory full of flavor and joy.
Understanding Doughnut Ingredients
Each ingredient in a doughnut recipe plays a crucial role in determining the texture, flavor, and rise of the final product. From the type of flour used to the choice of sweeteners and fats, understanding these components is key to perfecting homemade doughnuts.
Flour Explained
All-purpose flour is commonly used for making doughnuts due to its moderate protein content, which provides the necessary structure without making the dough too tough. Some recipes may call for bread flour for a chewier texture or cake flour for a lighter crumb. It's essential to measure flour accurately, often by weight, to ensure consistency in the dough's formation.
The Role of Sugars
Granulated sugar is typically used in the dough mixture for a sweet base flavor, contributing to browning and tenderizing the dough through the Maillard reaction. Powdered sugar, often dusted on finished doughnuts or used in glazes, provides a delicate sweetness and appealing texture. Sugars also feed the yeast during fermentation, aiding with the rise of the dough.
Milk, Eggs, and Butter
The dairy components like milk and unsalted butter introduce richness and tenderize the dough by shortening the gluten strands. Milk also contributes to the browning of the doughnuts during frying. Eggs, specifically egg yolks, add color, richness, and leavening properties due to their fat and emulsifiers, which trap air and give volume to the dough.
Yeast and Leavening Agents
Active dry yeast is a common leavening agent in yeasted doughnuts, contributing to the airy, light texture. It requires activation in warm milk and a pinch of sugar before it's added to the dough. During the kneading process, gluten networks form, which are essential for trapping the carbon dioxide produced by the yeast, resulting in a puffed-up doughnut after frying.
Essential Tools and Equipment

Creating the perfect homemade doughnut requires a set of specific tools and equipment to ensure quality and ease in the process. It's important to use the right implements, from cutting to frying, for a successful outcome.
Using a Doughnut Cutter
To shape doughnuts uniformly, a doughnut cutter is indispensable. A simple press and twist are all it takes for classic doughnut shapes, complete with the hole in the center. For doughnut holes, repurpose the cut-out dough or use a smaller cutter.
Choosing the Right Frying Equipment
The cooking vessel can make a significant difference in doughnut frying. Ideally, a deep fryer or a heavy-bottomed pan provides consistent heating and space for the doughnuts to float. Fill it with high-quality vegetable oil for frying, ensuring the doughnuts absorb less oil and remain light and fluffy.
Thermometers for Accurate Temperature Control
Consistent heat is critical for the perfect fry. Using a candy or deep-fry thermometer allows one to monitor the oil temperature precisely, maintaining it around 360 degrees Fahrenheit. Accurate temperature control avoids under or overcooking and ensures a golden, delicious finish.
Kitchen Essentials for Doughnut Making:
Doughnut Cutter
Stand Mixer with Dough Hook
Mixing Bowl
Rolling Pin
Deep Fryer or Heavy-Bottomed Pan
Candy or Deep-Fry Thermometer
Baking Sheet with Parchment Paper
Vegetable Oil for Frying
Preparing the Dough

Crafting the perfect doughnut starts with meticulous dough preparation, which sets the foundation for a delectable outcome. One must, with precision, mix the right ingredients and allow the dough to proof correctly before shaping it into the classic doughnut form.
Making the Yeast Dough
To make yeast doughnuts, the cook begins by combining warm water or milk with yeast, to which sugar is often added to help activate the yeast. This mixture should sit until it becomes foamy, indicating that the yeast is active. Next, the cook blends this yeast mixture with flour—typically all-purpose or bread flour—to form a dough. The addition of fat, like butter or oil, and sometimes eggs, enriches the dough, giving it a tender crumb. Essential to achieving the correct texture, each ingredient must be measured accurately.
The Importance of Proofing
Proofing is a crucial step where the dough must rise until it doubles in size, a process which can take one to two hours. During this time, the yeast ferments, creating gases that make the dough rise and impart a light, airy structure to the pastries. The dough should be covered with plastic wrap or a damp towel and placed in a warm, draft-free environment to ensure the rise is even and consistent. If the dough rises too much or too little, the texture of the doughnuts can be adversely affected.
Shaping the Doughnuts
Once the dough has properly risen, the next step is shaping it. The cook turns the risen dough out onto a lightly floured surface and gently rolls it to an even thickness, usually about half an inch. Using a doughnut cutter or a pair of round cutters (one larger for the outer circle and one smaller for the hole), they press out the individual doughnuts. Excess dough can be kneaded lightly into a ball, re-rolled, and more doughnuts can be cut until all the dough is used. Care must be taken not to overwork the dough as it can become tough. The shaped doughnuts should then be set aside for a short second proof, often around 15-30 minutes, to puff up slightly before frying.
Frying Techniques
Frying doughnuts at home requires attention to detail with regard to oil temperature, frying duration, and proper drainage to ensure a delightful result.
Achieving the Perfect Fry
To achieve the perfect fry, one must maintain a consistent temperature, as fluctuations can significantly affect the quality of the doughnuts. Using oils with a high smoke point, such as canola oil, peanut oil, or vegetable oil, is ideal to achieve a crispy exterior without internal sogginess. A well-calibrated thermometer is crucial in monitoring the oil’s temperature.
Frying Temperatures and Times
The consensus among experts points to a frying temperature between 350°F and 360°F. It is important to note that adding dough can lower the oil temperature; thus, one might start a tad above this range. Frying times typically vary by size, with standard doughnuts needing approximately 2 minutes per side and smaller doughnut holes requiring less time. One should always use a timer to avoid over or undercooking.
Doughnut Size Temperature Range Approx. Frying Time Standard 350°F - 360°F 2 minutes per side Doughnut Holes 350°F - 360°F Less than 2 minutes
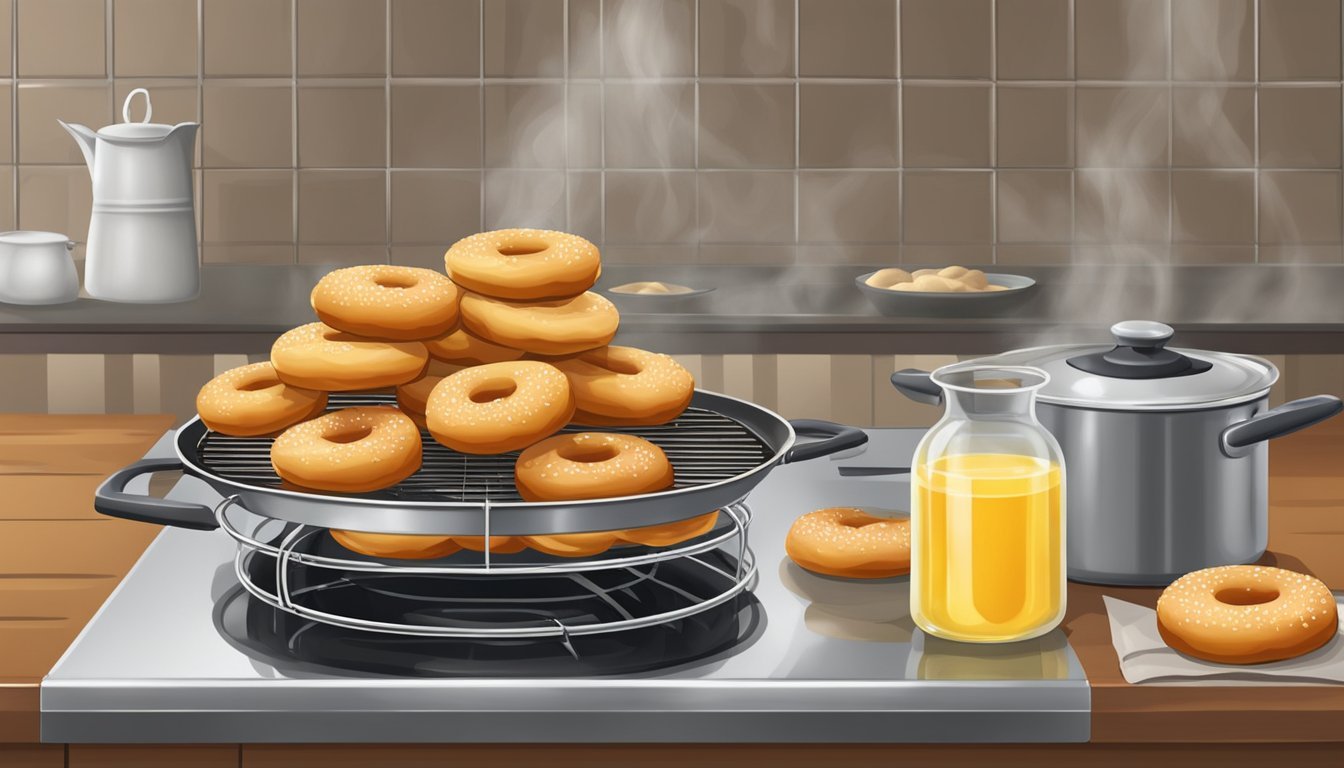
Handling and Draining Fried Doughnuts
Post-frying, doughnuts should be handled with care. Use a slotted spoon or strainer to remove them from the oil and immediately transfer them to a cooling rack with paper towels underneath to soak up excess oil. The draining process is vital for texture and to prevent an oily residue. If adding a sugar or glaze coating, allow the doughnuts to drain and cool slightly first to ensure the coating adheres well.
Glazing and Finishing Touches
Crafting the perfect glaze and adding an array of toppings can transform freshly fried doughnuts into tantalizing treats. This final step requires careful attention to detail and a delicate touch.
Creating a Variety of Glazes
To make a standard vanilla glaze, one needs to combine 1 cup of powdered sugar, a few tablespoons of milk, and 1/2 teaspoon of pure vanilla extract in a medium mixing bowl, whisking until smooth. The consistency should be thick yet pourable; one can adjust this with more sugar or milk if necessary. For a richer flavor, melted unsalted butter can be incorporated into the mixture. To craft a variety of glazes, chefs may also integrate light corn syrup for added sheen or blend in cinnamon or other spices for a unique twist.
Applying Glaze to Doughnuts
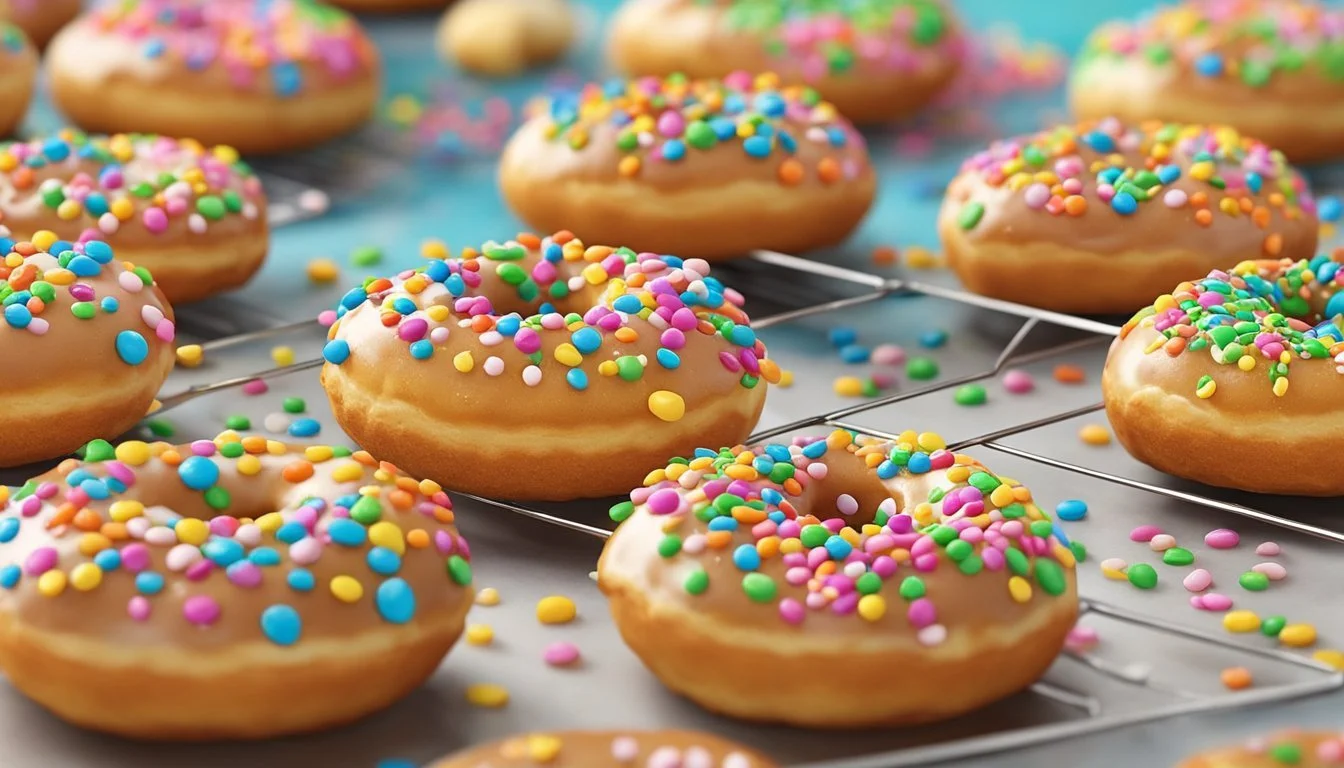
To glaze a doughnut, wait until it has cooled slightly after frying for easy handling. Dip the doughnut’s top half into the glaze or drizzle the glaze over the surface, ensuring even coverage for a uniform set. Drawing from professional techniques, one should place the glazed doughnuts on a wire rack to prevent sogginess, and the excess glaze can drip off cleanly, leaving the doughnuts fluffy and well-coated.
Decorative Garnishes and Toppings
For an eye-catching effect, one can add sprinkles or other decorative toppings to the glaze while it's still wet to ensure adherence. Beyond sprinkles, options for embellishments include toasted coconut, chopped nuts, or even cereal bits. Creating themed doughnuts with specific color schemes and toppings can provide a customized touch for special occasions.
Recipes and Variations
The pursuit of perfect homemade doughnuts begins with mastering the basic yeast dough recipe and then exploring gourmet flavor twists and dietary variations. This allows home bakers to produce both traditional and innovative doughnuts that cater to a wide audience, including those with specific dietary requirements.
Classic Yeast Doughnut Recipe
The foundation of a classic doughnut is a well-executed yeast dough. Begin by activating the yeast in warm milk, ensuring it's around 100° F. Combine this with large eggs, softened butter, sugar, salt, and a hint of ground nutmeg for a traditional flavor in a stand mixer. Gradually add in the flour until a soft dough forms. Allow it to rise until doubled. Roll out the dough, cut out doughnuts and doughnut holes, then fry them until golden. Doughnuts should be light, fluffy, and have a characteristic thin light ring around the middle when done perfectly.
Ingredients:
Warm milk (approx. 200ml)
Large eggs
Unsalted butter
Sugar
Salt
Ground nutmeg
Active dry yeast
All-purpose flour
Method:
Activate yeast in warm milk with sugar.
Mix in eggs, butter, sugar, salt, and nutmeg.
Add flour and knead into a soft dough.
Let rise, shape, and fry until golden.
Innovative Doughnut Flavors
One can transform a basic doughnut into an extraordinary treat with various fillings, toppings, and glazes. Infuse glazes with flavors like matcha, lavender, or citrus zest for a sophisticated twist. Fill the doughnuts with homemade jams, custards, or chocolate for an indulgent surprise. A sprinkle of toasted coconut, crushed nuts, or cereal pieces can add an unexpected but delightful crunch.
Ideas:
Glazes: Matcha, lavender, lemon, maple
Fillings: Raspberry jam, vanilla custard, Nutella
Toppings: Toasted coconut, crushed almonds, cereal bits
Gluten-Free and Vegan Options
Gluten-free and vegan diets need not exclude the joy of doughnuts. Replace all-purpose flour with a gluten-free flour blend suited for breads and sweet buns. To cater to vegans, use plant-based milk and butter alternatives, and swap eggs for flax or chia seeds mixed with water. Vegan versions might alter the texture slightly, but still yield a delectable sweet treat worth the effort.
Gluten-Free Adjustments:
Substitute all-purpose flour with gluten-free bread flour mix.
Vegan Alternates:
Replace dairy milk with almond or soy milk.
Use vegan butter or coconut oil.
Substitute eggs with flax or chia eggs.
Every homemade doughnut recipe outlined can be adjusted in terms of frosting, filling, or dough mix-ins to suit the baker’s creative desires or dietary needs, ensuring that each batch of homemade yeast doughnuts is as unique as it is delicious.
Safety and Cleanup
Frying doughnuts at home is a delightful experience, but safety and efficient cleanup are crucial. Maintaining a secure environment and having a planned cleaning strategy will ensure the process is enjoyable and stress-free.
Best Practices for Deep Frying at Home
When deep frying doughnuts at home, it’s important to keep safety at the forefront to prevent accidents. Here are specific strategies one should employ:
Heat Management: Always use a deep-fry thermometer to monitor the oil temperature. The oil should be maintained between 350°F and 360°F to ensure proper frying and to minimize the risk of the oil catching fire.
Equipment Safety: Use long-handled utensils to carefully place and remove doughnuts from the oil to keep hands and arms at a safe distance. It's also wise to wear oven mitts to protect against splatters.
Fire Prevention: Have a fire extinguisher within reach when frying. In case of an oil fire, never use water to extinguish it as this can spread the fire. Instead, turn off the heat source and cover the pot with a metal lid to suffocate the flames.
Efficient Cleaning After Frying
Cleaning up after frying doughnuts can be done efficiently with the right approach. Here's how:
Oil Disposal: Once the oil has completely cooled, pour it into an appropriate container and dispose of it according to local regulations. Do not pour oil down the sink as it can solidify and block the pipes.
Surface Cleaning: Wipe down all surfaces with paper towels to remove oil residue before washing with soapy water. Use a degreaser if necessary for stubborn oil.
Preventive Measures: To simplify cleanup, one can set a tray lined with paper towels under the frying area to catch any spills or splatters.
By adhering to these safety and cleaning protocols, anyone can fry doughnuts at home with confidence and the assurance of a clean kitchen afterward.
Tips for Storing and Serving
Proper storage maximizes freshness, while creative serving enhances the doughnut enjoyment experience at home.
Storing Fresh Doughnuts
Freshly fried doughnuts should be stored in an airtight container at room temperature to maintain their texture and taste. They are best eaten within 1-2 days, as they do not contain preservatives found in store-bought varieties. For longer storage, individually wrap each doughnut in plastic wrap and place them in the freezer for up to two months. Thaw at room temperature before serving.
Serving Suggestions
When presenting doughnuts at home, serve them at room temperature or slightly warmed for about 5-10 seconds in the microwave to revitalize their texture. One can also consider a variety of toppings such as a sprinkle of powdered sugar, a drizzle of chocolate sauce, or a dollop of whipped cream to add a delightful touch to the serving. For a more elaborate display, arrange the doughnuts on a serving platter with a selection of dips and spreads, allowing guests to customize their treats.
