
How to Make Homemade Bread Crumbs
A Step-by-Step Guide
Homemade bread (What wine goes well with bread?) crumbs offer a resourceful and flavorful alternative to store-bought varieties, leveraging ingredients that one often has on hand. They can be made from a variety of bread types, whether fresh, stale, or even slightly toasted, to achieve the desired texture and taste. These versatile kitchen staples have a multitude of culinary uses, enriching dishes with added crunch and depth of flavor. From topping casseroles (What wine goes well with casseroles?) and salads to binding meatloaves and coating chicken, bread crumbs are a quintessential element in both classic and contemporary recipes.
Creating bread crumbs at home is a straightforward process that not only reduces food waste but also allows for customization. One can choose the coarseness of the crumbs, decide whether to include seasonings or keep them plain, and determine the best drying method—air drying, baking, or using a food processor or blender. This adaptability makes homemade bread crumbs particularly useful, as they can be tailored to complement the specific dish they are being used in.
Storing homemade bread crumbs is simple and practical. They can be kept in an airtight container at room temperature for a short period, refrigerated if they're to be used within a few weeks, or frozen for long-term storage. This ensures that whenever the need for bread crumbs arises, a prepared cook can have them ready to enhance any meal, without the preservatives and additives found in commercial options.
Choosing the Right Bread
Selecting the appropriate type of bread is a pivotal step in creating homemade breadcrumbs. The choice of bread impacts flavor, texture, and the overall quality of the breadcrumbs.
Types of Bread
Bread variety is crucial, as each type offers distinct flavors and textures. White bread provides a neutral taste and soft crumbs, while sourdough and rye impart a tangy or robust flavor. Italian bread and baguettes create a denser breadcrumb, often preferred for coatings. For a lighter, airier texture, one might consider Panko bread crumbs, typically made from bread without crusts.
Stale Bread vs. Fresh Bread
Stale bread is traditionally recommended for breadcrumbs as it is drier and easier to process into consistent crumbs. Fresh bread can still be used but typically requires additional drying in the oven to achieve the necessary texture. Methods vary, but a common approach includes baking cubed or torn bread pieces at 300°F until they are golden brown and crisp.
Gluten-Free and Whole Wheat Options
For those with dietary restrictions or a preference for whole grains, gluten-free and whole wheat bread offer great alternatives. Whole wheat bread yields nutritious crumbs with a heartier texture and nuttier taste. Gluten-free bread allows individuals with sensitivities to still enjoy breadcrumbs in their cooking. These varieties are interchangeable with white bread in most recipes, keeping in mind that the inherent flavors of the bread will carry through to the final dish.
Preparation and Tools
Proper preparation and the correct tools are essential for making homemade breadcrumbs efficiently. The right equipment will make the process smoother and ensure a consistent crumb.
Gathering Equipment
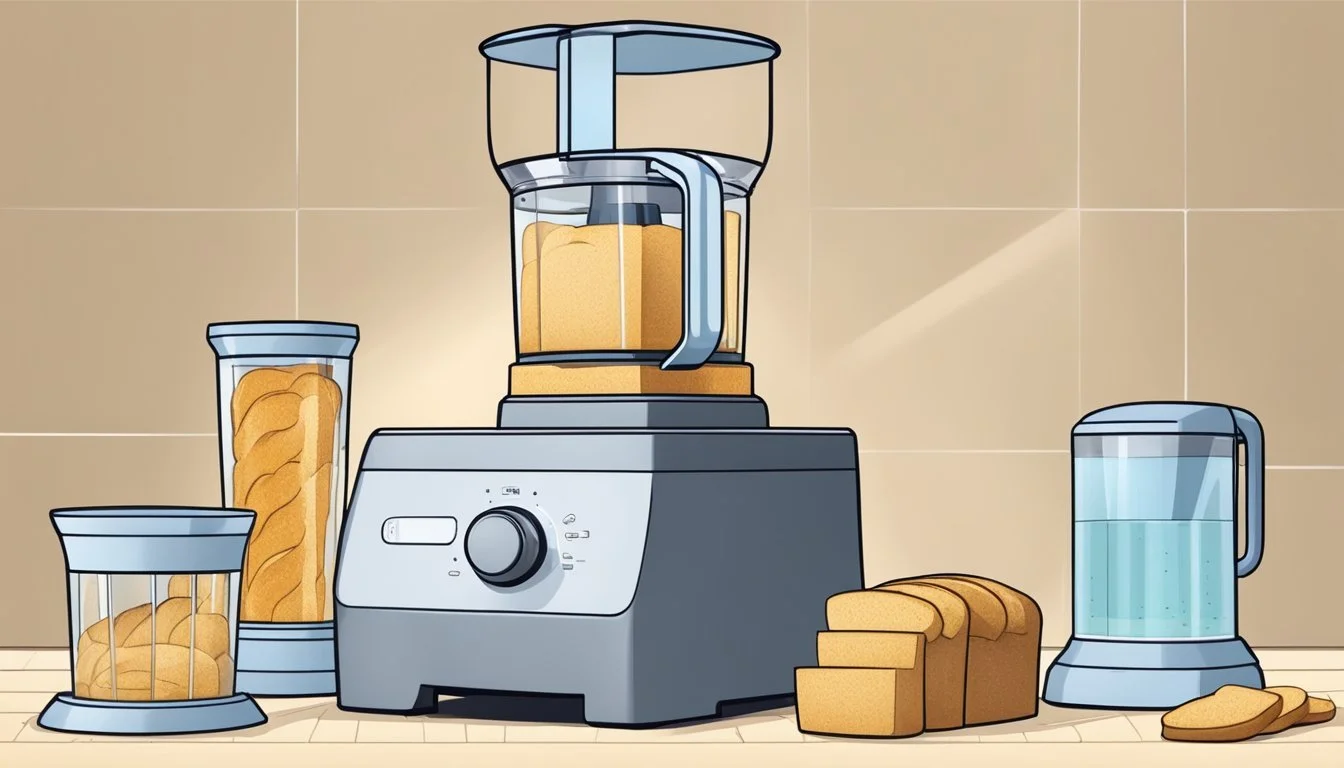
One will need a food processor or blender for a fine crumb, or a rolling pin, mallet, or box grater for a more textured result. Ensure to have a knife ready if the bread needs to be cut into smaller pieces and a plastic bag or paper towel to contain the bread during crushing. For toasting, an oven is required, along with a baking sheet if the drying method is preferred.
Food Processor/Blender: For fine crumbs.
Rolling Pin/Mallet: For crushing in a bag.
Box Grater: For hand-grated texture.
Knife: For initial bread slicing.
Plastic Bag/Paper Towel: For containing the bread.
Oven/Baking Sheet: For drying the bread.
Prepping the Bread
To begin, they must choose their bread—white, wheat, or even leftover crackers are acceptable choices. The crust can be removed if a lighter crumb is desired. Slice the bread into uniform pieces, strips, or cubes before drying or toasting, depending on the chosen method.
Choose the type of bread.
Optionally remove the crust.
Cut into uniform pieces for even drying.
Adjusting Bread Texture
The texture of the breadcrumbs can be varied according to need. For finer crumbs, one could pulse the dried bread in a food processor until the desired consistency is achieved. Alternatively, bread can be placed inside a plastic bag and crushed with a rolling pin or mallet. If a flakier crumb is preferred, the bread can be grated against a box grater. Always store the finished breadcrumbs in an airtight container in the pantry to maintain freshness.
Fine Crumbs: Pulse in a food processor.
Coarse Crumbs: Crush with a rolling pin or mallet.
Flakier Crumbs: Grate over a box grater.
Storage: Airtight container in the pantry.
Crumbing Process
Creating homemade bread crumbs is straightforward and can be done with manual techniques or with the aid of kitchen appliances. Achieving the desired fineness of the crumbs depends on the method and tools used.
Manual Crumbing Techniques
One can make bread crumbs without any electrical appliances by utilizing simple tools found in most kitchens. Dried bread can be placed inside a sealed bag and then crushed with a rolling pin. This technique allows for a certain level of control over the texture, tending towards a more coarse crumb texture. For finer crumbs, one can continue crushing until the desired consistency is reached.
Using Kitchen Appliances
For efficiency and uniform texture, kitchen appliances such as a food processor are ideal. They create bread crumbs quickly and can easily adjust from coarse crumbs to finer textures. The process involves breaking the dry bread into pieces that the food processor can handle and then pulsing or running the machine until the crumbs reach the preferred texture.
Achieving Desired Fineness
The fineness of bread crumbs is pivotal for certain recipes, ranging from panko-style crumbs, known for their light, airy texture, to fine dry crumbs used in coatings. The desired fineness can be adjusted by the amount of time the bread is processed or crushed. For instance, minimal processing will yield a coarser texture, suitable for toppings, whereas more extended processing will give a finer crumb used for breading and other delicate culinary applications.
Drying and Toasting
Proper drying and toasting are crucial for achieving the ideal texture and flavor in homemade bread crumbs. This section outlines two effective methods: oven-drying and pan-toasting.
Oven-Drying Bread Crumbs
To oven-dry bread crumbs, one should preheat the oven to a low temperature, typically between 250-300°F. The bread should be cut or torn into uniform pieces, no larger than 1 inch, to ensure even drying. Lay the bread pieces on a baking sheet in a single layer, avoiding overlap, which promotes consistent toasting.
Time & Temperature: Bake for 10-15 minutes at 300°F (150°C) or until the bread pieces achieve a golden color and a dry, crispy texture.
Stirring: Stir the bread pieces once or twice during the process to help them toast evenly.
Pan-Toasting Method
Pan-toasting offers a quicker alternative to the oven and infuses bread crumbs with additional flavor if desired.
Preheat a skillet over medium-low heat.
Melt butter or heat oil in the skillet to prevent sticking and add an extra layer of flavor.
Add the bread crumbs and any seasonings to the skillet.
Stir the crumbs frequently to ensure they toast evenly, gain a golden brown color, and become crispy.
Spread out the bread crumbs in the skillet to allow even exposure to the heat.
The pan should be watched carefully to prevent the bread crumbs from burning. This method offers a more hands-on approach, ensuring the bread crumbs reach the desired level of toastiness without overcooking.
Seasoning and Flavoring
Seasoning homemade breadcrumbs is essential to enhance their flavor profile and ensure they complement the dishes they're used in. Precision in choosing seasonings and understanding how to blend them for the desired outcome is key.
Choosing Seasonings
When selecting seasonings, one must consider the flavor balance between saltiness, aromatics, and herbs. Kosher salt is preferred by many for its pure taste and ability to blend well with other spices without being overpowering. It's recommended to start with a small amount and adjust according to taste.
Salt: Begin with a 1/2 teaspoon of kosher salt per cup of breadcrumbs and adjust to preference.
Aromatics: Garlic powder and onion powder are popular choices for adding depth.
Herbs: Choosing between fresh and dried herbs can significantly impact the flavor intensity.
Herbs and Spices
Herbs and spices introduce complexity and can create thematic breadcrumb variations. Regular use of parsley, oregano, or basil can offer an Italian flair, while rosemary and thyme provide a more rustic, earthy taste. Dried herbs often have a more concentrated flavor than fresh, hence require less quantity.
Italian Blend: Mix 1 tablespoon of Italian seasoning per cup of breadcrumbs.
Custom Blend: Combine 1 teaspoon each of dried parsley, oregano, and basil.
Cheese and Oil Addition
Parmesan cheese is excellent for adding a rich, nutty flavor to breadcrumbs. One can mix in grated parmesan, ensuring it is well-distributed for an even taste. A light drizzle of olive oil or melted butter can be used not only to help the dry seasonings adhere to the breadcrumbs but also to introduce a subtle richness.
Cheese: Stir in 1/4 cup of finely grated parmesan per cup of breadcrumbs.
Oil: Incorporate 1 tablespoon of olive oil or melted butter for added moisture and richness.
Storing and Freezing
Proper storage is essential for maintaining the quality and extending the lifespan of homemade bread crumbs. Utilizing airtight containers and understanding the effects of freezing are crucial aspects to consider.
Airtight Containers and Freezing
For optimal preservation, one should transfer bread crumbs to an airtight container after ensuring they are completely cool and dry. The absence of air circulation prevents the incursion of moisture, which could lead to spoilage. When opting to freeze bread crumbs, it's recommended to use freezer-safe airtight containers or heavy-duty freezer bags. By squeezing out excess air before sealing, one minimizes the risk of freezer burn and moisture accumulation.
In the pantry: Fresh bread crumbs stay good up to one week; store in a cool, dry place.
In the freezer: Both dry and fresh bread crumbs can be frozen for extended freshness, lasting anywhere from four to six months depending on the type.
Shelf Life and Container Types
When considering the shelf life of bread crumbs, the distinction between dry and fresh breadcrumbs is important:
Dry breadcrumbs: These can last up to six months when stored properly in an airtight container at room temperature.
Fresh breadcrumbs: These may have a shorter shelf life and are best used within a week when stored at room temperature, but can last up to four months if frozen.
When selecting containers for storage, options include:
Glass jars: A durable and non-reactive option, they provide a secure seal.
Plastic containers: Often more convenient, they should be freezer-safe if used for freezing.
Plastic bags: Space-saving and suitable for freezing, ensure they are designed for freezer use to prevent moisture ingress.
Using these methods will help maintain the freshness and usability of breadcrumbs, whether one plans to use them in the near future or save them for later culinary uses.
Cooking Uses and Pairings
Homemade breadcrumbs serve as a versatile ingredient, enhancing both the texture and flavor of various dishes. They add a crispy coating or a crunchy topping, transform the consistency of meat mixtures, and contribute to the cohesion and moistness in stuffings.

Breading for Meats and Vegetables
When breading meats such as chicken or fish, one can achieve a crispy outer texture by first dipping the pieces in flour and beaten egg before coating them evenly with breadcrumbs. Vegetables can also be breaded using a similar method for a crunchy appetizer or side dish.
Chicken Fries: Coat chicken strips with seasoned breadcrumbs for a quick, oven-baked treat.
Meatballs & Meatloaf: Incorporate breadcrumbs to help bind the meat and add lightness to these dishes.
Toppings and Casseroles
Breadcrumbs make for an excellent crunchy topping on casseroles, adding texture contrast to the creamy components beneath.
Macaroni and Cheese: A layer of lightly buttered breadcrumbs browned in the oven brings a satisfying crunch.
Crispy Vegetable Gratin: Sprinkle breadcrumbs on top before baking for a golden finish.
Croutons and Stuffing
For salads and soups, homemade breadcrumbs can be further toasted to create croutons that offer a delightful crunch.
Salad Croutons: Add toasted, cubed breadcrumbs to salads for extra texture.
Stuffing: Breadcrumbs act as the foundation for stuffing, absorbing flavors and providing structure. Use a food processor to achieve the desired crumb size.
By using a food processor to control the crumb size, chefs can tailor the breadcrumb texture for specific cooking applications, from fine to coarse, to suit the dish being prepared.
Health and Nutrition
Homemade breadcrumbs offer transparency in nutritional content and ingredient control, which significantly impacts their healthfulness compared to store-bought varieties.
Caloric Information
Homemade breadcrumbs’ caloric value hinges on the type of bread one uses. Typically, a slice of white bread contains approximately 66 calories, while whole-grain varieties may contain around 79 calories per slice. When breadcrumbs are made at home, the caloric density can be closely monitored. One can estimate that a cup of homemade breadcrumbs has between 300 to 400 calories, depending on the bread choice.
Benefits of Homemade vs. Store-Bought
Ingredients List: Homemade breadcrumbs give the advantage of selecting ingredients with better nutritional profiles. For instance, opting for whole-grain bread can enhance fiber content.
Store-Bought Breadcrumbs often include preservatives, added sugars, and excess sodium to extend shelf life and improve flavor.
Homemade Breadcrumbs, in contrast, can be made without unnecessary additives, aligning with a whole-foods-based diet.
Customization: One has the flexibility to enhance the nutritional value by incorporating herbs, nuts, and seeds for additional health benefits.
Store-Bought Homemade Preservatives Yes No Added Sugars Often Optional Sodium Content High Adjustable
By making breadcrumbs at home, individuals can ensure they are consuming a product that is in line with their dietary and nutritional requirements.
Recipes and Variations
Making homemade breadcrumbs is a practical and straightforward process. One can customize the texture and flavor based on their culinary needs, whether they prefer basic bread crumbs for a crispy coating or specialty variations like panko or Italian seasoned crumbs for a more distinct touch.
Basic Homemade Breadcrumbs Recipe
Ingredients:
Leftover bread (white or whole wheat)
Instructions:
Preheat oven to 300°F (150°C).
Slice the bread into 1/2-inch cubes if using fresh bread or simply use leftover bread as is.
Spread the bread cubes in a single layer on a baking sheet.
Bake for 10-15 minutes or until the cubes are dry and golden brown, stirring occasionally.
Allow to cool and then pulse in a food processor until they reach the desired consistency.
For those seeking a gluten-free option, simply replace the bread with any preferred gluten-free bread and follow the same steps for a safe alternative.
Specialty Breadcrumb Variations
Panko Bread Crumbs:
Achieved using crustless bread, panko crumbs are lighter and flakier than traditional breadcrumbs. They are typically used in Japanese cooking but have gained international popularity for adding a delicate crunch.
Italian Bread Crumbs:
Ingredients:
Basic homemade breadcrumbs
1 tsp dried oregano
1 tsp dried basil
1/2 tsp garlic powder
1/2 tsp onion powder
Salt and pepper to taste
Instructions: Mix the spices into the freshly processed, plain breadcrumbs.
Fresh Bread Crumbs:
Fresh bread crumbs can be made by gently pulsing fresh bread in a food processor until coarse. They provide a softer texture and are moist compared to dried breadcrumbs.
By experimenting with the size of the crumbs and the addition of various seasonings, one can elevate the flavor profile of any dish requiring breadcrumbs.
Practical Tips and Tricks
In making homemade breadcrumbs, precise techniques can make all the difference in quality. These tips and tricks address specific concerns, ensuring you have control over the flavor and consistency of your breadcrumbs with fast and easy methods.
Rescuing Oversalted Breadcrumbs
If one finds their breadcrumbs too salty, they can try adding unsalted breadcrumbs to the mix to balance out the flavor. Additionally, using a starch like potato flakes can help absorb some of the salt without significantly altering the texture of the breadcrumbs.
Improving Breadcrumb Texture
To achieve the desired texture, it's important to toast the bread until it's sufficiently dry. Here's a quick guide:
For coarser crumbs: After toasting, simply crumble the bread by hand.
For finer crumbs: Pulse the toasted bread in a food processor to the preferred consistency.
For those preferring a crunchier exterior to their breading, one could mix a small proportion of cornmeal with their breadcrumbs.
Creative Uses
Breadcrumbs have a variety of uses beyond the classic breading. Here are some inventive ways to put them to work:
Thickener for soups and stews: Sprinkle breadcrumbs to add body and richness.
Casserole topping: Mix with grated cheese and herbs for a crispy topping.
Stuffing additive: They can add bulk and absorb flavors beautifully in stuffings.
Remember, making your own breadcrumbs not only provides a fresher taste but also offers the flexibility to customize for any dish.
Conclusion
Making homemade bread crumbs is a simple and rewarding process. By doing so, one reduces food waste significantly by repurposing stale bread that might otherwise be discarded. With minimal effort, they can create a versatile ingredient that elevates the texture of countless dishes.
Tips for use: Homemade bread crumbs can be tailored for various uses; they serve excellently as breading for fried foods, adding a satisfying crunch. One may confidently experiment by seasoning them according to personal taste or the demands of the recipe they're enhancing.
Storing: Once prepared, these bread crumbs should be stored in an airtight container to preserve freshness. They can last for several weeks if kept in a cool, dry place, or for several months when frozen.
Advantage of Homemade: By making their own, individuals know exactly what ingredients are included, avoiding the preservatives found in store-bought versions. Moreover, they can control the texture, from rustic and chunky to finely ground.
Waste Reduction: Utilizing every last slice of bread is a sustainable kitchen practice, reflecting a thoughtful approach to consumption.
Sharing the Journey: For those proud of their homemade bread crumbs, sharing the process on Instagram can inspire others and spread the confidence to make their own. Clear, simple instructions paired with visuals can communicate the steps effectively, making it accessible for everyone.
In an era when sustainability and personalized cooking are held in high regard, homemade bread crumbs stand out as a small yet significant triumph in the kitchen.
