
How to Make Homemade Pasta Without a Machine
A Simple Guide for Hand-Rolled Dough
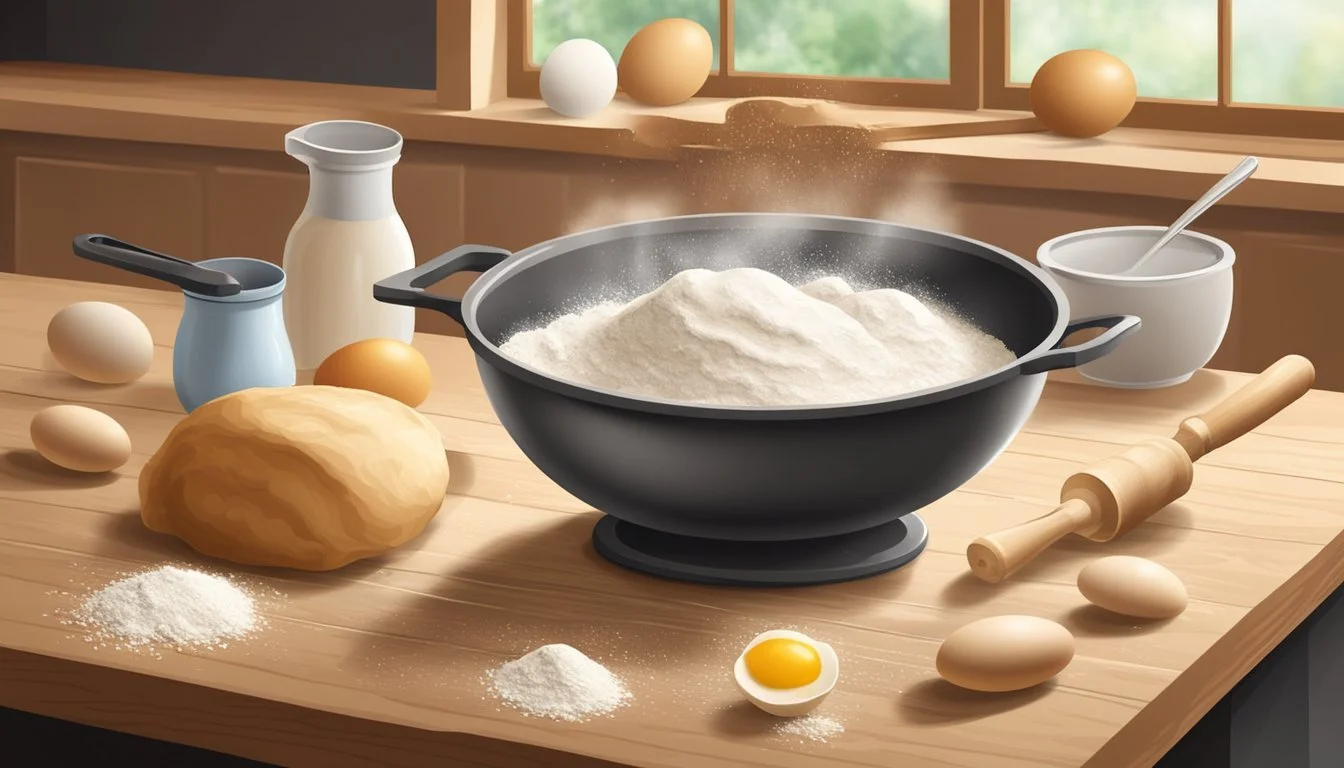
Making homemade pasta from scratch is a rewarding culinary venture that many may assume requires special tools or equipment. However, pasta (What wine goes well with pasta?) enthusiasts can breathe a sigh of relief—the creation of fresh, delectable noodles doesn't necessitate the use of a machine. With some basic ingredients and a little elbow grease, one can craft pasta that rivals even the finest Italian restaurants. A simple combination of flour and eggs forms the foundation of most pasta recipes, and with the assistance of a rolling pin, the dough can be shaped to the chef's desired thickness.
The process begins with the formation of a well in the center of the flour, into which eggs and a touch of salt are added. The eggs are then gently whisked, gradually incorporating the surrounding flour, to create a cohesive dough. Once the dough reaches the right consistency, kneading it becomes essential—a process that develops gluten, providing the pasta with its characteristic bite. After a period of rest, the dough is rolled out to an even thickness before being sliced into strands or shaped as desired.
Despite the seeming simplicity, making pasta from scratch without a machine does require patience and attention to detail. Factors like the type of flour used, the size of the eggs, and the ambient humidity can all influence the final product. Thus, it's important to understand the dough's texture and know when to adjust with either a dusting of flour or a few drops of water. For those seeking the satisfaction of crafting their own pasta but lacking a pasta machine, this hands-on method not only connects them to traditional Italian cooking practices but demonstrates that sometimes, the simplest tools are the most effective.
Gathering the Ingredients
Before embarking on the journey to make homemade pasta without a machine, selecting high-quality ingredients is crucial. Specific types of flour and eggs affect the texture and taste of pasta, while small amounts of salt and oil can influence the dough's consistency and flavor.
Choosing the Right Flour
The choice of flour is pivotal in pasta making, as it determines the texture and firmness of the pasta. All-purpose flour is versatile and commonly used due to its balanced protein content, which is suitable for pasta. For a more authentic and refined pasta, 00 flour, a finely ground Italian flour, is preferred for its silky and smooth consistency. Semolina flour, made from durum wheat, is another excellent choice that provides a more robust flavor and al dente texture.
Fresh vs. Store-Bought Eggs
Eggs act as a binding agent and enrich the pasta dough. Fresh, high-quality eggs typically yield a richer taste and a more supple dough. They should be at room temperature to mix more easily with the flour. While store-bought eggs can also be used, one may notice a difference in the pasta's color and texture depending on the freshness and quality of the eggs selected.
The Role of Salt and Oil
Salt is a necessary ingredient that enhances the pasta's overall flavor. A pinch of salt is usually sufficient. Olive oil is not always included in pasta dough, but when it is, it should be of high quality. The oil contributes to the dough's moisture and elasticity, making it easier to handle. A standard measure is about a tablespoon for every two cups of flour. Using olive oil is optional and can be excluded based on personal preference or specific pasta recipes.
Making the Dough
Making pasta dough from scratch is a straightforward yet rewarding endeavor. Beginning with the essential step of creating a flour well and advancing through meticulously integrating the ingredients, the method culminates with kneading the mixture into a smooth and elastic ball of dough.
Creating the Well
The initial task is to form a well in the center of the flour, which will hold the eggs and olive oil. This classic technique is employed in most pasta dough recipes to separate the wet and dry components during the initial mixing phase. Placing the flour on a clean, flat surface, one creates a large, deep indentation in the middle—enough to comfortably contain the eggs and oil.
Mixing the Ingredients
Into the well, one cracks in the eggs, adds a touch of olive oil, and sprinkles a pinch of salt. The mixing begins with a fork, whisking the eggs and oil together and gradually drawing in the surrounding flour. It’s crucial to incorporate the flour slowly to avoid lumps and ensure that the hydration of the dough is even.
Kneading to Perfection
After the dough starts forming, the mixing continues by hand to knead the pasta dough. Kneading is a critical part of the process, as it develops the gluten which gives the pasta its structure and chewy texture. The dough should be kneaded on a lightly floured surface for about 8-10 minutes until it becomes a smooth, elastic ball. If the dough feels too dry, one can add water, a tablespoon at a time, achieving the desired consistency.
Resting the Dough

After the pasta dough is kneaded, it enters an essential phase: resting. This step is crucial for the gluten in the dough to relax, making it easier to shape the pasta later on.
Covering with Plastic Wrap
To prevent the pasta dough from drying out during the rest period, one should cover it with plastic wrap. The plastic wrap should be placed directly on the surface of the dough to ensure an airtight seal. This helps to maintain the dough's moisture content and prevents the formation of a dry skin.
Procedure:
Flatten the ball of pasta dough slightly.
Lay a sheet of plastic wrap on the work surface.
Place the dough on the plastic wrap.
Wrap the dough snugly, pressing out any air pockets.
Rest Time Importance
The resting time for pasta dough is not arbitrary; it is a pivotal step in the pasta-making process. During this time, the gluten strands formed during kneading have a chance to settle and relax, which yields a more pliable dough that's easier to roll out.
Recommended Resting Time: At least 30 minutes at room temperature.
By adhering to the outlined rest period, one ensures the dough has enough time to reach the optimal texture for pasta making. It's a practice that underscores the importance of patience in achieving the desired outcome in the kitchen.
Rolling Out the Dough
To create smooth, even sheets of pasta dough without a machine, one needs to understand the proper technique, use a rolling pin effectively, and gauge the correct thickness. It requires some effort, but the result is worth it.
Without a Pasta Maker
When rolling out dough without a pasta maker, a flat surface well-dusted with flour is essential to prevent sticking. The chef should start by placing the ball of pasta dough in the center of the floured area. They use the heel of their hands to flatten the dough into a disk before beginning to roll out.
Achieving the Right Thickness
Achieving the right thickness is crucial for the texture of homemade pasta. The dough should be evenly rolled out to a transparency where a hand placed beneath it is visible but not overly thin to avoid tears. This consistency allows for optimal cooking and sauce absorption.
Ideal Thickness: Pasta dough should typically be rolled until it is about 1/16 inch thick, though some recipes may vary.
Consistent Texture: Uniformity in thickness ensures even cooking, so one should frequently check and smooth out any thicker edges.
Using a Rolling Pin
A rolling pin is an indispensable tool for homemade pasta enthusiasts. To roll out the dough:
Dust the rolling pin with flour to reduce sticking.
Apply even pressure and roll from the center outwards, rotating the dough a quarter turn after a few rolls to maintain a circular shape.
Continue until the dough reaches the desired thickness.
Pressure: Firm but gentle pressure is necessary for stretching the dough without tearing.
Rolling Technique: It must be done methodically, working from the center out toward the edges to stretch the dough evenly.
By adhering to these guidelines, one can produce high-quality, homemade pasta with the classic texture and taste that machine-made pasta often fails to achieve.
Cutting the Pasta
After rolling out the pasta dough into thin sheets, one moves to the stage of cutting the pasta into shapes and sizes. Mastery in cutting allows for uniform cooking and a professional touch to the final dish.
Creating Uniform Strips
To create uniform pasta strips, one needs a flat cutting surface and a sharp knife. A well-floured cutting area prevents sticking, while precise measurement ensures even cooking. For long, even strips, roll dough into a loose log and slice crosswise. Measuring with a ruler can help achieve consistent widths.
Pasta Shape Varieties
There are countless pasta shapes, each suited for different sauces and dishes. Classic shapes created without a machine include:
Fettuccine: Typically about 1/4-inch wide.
Spaghetti: Rolled and cut into thin, round strands.
Pappardelle: Broad strips, often about 3/4-inch to 1-inch wide.
Linguine: Narrower than Fettuccine, often under 1/4-inch.
Tagliatelle: Similar to Fettuccine but with a narrower cut, usually around 3/8-inch wide.
Choosing the right shape for your sauce or dish enhances the culinary experience.
Hand-Cutting Techniques
A sharp knife is critical for cleanly-cut pasta strips. For straight cuts, one should use a smooth, straight-down motion without sawing. For shapes like Pappardelle or Tagliatelle, gently rolling the dough into a flat tube and then slicing it into ribbons creates a rustic feel. A pastry wheel can be used for decorative edges or more intricate shapes. Patience and a steady hand yield the best results.
Cooking the Pasta
Once the homemade pasta is ready, it's crucial to cook it properly to achieve the perfect texture. This section delves into the key steps in boiling the pasta to ensure it's cooked al dente, properly drained, and served optimally.
Boiling Time and Texture
Cooking homemade pasta requires attentiveness to boiling time to achieve an al dente texture. The cook time can vary but typically ranges from 2 to 4 minutes for fresh pasta (how long does fresh pasta last?). The pasta should feel tender but slightly firm to the bite. She should start checking the pasta’s texture after 90 seconds in the boiling water to prevent overcooking.
Testing for Al Dente
To test for al dente, she can remove a piece of pasta from the water and bite into it; there should be a slight resistance in the center. An alternative method is to cut the pasta with a utensil; the pasta should not feel mushy. Testing frequently as the pasta nears completion will help ensure it retains its ideal texture.
Draining and Serving
Once the pasta is cooked al dente, she should quickly and carefully drain the pasta in a colander. It’s recommended to reserve a cup of the cooking water for adjusting the sauce consistency later, if needed. After draining, she may toss the pasta with a drizzle of olive oil to prevent sticking if it's not being immediately sauced and served. Serving should take place promptly to enjoy the pasta at its best temperature and consistency.
Storing and Refrigerating

Proper storage of homemade pasta significantly extends its shelf life. Whether one opts for refrigeration or freezing, employing the correct methods ensures pasta maintains its quality.
Short-Term Fridge Storage
For those intending to enjoy their homemade pasta within a couple of days, refrigeration is an ideal option. Pasta should be dusted with a bit of flour to prevent sticking and then placed in an airtight container or wrapped tightly in plastic wrap. It’s helpful to lay a kitchen towel under the wrap to absorb any excess moisture. This method can maintain freshness for up to two days in the refrigerator.
Freezing for Long-Term
For longer storage, freezing homemade pasta is the recommended choice. To freeze pasta, first lay it out in a single layer on a baking sheet, ensuring the pieces do not touch, and freeze until solid. Once frozen, transfer the pasta to airtight bags, removing as much air as possible before sealing. Label the bags with the date, as frozen pasta can last for up to three months. When one wishes to cook the frozen pasta, there’s no need to thaw; it can go straight into boiling water.
Best Practices
There are several best practices to observe when storing homemade pasta. Fresh pasta should always be stored as quickly as possible to preempt spoilage. When refrigerating, be vigilant about preventing the exposure of pasta to air. In the context of freezing, ensure pasta is frozen quickly and stored in a way that prevents freezer burn. Adhering to these best practices guarantees the home cook can reap the full benefits of a make-ahead meal strategy.
Creating Sauces and Accompaniments

Pasta is a versatile dish which pairs well with a variety of sauces and accompaniments, enhancing the flavor and adding nutrients. Here, we focus on three types of sauces: a simple olive oil dressing, tomato-based sauces, (What wine goes well with tomato-based sauces?) and creamy cheese sauces, each bringing its own unique profile to homemade pasta.
Simple Olive Oil Dressing
A simple olive oil dressing is quick to prepare and highlights the freshness of homemade pasta. The cook combines extra virgin olive oil, fresh minced garlic, salt, and pepper, whisking them together to create a light coating for the pasta. Optionally, they can add fresh herbs like basil (how long does basil last?) or parsley and a squeeze of lemon juice to elevate the flavor.
Ingredients:
Extra virgin olive oil: 1/4 cup
Garlic, minced: 2 cloves
Fresh basil, chopped: 1 tablespoon
Salt and pepper: to taste
Lemon juice: 2 teaspoons (optional)
Cook's Note: This dressing is not only simple to make but also allows the chef to adjust according to taste preferences.
Tomato-Based Sauces
Tomato-based sauces, such as marinara or bolognese, offer richness in flavor. They usually start with sautéing onions and garlic in olive oil before adding crushed tomatoes, cooking down to a thick sauce. For a bolognese, they add ground meat and simmer, allowing all flavors to meld. Tomato sauce is a great way to integrate vegetables and nutrients into a meal.
Ingredients for marinara sauce:
Olive oil: 2 tablespoons
Onion, finely chopped: 1 medium
Garlic, minced: 3 cloves
Crushed tomatoes: 28 ounces
Basil leaves: 6
Salt and pepper: to taste
Recipes Variation: The chef might choose to add vegetables like bell peppers or mushrooms to the sauce for added nutrients and texture.
Creamy and Cheese Sauces
Creamy and cheese sauces such as alfredo are indulgent accompaniments to pasta. To make an alfredo sauce, butter is melted with cream and then simmered until thick. Parmesan cheese is added off the heat, melting into the sauce to create a smooth texture.
Ingredients for alfredo sauce:
Butter: 1/2 cup
Heavy cream: 1 cup
Grated Parmesan cheese: 1 1/2 cups
Garlic, minced: 1 clove
Salt and pepper: to taste
Dietary Note: Chefs often choose cream sauces for their lush consistency, but they can be rich in calories, so portion control may be advised.
Nutrition and Health Information
Homemade pasta provides a certain level of control over nutrition, enabling one to track caloric intake and carbohydrate content. The ingredients and portion size can be adjusted to suit dietary preferences and health requirements.
Counting Calories
Calories in homemade pasta predominantly come from flour and eggs. One cup of all-purpose flour contains approximately 455 calories, while a large egg adds around 72 calories. The total calorie content will vary depending on the recipe's ratio of ingredients. A serving of homemade pasta without any sauces or additional toppings generally contains between 200 and 300 calories, assuming the portion is about one cup of cooked pasta.
Understanding Carbohydrates
The primary carbohydrate source in homemade pasta is the flour used to make the dough. A cup of all-purpose flour contains about 95 grams of carbohydrates, which serves as the body's main energy source. For those monitoring their carbohydrate intake, opting for alternative flour like whole wheat can provide more nutrients and a higher fiber content, which positively impacts blood sugar levels. Here's a breakdown of carbohydrate content:
All-purpose flour: ~95g of carbohydrates per cup
Whole wheat flour: ~87g of carbohydrates per cup, along with increased fiber
Tips and Tricks for Success
The key to crafting perfect homemade pasta lies in the meticulous execution of a few fundamental steps. Builders of this beloved staple can attain artisanal quality in their kitchens by steering clear of pitfalls and honing their technique.
Avoiding Common Mistakes
Type: Hard wheat flour, such as durum or “00” flour, is recommended for its high protein content, enhancing the pasta's structure and chewiness.
Measurement: Precise measurement is crucial. Use a kitchen scale for accuracy.
Dough Consistency:
Hydration: Use a ratio of about 100 grams of flour to 50 grams of liquid as a starting point, adjusting as needed.
Kneading: The dough should be kneaded until it is smooth and pliable. Under-kneading leads to brittle pasta, while over-kneading can make it tough.
Rolling Out the Dough:
Thickness: Roll the dough to an even thickness. Aim for a thin consistency that allows light to pass through when held up.
A bench scraper or pizza cutter can be handy to achieve uniform shapes and sizes.
Equipment Use:
A food processor can be employed to mix the dough until it resembles fine crumbs before turning it out onto a surface for kneading.
Using a stand mixer with a dough hook attachment simplifies kneading, but careful monitoring is essential to avoid overworking the dough.
Mastering the Art of Pasta Making
Practice and Patience:
Each batch of pasta offers a learning opportunity. Flexibility in adapting the recipe based on the dough's feel and the kitchen's environment (humidity, temperature) is important.
Shaping the Pasta:
Beyond the basic sheets, mastering shapes like fettuccine or pappardelle can enhance the dining experience. Consistent thickness and width can be achieved with practice and careful cutting.
Homemade pasta cooks quickly, generally in just 2-4 minutes. The pasta should be placed in a large pot of salted boiling water and stirred gently to prevent sticking. Taste test for doneness rather than relying solely on time.
By adhering to these practices, anyone can perfect the art of homemade pasta and impress diners with their culinary prowess.
Additional Resources
For those eager to expand their pasta-making skills beyond the basics, the following resources provide in-depth guidance and a variety of perspectives on creating homemade pasta without a machine.
Helpful Tutorials and Videos
YouTube: A treasure trove for visual learners, YouTube offers countless tutorials that demonstrate the pasta-making process. Beginners may find step-by-step videos particularly useful, where experienced cooks illustrate the delicate art of mixing, rolling, and shaping dough by hand.
Cooking Blogs and Websites: Websites of culinary enthusiasts often feature video sections where they share personal tips and tricks that can't be found in written recipes. Watching their techniques gives viewers a clearer understanding of the texture and consistency needed for perfect pasta.
Further Reading
Cookbooks: Several cookbooks are dedicated to the art of pasta-making. They often include detailed instructions for various pasta types and sauces, along with cultural context and historical notes.
Online Articles: Food-focused publications and culinary websites publish articles that delve into more specific topics, such as the science behind gluten development in pasta dough or comparisons of flour types. These articles can enhance one's theoretical understanding, which can be applied in practical pasta-making.
