
Sourdough Baking for the Holidays
Master Festive Loaves with Ease
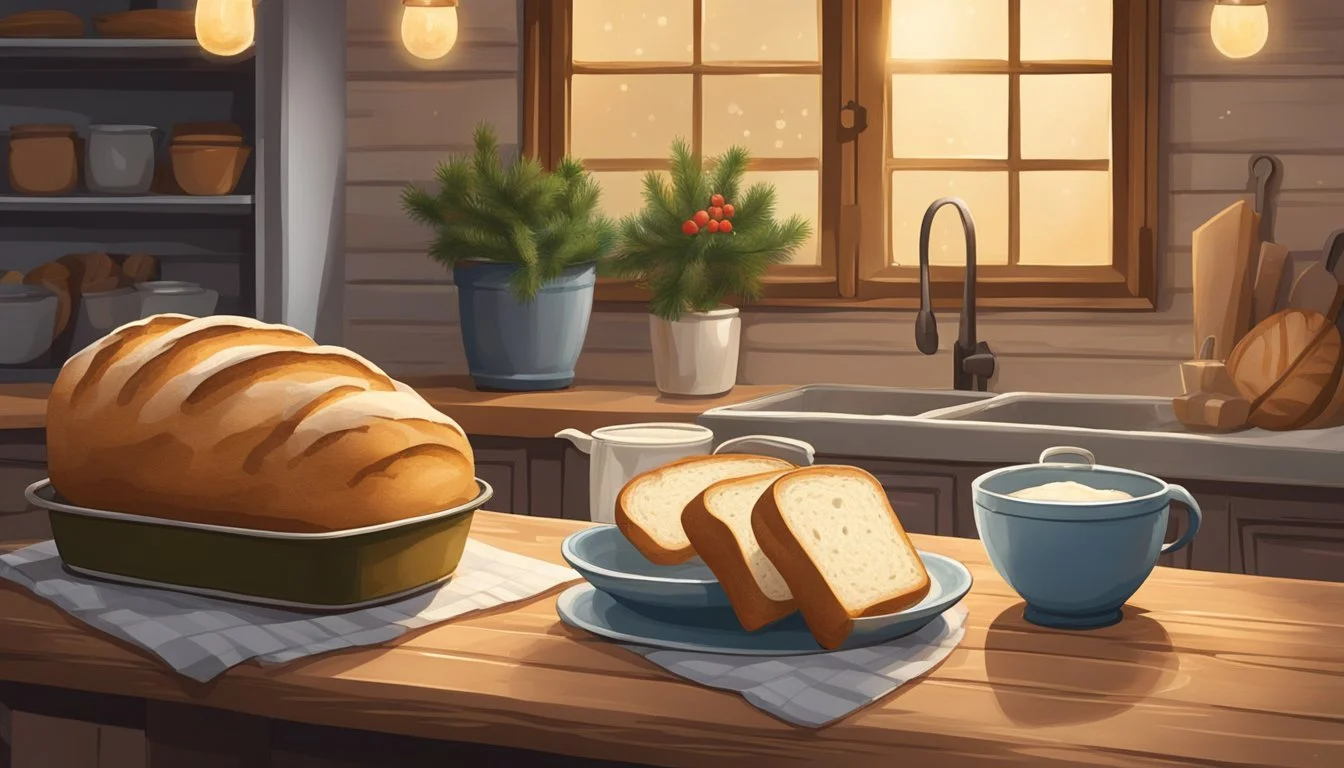
The holiday season is a time for traditions, and baking sourdough bread (What wine goes well with bread?) fits perfectly into the festive ritual. Sourdough, with its tangy flavor and hearty texture, presents a wholesome alternative to the usual holiday indulgences. This artisanal bread, made from a simple combination of flour, water, and salt, harnesses the power of natural fermentation to rise without the use of commercial yeast. The process of creating a sourdough loaf is an art that requires patience and precision, making the bread an especially rewarding addition to holiday feasts.
Bakers often turn to sourdough recipes as centerpieces for their holiday tables or as homemade gifts for friends and family. The versatility of sourdough allows it to be shaped into boules or sandwich loaves, and its recipes can be adapted to include festive ingredients like nuts, dried fruits, or spices, enhancing the spirit of the season. When planning holiday sourdough baking, timing is key. The bread's starter needs to be ripe, and adjustments to the proofing environment, such as using warm water or finding a cozy spot in the kitchen, ensure that the dough rises properly even in the cooler winter months.
With a little planning and understanding of the sourdough process, anyone can craft beautiful, flavorful bread that elevates their holiday celebrations. The anticipation of slicing into a fresh, homemade loaf, crusty on the outside and soft on the inside, adds to the joy of the season. Whether shared at the dinner table or given as a thoughtful present, sourdough baking is a heartwarming tradition that embodies the generosity and warmth of the holidays.
The Basics of Sourdough Starter
Sourdough starters are the heart of sourdough recipes; they contain a mixture of wild yeast and bacteria that cause fermentation, essential for the rise and flavor of the bread. Properly creating and maintaining a starter ensures an active levain for baking.
Creating Your Starter
To create a sourdough starter, one simply needs flour, water, and time. Begin by mixing equal parts of flour and room temperature water in a clean container. This mixture should be left to rest at room temperature, allowing wild yeast and bacteria present in the flour and environment to initiate the fermentation process. Signs of fermentation, such as the presence of bubbles and a slight increase in volume, typically appear within a few days.
Hydration: This is the ratio of water to flour in your starter, often starting at 100% hydration, which means using equal weights of flour and water.
Consistency: The starter should resemble a thick batter. Adjust by adding more flour or water if necessary.
Feeding and Maintaining Your Starter
To maintain a sourdough starter, regular feeding is crucial. Feeding involves discarding a portion of the starter and replenishing it with fresh flour and water.
Discard: Remove and dispose of about half of your starter.
Refresh: Add fresh flour and water back into the container, following the same hydration level.
Feeding should be done at least once a day, at a consistent time, to keep the starter active. An active starter will have a web of bubbles throughout and should double in volume within 4 to 12 hours after feeding. If a more robust fermentation activity is required, or if one lives in a cooler climate which may slow down the process, the starter can be fed more often.
Temperature: A consistent room temperature (70°F to 75°F) is ideal for sustaining lively fermentation activity.
Starter Consistency: An active sourdough starter will have a creamier texture and possess a balance of tartness and yeastiness in its aroma.
Once the starter is established and shows reliable signs of vigorous activity, it's ready to be used in a variety of sourdough recipes, or it can be developed further into a levain for specific baking needs. To maintain the vitality of the sourdough starter, consistent feeding and attention to the signs of active fermentation are key.
Understanding Sourdough Ingredients

In sourdough baking, each ingredient plays an integral role in the outcome of the bread, from the texture to the flavor profile. Precision in choosing and combining ingredients is crucial for a successful sourdough loaf.
Flour Varieties and Their Impact
The choice of flour greatly affects the structure and taste of sourdough bread. All-purpose flour is versatile and widely used, providing a balance between soft and chewy textures. For a denser bread with a fuller flavor, whole wheat flour is a strong choice as it contains more gluten and nutrients. The gluten content in the flour determines the dough's ability to rise and its overall elasticity.
The Role of Water
Water’s primary role is to hydrate the flour, activating the gluten which gives the dough its structure. The hydration level of the dough influences the texture of the bread, with higher hydration leading to a more open crumb and lighter bread. Distilled or filtered water is often preferred to eliminate any impurities that can affect the delicate balance of the starter.
Salt, Sugar, and Additives
Salt is essential for controlling yeast activity and enhancing the flavor of the bread. Typically, it is added after an initial mix to avoid interference with yeast fermentation. In some recipes, sugar might be included to provide a subtle sweetness and to encourage yeast growth. Additives, such as seeds or nuts, contribute additional flavors and textures. However, sourdough purists often stick to the basic ingredients of flour, water, salt, and the natural yeast present in the starter to allow the classic sourdough characteristics to shine through.
Mixing and Autolyse
Mixing
The process starts with mixing, which non-vigorously combines the primary components: flour, water, and the active sourdough starter. This foundational step is critical for setting the stage for effective fermentation and gluten development. Here's what you need to know:
Starter: It initiates fermentation.
Flour: It provides structure.
Water: It hydrates the flour enabling gluten formation.
Steps:
Add flour, water, and starter into a bowl.
Mix gently, usually for 1-2 minutes, until the flour is fully hydrated.
Autolyse
Following the initial mix, bakers employ the autolyse technique, a rest period that allows the dough to hydrate thoroughly — a key for gluten development. This step involves:
Resting: Leaves the mixed dough to sit, enhancing enzyme activity.
Hydration: Allows flour to absorb water, promoting gluten bonds.
Table: Autolyse Duration Variations
Duration Benefit 20 minutes Basic gluten formation 60 minutes Improved dough strength 5+ hours Enhanced flavor and texture
During autolyse:
Gluten Development: Protease enzymes work to strengthen the gluten network.
Dough Handling: Eases by reducing the required kneading time later on.
After autolyse, additional ingredients such as salt may be incorporated before further kneading. This rest period simplifies subsequent steps and contributes to the sourdough’s final quality in terms of color, flavor, and texture.
Kneading and Developing Gluten
Proper kneading is essential in sourdough bread-making as it develops gluten, which gives the dough its elastic quality and strength. Gluten is a protein that, when worked through kneading, forms a network that traps carbon dioxide produced by the fermenting yeast, contributing to the bread's texture and rise.
Folding Techniques
Letter Fold: The baker stretches the dough into a rectangle, then folds it in thirds. This process is rotated and repeated.
Stretch and Fold: Implemented every 30 minutes during the first 2 hours of bulk fermentation, this technique enhances gluten development without harsh handling.
Slap and Fold: For more assertive gluten development, this technique involves lifting and slapping the dough onto the work surface.
Key Benefits of Proper Kneading:
Elasticity: Enhances dough’s ability to stretch without tearing.
Strength: Builds a strong gluten network for a well-risen loaf.
Texture: Contributes to a uniform crumb structure with desirable air pockets.
Sourdough enthusiasts use various kneading methods, from traditional hand-kneading to employing a stand mixer. The choice of technique often depends on the baker's preference and the desired bread texture. For instance, the gentle Coil Fold is suitable for higher hydration doughs, promoting volume and an open crumb.
Kneading sourdough is a balance between developing enough gluten for structure while maintaining the dough's delicate fermentation. As kneading intensity impacts the final product, bakers often opt for minimal handling or no-knead methods, relying on time and fermentation to naturally tighten the gluten matrix.
Remember, the right kneading technique can transform the dough into a masterpiece of flavor and form, perfect for the holiday table.
Bulk Fermentation and Folding
During the holiday season, when baking sourdough bread becomes a cherished activity, understanding bulk fermentation is critical. This phase is where the dough undergoes its first rise after mixing, marking a pivotal moment in developing flavor and structure.
Bulk fermentation occurs when the dough rests and allows the yeast and bacteria to produce gases, contributing to the dough's volume. Temperature plays a decisive role; typically, at 78ºF, this process lasts for about 4 to 4.5 hours. However, lower temperatures or a reduced quantity of starter may extend this period.
The process involves several components:
Rise: Achieving a sufficient rise is essential. It indicates that fermentation is proceeding well.
Stretch and Fold: The baker must periodically stretch and fold the dough. This technique:
Enhances dough strength
Encourages even fermentation
Helps develop a desirable crumb structure
Folding Frequency Dough Impact Too Frequent Overworking Too Infrequent Inadequate Structure
One key aspect of successful fermentation is hydration. Bakers often hold back about 5% of water to ensure proper consistency. If the dough feels too wet or slack, they might introduce additional stretch and fold sequences. Each folding action should be gentle but firm, rotating the container 90° between folds for an even and consistent rise.
Through careful monitoring and adjustment, bakers ensure the dough's structure and elasticity improve during bulk fermentation. They should aim for a dough that is smooth to the touch and has demonstrated clear signs of volume increase.
Shaping and Proofing
Shaping and proofing are critical stages in sourdough baking that determine the loaf's final structure and taste. Proper attention to forming the loaf, final shaping and scoring, and mastering the proofing process ensures a beautiful and delicious sourdough bread.
Forming a Loaf
When forming a loaf, bakers should aim for a consistent structure that will support the bread during proofing and baking. For a standard sourdough boule, one begins by gently stretching the dough into a round shape. For longer loaves like baguettes or batards, it involves stretching the dough into a larger circle and then folding and sealing to form a long, even shape.
Final Shaping and Scoring
After pre-shaped loaves have rested, final shaping helps create the loaf's ultimate form and develops surface tension. This step, usually taking 5 to 10 minutes, is crucial for a well-baked sourdough. Scoring, or cutting the top of the dough with a sharp blade, controls where the bread expands during baking. Scores made with confidence result in better "oven spring" and enhance the loaf's visual appeal.
Proofing: Timing and Techniques
Proofing allows the dough to rise and develop flavor before baking. The proofing time varies based on ingredients and temperature. A standard proof at warm room temperature generally lasts from 1 to 4 hours, while a cold retard in the refrigerator could extend overnight or longer. To check for proper proofing, one can conduct a "poke test" – a gently poked indentation in the dough should hold its shape if the loaf is ready for the oven. Bake on a preheated, parchment-lined surface to achieve a crisp crust and even rising.
Preheating and Baking
Achieving the perfect sourdough bread during the holidays requires attention to the oven's preheating phase and baking process. These steps are critical for creating a golden crust and properly baked bread.
Oven Temperature and Steam
Sourdough bread baking benefits greatly from a fully preheated oven and the application of steam during the early stages of baking. The bread should be placed into an oven preheated to around 400 degrees Fahrenheit. This initial high temperature helps to set the crust and is crucial for achieving the desired ovenspring, which refers to the final rise of the dough once it hits the heat. For the first 20-30 minutes, steam should be introduced as it is essential for preventing the crust from hardening too quickly and for allowing the bread to expand.
Preheat the oven for at least 20-30 minutes before baking.
Create steam by using a spray bottle to mist water on the dough or adding a pan of water at the bottom of the oven.
Using a Dutch Oven
The Dutch oven is a baker's ally for creating artisanal-style sourdough bread with a crisp, golden crust. The Dutch oven needs to be preheated along with the regular oven. Upon placing the dough inside, the lid of the Dutch oven traps steam naturally released by the bread, simulating a professional steam oven.
Preheat the Dutch oven in the oven for about 30 minutes to 1 hour.
After preheating, bake the dough for the first half of the baking period with the lid on to lock in the steam.
Remove the Dutch oven lid halfway through the baking time to allow the crust to become golden and crisp.
Here is a succinct baking guide:
Preheat the oven with the Dutch oven inside to 400 degrees Fahrenheit.
Place the dough in the preheated Dutch oven and cover with the lid.
Bake with the lid on for about 20-30 minutes.
Remove the lid to finish baking and develop a golden crust, an additional 20-30 minutes.
Sourdough Baking for the Holidays
The holidays offer an ample opportunity for bakers to showcase their skills with sourdough, making everything from traditional loaves to sweet pastries. This section delves into the different ways sourdough can enhance holiday baking, including variations of bread, holiday-themed pastries, and best practices for gifting and storing these delights.
Sourdough Bread Variations
Holiday celebrations often feature special breads that have become family traditions. For Christmas, a robust sourdough boule can serve as the centerpiece for dinner, while Easter might call for a braided sourdough brioche, symbolizing craftsmanship and tradition. Thanksgiving tables shine with sourdough dinner rolls, soft on the inside with a satisfying crust, perfect for sopping up gravy.
Classic Boule: Ferment for 8-14 hours at room temperature.
Sourdough Brioche: Use warm water to mix, aiding the dough's temperature.
Dinner Rolls: Increase pre-fermented flour for a quicker fermentation.
Holiday Sourdough Pastries and Sweets
Sourdough isn't confined to savory applications; it can also introduce a depth of flavor to holiday sweets. Sourdough cinnamon rolls are a warming treat, with the tang of sourdough adding complexity to the sweet spice. Sourdough gingerbread cookies present a twist on the holiday classic—a hint of sourdough's tang elevating the familiar ginger and molasses notes. Impress guests with a sourdough stollen, a traditional German bread dotted with dried fruit and nuts, the sourdough adding a nuanced taste and texture.
Sourdough Cinnamon Rolls: Mix levain into the dough for added flavor.
Gingerbread Cookies: Incorporate sourdough discard for texture.
Stollen: A long, cold ferment complements the rich fruits and spices.
Gifting and Storing Sourdough Baked Goods
When gifting sourdough creations, presentation is key. Wrap bread and pastries in parchment paper, tied with a festive ribbon. To maintain freshness, store bread in a cotton bag or bread box for a few days. Freeze for longer storage—sliced for convenience. Pastries can be refrigerated if containing cream or custard fillings, but are best enjoyed fresh.
Short-Term Storage: Bread box or cotton bag.
Freezing: Slice before freezing for easy use.
Refrigeration: Only for pastries with perishable fillings.
Advanced Sourdough Techniques

In the world of sourdough baking, mastering advanced techniques can significantly enhance the quality, flavor, and aesthetic of holiday breads. This section will delve into the intricacies of manipulating rise times and temperature, the artistry of creating beautiful bread designs, and the simplicity of no-knead recipes that yield complex textures.
Managing Rise Times and Temperature
Proper management of rise times and temperature has a profound effect on the crumb structure and outer crust of sourdough bread. Bread flour's ability to retain structure at higher hydration levels is key when aiming for an open and airy crumb.
Ideal Temperature: To promote consistent fermentation, keeping the dough between 75-85°F (24-29°C) during bulk rise is recommended.
Controlling Rise Times: The rise times can vary, but standard bulk fermentation is often between 3-5 hours, depending on ambient temperature and dough composition.
Creating Artisanal Bread Designs
Crafting artisanal bread designs allows bakers to impart a personal touch to each loaf. A well-floured lame or sharp blade is essential to design intricate patterns on the dough's surface.
Scoring Techniques: Precise, shallow cuts will yield delicate patterns, while deeper slashes help the dough expand and create dramatic ears.
Pattern Variety: Play with different designs such as a classic crosshatch or leaf patterns which not only look stunning but also facilitate even rising.
Exploring No-Knead Recipes
Embracing no-knead sourdough recipes caters to both convenience and complex flavor development. These recipes typically entail a longer fermentation period to compensate for the lack of kneading, allowing enzymes in the flour to slowly break down the starches and create a more flavorful dough.
Long Fermentation: No-knead doughs benefit from extended fermentations, often 12 to 18 hours, which can be conveniently done overnight.
Handling the Dough: Minimal handling helps maintain gas bubbles in the dough, leading to a superior crumb structure when baked.
Troubleshooting Common Sourdough Problems
Holiday sourdough baking can present unique challenges, but with proper techniques, sourdough bakers can troubleshoot common issues related to overproofing, gluten development, and fermentation to achieve the ideal texture and flavor.
Dealing with Overproofed Dough
Sourdough that has proofed for too long can lead to overproofing, where the dough becomes slack and loses its ability to rise. This results in a loaf with a dense texture and less volume. To mitigate this:
Reduce Proofing Time: Reduce the final proofing time and observe the dough's volume, which should increase by no more than 30-50%.
Temperature Control: Control the proofing environment by opting for a cooler spot, as excessive heat accelerates the proofing process.
Ensuring Proper Gluten Development
Gluten gives sourdough its structure and chewiness. Inadequate gluten development can compromise the bread's texture. Here are steps to enhance gluten formation:
Consistent Kneading: Employ a thorough kneading process, which typically takes around 10 to 15 minutes by hand to form a smooth and elastic dough.
Rest and Stretch: Allow the dough to rest and perform a series of stretch-and-fold techniques during the initial fermentation period to strengthen the gluten network.
Addressing Issues with Fermentation
Fermentation is the heart of sourdough, and issues here can affect both the bread's flavor and rise. To address fermentation challenges:
Starter Vigor: Maintain a vigorous starter by feeding it regularly and keeping it at a consistent temperature, ideally between 75°F and 80°F (24°C to 27°C).
Monitor Dough Temperature: Use a thermometer to ensure the dough remains at a consistent temperature throughout fermentation to avoid under or over-fermentation.
Conclusion

With the festive period in the air, a well-planned sourdough baking schedule can enhance the holiday experience. Sourdough bakers, whether novice or seasoned, will find that incorporating sourdough bread into their celebration meal plans adds a touch of personalization and warmth to the table. Through methodical preparation, bakers gain the knowledge required to produce delectable loaves that are as much a feast for the eyes as they are for the palate.
They must remember to factor in proofing times, which can be lengthy but are crucial for that characteristic sourdough tang and texture. Moreover, understanding the stages of dough development is essential to juggle the various tasks that come with holiday baking. Bakers should not hesitate to experiment with enriched sourdough recipes for an added festive flair.
Here are brief reminders for a successful holiday sourdough bake:
April Sourdough Schedule: Start planning early to ensure ample time for practice and perfection.
Ingredients: Have all ingredients ready, including a healthy, active starter.
Festive Shapes and Flavors: Consider adding traditional holiday spices or shaping loaves in festive designs.
Preheat and Score: Preheat the oven adequately, and score the dough just before baking for that perfect crust.
Enjoy the Process: Embrace the journey of sourdough baking as part of the holiday joy.
A baker's careful attention to detail and passion for the craft will undoubtedly lead to loaves that embody the spirit and joy of the holiday season.
