
Frozen vs Fresh Bread Dough: Which Is Best for Homemade Baking?

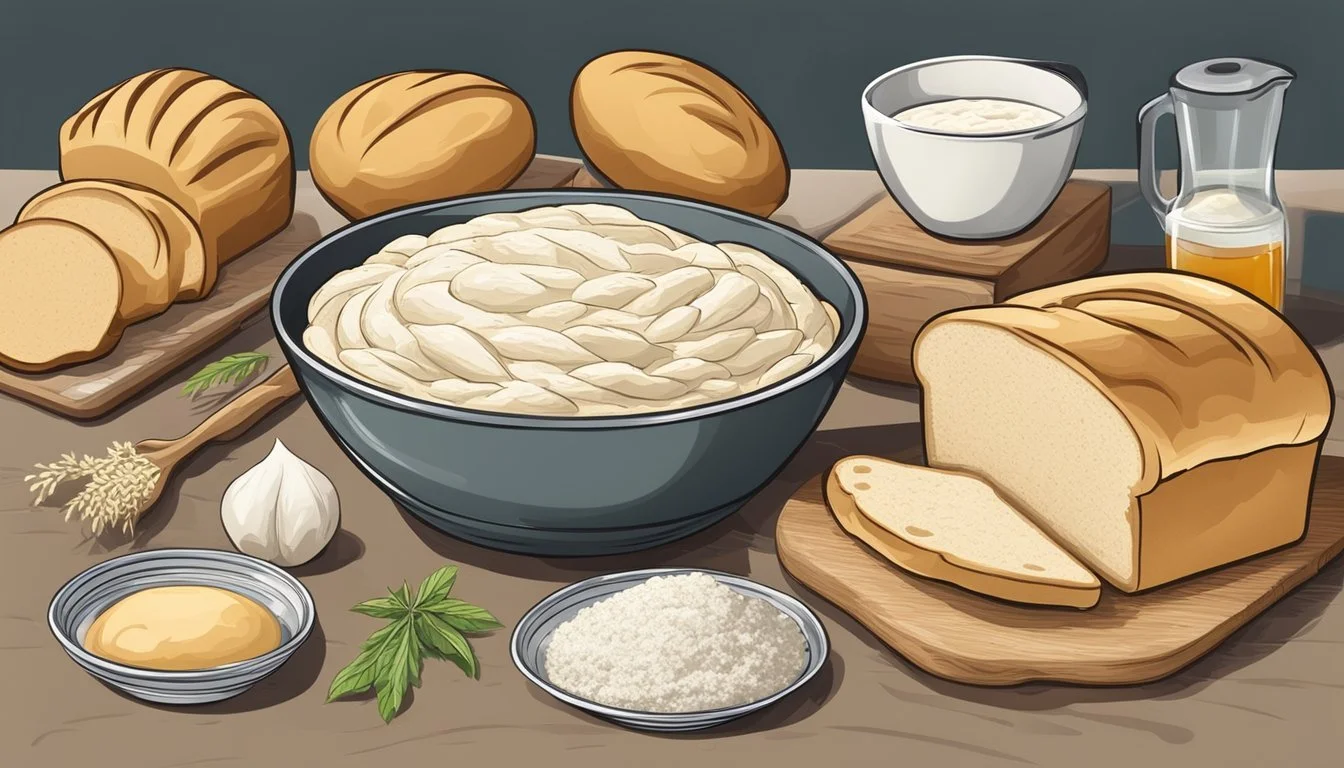
Bread dough is a versatile ingredient that forms the foundation of countless delicious baked goods. Whether using frozen or fresh dough, home bakers can create an array of breads, rolls, and pastries with relative ease. Both frozen and fresh bread dough offer convenience and flexibility, allowing for quick preparation of homemade-tasting breads without the need to make dough from scratch.
Frozen bread dough provides a time-saving option for busy cooks. It can be thawed overnight in the refrigerator or at room temperature for a few hours before shaping and baking. This pre-made dough eliminates the need for measuring ingredients and kneading, making it an ideal choice for novice bakers or those short on time.
Fresh bread dough, on the other hand, offers more immediate use and often yields a slightly better texture and flavor. It can be purchased from bakeries or made at home, allowing for customization of ingredients and flavors. Regardless of the type chosen, both frozen and fresh bread dough can produce satisfying results when handled properly and baked according to recipe instructions.
Understanding Bread Dough
Bread dough is a versatile mixture that can be prepared fresh or frozen for later use. Its composition and handling affect the final product's texture and flavor.
Frozen vs. Fresh Bread Dough
Frozen bread dough offers convenience and longevity. It allows bakers to prepare large batches in advance, saving time on busy days. Fresh dough, on the other hand, provides optimal flavor and texture.
Frozen dough typically requires additional yeast to compensate for cells that die during freezing. This ensures proper rising after thawing. Fresh dough maintains its original yeast content and gluten structure.
Baked goods from frozen dough may have slightly less volume compared to those made from fresh dough. The freezing process can weaken the gluten structure, affecting the bread's ability to expand fully during baking.
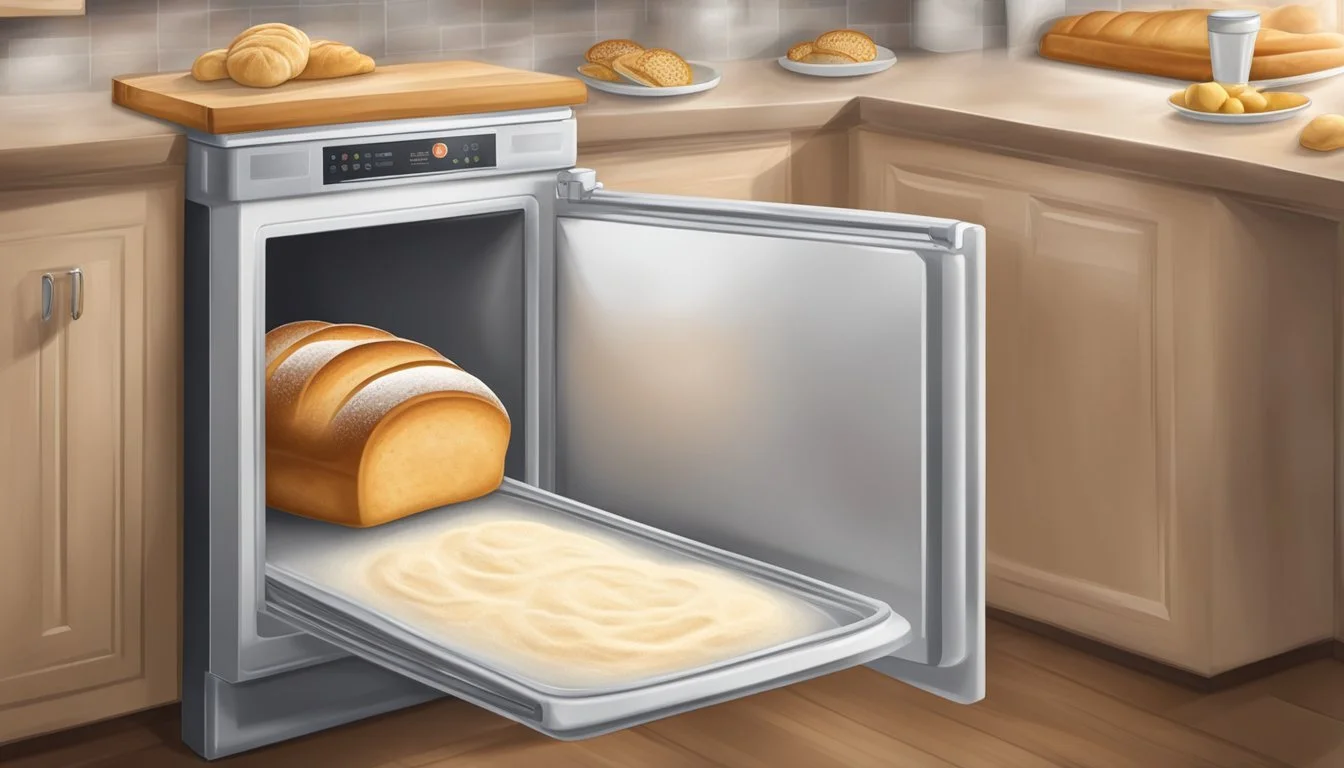
Principles of Dough Thawing
Proper thawing is crucial for frozen dough performance. Gradual defrosting in the refrigerator is ideal, typically taking 8-12 hours. This method preserves dough integrity and prevents excessive yeast activation.
For quicker results, dough can be thawed at room temperature. This takes about 2-3 hours but requires careful monitoring to prevent overproofing.
Microwave thawing is not recommended as it can partially cook the dough and lead to uneven results.
After thawing, allow the dough to come to room temperature before shaping and baking. This ensures even rising and optimal texture.
Storage and Shelf Life Considerations
Frozen bread dough can be stored for up to 3 months in a freezer-safe bag or container. Proper wrapping prevents freezer burn and maintains dough quality.
Fresh dough should be used within 24-48 hours when refrigerated. It can be kept at room temperature for 2-4 hours before use.
Label frozen dough with the date of freezing to track storage time. Thawed dough should not be refrozen, as this can significantly impact quality and safety.
Storing dough in portion-sized balls or loaf shapes facilitates easier thawing and use. This method allows for baking only what's needed, reducing waste.
Preparing Frozen Dough for Baking
Proper preparation of frozen dough is crucial for achieving delicious homemade bread. Following the right steps ensures optimal texture and flavor.
Thawing Dough Safely
Remove frozen dough from the freezer and place it in a greased bowl. Cover tightly with plastic wrap to prevent drying. Thaw in the refrigerator overnight for best results.
For quicker thawing, leave dough at room temperature for 2-3 hours. Keep it covered to maintain moisture. Avoid using a microwave or hot water, as these can partially cook the dough.
Once thawed, the dough should feel soft and pliable. Gently press it to check for any remaining frozen spots before proceeding.
The Role of Temperature in Dough Rising
Temperature significantly affects yeast activity and dough rising. Ideal rising temperature is between 75-85°F (24-29°C).
Place thawed dough in a warm, draft-free area. Cover with a damp cloth to retain moisture. Rising time varies but typically takes 1-2 hours.
To create a warm environment, preheat oven to lowest setting for 1-2 minutes, then turn off. Place covered dough inside with oven door slightly open.
Dough is ready when it doubles in size. Perform the finger test: poke dough gently. If indentation remains, it's ready for shaping.
Kneading and Shaping Bread Dough
After rising, punch down dough to release air bubbles. Turn onto a lightly floured surface for kneading.
Knead for 5-10 minutes until smooth and elastic. This develops gluten, creating better texture.
Shape dough according to recipe:
For loaves: roll into rectangle, fold sides, pinch seams
For rolls: divide dough, shape into balls
For braids: divide into strands, braid together
Place shaped dough in greased baking pan. Cover and let rise again until doubled, about 30-45 minutes.
Preheat oven to recipe temperature. Bake as directed, usually 20-30 minutes for rolls, 30-40 minutes for loaves.
Customizing Your Bread Dough

Personalizing bread dough allows bakers to create unique flavors and textures. By adding various ingredients and adjusting techniques, you can transform basic dough into extraordinary loaves.
Incorporating Sweet and Savory Ingredients
Cheese adds richness and depth to bread. Grated cheddar or parmesan can be kneaded into the dough or sprinkled on top before baking. Seeds like sesame, poppy, or sunflower provide crunch and nutty flavors.
For savory breads, minced garlic or roasted garlic cloves enhance aroma and taste. Herbs such as rosemary, thyme, or basil infuse the dough with fresh flavors. Mix dried herbs directly into the flour or fold fresh ones in during kneading.
Sweet additions like cinnamon, raisins, or chocolate chips create delightful breakfast breads. For fruit-filled loaves, fold in dried cranberries or chopped apples after the first rise.
Creating Different Bread Types
Whole wheat flour produces heartier, denser loaves. Replace 25-50% of white flour with whole wheat for added nutrition and flavor. Rye flour creates tangy, moist breads perfect for sandwiches.
For focaccia, increase olive oil in the dough and top with herbs and sea salt. Brioche requires extra butter and eggs for a rich, tender crumb. Ciabatta uses a wetter dough and longer fermentation for large air pockets.
Sourdough starters add complexity and tang to breads. They require more time but result in distinct flavors and textures. Flatbreads like naan or pita use similar dough but different shaping and cooking methods.
Tips for Enhancing Bread Aroma and Flavors
Brushing dough with melted butter before baking creates a golden, flavorful crust. Egg washes add shine and help toppings adhere. Olive oil brushed on focaccia enhances its characteristic texture.
Sprinkle coarse salt, sesame seeds, or oats on top for added crunch and flavor. Mix honey or molasses into the dough for subtle sweetness and improved browning.
Experiment with flavored oils like garlic or herb-infused varieties. These add depth without altering the dough's structure. For a crispy crust, place a pan of water in the oven during baking to create steam.
Try autolyse, a resting period for flour and water before adding yeast. This develops gluten and enhances flavor. Slow, cold fermentation in the refrigerator also intensifies taste and improves texture.
Baking Techniques and Tips
Mastering the art of baking bread requires attention to detail and proper techniques. The following tips will help ensure your bread turns out perfectly every time.
Optimizing Baking Time and Temperature
Preheat the oven to 375°F (190°C) for most bread types. Place the dough in the center rack for even heat distribution. Baking time varies depending on the size and type of bread:
Small rolls: 15-20 minutes
Medium loaves: 30-35 minutes
Large loaves: 40-45 minutes
For a crispy crust, place a shallow pan of water on the bottom rack to create steam. Cover the bread with foil if it browns too quickly. Adjust temperature and time as needed based on your oven's performance.
Checking Bread for Doneness
Use multiple methods to ensure your bread is fully baked:
Tap the bottom - it should sound hollow
Internal temperature should reach 190°F-210°F (88°C-99°C)
Crust should be golden brown
Use a food thermometer for accuracy. Insert it into the center of the loaf. If the bread isn't done, return it to the oven for 5-minute intervals until fully baked.
Cooling and Storing Baked Bread
Allow bread to cool completely before slicing. Place it on a wire rack to prevent a soggy bottom. Cooling time varies:
Small rolls: 15-20 minutes
Medium loaves: 1-2 hours
Large loaves: 2-3 hours
Once cooled, store bread in a paper bag or bread box at room temperature for 2-3 days. For longer storage, slice and freeze for up to 3 months. Thaw frozen bread at room temperature or in the microwave for quick serving.
Advanced Bread Recipes
Advanced bread recipes elevate the art of baking with complex techniques and unique flavor combinations. These recipes challenge bakers to expand their skills and create impressive loaves for special occasions.
Sweet and Dessert Bread Ideas
Cinnamon rolls stand out as a beloved sweet bread option. Using enriched dough, bakers can create soft, pillowy rolls filled with cinnamon sugar and topped with cream cheese frosting. For a twist, try adding chopped nuts or dried fruit to the filling.
Monkey bread offers a fun, pull-apart experience. This sweet treat combines bite-sized pieces of dough coated in cinnamon sugar, then baked in a bundt pan. Some variations include a caramel sauce or chopped pecans for added indulgence.
Braided bread showcases both skill and beauty. A three-strand braid is a good starting point, but adventurous bakers can attempt six-strand or even nine-strand braids. Fillings like jam or chocolate can be incorporated for extra flavor.
Savory Bread Delights
Herb-infused focaccia demonstrates the versatility of bread dough. This Italian flatbread can be topped with rosemary, olives, cherry tomatoes, or roasted garlic. A generous drizzle of olive oil before baking ensures a crispy exterior.
Cheese-stuffed bread rolls elevate any meal. Provolone, cheddar, or mozzarella can be wrapped inside the dough before baking, creating a gooey center when served warm.
Sourdough boules with mix-ins like roasted garlic, sun-dried tomatoes, or kalamata olives add complexity to the tangy base flavor. These artisanal loaves impress with their crusty exterior and chewy crumb.
Holiday and Special Occasion Breads
Easter brings the tradition of hot cross buns, spiced sweet rolls marked with a cross. These fragrant buns often contain dried fruit and are glazed for a festive touch.
Challah, a Jewish braided bread, graces many holiday tables. Its rich, eggy dough can be shaped into intricate designs, sometimes incorporating raisins or honey for Rosh Hashanah.
Christmas stollen, a German fruit bread, features dried fruits, nuts, and spices. It's often dusted with powdered sugar to resemble a snow-covered loaf. This dense, sweet bread improves with age, making it ideal for gifting.
Baking forums often buzz with tips for perfecting these advanced recipes, especially around holidays. Enthusiasts share techniques for achieving the perfect crumb, crust, and flavor balance in these sophisticated breads.
Creative Uses for Leftover Bread
Leftover bread can be transformed into delicious new dishes and paired with tasty dips and spreads. These simple ideas breathe new life into stale bread, reducing food waste while creating satisfying meals and snacks.
Transforming Bread into New Meals
Stale bread makes excellent homemade croutons. Cut bread into cubes, toss with olive oil and herbs, then bake until crispy. Add these to salads for extra crunch.
Bread pudding offers a sweet way to use leftover bread. Combine cubed bread with eggs, milk, sugar, and spices, then bake until golden.
For a savory option, try making a strata. Layer bread cubes with cheese, vegetables, and cooked meats in a baking dish. Pour an egg mixture over top and bake until set.
Turn leftover focaccia or pita into crispy pizza. Top with marinara sauce, mozzarella, parmesan, and pepperoni. Bake until the cheese melts and the edges are crisp.
Pairing Bread with Dips and Spreads
Toasted bread slices make perfect vehicles for dips and spreads. Rub garlic on toasted bread for easy bruschetta. Top with diced tomatoes, basil, and olive oil.
Create crostini by slicing a baguette thinly and toasting. Serve with olive tapenade, hummus, or herbed goat cheese.
For breakfast, toast thick slices of bread and top with mashed avocado, a poached egg, and crumbled breakfast sausage.
Make savory French toast by dipping bread in an egg mixture seasoned with herbs and parmesan. Pan-fry until golden and serve with marinara sauce for dipping.
Home Baking Essentials

Equipping your kitchen with the right tools is crucial for successful bread baking. Proper supplies and safety measures ensure optimal results and a smooth baking process.
Recommended Baking Supplies
A stand mixer with a dough hook attachment is invaluable for mixing and kneading bread dough efficiently. A greased loaf pan is essential for shaping and baking most bread recipes.
An instant-read thermometer helps determine when bread is fully baked. Plastic wrap protects dough during rising, preventing it from drying out.
Foil can be used to cover bread if it browns too quickly during baking. A microwave can be handy for quickly thawing frozen dough in emergencies.
Other useful items include:
Cooling racks
Measuring cups and spoons
Dough scraper
Bread knife
Safety and Cleaning Guidelines
Always use oven mitts when handling hot baking sheets or pans. Keep work surfaces clean and sanitized to prevent contamination.
Wash hands thoroughly before and after handling dough. Clean all utensils and baking equipment with hot, soapy water after use.
Store ingredients properly to maintain freshness and prevent pest infestations. Check expiration dates regularly and discard any outdated items.
When using electrical appliances, ensure they are unplugged when not in use. Keep cords away from hot surfaces and water to prevent accidents.
Preserving Your Dough
Freezing bread dough is an excellent way to save time and enjoy fresh bread on demand. This method allows you to prepare dough in advance and bake it when needed.
Freezing and Defrosting Bread Dough
To freeze bread dough, shape it into loaves or rolls before freezing. Place the shaped dough on a baking sheet and freeze for 1-2 hours until solid. This initial freezing helps maintain the dough's shape.
Once frozen, wrap the dough tightly in plastic wrap and place it in a freezer bag. Label the bag with the date and type of dough. Properly stored bread dough can last in the freezer for up to 4 weeks.
To defrost, transfer the frozen dough to the refrigerator overnight. This slow thawing process helps preserve the yeast's viability. After thawing, allow the dough to come to room temperature and rise before baking.
For added convenience, consider freezing individual portions. This allows you to bake only what you need, reducing waste and ensuring fresh bread whenever desired.
Remember that frozen dough may not rise as well as fresh dough due to some yeast die-off during freezing. To compensate, you can increase the yeast in your recipe by 1/4 to 1/2 teaspoon per 3 cups of flour.
Community and Forum Insights
Online baking communities offer valuable resources for both novice and experienced bakers exploring frozen and fresh bread dough options. Members share tips, recipes, and experiences to help others improve their baking skills.
Leveraging Baking Communities for Ideas
Baking and desserts forums serve as hubs for creative dough applications. Members post inventive uses for frozen bread dough, like quick cinnamon rolls or savory stuffed breads. Experienced bakers offer advice on proofing techniques and baking times for optimal results.
Some forums feature dedicated sections for recipes using frozen bread dough, allowing users to easily find new ideas. Popular suggestions include garlic knots, pizza bases, and fruit-filled pastries. These communities also discuss strategies for enhancing frozen dough with added ingredients or flavorings.
Sharing Recipes and Experiences
Bakers frequently share their successes and challenges when working with different dough types. A forum member might detail their experience using Bridgford frozen dough compared to homemade versions. Others post step-by-step guides for transforming basic frozen dough into artisanal-style loaves.
Neighborhood connections also play a role in recipe exchanges. A baker might share how they impressed neighbors with rolls made from frozen dough, sparking local interest. Community cookbooks often feature crowd-sourced recipes highlighting both frozen and fresh dough applications, reflecting regional preferences and family traditions.
