
The Ultimate Guide to Organizing Your Kitchen for Canning
Streamlined Storage Solutions

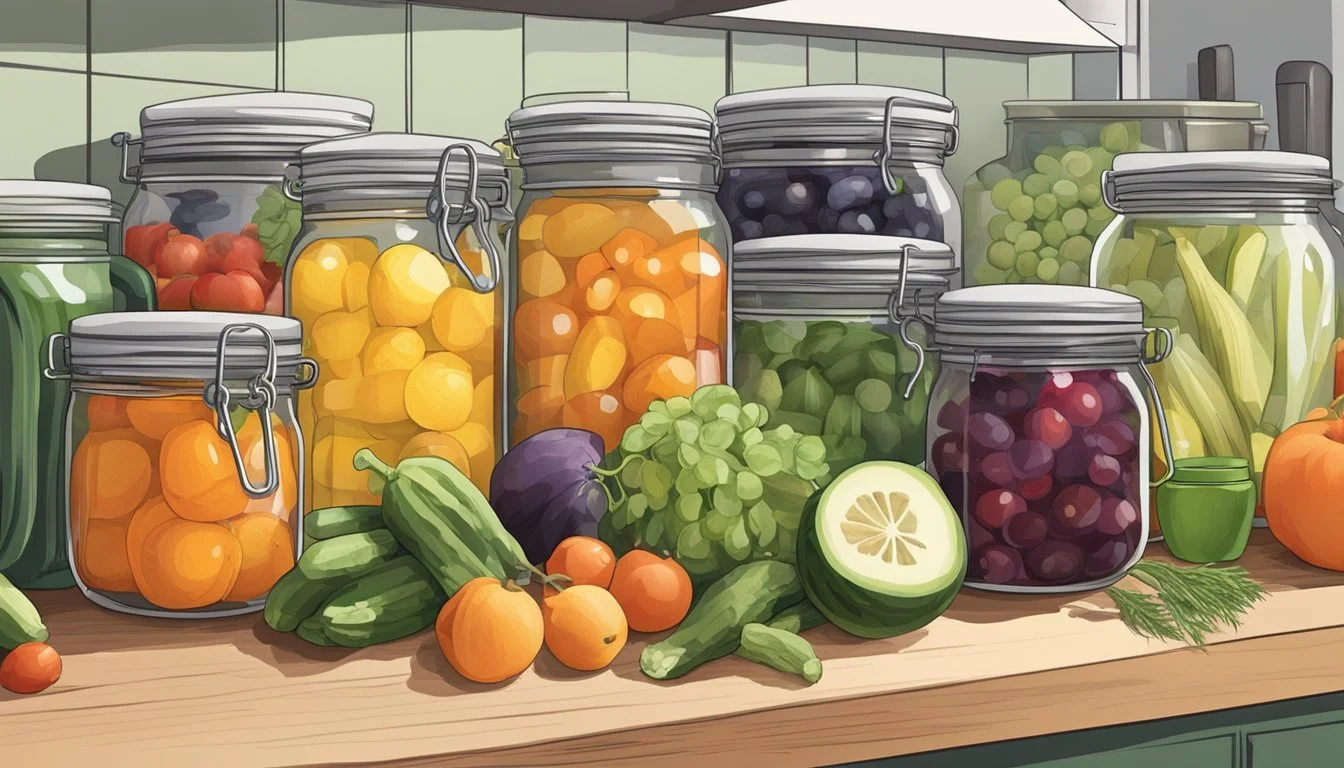
Modern canning practices offer a reliable way to preserve the bounty of the garden, allowing one to capture the peak freshness and nutritional value of fruits and vegetables. Organizing a kitchen for the process of canning is essential for efficiency and safety. The organization not only streamlines the workflow but also ensures the necessary equipment and ingredients are readily accessible. Having a designated area for canning supplies, from jars to labels and from pots to ladles, minimizes clutter and simplifies the canning experience.
An effective storage system for canning supplies is indispensable. Categorizing items by use and size and employing storage solutions such as clear, stackable bins or shelves can save time. It's also crucial to label and date canned goods, ensuring easy identification and rotation for peak quality. Magnetic spice jars under upper cabinets or labeled can dispensers integrate neatly into the kitchen space and offer both practicality and aesthetic appeal.
The kitchen setup for canning should allow for clean, well-ventilated areas to handle prep work, cooking, filling jars, and the eventual storing of canned goods. Heat sources should be ample and stable to support large canning pots, and counter space should be clear for arranging filled jars before and after the canning process. By dedicating a space for each stage of canning, from preparation to sealing to storage, one can ensure a successful and enjoyable preservation experience.
Understanding Canning Basics
Canning is a food preservation method that extends the shelf life of perishable foods by sealing them in airtight containers. This section explains the core concepts of canning, differentiates between its two main types, and outlines the essential equipment necessary for the process.
What is Canning?
Canning involves placing foods in jars or cans and heating them to a temperature that destroys microorganisms and inactivates enzymes. This heat treatment, followed by sealing, prevents spoilage and can keep food safe for long periods.
Types of Canning: Water Bath vs. Pressure Canning
Water Bath Canning: This method is suitable for high-acid foods like fruits, pickles, jams, and jellies. Foods that fall into this category naturally inhibit bacterial growth.
Procedure:
Fill canner with water enough to cover jars by at least one inch.
Boil jars to process as per specific recipe time.
Pressure Canning: Required for low-acid foods such as meat, poultry, and vegetables, which are prone to bacterial growth. This method uses a pressure canner to reach higher temperatures than boiling water can achieve.
Procedure:
Place jars in the pressure canner with several inches of water.
Process according to USDA-recommended times, specific to the food being canned.
Fundamental Canning Equipment
A successful canning experience requires the following key tools:
Jars: Glass canning jars specifically designed for repeated heating and cooling cycles.
Lids and Rings: Lids seal the jar, and rings secure the lids in place during the canning process.
Funnel: A wide-mouth canning funnel assists in filling jars and minimizes spills.
Jar Lifter: A tool with a rubber grip that securely lifts hot jars out of the canner.
Canner: A large pot for water bath canning or a specialized pot called a pressure canner; both are used for processing jars.
Pantry: A cool, dark, and dry area where filled cans can be stored.
This overview of canning basics outlines the critical steps and equipment needed for anyone to start preserving foods safely at home. It's a comprehensive approach to extending the lifespan of one’s pantry with self-canned delicacies.
Preparing Your Kitchen for Canning
Before one begins the canning process, it is essential to have a clean and organized workspace and to understand the importance of safety in the kitchen. The right organization of canning supplies and a clear understanding of safety measures will streamline the process and help avoid contamination or accidents.

Clearing and Cleaning the Workspace
A canner must start by clearing any unnecessary items from countertops to create ample space for canning activities. They should disinfect all surfaces, paying special attention to areas where food will be prepped. Ensure that the workspace is free of residue or debris that could compromise the canning jars' seal or the food quality.
Countertops: Remove clutter and clean thoroughly.
Sinks: Sanitize for washing produce and jars.
Organizing Canning Supplies
The next step involves organizing the essential canning supplies and making sure everything is within reach. Canning equipment should be sorted and stored for easy access. Here is how one might arrange their supplies:
Canning jars: Store in kitchen cabinets or on sturdy shelves.
Lids and bands: Keep in kitchen drawers or bins, separate from jars to prevent damage.
Tools: Arrange ladles, jar lifters, and funnels in order of use.
The organization of these supplies will ensure a smooth workflow during the canning process.
Safety Considerations in the Kitchen
Safety in the kitchen is paramount during canning. One should check the condition of the canning jars and lids for any chips or rust that could compromise the seal. The user must follow guidelines for processing times meticulously to ensure proper food preservation and safety.
Jar inspection: Check for nicks or cracks before use.
Correct processing: Adhere strictly to recommended times for the boiling water bath or pressure canning.
By keeping these safety considerations in mind, they will protect themselves and ensure the integrity of the preserved foods.
Selecting and Preparing Canning Jars
When it comes to canning, the proper selection and preparation of canning jars is vital for preserving food safely and effectively.
Choosing the Right Jar Size
The selection of the correct jar size is dependent on what one intends to preserve. Mason and Kerr jars come in a wide array of sizes, from small 4-oz jelly jars to large 32-oz quart jars. For jams, jellies, and relishes, smaller jars are preferable, while for whole fruits and vegetables, one should consider pint or quart sizes as these provide sufficient space for both the contents and the necessary headspace.
Inspecting Jars for Damage and Rust
Before use, one must thoroughly inspect each canning jar for chips, cracks, or any damage that could compromise the seal. Lids and screw bands should also be checked for rust and deformities. A compromised jar may lead to food spoilage.
Check the rim of each jar for nicks.
Hold jars up to the light to inspect for cracks.
Examine screw bands and replace if rusty.
Dispose of or recycle any jars and components unsuitable for canning.
Sterilizing Jars before Use
Sterilization is crucial for ensuring food safety. One should thoroughly wash jars in hot, soapy water. Following cleaning, the jars need to be boiled for 10 minutes to sterilize. For higher elevations above 1,000 feet, add one minute for every additional 1,000 feet elevation.
Fill a large pot or canner with water until jars are submerged by at least one inch.
Bring the water to a boil and start timing once the water is at a rolling boil.
Carefully remove the jars using canning tongs, and place them on a clean surface to air-dry.
Through careful selection, inspection, and preparation, canning becomes a reliable method to preserve the bounty of home gardens and to enjoy seasonal delights year-round.
The Canning Proces
The canning process is a methodical approach to preserving food safely, involving filling jars, managing headspace, and ensuring proper sealing and processing. Each step is critical to maintaining the quality and safety of preserved foods.
Filling the Jars
One begins the canning process by sterilizing the jars and then filling them with prepared food items. They need to be careful to leave the appropriate space at the top of the jar, which is known as headspace. The content should be free from air bubbles, which can be removed by gently running a non-metallic utensil inside the jar.
Understanding Headspace
Headspace, the gap between the food surface and the lid, is crucial for creating a vacuum seal during the canning process. The amount of headspace needed depends on the type of food and the canning method:
Jams and Jellies: 1/4 inch
Fruits and Tomatoes: 1/2 inch
Pickles and Relishes: 1/2 inch
Meats and Vegetables: 1 to 1 1/4 inches
One should follow the recommended headspace to avoid under- or overfilling, which could compromise the seal.
Sealing and Processing Jars
After filling the jars and wiping the rims clean, one must place the lids on top and secure them with bands until they are fingertip tight. The jars are then placed in either a water bath canner or a pressure canner, depending on the acidity of the food being canned.
The processing time varies according to the food type, jar size, and elevation. It is crucial to process the jars for the correct amount of time to eliminate bacteria and create a vacuum seal. After processing, the jars are removed and allowed to cool. The seals are then checked; a proper seal will show an indented lid that does not flex when pressed.
Storing and Organizing Canned Goods
When it comes to home canning, an organized storage system ensures safety, longevity, and minimal food waste. A well-thought-out organization strategy takes into account everything from labeling for easy identification to efficient stock rotation.
Labeling for Identification and Safety
Labels are critical for safety and convenience. Each canner should label their jars with the contents and canning date. Using a permanent marker directly on the lid or affixing a piece of masking tape to write the information ensures longevity of the label, even in conditions of varying temperatures or moisture.
Contents: What's inside the jar.
Date: When it was canned.
Best Practices for Pantry Organization
An orderly pantry not only looks good but also saves time and reduces waste. Utilize a combination of shelving solutions such as stackable racks or tiered organizers to maximize the vertical space and ensure visibility and access to all cans. Transparent bins with labels are excellent for grouping items and can be easily pulled out for efficient use.
Stackable Racks: To hold multiple cans and provide visibility for all layers.
Tiered Organizers: Also known as "stadium seating," allowing a clear view of all items.
Clear Bins: For grouping similar items together, enhancing the ease of access.
Rotating Stock to Minimize Food Waste
An important aspect of pantry management is the practice of stock rotation, often summarized by the phrase "first in, first out." Ensure that newer canned goods are placed behind the older ones, which encourages the use of older stock before it expires. This method is crucial in diminishing the chance of food waste and keeping the pantry's inventory fresh.
Front: Place older jars.
Back: Add new jars.
Rotation Frequency: Regularly, especially after each canning session.
Maintenance of Canning Tools and Equipment

Maintaining canning tools and equipment is essential for their longevity and to ensure the safety of the canning process. Proper cleaning, storage, and regular inspection for wear and tear are critical steps.
Cleaning and Storing Equipment Post-Canning
Cleaning: Immediately after use, all canning equipment should be washed with hot soapy water. Items such as the canning pot, which is often made of stainless steel or enamel, should be cleaned to remove any food residue. Pressure canners and waterbath canners need to be emptied and dried to prevent rusting. Other tools like lid lifters or jar tongs should be thoroughly washed and dried.
Canning Jars: Wash with soapy water, rinse, and dry completely.
Lids and Rings: Clean with warm water, check for rust or damage; do not reuse lids for processing.
Canning Pot and Rack: Make sure no food particles are stuck to them to prevent contamination.
Storing: Once clean and dry, store equipment in a dry place to avoid mold and rust.
Canning Jars: Store them without the lids or rings to allow air circulation.
Canning Pot: Invert on a shelf or store in a dry area to avoid moisture accumulation.
Regularly Checking for Wear and Replacements
Regular inspection of canning tools and equipment is vital for both safety and effectiveness.
Seals and Gaskets on Pressure Canners: Check for cracks or wear; replace as needed.
Canning Jars: Inspect for nicks, cracks, or chips, especially on the rims.
Lids: Always use new lids to ensure a proper seal.
Maintaining these items in good condition is crucial for successful canning and food preservation.
Advancing Your Canning Techniques
Mastering canning techniques is essential for preserving a variety of foods, from tangy pickles to rich fruit butters. A well-organized kitchen enables one to handle the intricacies of canning both high-acid and low-acid foods with efficiency, employing advanced tools that expedite the process.
Canning High-Acid vs. Low-Acid Foods
High-acid foods such as fruits, jams, jellies, and pickles can be safely processed in a water bath canner. This method involves covering jars with at least one inch of water and boiling them for a period of time specified for the food being preserved. High-Acid Foods typically have a pH level of 4.6 or lower, which inhibits the growth of bacteria indigenously.
Fruits: Apples, peaches, pears
Jellies and Jams: Strawberry, raspberry, apricot
Pickles and Butters: Cucumber pickles, apple butter
On the other hand, low-acid foods like meats and vegetables must be preserved using a pressure canner, which reaches higher temperatures necessary to eliminate bacteria that can thrive even in a sealed jar. Low-Acid Foods generally have a pH above 4.6.
Vegetables: Carrots, green beans, peppers
Meats: Beef, chicken, fish
Improving Efficiency with Advanced Tools
Incorporating advanced tools can boost one’s precision and consistency when canning:
Jar Lifter: For safely lowering and removing jars from hot water.
Lid Lifter: To place lids on jars while keeping them sterile.
Headspace Tool: Ensures proper spacing to allow for food expansion.
Pressure Canner: Essential for canning low-acid foods to prevent spoilage.
Key Points:
Use the correct canner for the type of food being preserved.
Advanced tools enhance safety and efficiency.
Consistently measure headspace for successful sealing.
Troubleshooting Common Canning Issues
When preserving foods through canning, encountering issues like seal failures and processing errors can be disheartening. This section clearly outlines how to identify and address these common problems, ensuring the safety and longevity of your preserved goods.
Dealing with Seal Failures
Proper sealing is crucial for canning safety and shelf stability. Seal failures most often occur due to imperfections in the jar rims, improper application of lids, or food residue left on the sealing edge. To mitigate these risks:
Inspect canning lids and jars for any nicks or irregularities before use.
Clean the jar rims thoroughly to remove all food particles.
Follow the manufacturer’s instructions for prepping lids.
Ensure the correct headspace as recommended for specific foods.
Remove air bubbles by running a non-metallic spatula around the inside edge of the jar.
In the event of a seal failure:
Refrigerate the contents and consume within a few days.
Alternatively, reprocess within 24 hours using a new, clean lid.
Venting and Processing Errors
Venting is a critical step that involves removing air from the pressure canner to ensure accurate pressure buildup and prevent spoilage. Errors in venting and processing might cause food safety issues and lead to compromised preservation.
Always allow steam to vent for 10 minutes before closing the vent port.
Use a timer to ensure exact processing times. Underprocessing leads to spoilage, whereas overprocessing can compromise food quality.
Correcting processing errors typically involves:
Checking the canner's vent and ensuring it’s clean and unobstructed.
Reprocessing the jars immediately if the time or pressure was incorrect.
Discarding any jars that show signs of spoilage upon discovering a processing error, as the safety of the contents cannot be ensured.
By following these problem-solving measures, canners can rectify common canning issues effectively and maintain confidence in their home-preserving endeavors.
Beyond Canning: Other Forms of Preserving

While canning is a popular method of preserving foods, many other techniques can extend the shelf-life of produce and other kitchen staples. These methods not only diversify your pantry but also offer different flavors and textures to enjoy throughout the year.
Using Dehydration and Freezing for Preservation
Dehydration is an excellent method for preserving a variety of foods including fruits, vegetables, herbs, and meats. By removing moisture, dehydration inhibits the growth of bacteria, yeasts, and molds that cause food spoilage. It's an energy-efficient option suited for long-term storage of dry goods. Individuals should:
Slice produce uniformly for even drying.
Use a dehydrator or an oven at the lowest setting with the door slightly open.
Freezing is another practical approach to preserve fresh produce, meals, and a wide array of other food items. The process is straightforward:
Blanch vegetables beforehand to preserve flavor, color, and texture.
Cool them quickly in ice water to halt the cooking process.
Dry them thoroughly to prevent ice crystals.
Store in airtight containers or freezer bags to prevent freezer burn.
Both methods are effective for retaining nutritional value and flavor, making them a valuable component of food preservation.
Crafting Jams, Jellies, and Relishes
Jams and jellies offer a delightful way to preserve the essence of fruits in a spreadable form. These sweet preserves involve:
Cooking fruit with sugar until it reaches a gel-like consistency.
Using pectin either naturally present in the fruit or as an added ingredient to achieve the proper set.
Creating relishes introduces a savory or tangy alternative to sweet preserves. Relishes are made by:
Chopping vegetables or fruits and cooking them with vinegar, sugar, and spices.
Storing them in sterilized jars to enhance flavor over time.
These condiments can offer a burst of flavor to meals and are an excellent way to preserve excess garden produce.
Canning Season: Preparing for the Harvest
Preparing one's kitchen for canning season involves strategic planning and ensuring that the quality of produce used is at its peak. The following sections aim to guide readers through organizing their kitchen effectively and making the most of each season's bounty.
Planning and Preparing for Different Seasons
When entering the heart of canning season, the homeowner begins by creating a detailed plan that considers the availability of different fruits and vegetables throughout the year. They lay out a month-by-month canning calendar, noting the specific periods when harvests peak, to avoid missing opportunities for preserving fresh produce.
Spring: They keep an eye out for asparagus, radishes, and early strawberries.
Summer: Berries, cherries, peaches, and cucumbers fill their baskets, among other summer produce.
Autumn: Hearty items like apples, pumpkins, and late tomatoes are prioritized.
Winter: Though fresh pickings are slimmer, opportunities to can citrus fruits or late-harvested vegetables like beets still exist.
The person ensures their kitchen is equipped with essential utensils – from jars and lids to canning pots. They guarantee that supply levels correlate directly to the expected harvest quantities, and that they are easily accessible, perhaps using wire baskets or shelves systematically arranged for quick retrieval.
Maximizing the Quality of Seasonal Produce
To maximize the quality of the preserved harvest, the individual adheres to a set of best practices during the preparation process. They take care to select only the freshest produce, as blemishes or overripeness can compromise the final product.
Storage:
Freshly picked fruits and vegetables are stored in clean, ventilated wire baskets before canning. This allows air circulation and keeps the produce fresh.
Produce that ripens quickly or is sensitive to heat is often stored in cooler home areas away from direct sunlight.
Preparation:
Each fruit or vegetable is thoroughly washed, peeled if necessary, and cut according to the canning recipe's directions before being processed.
Ingredients like pectin or vinegar may be measured and set aside, so once the harvest is processed, the canning can begin without delay.
By focusing on detailed planning and clothed in knowledge about seasonal produce, a canner can effectively organize their kitchen and take full advantage of peak harvest times.
Health and Safety in Home Canning
Home canning is a rewarding method of preserving food, but it must be done with precision and care to prevent foodborne illness. Understanding the associated risks and adhering to safety guidelines are crucial.
Understanding the Risks of Improper Canning
Improper canning techniques can lead to serious health risks, including food poisoning and botulism — a potentially fatal illness caused by toxins produced by the bacterium Clostridium botulinum. These risks are particularly prevalent when canning low-acid foods such as poultry and seafood, as they require specific heat levels to eliminate bacteria. Both pressure canning and water bath canning must be approached with these risks in mind to ensure the safety of the canned goods.
Safety Tips for Home Canning
When engaging in home canning, the following safety tips should be strictly followed:
Use Proper Equipment: Utilize canners with Underwriter's Laboratory (UL) approval and ensure the equipment is in good working condition. Specifically, pressure canners must have a flexible, not brittle or sticky, rubber gasket.
Avoid Unreliable Methods: Never use a slow cooker, dishwasher, microwave, or solar oven for canning, as these do not reach the necessary temperatures to safely sterilize food.
Temperature and Storage: Store canned goods in a clean, cool, dark, and dry place, maintaining a temperature range between 50 and 70°F to maximize shelf life and prevent spoilage.
Sterilization: Sterilize jars and lids properly before use to kill any harmful microorganisms that could contaminate the food.
Follow Tested Recipes: Adhere to up-to-date, research-based canning recipes and processing times to ensure that a safe internal temperature is reached and maintained.
By maintaining the integrity of the canning process through these safety practices, one can significantly reduce the risks associated with home canning and ensure the production of safe, consumable foods.
